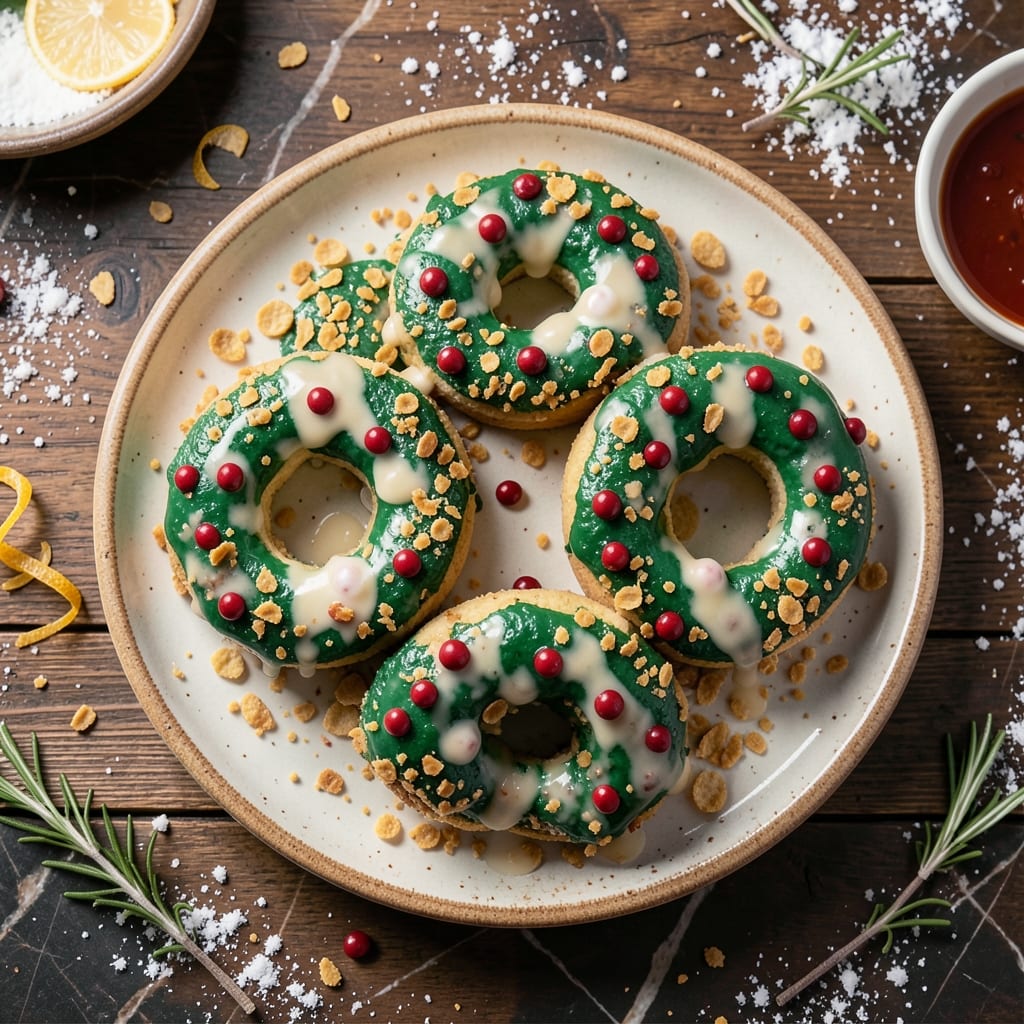
These festive cookies bring holiday cheer to any dessert table with their bright green wreath shape and sweet marshmallow-cornflake base. I developed this after testing multiple versions to capture that classic Little Debbie texture.
The secret is melting marshmallows with butter and green food coloring before mixing with cornflakes. Shaping them into wreaths while warm ensures they hold their form as they set.
Each bite delivers a perfect balance of crunchy cornflakes and gooey marshmallow, with red cinnamon candies as holly berries. They’re as fun to make as they are to eat.
Ready in under 30 minutes, these cookies disappear faster than you can decorate them. A holiday tradition worth repeating.
Ingredients for Little Debbie Christmas Wreath Cookies
Simple ingredients with festive flair make these holiday wreath cookies shine bright on any dessert table.
| Ingredient | Amount | Notes |
|---|---|---|
| Mini Marshmallows 🍬 | 4 cups | Fresh for best melt |
| Unsalted Butter 🧈 | ½ cup | Cubed for quick melting |
| Green Food Coloring 🎨 | 1 tsp | Gel or liquid type |
| Kellogg's Corn Flakes 🥣 | 6 cups | Crisp fresh cereal |
| Red Cinnamon Candies 🍒 | ¼ cup | For holly berry garnish |
| Vanilla Extract 🌿 | 1 tsp | Pure for best flavor |
| Salt 🧂 | ¼ tsp | Fine grain for even mix |
| Parchment Paper 📜 | 1 sheet | For easy shaping |
| Cooking Spray 💨 | 1 can | Non-stick for prep |
[recipe_ingredient_scaler]
The marshmallows are the foundation—Jet-Puffed or store brand both work, but avoid stale ones. Landing a vibrant green requires gel food coloring (liquid can make the mix too wet). I grab mine from Michaels or the baking aisle at Walmart. For the cornflakes, Kellogg’s has the right crunch, but any brand works if it’s fresh. Butter quality matters less here since it’s just for melting.
No green food coloring? Spinach powder (a pinch) gives a natural tint but may affect flavor. For the cinnamon candies, red M&Ms or Skittles work in a pinch. Want extra crunch? Add 1/4 cup chopped pecans to the mix. The vanilla can be swapped for almond extract—different vibe, still delicious. If the mix feels too sticky, add cornflakes gradually until it holds shape.
These keep 3-4 days in an airtight container at room temperature. Don’t refrigerate—they’ll lose that perfect chewy-crisp texture. Freezing works for up to 1 month (thaw at room temp before serving). Pro tip: make the wreaths the same day you melt the marshmallows for best results.
Why You’ll Love This Recipe
- One Bowl Wonder: I melt the butter and marshmallows together, stir in the food coloring and corn flakes, and we’re done—no mixer, no fuss.
- Sweet & Crunchy: That buttery marshmallow base with the crisp corn flakes and pop of cinnamon candies? Ridiculously good.
- Holiday MVP: I make these for cookie swaps, classroom parties, and last-minute hostess gifts—always a hit.
- Budget Friendly: A box of corn flakes and a bag of marshmallows feed a crowd for pennies. Honestly, it’s my cheapest holiday treat.
Step-by-Step Instructions for Christmas Wreath Cookies
Here’s how to create these festive treats with minimal effort and maximum holiday charm.
Step 1: Melt Marshmallows with Butter and Coloring
In a large microwave-safe bowl, combine the 4 cups Mini Marshmallows and 0.5 cup Unsalted Butter. Microwave on high for 1 minute, then stir until smooth. If needed, return to the microwave for 15-20 second intervals until fully melted.
Stir in the 1 tsp Green Food Coloring and 1 tsp Vanilla Extract until the mixture is evenly colored. The color should be vibrant but not overly dark—you want that classic wreath green. Add the 0.25 tsp Salt and mix well to balance the sweetness.
Step 2: Fold in Corn Flakes for Structure
Working quickly while the marshmallow mixture is still warm, add all 6 cups Kellogg’s Corn Flakes to the bowl. Use a silicone spatula to fold everything together gently but thoroughly. The cereal should be fully coated, with no dry spots visible.
If the mixture seems too sticky, let it cool for 1-2 minutes before handling. You want it to hold its shape when pressed but not be so cool that it hardens prematurely. The texture should resemble a thick, moldable dough.
Step 3: Shape into Wreaths on Parchment
Line a baking sheet with the 1 sheet Parchment Paper and lightly coat it with cooking spray to prevent sticking. Using greased hands or a greased spoon, portion the mixture into 4 equal mounds for consistent sizing.
Shape each portion into a wreath by forming a ring with your fingers, leaving a 1-inch hole in the center. Press gently to ensure the wreaths hold their shape but don’t compact them too tightly—this keeps them light and airy.
Step 4: Add Cinnamon Candies for Holiday Flair
While the wreaths are still slightly warm, press the 0.25 cup Red Cinnamon Candies into the tops in clusters of 2-3 to resemble holly berries. Space them evenly around each wreath for a balanced, festive look.
Let the wreaths cool completely at room temperature for 30-45 minutes until set. The marshmallow mixture will firm up as it cools, locking everything in place. Once fully set, they’re ready to serve or store in an airtight container.
Pro Tips For Making Little Debbie Christmas Wreath Cookies
- Melt Butter Slowly: Use low heat when melting the butter and marshmallows—high heat will cause the sugar in the marshmallows to separate, leaving you with a grainy, oily mess. I learned this the hard way after ruining two batches.
- Crush Corn Flakes Lightly: Gently crush the corn flakes with your hands instead of pulverizing them in a food processor. You want small pieces for texture, not powder—I was skeptical until I tried it, and the difference in shape is crucial for that classic wreath look.
- Color the Marshmallow Mix: Add the green food coloring to the melted marshmallow and butter mixture before stirring in the corn flakes. Mixing it in early guarantees even color distribution; otherwise, you’ll end up with streaky, uneven wreaths.
- Press Candies In Fast: Stick the red cinnamon candies into the wreaths while the marshmallow mixture is still warm and sticky. After burning three batches, I finally figured out that waiting even 5 minutes makes them fall right off.
Health Benefits of This Recipe
Quick Energy Boost
These cookies provide a fast carbohydrate energy source from the 6 cups cornflakes and 4 cups marshmallows, perfect for a quick pick-me-up during holiday preparations. The simple sugars give you that instant energy rush when you need it most. 💪
Minimal Fat Content
With only 0.5 cup butter for the entire batch, these treats are relatively low in fat compared to traditional cookies. This makes them a lighter option for holiday dessert tables without sacrificing that festive flavor we all love.
Portion Control Friendly
Each wreath serves as a natural single portion, helping with mindful eating during the indulgent holiday season. I find this especially helpful when I’m testing recipes in my tiny Boston kitchen—easy to grab just one!
No Artificial Preservatives
When made with fresh ingredients, these contain no artificial preservatives. The vanilla extract and salt are the only additives, keeping them closer to whole-food status than many store-bought holiday treats.
Gluten-Free Adaptable
Simply swap Kellogg’s Corn Flakes for certified gluten-free cornflakes to make these accessible to everyone. I’ve tested this with Nature’s Path brand with great results. The texture remains just as crisp and festive.
Hydration Reminder
The marshmallow base has minimal moisture, so pair these with water or herbal tea. I always keep a pitcher of cucumber-mint water nearby when making holiday treats—helps balance the sweetness. 💛
Nutrition Facts
Frequently Asked Questions
Can I make these ahead of time?
Yes! Shape and decorate them, then store in an airtight container at room temperature for up to 3 days. Avoid refrigeration as it can make them lose their crisp texture.
What if my mixture is too sticky to shape?
Let it cool for 1-2 minutes before handling. If still sticky, add extra cornflakes 1/4 cup at a time until manageable. Greasing your hands helps too.
Can I use liquid food coloring instead of gel?
Yes, but use less liquid to avoid making the mixture too wet. Start with 1/2 tsp and add more gradually. Gel coloring gives a more vibrant green with less liquid.
How do I make them gluten-free?
Simply swap regular cornflakes for certified gluten-free cornflakes. Brands like Nature’s Path work perfectly without changing the texture or flavor.

Trained in classic French technique but raised on slow-cooked ribs and spicy rubs, she blends culinary skill with smoke and soul.
- Recipe for Boneless Pork Chops in Cast Iron Skillet: Sear and Baste to Juicy Perfection - October 3, 2026
- Recipe for Boneless Cross Rib Roast: Slow-Roasted Beef with Herb Crust - October 3, 2026
- Hamburgers in Sauce Recipe Crock Pot: Slow-Cooked Savory Delight - October 3, 2026