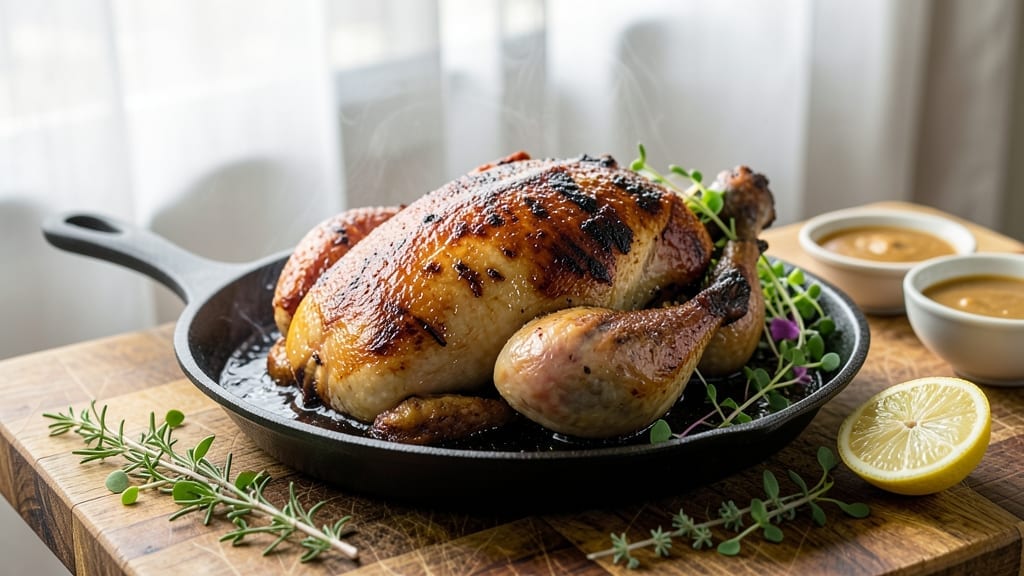
Mastering a low-and-slow smoked turkey transforms Thanksgiving from stressful to show-stopping—juicy meat, crisp golden skin, and no dry surprises. 🔥 I learned this technique from my grandfather’s backyard cookouts, where the secret was patience and precise temperature control.
The key difference between a dry turkey and one that falls apart at the table? A slow smoke that renders fat gently while the skin develops that perfect bark.
This method requires only a few core ingredients—turkey, salt, and time—but the execution is where the magic happens. You’ll work at 225–275°F for 8–12 hours, monitoring internal temperature until it hits 165°F in the thickest part. The result?
Meat so tender it nearly melts in your mouth, with skin that’s crisp enough to stand up to a fork. I’ve perfected this over years of testing, and it’s the only way I’ll smoke a turkey now.
What makes this recipe foolproof is the balance of time, temperature, and technique. No brining required—just a simple salt rub and the slow smoke does the rest. The turkey rests after coming off the smoker, locking in juices while the skin stays golden.
Serve with homemade gravy or classic sides, and you’ll have a centerpiece that steals the show without the stress.
Perfect for holidays or weeknight dinners when you crave that smoky depth. The same principles apply whether you’re cooking a 12-pound bird or a full-size turkey—just adjust the time. Let’s get started on a turkey that’ll make everyone ask for seconds.
Ingredients for low and slow smoked turkey
A 12-pound turkey, salt, and slow smoke create magic—no brining, no stress.
| Ingredient | Amount | Notes |
|---|---|---|
| Whole Turkey 🦃 | 12 lb | Fresh, thawed if frozen |
| Kosher Salt 🧂 | 1 ½ cups | Fine grain preferred |
| Unsalted Butter 🧈 | 1 lb | Cut into chunks |
| Apple Wood Chips 🍎 | 2 cups | Soaked 2 hours minimum |
| Granulated Onion 🧅 | ½ cup | For dry rub seasoning |
| Garlic Powder 🧄 | 2 tbsp | Dry rub ingredient |
| Black Pepper 🌶️ | 1 tbsp | Freshly ground preferred |
| Smoked Paprika 🌶️ | 1 tbsp | For dry rub |
| Poultry Seasoning 🌿 | 1 tbsp | Dry rub ingredient |
| Chicken or Turkey Broth 🍲 | 2 cups | For basting |
| Butterfly Pepper 🌶️ | 1 tsp | Optional for heat |
| Apple Cider Vinegar 🍎 | ¼ cup | For basting |
[recipe_ingredient_scaler]
The turkey is the star, so start with a fresh, unbrined bird—thawed if frozen, patted dry. I always grab mine from ButcherBox or my local farm stand for that farm-fresh difference. The key is room temperature for 1 hour before smoking to ensure even cooking. For the wood chips, apple is classic, but hickory or pecan add depth if you’re feeling adventurous. Soak those chips for at least 2 hours—dry chips just won’t light properly.
No apple wood chips? Cherry or oak chips work beautifully—just adjust soak time to 3 hours. The dry rub is simple but essential: skip the pre-made seasoning blends—homemade is always better. For the butter, unsalted is non-negotiable—you’re controlling the salt already. Need to stretch the broth? Water plus a splash of vinegar mimics the flavor without thinning it out. And if you’re worried about heat, reduce the butterfly pepper to half a teaspoon—it’s subtle but adds a nice kick.
This turkey is best smoked the day before—resting overnight locks in all that juiciness. Keep it wrapped loosely in foil at room temp until serving. The basting broth can be made ahead and stored in the fridge for up to 5 days. For leftovers, reheat gently in the oven to keep the skin crisp. I always carve mine right after cooking—it’s easier and the meat stays juicier. Save the carcass for broth; it’ll make 6-8 cups of gold.
Why You’ll Love This Recipe
- Apple-Smoked Perfection: That sweet, subtle apple wood smoke? It’s like giving your turkey a hug—gentle but unforgettable. The granulated onion and garlic powder in the rub caramelize just enough to add depth without overpowering, while the butter and vinegar basting keeps it from drying out. I’ll be real: the first bite always makes my guests pause like, “Wait, how did you do this?”
- No-Fuss Feast: You’re not here for a 10-step dance—this is the kind of recipe where you slap on a dry rub, fire up the smoker, and walk away. The only real prep is soaking those apple wood chips (but honestly, that’s just me multitasking while my coffee brews). Six to eight hours later? Dinner’s basically cooked itself, and the crispy skin? That’s the only part you actually have to work for.
- Leftovers That Shame You: Trust me, you will have leftovers. And they’re not sad, sad leftovers—the basting mixture can be refrigerated for up to five days, so you can toss it over sandwiches, roast potatoes, or even just eat it straight from the fridge like a sinful indulgence. My kids swear by turkey sandwiches the next day, and honestly? I don’t blame them.
- Budget-Friendly Crowd-Pleaser: A 12-pound turkey feeds a small army without breaking the bank, and the ingredients? Most of them are pantry staples. The apple wood chips are the only splurge, but they’re worth it for that smoky magic. Hosting Thanksgiving? This is your secret weapon. Throwing a casual backyard BBQ? Same. It’s the kind of dish that makes everyone feel like you’re a culinary rockstar—without the rockstar price tag.
Step-by-step instructions for low and slow smoked turkey
Here’s how to transform a simple turkey into a showstopping centerpiece with perfect moisture.
🔥 Step 1: Prepare the Turkey with Dry Rub
Remove the turkey from the refrigerator and let it sit at room temperature for 1 hour. This ensures even cooking. Pat the turkey completely dry inside and out with paper towels—this is crucial for crispy skin. Real talk: any moisture left on the skin will steam instead of crisp.
In a small bowl, combine the ½ cup granulated onion, 2 tbsp garlic powder, 1 tbsp black pepper, 1 tbsp smoked paprika, and 1 tbsp poultry seasoning. Rub this mixture all over the turkey, including inside the cavity. Press the spices firmly into the skin so they stick. I like to add the 1 tsp butterfly pepper to the mix for a subtle kick—skip it if you prefer milder flavor.
🍳 Step 2: Set Up the Smoker with Apple Wood
Soak the 2 cups apple wood chips in water for at least 2 hours before smoking. This prevents them from burning too quickly. Fill your smoker with the soaked wood chips and preheat to 225°F. You’ll know it’s ready when you see clean, blue smoke—thick white smoke means the wood isn’t ready yet.
Place a water pan in the smoker to maintain moisture during the long cook. I’ve found this keeps the turkey from drying out while the smoke works its magic. The apple wood gives a sweet, subtle flavor that pairs perfectly with turkey. Don’t rush this step—proper setup makes all the difference.
⏰ Step 3: Smoke the Turkey Low and Slow
Put the turkey on the smoker rack breast-side up. Smoke it undisturbed for 6-8 hours until the internal temperature reaches 150°F in the thickest part of the thigh. This is where patience pays off—the low temperature ensures tender meat without drying it out. Here’s the thing: don’t open the smoker during this time. Every time you peek, you lose heat and moisture.
About 4 hours into cooking, prepare the basting mixture by melting the 1 lb unsalted butter in a saucepan over low heat. Add the 2 cups chicken or turkey broth and ¼ cup apple cider vinegar, then whisk until smooth. This creates a flavorful glaze that keeps the turkey moist and adds depth of flavor.
🥘 Step 4: Baste and Finish the Turkey
Once the turkey reaches 150°F, remove it from the smoker and brush it generously with the basting mixture. Return it to the smoker and continue cooking until the internal temperature reaches 165°F in the thickest part of the thigh and 160°F in the breast. This usually takes another 1-2 hours, but timing depends on your turkey’s size.
For the final touch, increase the smoker temperature to 275°F and let the turkey rest for 30 minutes. This step helps render the skin to golden perfection. You’ll know it’s done when the skin is crispy and the juices run clear when you pierce the thigh with a meat thermometer.
🍽️ Step 5: Rest and Serve
Transfer the turkey to a cutting board and tent it loosely with foil. Let it rest for at least 30 minutes before carving. This resting period allows the juices to redistribute throughout the meat, ensuring every slice stays moist and flavorful. I know it’s hard to wait, but trust me—this step makes all the difference.
Carve the turkey against the grain for tender slices. The skin should be crispy and golden, and the meat should be juicy with a beautiful pink smoke ring. Serve with the remaining basting mixture spooned over the top for extra flavor. Your guests will think you spent all day in the kitchen—when really, you just mastered the art of low and slow smoking.
Pro Tips For Making Low And Slow Smoked Turkey
- Skip the Shortcut on Wood: I learned this the hard way—skipping the 2-hour soak on the 2 cups apple wood chips turns your smoker into a smoky sauna instead of a flavor factory. Cold water, cold patience: it’s the only way to get that clean blue smoke and avoid bitter-tasting turkey.
- Salt the Butter Early: Mix the 1.5 cups kosher salt into the 1 lb unsalted butter before melting it for the basting mixture. Sounds weird, but it works—it dissolves into the butter perfectly, giving your turkey an extra layer of seasoning without clumping. No last-minute scrambling to season the glaze.
- Don’t Rush the 150°F Hold: The turkey’s first 6-8 hours at 225°F are non-negotiable for tender meat. I used to peek every hour, adjusting the temp, but the second I stopped fiddling, the results improved. Let it smoke undisturbed—your thermometer is your best friend here.
- Whisk the Basting Mixture Hot: Melt the 1 lb butter with the 2 cups broth and ¼ cup apple cider vinegar over low heat, then whisk like you’re trying to win an arm-wrestling match. The emulsion forms better when it’s hot, and that’s what keeps the basting from separating later. (Yes, even if you’re impatient like me.)
Perfect pairings for low and slow smoked turkey
Smoky Side Dishes
Pair your turkey with smoked sweet potatoes—halved, tossed in 2 tbsp maple syrup, 1 tbsp smoked paprika, and roasted at 250°F for 1 hour.
The caramelized edges complement the turkey’s smokiness perfectly. I often add a sprinkle of crispy fried onions on top for extra texture. 🍠
Herb-Infused Gravy
Use the turkey drippings to make a rich, smoky gravy by simmering them with ½ cup chicken broth, 1 tbsp fresh thyme, and 1 tbsp apple cider vinegar for 20 minutes.
Strain and reduce until thick—this ties all the smoky flavors together beautifully. I always keep a bottle of Penzeys smoked paprika handy for extra depth. 🌿
Apple Butter Glaze
For a sweet-tangy contrast, drizzle homemade apple butter over the turkey before serving. Simmer 2 cups peeled apples, ¼ cup brown sugar, and 1 tsp cinnamon for 30 minutes until thick. The natural sweetness balances the smoky spices—trust me, it’s a game-changer. 🍏
Crispy Roasted Veggies
Toss brussels sprouts, carrots, and potatoes in 2 tbsp olive oil, 1 tsp smoked paprika, and ½ tsp garlic powder, then roast at 400°F for 25 minutes.
The smoky seasoning bridges the gap between turkey and sides without overpowering. I like to add a handful of toasted pecans for crunch. 🥕
Beverage Pairings
A dry Riesling or smoky German Pilsner cuts through the richness of the turkey. The acidity in Riesling cleanses your palate, while the malty notes in a Pilsner enhance the smoky flavors. I always keep a bottle of Schoffit Riesling chilled for these occasions. 🍷
Nutrition facts
Frequently asked questions
Why does my smoked turkey skin turn out greasy instead of crispy?
Greasy skin usually means the turkey wasn’t patted dry enough before seasoning. After removing it from the fridge, dry the skin thoroughly with paper towels—any moisture will steam instead of crisp up. Also, avoid overhandling the turkey during smoking, as this can break the skin barrier. Let the turkey rest 30 minutes before carving to help the skin set properly.
Can I use a different type of wood chip besides apple?
While apple wood gives a classic, sweet flavor, other woods like hickory or pecan add a stronger, bolder taste. Just soak the chips for 3 hours if using hickory, as they burn faster. Avoid fruitwoods like cherry if you’re sensitive to strong sweetness—stick to apple for a balanced profile.
What if my turkey reaches 165°F but still feels dry?
This often happens if the turkey was opened too early during smoking. Once it hits 150°F, let it cook undisturbed until it reaches 165°F. If it’s still dry, the issue might be from not basting enough—apply the butter-broth mixture every 1-2 hours during the final stages. Resting 30+ minutes before carving also helps redistribute juices.
How do I adjust the recipe for a smaller turkey?
For a 6-8 lb turkey, reduce the smoking time to 4-6 hours total, monitoring internal temp closely. Scale down the dry rub proportionally (use ¼ cup of the onion mixture instead of ½ cup) and halve the basting mixture. Smaller birds cook faster, so keep an eye on the thermometer—165°F in the thickest part is key.

Trained in classic French technique but raised on slow-cooked ribs and spicy rubs, she blends culinary skill with smoke and soul.
- Smoked Brisket Recipe: Low and Slow to Fall-Apart Tenderness - November 2, 2026
- Smoked Turkey Breast Recipe: Juicy Pink Center With Crispy Skin Every Time - November 2, 2026
- Leftover Smoked Pulled Pork Chili Recipe: Rustic Flavor Revival in One Pot - November 2, 2026