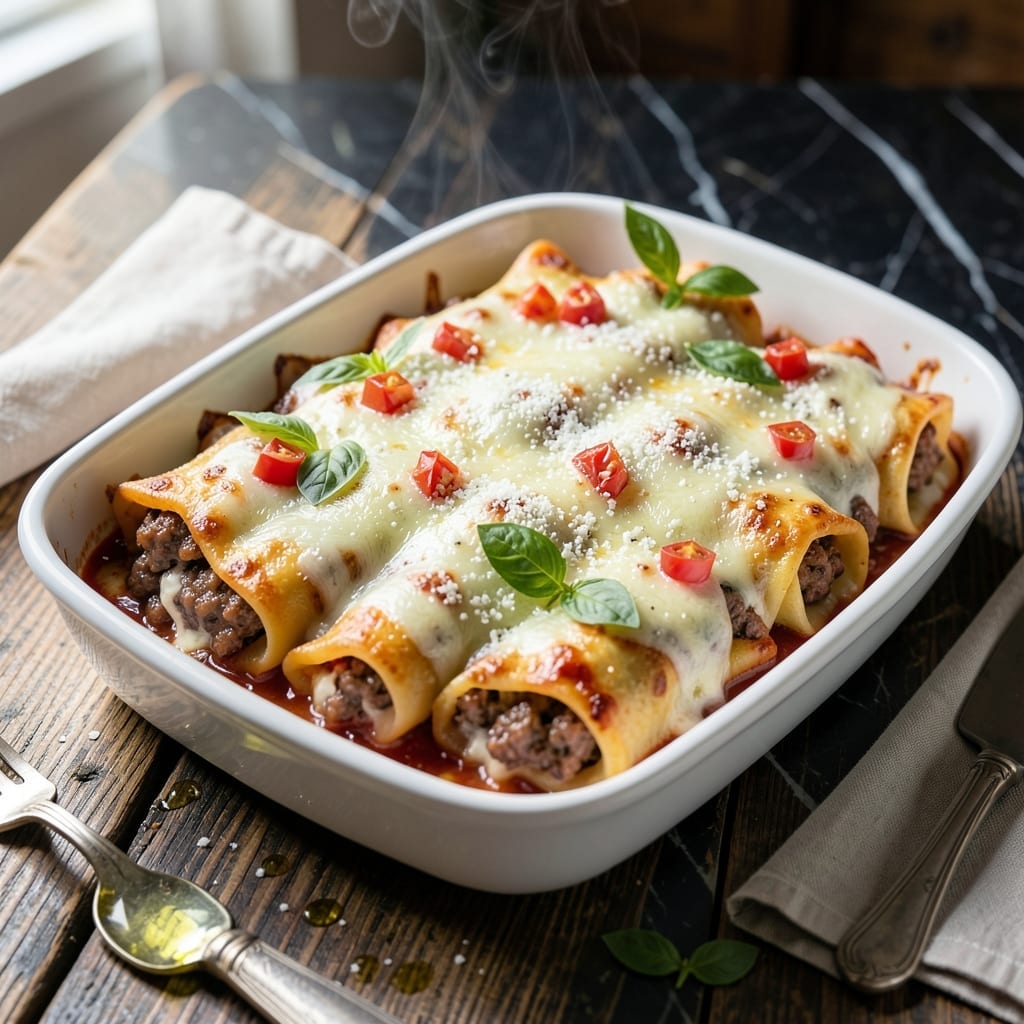
This manicotti delivers perfectly layered flavors in every bite. The meat filling combines ground beef with herbs and cheese for a rich, savory center.
Assembly is simple: stuff the shells, top with sauce, and bake until bubbly. The result is a dish that looks impressive but comes together with ease.
Ingredients for Manicotti Recipe with Meat
Classic Italian ingredients create rich, layered manicotti everyone will love at first bite.
| Ingredient | Amount | Notes |
|---|---|---|
| Manicotti Shells 🍝 | 12 pieces | Uncooked, no-boil preferred |
| Ground Beef 🥩 | 1 lb | 80/20 lean-to-fat ratio |
| Ricotta Cheese 🧀 | 15 oz | Whole milk for richness |
| Mozzarella Cheese 🧀 | 8 oz | Shredded from block |
| Parmesan Cheese 🧀 | ½ cup | Freshly grated preferred |
| Large Egg 🥚 | 1 whole | For binding filling |
| Garlic Cloves 🧄 | 3 cloves | Minced for filling |
| Fresh Parsley 🌿 | ¼ cup | Chopped, for filling |
| Dried Oregano 🍃 | 1 tsp | For seasoning filling |
| Dried Basil 🌿 | 1 tsp | For seasoning filling |
| Marinara Sauce 🍅 | 3 cups | Quality jarred or homemade |
| Olive Oil 🫒 | 1 tbsp | For greasing baking dish |
| Salt 🧂 | 1 tsp | Divided for seasoning |
| Black Pepper 🌶️ | ½ tsp | Freshly ground preferred |
[recipe_ingredient_scaler]
The ground beef is the foundation here. 80/20 lean-to-fat ratio gives the best flavor and moisture—avoid extra-lean as it can dry out. Whole Foods or ButcherBox offer quality grass-fed options, but standard grocery store beef works fine too. For the ricotta, whole milk is essential (the low-fat version gets watery). Look for fresh, high-quality cheese at the deli counter rather than pre-packaged.
No ricotta? Cottage cheese blended smooth works in a pinch. Swap ground beef for Italian sausage (casings removed) for extra flavor, or use a mix of beef and pork. If fresh parsley isn’t available, dried at one-third the amount is fine. For the marinara, Rao’s or Victoria brands are excellent jarred options—no need to make it from scratch unless you’re feeling ambitious.
Assemble and refrigerate manicotti up to 24 hours before baking (cover tightly). Leftovers keep well for 4-5 days in the fridge or can be frozen for 3 months. Reheat individual portions in the microwave or bake covered until warmed through.
Why You’ll Love This Recipe
- No-Fuss Assembly: I just stuff the shells with the beef and ricotta mix, layer with sauce, and let the oven do the rest.
- Three-Cheese Magic: The ricotta, mozzarella, and parmesan blend is so rich and creamy, it makes every bite feel indulgent.
- Crowd-Pleasing Meal: Honestly, this is the one dish I can serve at family dinners or potlucks and know everyone will clean their plates.
- Budget-Friendly Feast: Ground beef and manicotti shells stretch far, so I get a hearty, filling meal without breaking the bank.
Step-by-Step Instructions for Manicotti With Meat
Here’s the method. Straightforward, tested, works every time.
Step 1: Prepare the Meat and Cheese Filling
Brown the 1 lb Ground Beef in a skillet over medium-high heat until fully cooked through, about 6-8 minutes. Drain excess fat and let it cool slightly. This prevents the filling from being greasy and ensures even distribution in the shells.
In a large bowl, combine the cooked ground beef with 15 oz Ricotta Cheese, 8 oz Mozzarella Cheese, 0.5 cup Parmesan Cheese, 1 whole Large Egg, minced 3 cloves Garlic Cloves, 0.25 cup Fresh Parsley, 1 tsp Dried Oregano, 1 tsp Dried Basil, ½ tsp Salt, and 0.5 tsp Black Pepper. Mix until all ingredients are evenly incorporated and the filling holds together.
Step 2: Stuff the Manicotti Shells
Preheat your oven to 375°F. Lightly grease a 9×13-inch baking dish with 1 tbsp Olive Oil to prevent sticking. Spread 1 cup of the 3 cups Marinara Sauce evenly across the bottom of the dish. This creates a flavorful base and keeps the shells moist during baking.
Fill each of the 12 pieces Manicotti Shells with the meat and cheese mixture using a spoon or piping bag. Place the stuffed shells seam-side up in the baking dish. The shells should fit snugly but not be overcrowded. Pour the remaining 2 cups of marinara sauce over the top, ensuring each shell is well-coated.
Step 3: Bake Until Bubbly and Golden
Cover the baking dish tightly with aluminum foil to trap steam, which helps cook the shells evenly. Bake in the preheated oven for 25 minutes. Then, remove the foil and bake for an additional 10-15 minutes until the cheese is melted and the top is light golden brown.
You’ll know it’s done when the sauce is bubbling at the edges and the cheese has a slightly crisp, golden surface. The internal temperature of the filling should reach 165°F to ensure the egg is fully cooked and the dish is safe to eat.
Step 4: Rest and Serve
Remove the dish from the oven and let it rest for 5-10 minutes before serving. This allows the filling to set slightly, making it easier to serve without the cheese oozing out. The resting period also lets the flavors meld together for a more cohesive dish.
Garnish with additional Fresh Parsley or a sprinkle of Parmesan Cheese if desired. Serve warm with extra marinara sauce on the side for dipping. Each serving should showcase the rich, layered flavors of the meat and cheeses, with the shells perfectly tender.
Pro Tips For Making Manicotti Recipe With Meat
- Parboil the Shells: Boil the manicotti shells for 2-3 minutes less than the package says—I learned this the hard way after they turned to mush during baking. They’ll finish cooking in the oven.
- Drain the Beef: After browning the ground beef, drain the fat completely, even if it looks minimal. Greasy ricotta filling is the thing that matters most for texture.
- Skip Overstuffing: Resist the urge to pack the shells too full. About 2 tablespoons of filling per shell is plenty, or they’ll burst and make a mess.
- Add Egg to Ricotta: Mix one egg into the ricotta cheese before stuffing—it binds everything together so the filling doesn’t ooze out while baking.
Troubleshooting Perfect Results
Shells Won’t Softens
If your manicotti shells stay tough, they likely didn’t absorb enough moisture. I always spread 1 cup marinara sauce on the baking dish bottom before adding shells. Also, ensure you’re using no-boil shells and covering tightly with foil during the first 25 minutes of baking. 💡
Filling Too Dry
Dry filling usually means overcooked beef or insufficient cheese. Use 80/20 ground beef for fat content, and don’t drain it completely. Mix in 15 oz whole milk ricotta—it’s creamier than low-fat. Add 1 whole egg to bind everything together properly.
Cheese Doesn’t Melt
Pre-shredded cheese often contains anti-caking agents that prevent melting. I recommend shredding 8 oz mozzarella and ½ cup parmesan from blocks yourself. Also, uncover the dish for the last 10-15 minutes to allow proper browning and melting.
Sauce Too Watery
Thick, quality sauce prevents a soggy dish. I prefer Rao’s or Victoria brands. If using homemade, simmer it first to reduce excess liquid. Spread only 1 cup on the bottom and reserve 2 cups for topping to avoid overwhelming the shells.
Manicotti Bursts
Overfilling is the main culprit. Use about ¼ cup filling per shell—it should fit comfortably without straining the pasta. Place shells seam-side up in the dish, and avoid overcrowding. They’ll expand slightly during baking. 🔥
Uneven Cooking
Ensure your oven is fully preheated to 375°F before baking. Rotate the dish halfway through if your oven has hot spots. The filling’s internal temperature should reach 165°F for safe, even doneness throughout.
Nutrition Facts
Frequently Asked Questions
Can I use a different type of pasta?
Yes, jumbo pasta shells or lasagna noodles work well as substitutes. For shells, stuff them generously with the meat mixture.
How do I prevent the filling from leaking out?
Chill the filling for 15-20 minutes before stuffing to help it hold its shape. Also, avoid overfilling each shell.
Can I make this ahead of time?
Assemble the dish, cover tightly, and refrigerate for up to 24 hours. Add 5-10 minutes to the baking time if cooking from cold.
What’s the best way to stuff the shells?
A piping bag makes filling easiest, but a spoon works too. Hold the shell upright and fill from both ends for even distribution.

Trained in classic French technique but raised on slow-cooked ribs and spicy rubs, she blends culinary skill with smoke and soul.
- Recipe for Boneless Pork Chops in Cast Iron Skillet: Sear and Baste to Juicy Perfection - October 3, 2026
- Recipe for Boneless Cross Rib Roast: Slow-Roasted Beef with Herb Crust - October 3, 2026
- Hamburgers in Sauce Recipe Crock Pot: Slow-Cooked Savory Delight - October 3, 2026