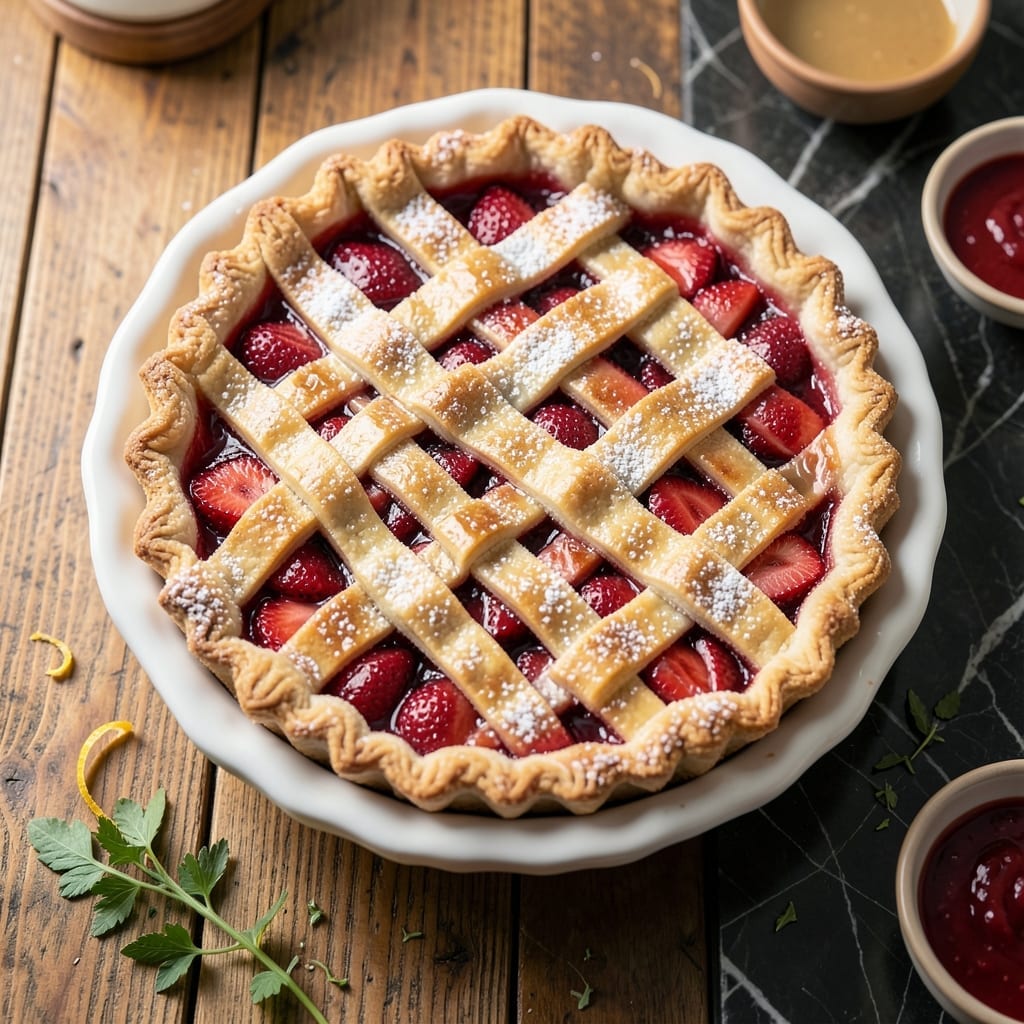
This strawberry pie captures the essence of summer in every slice, with a flaky lattice crust that frames juicy, bursting berries. I developed this version after years of perfecting the balance between sweet filling and buttery pastry.
The secret lies in pre-cooking the strawberries with sugar to concentrate their natural flavors before baking. This ensures a thick, glossy filling that holds its shape when sliced, preventing the dreaded soggy bottom crust.
What emerges from the oven is a golden pie with a filling that’s neither too runny nor overly firm, showcasing the berries’ vibrant color and fresh taste. The lattice top allows steam to escape while creating a visually stunning presentation.
Serve warm with vanilla ice cream for the ultimate dessert experience. Here’s how to make this classic treat at home.
Ingredients for Marie Callender’s Strawberry Pie
Fresh strawberries and flaky pastry create this summer classic with a lattice top.
| Ingredient | Amount | Notes |
|---|---|---|
| Fresh Strawberries 🍓 | 6 cups | Hulled and sliced |
| Granulated Sugar 🍚 | 1 ½ cups | Divided for filling and crust |
| Cornstarch 🌾 | ¼ cup | For thickening filling |
| Lemon Juice 🍋 | 2 tbsp | Freshly squeezed preferred |
| Unsalted Butter 🧈 | 1 cup | Cold, cubed for crust |
| All-Purpose Flour 🌾 | 2 ½ cups | Plus extra for dusting |
| Salt 🧂 | ½ tsp | Divided for filling and crust |
| Vanilla Extract 🌿 | 1 tsp | Pure extract recommended |
| Heavy Cream 🥛 | 2 tbsp | For egg wash substitute |
| Egg 🥚 | 1 whole | For egg wash |
| Vanilla Ice Cream 🍦 | 1 cup | For serving |
[recipe_ingredient_scaler]
The strawberries are everything here. Farmers market berries are ideal (in season, June-August), but grocery store ones work if they smell sweet and look vibrant. I usually grab a few extra quarts—some for the pie, some for snacking. For the butter, Plugrá or Kerrygold give the flakiest crust. If your berries are tart, bump the sugar up a touch.
No fresh strawberries? Frozen works in a pinch—thaw and drain them well first. Cornstarch can be swapped for tapioca starch at the same amount. Out of vanilla? Almond extract at half the amount adds a nice depth. For the crust, shortening instead of butter makes it extra flaky (but less flavorful). Skip the egg wash and use extra cream if you’re vegan.
This pie keeps 2-3 days at room temperature, loosely covered. The filling thickens as it cools—wait at least 2 hours before slicing. Freezes beautifully for up to 3 months.
Why You’ll Love This Recipe
- One Bowl Wonder: I mix everything right in the pie dish—no extra bowls, just strawberries, sugar, and a quick cornstarch slurry.
- Sweet-Tart Magic: That lemon juice cuts through the sugar perfectly, and the butter adds this rich depth that makes every bite taste expensive.
- Weekend or Weeknight: Honestly, I’ve served this at summer BBQs and random Tuesdays—it’s just as good cold the next day.
Step-by-Step Instructions for Strawberry Pie
Here’s the method I use to get that perfect balance of juicy berries and flaky crust.
Step 1: Prepare the Pie Crust Dough
In a large bowl, whisk together the 2.5 cups All-Purpose Flour and ¼ tsp Salt. The salt enhances the buttery flavor. Cut in the 1 cup Unsalted Butter (cold and cubed) using a pastry cutter until the mixture resembles coarse crumbs with some pea-sized butter pieces visible.
Drizzle in 2 tbsp Heavy Cream and mix just until the dough comes together. Don’t overwork it—you want visible butter streaks for flakiness. Divide the dough in half, form into discs, and refrigerate for 1 hour. This rest makes the crust easier to roll out.
Step 2: Make the Strawberry Filling
In a large saucepan, combine 6 cups Fresh Strawberries (hulled and sliced), 1 cup Granulated Sugar, 0.25 cup Cornstarch, 2 tbsp Lemon Juice, and ¼ tsp Salt. The cornstarch will thicken the filling beautifully as it cooks.
Cook over medium heat for 8-10 minutes, stirring constantly, until the mixture thickens and turns a deep, glossy red. You’ll notice it coats the back of a spoon when it’s ready. Remove from heat and stir in 1 tsp Vanilla Extract. Let it cool completely before assembling.
Step 3: Assemble the Lattice Pie
Roll out one dough disc on a lightly floured surface into a 12-inch circle. Transfer it to a 9-inch pie dish and trim the edges, leaving a slight overhang. Spoon the cooled strawberry filling into the crust, mounding it slightly in the center.
Roll out the second dough disc and cut it into 1-inch strips for the lattice. Weave the strips over the filling, alternating over and under to create the classic lattice pattern. Trim and crimp the edges to seal. Brush the lattice with a mixture of 1 whole Egg and 1 tbsp Heavy Cream for a golden finish.
Step 4: Bake to Golden Perfection
Preheat your oven to 375°F. Place the pie on a baking sheet lined with parchment paper to catch any drips. Bake for 45-50 minutes until the crust is deep golden brown and the filling is bubbling through the lattice.
If the edges start browning too quickly, tent them with foil. The filling should be thick and bubbly, not runny. Let it cool for at least 2 hours before slicing—this gives the filling time to set completely.
Step 5: Serve Warm with Ice Cream
Slice the pie into 8 servings and serve each piece warm with a scoop of Vanilla Ice Cream on top. The contrast of the warm, juicy filling and the cold ice cream is what makes this pie unforgettable.
Store any leftovers covered in the refrigerator for up to 3 days. Reheat individual slices in the microwave for 20-30 seconds to restore that just-baked warmth.
Pro Tips For Making Marie Callender’S Strawberry Pie
- Pre-cook the strawberries: Simmer the strawberries with sugar and cornstarch for 5-7 minutes first—this prevents a runny filling and guarantees that thick, glossy texture Marie Callender’s is known for.
- Use ripe but firm berries: Pick strawberries that are fully red but still firm to the touch; overripe ones turn to mush during baking, and underripe ones stay tart and hard.
- Chill before slicing: Let the pie cool completely, at least 4 hours, so the filling sets fully—I learned this the hard way after cutting into a soupy mess more than once.
- Dot with cold butter: Cut the unsalted butter into small cubes and keep it cold until you scatter it over the filling; it melts slowly and creates little pockets of richness throughout.
Essential Equipment for Perfect Results
Pie Dish Essentials
Invest in a 9-inch glass pie dish—I prefer Pyrex for its even heat distribution. The transparency lets you monitor the bottom crust for perfect browning. Avoid dark metal pans which can over-brown the edges before the center cooks through.
Rolling Tools
A French-style rolling pin without handles gives me the most control for rolling out the dough. Pair it with a pastry mat marked with measurements to ensure consistent 12-inch circles. The mat also prevents sticking without excess flour.
Lattice Weaving
For clean lattice strips, use a fluted pastry wheel to cut 1-inch wide strips. I love my OXO brand wheel—it glides through dough effortlessly. A small offset spatula helps lift and position strips without stretching them.
Baking Setup
Place your pie dish on a half-sheet pan lined with parchment. This catches inevitable filling drips and makes transferring in and out of the 375°F oven safer. I use Nordic Ware pans for their durability and non-warp construction. 🔥
Cooling Rack
After baking, transfer the pie to a wire cooling rack to prevent the bottom crust from steaming. This allows air circulation on all sides for even cooling. I’ve found stainless steel racks last longer than coated ones.
Serving Tools
A pie server with a sharp edge cuts through the lattice cleanly. I keep a Spring Chef server in my drawer—its thin blade slides under slices without crushing the flaky crust. Serve with a large metal spoon for the ice cream.
Nutrition Facts
Frequently Asked Questions
Can I use frozen strawberries instead of fresh?
Yes, but thaw and drain them well first to prevent a watery filling. Pat them dry with paper towels before using.
Why did my filling turn out runny?
Likely the filling wasn’t cooked long enough to activate the cornstarch. Ensure it bubbles and thickens before removing from heat. Let it cool 2 hours before slicing.
How do I prevent the crust from browning too fast?
Tent the edges with foil after 20-25 minutes of baking. This protects them while allowing the lattice to brown.
Can I make this ahead of time?
Bake the pie up to 1 day in advance. Store at room temperature and reheat slices in the microwave for 20 seconds.

Trained in classic French technique but raised on slow-cooked ribs and spicy rubs, she blends culinary skill with smoke and soul.
- Recipe for Boneless Pork Chops in Cast Iron Skillet: Sear and Baste to Juicy Perfection - October 3, 2026
- Recipe for Boneless Cross Rib Roast: Slow-Roasted Beef with Herb Crust - October 3, 2026
- Hamburgers in Sauce Recipe Crock Pot: Slow-Cooked Savory Delight - October 3, 2026