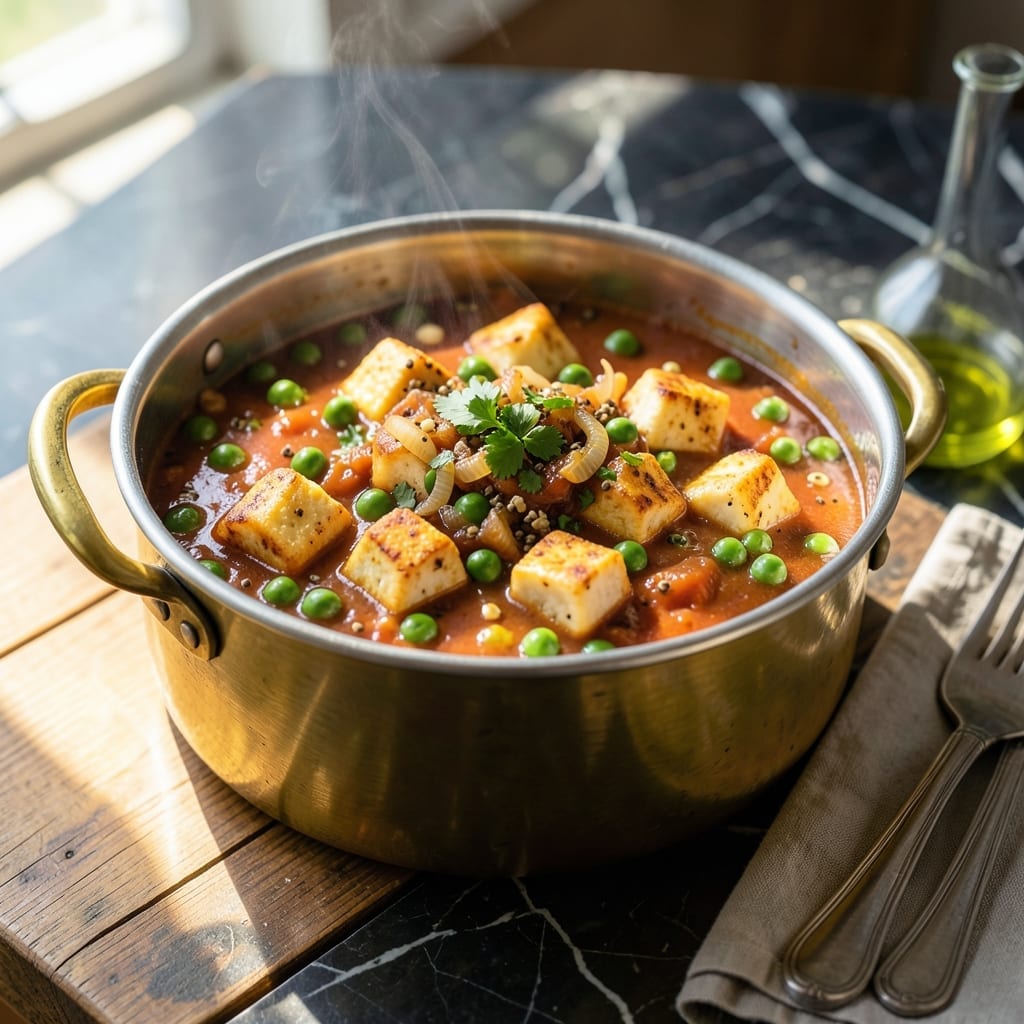
Pressure cooking transforms this classic North Indian dish into a comfort meal ready in minutes. I developed this method after testing traditional techniques in my small Boston kitchen.
The cooker locks in flavors, creating tender paneer and peas in a rich, spiced tomato gravy. This approach maintains authenticity while adapting to modern cooking demands.
You’ll achieve perfectly cooked matar paneer with soft cheese cubes and vibrant green peas, all bathed in a velvety, aromatic sauce. The pressure cooker ensures consistent results every time.
This dish delivers the warmth and satisfaction of traditional Indian cooking with minimal effort. Here’s how to make it perfectly in your pressure cooker.
Ingredients for Matar Paneer Recipe Cooker
Rich spices and fresh ingredients bring this North Indian classic to life in minutes.
| Ingredient | Amount | Notes |
|---|---|---|
| Paneer 🧀 | 1 lb | Cubed, full-fat preferred |
| Green Peas 🌱 | 1 ½ cups | Fresh or frozen |
| Tomatoes 🍅 | 4 whole | Ripe, medium-sized, blanched and pureed |
| Onion 🧅 | 1 whole | Large, finely chopped |
| Garlic Cloves 🧄 | 4 cloves | Minced for depth |
| Fresh Ginger 🌿 | 1 tbsp | Grated or minced |
| Green Chili 🌶️ | 1 whole | Finely chopped, seeds removed |
| Cumin Seeds 🌿 | 1 tsp | Whole for tempering |
| Garam Masala 🌶️ | 1 tsp | Freshly ground preferred |
| Ground Coriander 🌿 | 1 tbsp | Lightly toasted for aroma |
| Ground Cumin 🌿 | 1 tsp | Toasted for warmth |
| Turmeric Powder 🌶️ | ½ tsp | For color and earthiness |
| Red Chili Powder 🌶️ | ½ tsp | Adjust to heat preference |
| Heavy Cream 🥛 | ½ cup | For velvety finish |
| Fresh Cilantro 🌿 | ¼ cup | Chopped, for garnish |
| Vegetable Oil 🫒 | 3 tbsp | Neutral flavor for cooking |
[recipe_ingredient_scaler]
The paneer is the star here. Look for fresh, unsalted blocks at Indian grocery stores like Patel Brothers or Whole Foods. Avoid pre-crumbled—it doesn’t hold shape as well. If you can’t find paneer, extra-firm tofu works in a pinch (press it first). The peas should be bright green—frozen are often sweeter than out-of-season fresh. Tomato quality matters, so use vine-ripened if possible.
No garam masala? Mix equal parts cinnamon, cardamom, cloves, and black pepper for a close substitute. Fresh ginger is ideal, but ground ginger at half the amount works. Out of cilantro? Fresh parsley adds color without the same flavor. For a dairy-free version, swap the heavy cream for coconut milk—it’ll change the taste slightly but still be delicious. The chili heat is flexible—skip it entirely if you prefer mild.
Paneer keeps in the fridge for 3-4 days if submerged in water (change daily). The dish itself reheats well—store in an airtight container for up to 3 days. Freezing isn’t ideal (the sauce separates), but if you must, freeze without the cream and stir it in fresh when reheating.
Why You’ll Love This Recipe
- One-Pot Wonder: I dump everything into the cooker and walk away—no stirring, no fuss, just tender paneer and sweet peas soaking up the flavors.
- Garlic-Tomato Magic: The garlic cloves and tomatoes simmer together until they create this rich, aromatic gravy that makes the paneer taste ridiculous.
- Weeknight Hero: I make a big batch on Sunday and reheat portions all week—tastes even better the next day.
- Paneer on a Budget: Paneer can be pricey, but a little goes a long way here. Honestly, it’s my sneaky way to stretch a meal without skimping on taste.
Step-by-Step Instructions for Pressure-Cooked Matar Paneer
This streamlined pressure cooker method delivers all the depth of flavor with minimal effort.
Step 1: Build the Aromatic Base
Heat the 3 tbsp vegetable oil in your pressure cooker on the sauté function. Add the 1 tsp cumin seeds and let them sizzle for 20-30 seconds until they turn a shade darker and release their earthy aroma. Immediate fragrance is your cue they’re ready.
Add the finely chopped onion and cook for 5-6 minutes until it transforms from opaque to a rich golden brown. Stir frequently to prevent burning. Then add the minced garlic cloves, 1 tbsp fresh ginger, and finely chopped green chili, cooking for 1 minute until the raw smell disappears.
Step 2: Develop the Spiced Tomato Foundation
Add the blanched and pureed tomatoes, 1 tbsp ground coriander, 1 tsp ground cumin, 0.5 tsp turmeric powder, and 0.5 tsp red chili powder. Stir well to combine and cook for 4-5 minutes until the oil begins to separate at the edges.
This separation signals that the spices are fully bloomed and the raw tomato taste has mellowed into a deep, fragrant base. The mixture should thicken slightly and turn a rich, reddish-brown color. Taste and adjust the chili powder now if you prefer more heat.
Step 3: Pressure Cook the Peas and Paneer
Stir in the 1.5 cups green peas and 1 lb cubed paneer. Gently fold to coat the paneer in the spiced tomato mixture. Add ½ cup water and stir once more. Secure the lid and cook on high pressure for 5 minutes.
Once the cooking cycle completes, allow a natural pressure release for 5 minutes, then manually release any remaining pressure. The peas should be tender but still hold their shape, and the paneer will have absorbed the rich, spiced flavors without falling apart.
Step 4: Finish with Cream and Garam Masala
Open the lid and stir in the 0.5 cup heavy cream and 1 tsp garam masala. Simmer uncovered for 3-4 minutes on the sauté function to allow the flavors to meld and the sauce to thicken slightly. The cream will mellow the acidity and add a velvety richness.
The sauce should coat the back of a spoon, and the paneer will glisten with the creamy, spiced gravy. Taste and adjust the seasoning if needed, though the flavors should be well-balanced from the pressure cooking process.
Step 5: Garnish and Serve
Sprinkle the 0.25 cup chopped fresh cilantro over the top and give it a final gentle stir. The cilantro adds a bright, fresh contrast to the rich, warm spices. Let the dish sit for 5 minutes off the heat to allow the flavors to settle.
Serve hot with naan or steamed basmati rice. Each bite should deliver tender paneer, sweet peas, and a creamy, aromatic gravy that’s both comforting and deeply flavorful. The paneer will be soft yet firm, perfectly soaking up the sauce.
Pro Tips For Making Matar Paneer Recipe Cooker
- Sauté Onions Long: Cook the onions until golden brown—not just soft—before adding tomatoes. I learned this the hard way; raw onion taste ruins the gravy every time.
- Soak Paneer First: Soak paneer cubes in warm water for 10 minutes before adding to the cooker. Sounds weird, but it keeps them soft and stops them from turning rubbery.
- Skip Frozen Peas: Use fresh or thawed peas instead of frozen straight from the freezer. After one mushy batch, I finally figured out they release too much water and dilute the gravy.
- Crush Garlic Well: Pound the garlic cloves into a paste rather than just chopping. My grandmother swore by this, and the flavor in the curry actually changes the outcome.
Storing and Reheating matar paneer recipe cooker
Refrigerator Storage
Let this dish cool completely before transferring to an airtight container. It keeps beautifully in the fridge at 40°F or below for up to 3 days. I find the flavors actually deepen overnight as the spices continue to meld. ❄️
Freezer Storage
While not ideal, you can freeze this for up to 1 month. I recommend storing without the heavy cream—it separates when frozen. Freeze in a single layer first, then transfer to a freezer bag to prevent clumping.
Stovetop Reheating
This is my preferred method. Reheat gently over medium-low heat in a saucepan, adding 2-3 tbsp water or milk to restore creaminess. Stir frequently to prevent the paneer from sticking. It takes about 8-10 minutes to heat through. 🔥
Microwave Reheating
For quick meals, microwave individual portions covered with a damp paper towel. Use 50% power in 1-minute intervals, stirring between each, until reaching 165°F. Add a splash of cream to refresh the sauce.
Paneer Texture Tip
If the paneer seems dry after reheating, let it sit in the warm sauce for 5 minutes off heat. It’ll reabsorb the flavors beautifully. I learned this trick after my first failed reheat in that tiny Boston kitchen.
Nutrition Facts
Frequently Asked Questions
Can I use frozen peas?
Frozen peas work perfectly and often taste sweeter than fresh out-of-season ones. No need to thaw—add them directly to the cooker with the paneer.
Why does my paneer turn rubbery?
Overcooking or using low-fat paneer causes this. Stick to 5 minutes pressure cooking with full-fat paneer for the creamiest texture.
What if I don’t have a pressure cooker?
Simmer everything in a heavy pot for 20-25 minutes instead. Add a splash of water to prevent sticking and stir occasionally.
Can I make this dairy-free?
Yes! Swap paneer for extra-firm tofu and replace cream with coconut milk. The flavor changes slightly but stays delicious.

Trained in classic French technique but raised on slow-cooked ribs and spicy rubs, she blends culinary skill with smoke and soul.
- Recipe for Boneless Pork Chops in Cast Iron Skillet: Sear and Baste to Juicy Perfection - October 3, 2026
- Recipe for Boneless Cross Rib Roast: Slow-Roasted Beef with Herb Crust - October 3, 2026
- Hamburgers in Sauce Recipe Crock Pot: Slow-Cooked Savory Delight - October 3, 2026