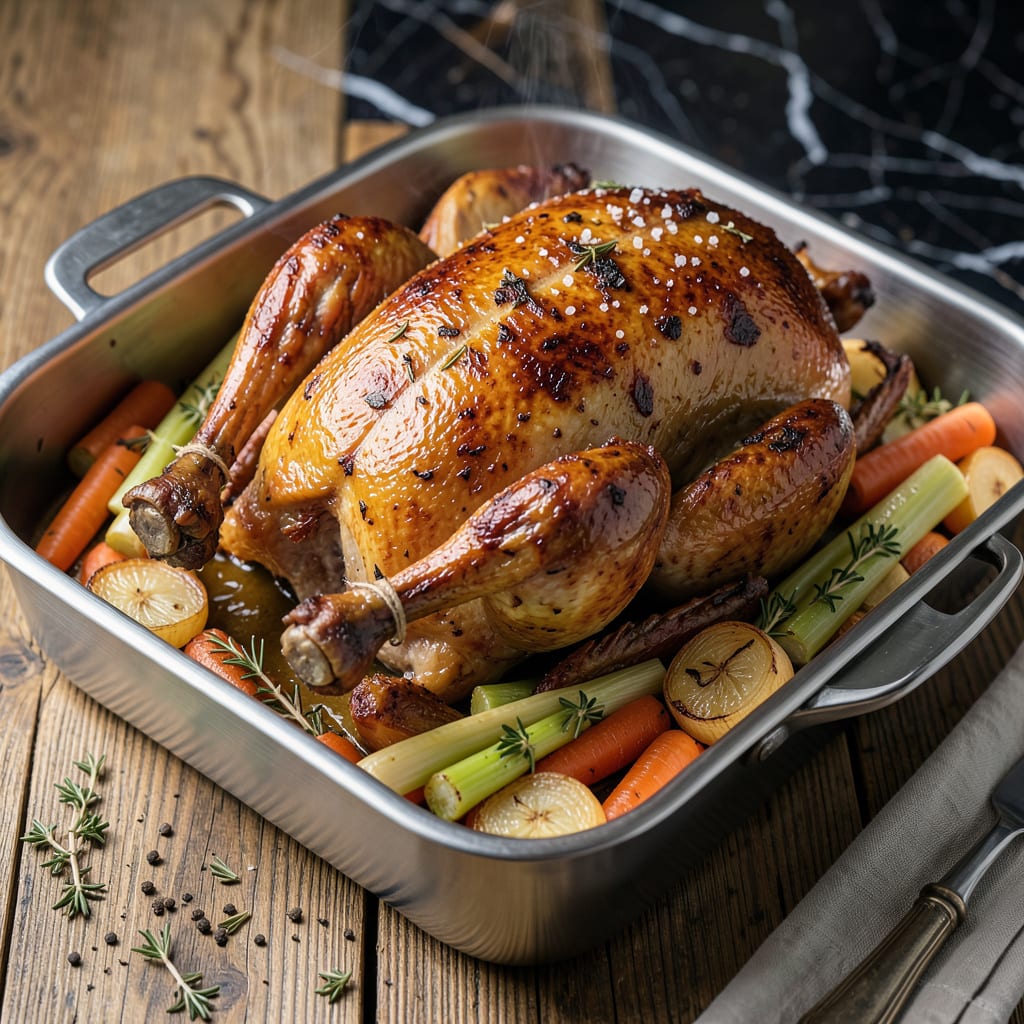
Here’s the thing—you don’t need a fancy roasting rack to cook a juicy, golden-brown turkey. I’ve roasted more birds than I can count without one, and the results are just as impressive. The secret? Using what you already have in your kitchen to create the perfect cooking environment.
What works best is making a simple bed of chopped vegetables (carrots, onions, celery) or even crumpled foil balls in your roasting pan. This elevates the turkey so air circulates underneath, preventing soggy skin while keeping the meat tender and flavorful. No special equipment, no stress—just smart kitchen hacks that deliver restaurant-quality results.
You’ll end up with a turkey that’s evenly cooked, with crispy skin and meat that practically falls off the bone. The vegetables in the pan will caramelize and create a flavorful base for gravy, so nothing goes to waste. It’s the kind of simple solution that makes holiday cooking feel manageable instead of overwhelming.
Perfect for Thanksgiving, Sunday supper, or whenever you’re feeding a crowd. Let’s get that bird in the oven!
📚 In This Guide
- What You’ll Need
- Instructions
- Tips and Common Mistakes
What Youll Need
- ● Whole turkey (12–24 lbs, fully thawed if frozen)
- ● Roasting pan (sturdy, heavy-duty, at least 2–3 inches deep)
- ● Aluminum foil (1 roll, heavy-duty preferred)
- ● Vegetables for a DIY “rack” (4–5 carrots, 3–4 celery stalks, 2 onions, or 2–3 potatoes—halved or chopped)
- ● Cooking oil or melted butter (2–3 tbsp for basting)
- ● Kitchen twine (10–12 inches, to tie legs if needed)
- ● Meat thermometer (instant-read, highly recommended)
- ● Salt & pepper (1–2 tbsp each, or to taste)
- ○ Herbs & aromatics (optional: 3–4 garlic cloves, 1 lemon, fresh thyme/rosemary)
- ○ Basting tool (optional: silicone brush or bulb baster)
- ● Oven mitts (heat-resistant, for handling the pan)
- ● Carving knife & fork (sharp, for serving)
Step-by-Step Instructions for Roasting Turkey Without Rack
Here’s the foolproof method I swear by—crispy skin, juicy meat, and no special equipment needed!
Create a Stable Veggie Base for Even Cooking
Start by chopping 4-5 unpeeled carrots, 2 celery stalks, and 1 large onion into 1-inch chunks. I prefer leaving the peels on for extra flavor and stability. Arrange these in a single layer across the bottom of your roasting pan—they’ll act as a natural rack while infusing the turkey with aromatic goodness.
This vegetable platform elevates the turkey just enough for air circulation while preventing direct contact with the pan. The onions will caramelize during cooking, adding depth to your pan drippings. Make sure the veggies are spread evenly to support the turkey’s weight without collapsing.
Prepare the Turkey for Maximum Juiciness
Pat the turkey completely dry with paper towels—this is non-negotiable for crispy skin. I like to use a clean kitchen towel for the final drying pass to ensure every nook is moisture-free. Once dry, season the cavity generously with salt and pepper, then stuff it with fresh herbs (thyme, rosemary, and sage work beautifully).
Next, carefully separate the skin from the breast meat and rub softened butter directly onto the flesh. This butter layer bastes the meat from within as it roasts. Finally, coat the entire exterior with more butter and season aggressively—don’t be shy with the salt. The skin should glisten with fat before it goes in the oven.
Roast Using the Flip Technique for Even Browning
Preheat your oven to 425°F and position the rack in the lower third. Place the turkey breast-side up on your vegetable bed and roast for 45 minutes. This high initial heat jumpstarts the browning process and helps render fat from the skin.
After the first 45 minutes, carefully flip the turkey breast-side down using sturdy tongs and a spatula for support. Roast for another 30 minutes, then flip back to breast-side up. This flip technique ensures the dark meat gets direct heat while protecting the breast from overcooking. Continue roasting until the internal temperature reaches 165°F in the thickest part of the thigh.
Baste Strategically for Perfect Skin and Moisture
Every 30 minutes during roasting, baste the turkey with its own juices using a bulb baster or spoon. I focus on the breast and thighs, making sure to get under any loose skin. After the final flip (breast-side up), increase the oven temperature to 450°F for the last 15-20 minutes to crisp the skin.
Watch closely during this final blast—the skin should turn a deep golden brown and become audibly crisp when tapped. The juices should run clear when you pierce the thigh, and the legs should move easily when wiggled. If the skin browns too quickly, tent loosely with foil but leave the ends open for steam to escape.
Rest Properly for Juicy, Tender Meat
Transfer the turkey to a cutting board and tent loosely with foil. Let it rest for a full 30-45 minutes—this is when the magic happens! The internal temperature will rise another 5-10 degrees as the juices redistribute throughout the meat. I always place a kitchen towel over the foil tent to keep it extra warm.
While resting, the vegetable base will have caramelized beautifully. I mash these directly in the pan with a potato masher to create an instant flavor base for gravy. The turkey should feel firm but yield slightly when pressed, and the skin should crackle when sliced. Carve against the grain and serve immediately for that perfect juicy bite!
Tips and Common Mistakes for Perfect Roasting Without a Rack
Let me share the game-changing insights I’ve learned from years of roasting turkeys without special equipment—these details make all the difference!
The Veggie Base Secret: In Step 1, don’t just chop those 4-5 unpeeled carrots, 2 celery stalks, and 1 large onion—cut them into uniform 1-inch chunks for stability. The peels add flavor and prevent slipping. I learned this the hard way after a turkey tilted mid-roast! Arrange them in a single layer with no gaps to support the bird evenly.
Butter Application Technique: When preparing the turkey in Step 2, take extra time to separate the skin from the breast meat completely. Rub that softened butter directly onto the flesh—not just under the skin. This creates a continuous basting layer that keeps the meat incredibly juicy throughout the 45 minutes of initial roasting at 425°F.
Flip Timing Precision: The 45 minutes breast-side up in Step 3 is crucial for rendering fat. When you flip to breast-side down for 30 minutes, use sturdy tongs and a wide spatula for support. I place a folded kitchen towel under the spatula for extra grip—this prevents tearing the skin during the flip.
Final Crisp Strategy: During the 15-20 minutes at 450°F in Step 4, rotate the pan 180 degrees halfway through for even browning. The skin should be a deep golden brown and make a crisp sound when tapped. If it’s browning too quickly, tent with foil but leave the ends open to maintain crispness.
Pro Tips for Roasting Turkey Without Rack
- Let me share the game-changing insights I’ve learned from years of roasting turkeys without special equipment—these d…
- The Veggie Base Secret: In Step 1, don’t just chop those 4-5 unpeeled carrots, 2 celery stalks, and 1 large onion—cut…
- Butter Application Technique: When preparing the turkey in Step 2, take extra time to separate the skin from the brea…
Frequently Asked Questions
Got questions about roasting a turkey without a rack? You’re not alone! Here are the most common concerns—and easy solutions—to ensure your bird turns out golden and delicious.
Can I use vegetables instead of a rack?
Absolutely! Chop carrots, onions, celery, or potatoes into large chunks and arrange them in the pan. They’ll elevate the turkey, add flavor to the drippings, and prevent sticking. Just replace them halfway if they burn. Bonus: roasted veggies for sides!
Will the turkey cook evenly without a rack?
Yes, if you flip it halfway! Roast breast-side up for the first 2/3 of the time, then carefully flip to crisp the back. Use oven mitts + a sturdy spatula for support. A meat thermometer (165°F in the thigh) is your best friend here.
What if my turkey sticks to the pan?
Prevent sticking by oiling the pan generously (or lining it with parchment). If it sticks, let it rest 10–15 minutes post-roasting—the juices will release it. Gently wiggle a spatula underneath if needed, but don’t force it!
How do I keep the breast from drying out?
Baste every 30–45 minutes with pan juices or melted butter, and tent loosely with foil if the skin browns too fast. Brining (even a quick 4-hour saltwater soak) also locks in moisture. Pro tip: Start breast-side down for extra juiciness!
Can I use a baking sheet or casserole dish instead?
Yes, but choose a sturdy, rimmed sheet pan (half-sheet size works) or a deep casserole dish. Avoid glass—it may shatter with temperature swings. Add 1/4-inch water to the pan to stabilize heat and prevent warping.
Roasting a turkey without a rack doesn’t mean sacrificing flavor or juiciness! With a few clever kitchen hacks—like using veggies, foil, or even a DIY rack—you can achieve golden-brown perfection every time. 🦃✨ No special equipment? No problem!
Now that you’re armed with these tips, it’s time to put them to the test. Grab that turkey, preheat the oven, and get roasting! For extra confidence, check out our FAQ section if you hit any snags along the way. Happy cooking—your juiciest turkey yet is just an oven timer away! ⏰🍽️

Trained in classic French technique but raised on slow-cooked ribs and spicy rubs, she blends culinary skill with smoke and soul.
- Recipe for Boneless Pork Chops in Cast Iron Skillet: Sear and Baste to Juicy Perfection - October 3, 2026
- Recipe for Boneless Cross Rib Roast: Slow-Roasted Beef with Herb Crust - October 3, 2026
- Hamburgers in Sauce Recipe Crock Pot: Slow-Cooked Savory Delight - October 3, 2026