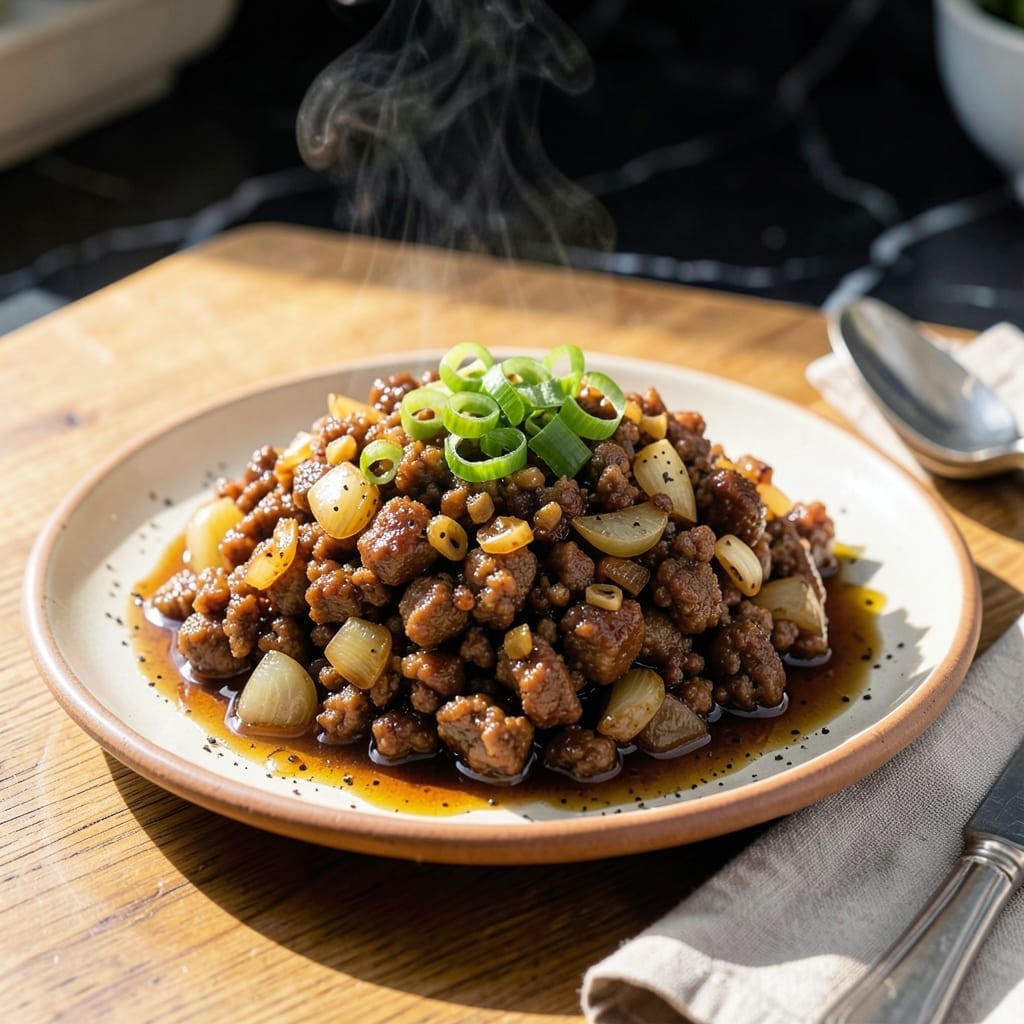
This Filipino-style ground pork dish brings authentic flavors to your home kitchen with a simple, no-fuss approach. I developed this method after studying my grandmother’s intuitive cooking techniques, translating her vague handwritten notes into a reliable recipe anyone can master.
The secret lies in balancing savory, tangy, and slightly sweet notes—hallmarks of Pinoy cooking. A splash of vinegar and a touch of soy sauce create depth, while garlic and onions build the aromatic base that defines this dish.
You’ll end up with tender, flavorful pork that’s versatile enough for rice, tacos, or even as a filling for lumpia. The texture is perfect every time, with no dry or greasy results.
No special equipment or hard-to-find ingredients required—just a skillet and about 30 minutes of your time.
Ingredients for Mince Pork Recipe Pinoy
Ground pork, vibrant veggies, and pantry staples create this dish with authentic Pinoy flavor.
| Ingredient | Amount | Notes |
|---|---|---|
| Ground Pork 🐖 | 1 ½ lb | 80/20 fat ratio preferred |
| Garlic Cloves 🧄 | 8 cloves | Minced finely for depth |
| Yellow Onion 🧅 | 1 whole | Diced small and even |
| Soy Sauce 🫙 | ¼ cup | Filipino brands preferred |
| White Vinegar 🍶 | 3 tbsp | Cane vinegar if available |
| Brown Sugar 🫘 | 2 tbsp | Packed for sweetness balance |
| Bay Leaves 🍃 | 2 whole | Dried, for aromatic depth |
| Ground Black Pepper 🌶️ | 1 tsp | Freshly ground preferred |
| Salt 🧂 | 1 tsp | Adjust to taste later |
| Tomato Paste 🍅 | 2 tbsp | For umami richness |
| Green Peas 🌱 | ½ cup | Frozen works perfectly |
| Carrot 🥕 | 1 whole | Diced small for texture |
| Vegetable Oil 🫒 | 2 tbsp | Neutral flavor for cooking |
[recipe_ingredient_scaler]
The pork is the foundation here. Ground pork with 20% fat gives you that juicy, tender texture without being greasy. Filipino grocery stores often carry pre-marinated versions, but regular supermarket ground pork works just fine. Look for freshly ground if you can find it—it makes a noticeable difference. Bay leaves are worth hunting down at an Asian market (they’re usually cheaper and fresher there).
No cane vinegar? Apple cider or rice vinegar work in a pinch. Fresh out of soy sauce? Tamari at one-to-one ratio gets you close. The brown sugar can be swapped for coconut sugar if you prefer. Don’t have green peas? Diced bell peppers add a nice crunch. Tomato paste can be skipped, but you’ll lose some depth—add a splash of fish sauce instead if you have it.
Cooked pork keeps in the fridge for 4-5 days and freezes beautifully for 3 months. Portion into meal-sized containers before freezing (worth the extra minute). Reheats best with a splash of water to bring back the moisture. Always let it come to room temperature before reheating for even warmth.
Why You’ll Love This Recipe
- I’ll be real: one batch feeds us for two meals, and it tastes even better the next day.
- One Pan Meal: I brown the pork, toss in the garlic and onion, then let the soy and vinegar work their magic—no extra pots, no fuss.
- Umami Bomb: Honestly, the combo of soy and vinegar with the pork is ridiculous. That tangy-savory punch hits every time.
- Weeknight Hero: Between us, this is my Tuesday night lifesaver—ready before the rice cooker beeps.
Step-by-Step Instructions for Savory Filipino-Style Ground Pork
Here’s my tested method for building layers of flavor that define this classic dish.
Step 1: Sauté Aromatics Until Fragrant
Heat the 2 tbsp Vegetable Oil in a large skillet over medium heat. Add the 1 whole Yellow Onion (diced small and even) and cook for 3-4 minutes until it turns translucent and begins to soften at the edges.
Now add all 8 cloves Garlic Cloves (minced finely) and sauté for 1-2 minutes until fragrant. Watch carefully—garlic burns easily. You’ll know it’s ready when the kitchen fills with that unmistakable, intoxicating aroma and the garlic turns just a shade lighter.
Step 2: Brown the Pork and Build the Base
Increase heat to medium-high and add the 1.5 lb Ground Pork, breaking it up with a wooden spoon. Cook for 6-8 minutes until the pork loses its raw color and begins to brown, stirring occasionally to prevent sticking.
Once the pork is no longer pink, stir in the 2 tbsp Tomato Paste and cook for 2 minutes to deepen its color and intensify its umami richness. This step creates the foundation of your sauce, so don’t rush it—let the tomato paste caramelize slightly at the edges.
Step 3: Simmer with Sauce and Seasonings
Pour in the 0.25 cup Soy Sauce, 3 tbsp White Vinegar, and 2 tbsp Brown Sugar. Stir well to combine, then add the 2 whole Bay Leaves, 1 tsp Ground Black Pepper, and 1 tsp Salt. Reduce heat to medium-low and let it simmer for 5 minutes.
The sauce should begin to thicken slightly and turn a rich, glossy brown. Taste and adjust the seasoning if needed, but remember the flavors will concentrate as it cooks. This is where the magic happens—the balance of salty, sweet, and tangy that defines this dish.
Step 4: Add Vegetables and Finish Cooking
Stir in the 1 whole Carrot (diced small) and 0.5 cup Green Peas. Simmer for another 5-7 minutes until the carrots are tender but still hold their shape, and the peas are heated through. You’ll notice the sauce clinging beautifully to the vegetables and pork.
If the mixture seems too dry, add a splash of water to loosen it, but don’t overdo it—you want a rich, saucy consistency, not soupy. The carrots should be just tender enough to offer a slight bite, and the peas should retain their vibrant green color without turning mushy.
Pro Tips For Making Mince Pork Recipe Pinoy
- Brown the Pork First: Cook the ground pork over medium-high heat until fully browned and crumbly before adding onions—this builds depth of flavor and prevents a watery sauce.
- Mince Garlic Finely: After burning garlic a few too many times, I now mince it as fine as possible so it distributes evenly and cooks through without bitter spots.
- Balance the Vinegar: Start with half the vinegar you think you need, taste, then adjust—I learned this the hard way after overpowering the dish with too much acidity.
- Simmer Low and Slow: Once everything’s combined, let it simmer on low for 10-15 minutes so the soy sauce and vinegar meld properly into the pork.
Make-Ahead Tips for This Recipe
Overnight Flavor Boost
I always make this a day ahead when possible. After cooking, let it cool completely, then transfer to an airtight container and refrigerate overnight. The flavors meld together beautifully, and the pork absorbs the sauce more deeply. 💡
Freezer-Friendly Batches
This recipe freezes wonderfully for up to 3 months. Portion into 1-cup servings in freezer bags, squeeze out excess air, and lay flat to save space. I use quart-sized bags for perfect single-meal portions.
Quick Thaw Method
When ready to use, thaw overnight in the fridge or use the microwave’s defrost setting for 5-7 minutes. For best results, transfer to the fridge once it’s no longer frozen solid to finish thawing evenly.
Reheating Perfection
Reheat on the stovetop over medium-low heat with a splash of water to prevent drying out. Stir occasionally until reaching 165°F. Microwave works too—cover with a damp paper towel and heat in 1-minute intervals. 🔥
Meal Prep Shortcut
Cook a double batch and use half immediately, freezing the rest. I often prep this on Sunday and use it for quick lunches throughout the week. The flavors actually taste better after a day or two in the fridge.
Nutrition Facts
Frequently Asked Questions
Can I use lean ground pork instead of 80/20?
You can, but the dish may turn out drier. The fat in 80/20 keeps it juicy. If using lean, add 1-2 tbsp oil to compensate.
Why is vinegar used in this recipe?
Vinegar adds the signature tangy brightness of Pinoy dishes. It also tenderizes the pork and balances the richness. Use white or cane vinegar for authentic flavor.
How do I prevent the dish from being too salty?
Start with half the soy sauce, taste, then adjust. Use low-sodium soy sauce if preferred. The sauce reduces, concentrating flavors.
Can I add potatoes instead of carrots?
Dice 1 large potato small and add it with the peas. It’ll soak up the sauce beautifully. Cook 2-3 minutes longer to soften.

Trained in classic French technique but raised on slow-cooked ribs and spicy rubs, she blends culinary skill with smoke and soul.
- Octopus Recipe Pan Fried: Crispy Edges With Tender Bites - October 3, 2026
- Recipe For Fried Pork Chops In An Iron Skillet: Crispy Crust With Juicy Centers - October 3, 2026
- Recipe for Fully Cooked Spiral Ham: Sweet Glaze and Effortless Elegance - October 3, 2026