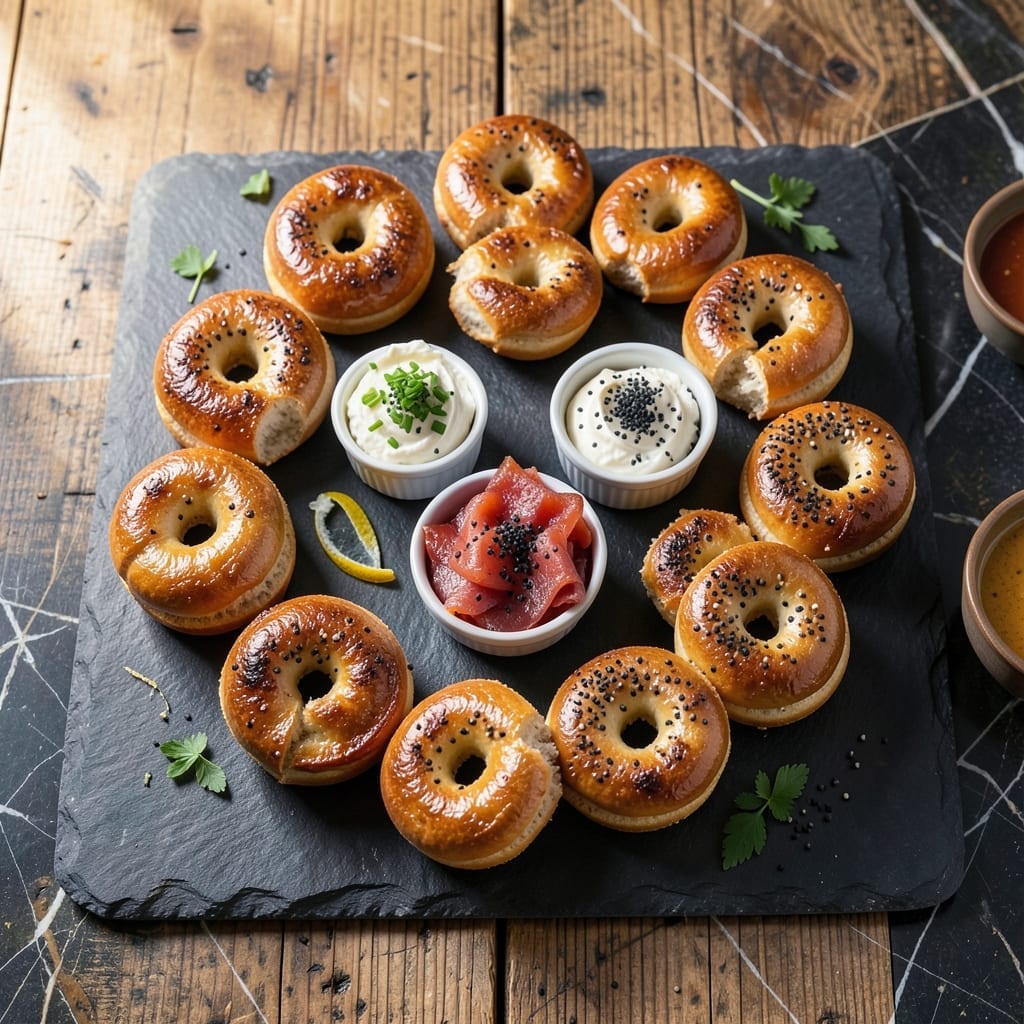
I’ve cracked the code for making perfect mini bagels at home—no specialty equipment needed. These bite-sized versions deliver the same chewy texture and golden crust as their full-size counterparts, but in a fast, convenient package.
The process is surprisingly simple: mix, shape, boil, then bake. The boiling step is crucial—it gives the bagels their signature glossy finish and distinct flavor. You’ll be amazed how quickly they come together.
What you get is a batch of warm, fresh mini bagels ready for toppings or sandwiches. Their small size makes them ideal for breakfast, snacks, or even party appetizers.
Try them with sweet or savory toppings for endless variety. The possibilities are limitless.
Ingredients for Mini Bagel Recipe Ideas
Just a handful of pantry staples transforms into warm, chewy mini bagels ready in no time.
| Ingredient | Amount | Notes |
|---|---|---|
| Bread Flour 🌾 | 4 cups | High-protein for chewiness |
| Warm Water 💧 | 1 ¼ cups | 110-115°F for yeast activation |
| Active Dry Yeast 🍞 | 2 ¼ tsp | One packet plus a pinch |
| Granulated Sugar 🍚 | 1 tbsp | Feeds the yeast |
| Kosher Salt 🧂 | 2 tsp | Diamond Crystal preferred |
| Baking Soda 🧪 | 1 tbsp | For boiling water alkalinization |
| Honey 🍯 | 1 tbsp | For boiling water sweetness |
| Vegetable Oil 🫒 | 1 tbsp | For greasing bowl |
| Large Egg 🥚 | 1 whole | For egg wash finish |
| Sesame Seeds 🌰 | 2 tbsp | Optional topping |
| Poppy Seeds 🌿 | 2 tbsp | Optional topping |
| Everything Bagel Seasoning 🌶️ | 2 tbsp | Optional topping blend |
[recipe_ingredient_scaler]
The flour makes all the difference here. Bread flour (King Arthur is my go-to) gives that signature chew—all-purpose works in a pinch but the texture won’t be quite the same. Yeast needs to be fresh (check the expiration date) and the water 110-115°F—too hot kills it, too cold slows it. I grab my yeast from Trader Joe’s or the bulk bins at Whole Foods.
No bread flour? Add 1 tbsp vital wheat gluten per cup of all-purpose. Out of honey? Brown sugar or barley malt syrup works for the boiling water. Skip the egg wash for vegan versions—aquafaba or maple syrup gives a similar shine. The toppings are totally flexible: onion flakes, garlic powder, or coarse salt all work great.
Dough keeps 2 days in the fridge (punch down if it rises too much) or 1 month frozen. Baked bagels? 3 days at room temp in a paper bag, 1 week frozen. Reheat in a 350°F oven for 5-10 minutes to restore that fresh-baked feel.
Why You’ll Love This Recipe
- No-Fuss Dough: I just mix bread flour, warm water, yeast, sugar, and salt—no fancy steps, no waiting for hours.
- Chewy Perfection: Honestly, the texture from that bread flour and yeast combo is ridiculous—crisp outside, soft inside.
- Breakfast to Go: I make a batch Sunday, freeze half, and grab one for rushed mornings.
- Budget Friendly: Five basic ingredients, and I get a dozen mini bagels for less than store-bought.
Step-by-Step Instructions for Mini Bagels
Here’s the method. Straightforward, tested, works every time.
Step 1: Activate the Yeast and Mix the Dough
In a small bowl, combine the 1.25 cups Warm Water (make sure it’s 110-115°F—too hot kills the yeast), 1 tbsp Granulated Sugar, and 2.25 tsp Active Dry Yeast. Let it sit for 5-7 minutes until foamy. This is your yeast proofing—if it doesn’t bubble, start over with fresh yeast.
In a stand mixer with the dough hook, combine the 4 cups Bread Flour and 2 tsp Kosher Salt. Add the yeast mixture and mix on low for 2 minutes until a shaggy dough forms. Increase speed to medium and knead for 6-8 minutes until smooth and elastic. The dough should pull away from the bowl and feel slightly tacky but not sticky.
Step 2: First Rise and Shape the Mini Bagels
Lightly grease a large bowl with the 1 tbsp Vegetable Oil. Transfer the dough to the bowl, turning to coat all sides. Cover with a damp towel and let rise in a warm place for 1 hour or until doubled in size. I place mine near a sunny window or on top of the fridge for consistent warmth.
Once doubled, punch down the dough and divide it into 16 equal pieces (about 2 oz each). Roll each piece into a ball, then poke a hole through the center with your thumb and stretch gently into a 1.5-inch ring. Place on a parchment-lined baking sheet, cover, and let rest for 10 minutes.
Step 3: Boil and Add Toppings
Preheat your oven to 425°F. In a large pot, bring 2 quarts of water to a boil. Stir in the 1 tbsp Baking Soda and 1 tbsp Honey—this creates the signature bagel sheen and adds subtle sweetness. The water should look slightly cloudy and smell faintly sweet.
Boil 3-4 bagels at a time for 30-45 seconds per side using a slotted spoon. They’ll float immediately. Transfer to a wire rack to drain briefly. While still wet, brush each with the Large Egg beaten with a splash of water, then sprinkle generously with your choice of 2 tbsp Sesame Seeds, 2 tbsp Poppy Seeds, or 2 tbsp Everything Bagel Seasoning. The toppings will stick best when the bagels are moist.
Step 4: Bake to Golden Perfection
Transfer the topped bagels to a parchment-lined baking sheet. Bake in the preheated oven for 12-15 minutes until deep golden brown with a glossy finish. Rotate the pan halfway through for even browning. The bagels should sound hollow when tapped on the bottom.
Let them cool on a wire rack for at least 10 minutes before serving. This cooling period allows the interior to set properly. Serve warm or at room temperature. For best texture, slice them within 24 hours—though they’ll disappear much faster than that.
Pro Tips For Making Mini Bagel Recipe Ideas
- Proof the Yeast: Always activate your dry yeast in warm water with a pinch of sugar first—I learned this the hard way after a few dense, sad mini bagels.
- Use Bread Flour: Skip the all-purpose; bread flour’s higher protein actually changes the outcome, giving your mini bagels that chewy texture they need.
- Rest Before Boiling: Let the shaped dough rest for 10 minutes before boiling, or they’ll deflate in the water like a sad balloon.
- Boil in Sugar Water: Add a tablespoon of sugar to the boiling water—it’s the thing that matters most for getting that glossy, golden crust.
Common Mistakes When Making Perfect Results
Overproofing the Dough
Let the dough rise too long, and your bagels will collapse in the boiling water. I learned this the hard way—after 90 minutes at room temperature, they’re ready. Any longer and the structure weakens, losing that perfect chew. 💡
Skipping the Boil
This step creates the signature texture and shine. Without boiling, you’ll end up with bread rolls, not bagels. Use 2 quarts of water with 1 tbsp Baking Soda and 1 tbsp Honey for the best results. Don’t rush this crucial 30-45 second bath per side.
Water Temperature Issues
Yeast is fussy—too hot (above 120°F) kills it, too cold (below 105°F) slows activation. Use a thermometer for 110-115°F water. I check mine with a Taylor instant-read for accuracy.
Uneven Shaping
Inconsistent sizes mean uneven baking. Weigh each piece to 2 oz and shape into uniform 1.5-inch rings. I use a kitchen scale for precision. The holes should be about the width of your thumb.
Overloading the Boil
Crowding the pot lowers water temperature and leads to gummy bagels. Boil 3-4 at a time maximum. This gives each enough space to float freely and develop that perfect glossy exterior.
Skipping the Cool
Slicing too soon traps steam, making the insides gummy. Always cool on a rack for 10 minutes before serving. This lets the interior set while keeping the crust crisp. ✨
Nutrition Facts
Frequently Asked Questions
Can I make these without a stand mixer?
Knead by hand for 8-10 minutes until smooth. The dough will be slightly sticky at first but will become elastic. Just be sure to use bread flour for the best texture.
Why do we boil the bagels first?
Boiling in alkaline water gives bagels their signature chewy texture and glossy crust. It also helps toppings stick better. Skip this step and you’ll end up with bread rolls, not bagels!
How do I store leftover mini bagels?
Keep them in an airtight container at room temperature for up to 3 days. For longer storage, freeze for up to 1 month. Reheat in a 350°F oven for 5 minutes to restore freshness.
Can I use all-purpose flour instead?
Yes, but add 1 tbsp vital wheat gluten per cup for better chew. The texture won’t be identical to bread flour, but it’ll still be delicious.

Trained in classic French technique but raised on slow-cooked ribs and spicy rubs, she blends culinary skill with smoke and soul.
- Recipe for Crock Pot Swiss Steak: Slow-Cooked Beef With Mushroom Gravy - October 3, 2026
- Recipe for Kabsa Rice: Spiced Middle Eastern Feast in One Pot - October 3, 2026
- Hamburger Stir Fry Recipe Healthy: Lean Protein and Veggie-Packed Dinner - October 3, 2026