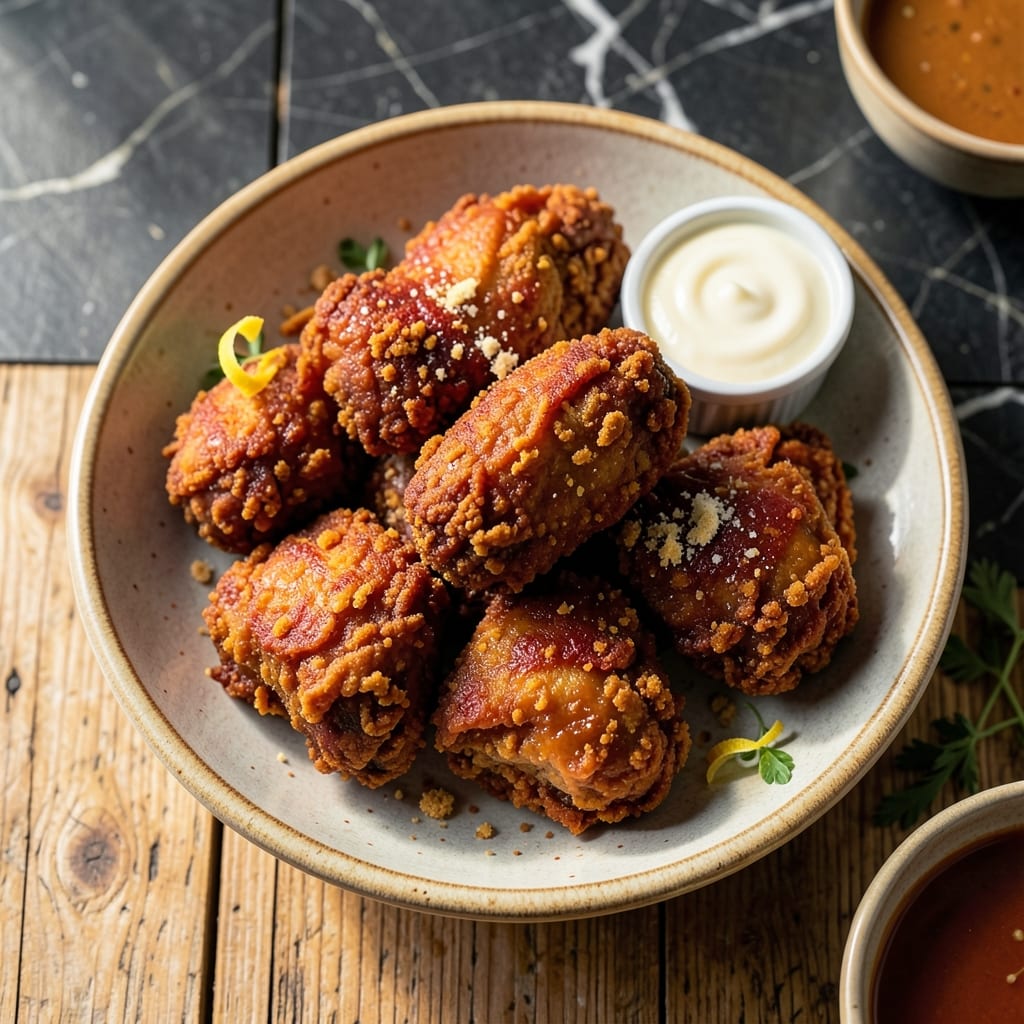
There’s a reason Minnie’s fried chicken became legendary in The Help—it delivers crispy, golden perfection with a soulful blend of spices. This recipe captures that same magic with a simple yet precise approach to Southern frying.
The secret lies in the buttermilk marinade and a carefully seasoned flour coating. I’ve tested this method repeatedly to ensure every piece comes out crispy outside and juicy inside, just as Minnie intended.
With a steady frying temperature and proper draining, you’ll achieve that signature crunch without excess grease. The spices create a flavorful crust that’s both aromatic and perfectly balanced.
Serve hot for the best texture and flavor. This is the kind of fried chicken that brings comfort to any table.
Ingredients for Minnie’s Fried Chicken Recipe from the Help
Bone-in chicken, buttermilk, and a secret spice blend create that legendary Southern crisp.
| Ingredient | Amount | Notes |
|---|---|---|
| Chicken Pieces 🍗 | 3 lb | Bone-in, skin-on thighs and drumsticks |
| Buttermilk 🥛 | 2 cups | Full-fat for best marinade |
| All-Purpose Flour 🌾 | 2 cups | For crispy coating |
| Cornstarch 🌽 | ¼ cup | Extra crispiness boost |
| Paprika 🌶️ | 2 tbsp | Sweet or smoked variety |
| Garlic Powder 🧄 | 1 tbsp | Not garlic salt |
| Onion Powder 🧅 | 1 tbsp | Fresh ground preferred |
| Salt 🧂 | 1 tbsp | Kosher or sea salt |
| Black Pepper 🌶️ | 1 tbsp | Freshly ground preferred |
| Cayenne Pepper 🔥 | ½ tsp | Adjust for heat preference |
| Vegetable Oil 🫒 | 4 cups | For deep frying |
| Dried Thyme 🍃 | 1 tsp | For aromatic depth |
| Dried Oregano 🌿 | 1 tsp | Crushed for best flavor |
[recipe_ingredient_scaler]
The chicken is the foundation here. Bone-in, skin-on thighs and drumsticks give you that juicy interior and crispy exterior Minnie was known for. Most supermarkets carry them pre-cut, but ask your butcher to break down a whole chicken if you want more variety. The buttermilk should be full-fat—low-fat versions just don’t create the same tenderizing effect or rich flavor in the marinade.
No buttermilk on hand? Whole milk with 1 tbsp lemon juice or vinegar works in a pinch. For the flour coating, self-rising flour at half the amount can replace the all-purpose plus cornstarch combo. The paprika is essential for that signature color, but if you’re out, a mix of cayenne and sweet paprika can approximate it. Just don’t skip the cornstarch—it’s the secret to that extra-crispy crust.
Marinate the chicken for at least 4 hours (overnight is better). The coated pieces can rest 15-20 minutes before frying to help the crust adhere. Leftovers keep 3-4 days in the fridge, but honestly, this is best eaten fresh and hot.
Why You’ll Love This Recipe
- So Simple: I just soak the chicken in buttermilk, dredge in flour and cornstarch, and fry—no fancy steps.
- That Crispy Bite: The paprika in the flour gives it this warm, slightly smoky crunch that’s impossible to resist.
- Feeds My Crew: I make a big batch on Sunday and we’re set for leftovers that taste just as good cold the next day.
- Budget Winner: Chicken pieces and pantry staples keep this dish kind to my wallet without skimming on flavor.
Step-by-Step Instructions for Minnie’s Fried Chicken
Here is the method for achieving that signature crispy coating and juicy interior.
Step 1: Marinate Chicken in Buttermilk
Place the 3 lb Chicken Pieces in a large bowl and pour over the 2 cups Buttermilk. Ensure every piece is fully coated, then cover and refrigerate for at least 4 hours or preferably overnight.
The acidity in the buttermilk tenderizes the meat while the fat content ensures a moist result. You’ll notice the chicken starts to look slightly swollen as it absorbs the marinade—this means it’s working.
For best results, stir the chicken once or twice during marination to redistribute the buttermilk and guarantee even coverage.
Step 2: Prepare the Seasoned Flour Coating
In a large, shallow dish, combine the 2 cups All-Purpose Flour, 0.25 cup Cornstarch, 2 tbsp Paprika, 1 tbsp Garlic Powder, 1 tbsp Onion Powder, 1 tbsp Salt, 1 tbsp Black Pepper, 0.5 tsp Cayenne Pepper, 1 tsp Dried Thyme, and 1 tsp Dried Oregano. Whisk until fully incorporated.
The cornstarch is the secret to extra crispiness, while the blend of spices creates that soulful depth of flavor. Press the mixture through a fine-mesh sieve if you prefer a smoother coating.
Let the mixture sit for 5 minutes to allow the spices to meld, then stir again before using. This step ensures every bite is evenly seasoned.
Step 3: Coat and Rest the Chicken
Remove the chicken from the buttermilk, letting any excess drip off. Dredge each piece thoroughly in the seasoned flour mixture, pressing firmly to adhere. Shake off any loose flour—this prevents clumping during frying.
Place the coated pieces on a wire rack set over a baking sheet. This setup allows air to circulate, preventing the coating from becoming soggy. Let the chicken rest for 15-20 minutes.
The resting period helps the coating set, which means it will stay put during frying and create that coveted crunch. You’ll see the surface of the coating start to look slightly dry—that’s your visual cue it’s ready.
Step 4: Deep-Fry to Golden Perfection
Heat the 4 cups Vegetable Oil in a deep, heavy pot or Dutch oven to 350°F. Use a deep-fry thermometer for accuracy. The oil is ready when a pinch of flour sizzles and browns within 30 seconds.
Carefully lower the chicken into the hot oil, a few pieces at a time to avoid crowding. Fry for 12-15 minutes, turning occasionally, until the coating is deep golden brown and the internal temperature reaches 165°F.
Maintain the oil temperature between 325-350°F throughout frying. If it drops too low, the chicken will absorb oil and become greasy. If it climbs too high, the outside will burn before the inside cooks through.
Step 5: Drain and Rest Before Serving
Transfer the fried chicken to a wire rack or paper towels to drain. The rack method keeps the coating crispier than paper towels, which can trap steam. Sprinkle with a pinch of Salt while still hot to enhance the flavor.
Let the chicken rest for 5-10 minutes before serving. This brief pause allows the juices to redistribute, ensuring the meat stays moist and tender. Serve immediately while the coating is at its crispiest.
The chicken should have a shatteringly crisp exterior with a juicy, flavorful interior. Each piece should be evenly browned with no pale or burnt spots.
Pro Tips For Making Minnie’S Fried Chicken Recipe From The Help
- Soak Overnight: I learned this the hard way—give the chicken a full 12-hour bath in buttermilk with a pinch of paprika. Anything less and the flavor just doesn’t sink in deep enough. —
- Double Dredge: First coat in flour, then buttermilk again, then flour mixed with cornstarch. Sounds tedious, but it creates that shatter-crust Minnie’s known for. —
- Hot Oil Only: After burning my first batch, I now wait until the oil hits 350°F before adding the chicken. Too cool and you’ll get greasy, soggy pieces. —
- Rest on Rack: Skip the paper towels—set fried pieces on a wire rack so air circulates underneath. Keeps the bottom crisp instead of steam-soggy.
Perfect Pairings for These Flavors
Classic Southern Sides
Minnie’s chicken begs for traditional sides like creamy mashed potatoes with a splash of buttermilk. I love making mine with Yukon Gold potatoes and a touch of roasted garlic. The smooth texture contrasts beautifully with the crispy chicken. 💛
Fresh and Tangy
A vinegar-based coleslaw cuts through the richness perfectly. I use green cabbage, shredded carrots, and a dressing with apple cider vinegar and a pinch of sugar. The tanginess balances the spice in the chicken coating.
Biscuits and Honey
Warm buttermilk biscuits are a must for soaking up any extra oil or juices. I make mine with White Lily flour for that authentic Southern fluffiness. Drizzle with local honey from the Portland farmers market for a sweet touch.
Beer Pairings
A crisp American lager like Pabst Blue Ribbon complements the spices without overpowering. For craft lovers, a citrusy IPA from Deschutes Brewery here in Oregon adds a refreshing contrast to the richness. 🍺
Sweet Endings
Finish with peach cobbler or banana pudding for a true Southern experience. I use fresh peaches from my garden in summer, but canned work just fine in winter. The warm fruit pairs perfectly with the savory chicken.
Quick Pickles
Serve with bread and butter pickles for a tangy crunch. The sweetness and acidity cut through the fried coating. I always keep a jar in the fridge for impromptu fried chicken dinners.
Nutrition Facts
Frequently Asked Questions
What’s the best oil for frying?
Use vegetable oil or peanut oil for best results. They have a high smoke point and neutral flavor. Avoid olive oil as it can burn at frying temperatures.
Can I use boneless chicken?
Yes, but bone-in stays juicier. If using boneless, reduce frying time to 8-10 minutes and check internal temp reaches 165°F. Beware it may dry out faster.
How do I keep it crispy?
Drain on a wire rack, not paper towels. Keep in a single layer and serve immediately. Reheat in a 350°F oven for 5-10 minutes if needed.
Can I make it ahead?
Marinate chicken up to 24 hours ahead. Coat and fry just before serving—the crust loses crispness if stored. Leftovers keep 3-4 days refrigerated.

Trained in classic French technique but raised on slow-cooked ribs and spicy rubs, she blends culinary skill with smoke and soul.
- Recipe for Boneless Pork Chops in Cast Iron Skillet: Sear and Baste to Juicy Perfection - October 3, 2026
- Recipe for Boneless Cross Rib Roast: Slow-Roasted Beef with Herb Crust - October 3, 2026
- Hamburgers in Sauce Recipe Crock Pot: Slow-Cooked Savory Delight - October 3, 2026