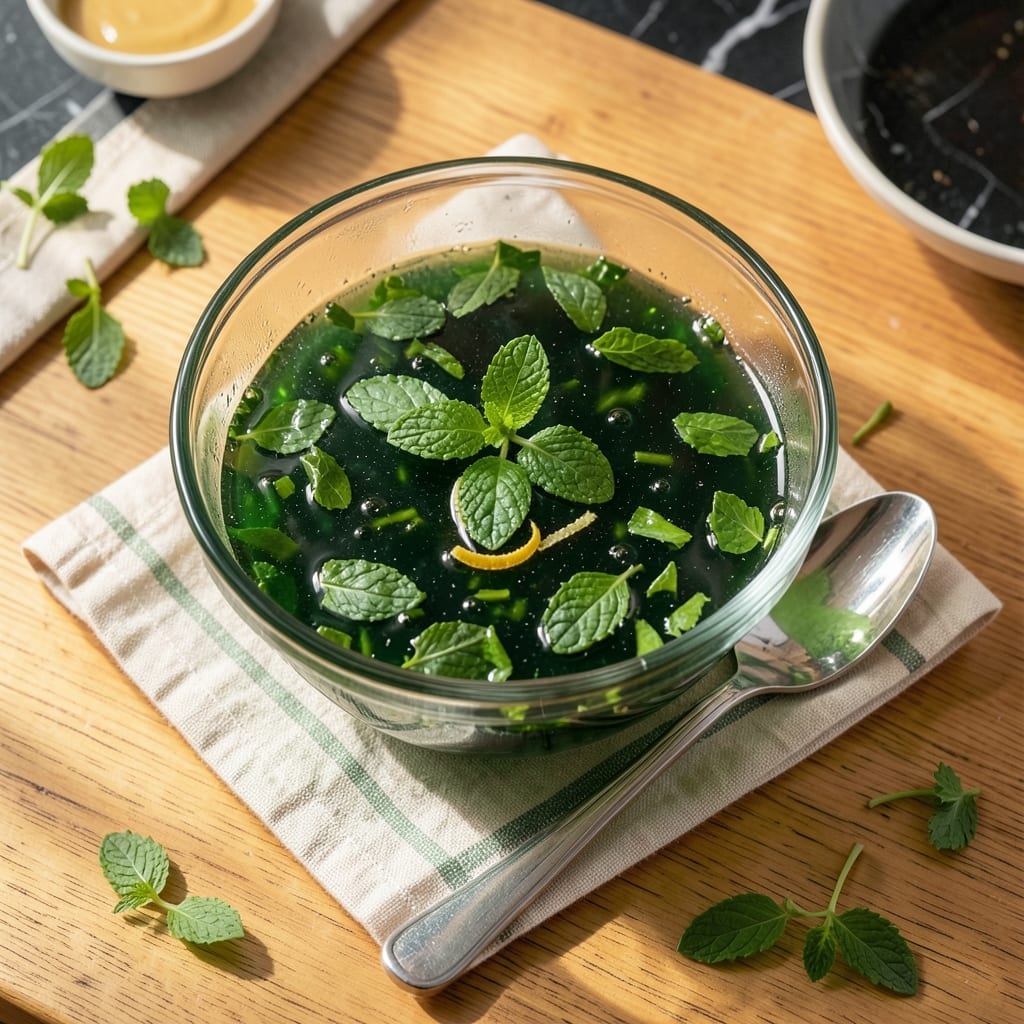
This vibrant mint jelly transforms any roast into a restaurant-worthy dish. The fresh herb aroma brightens rich meats beautifully.
With just a handful of ingredients and 15 minutes, you’ll have a versatile condiment that keeps for months. Perfect for lamb, pork, or even cheese boards.
Ingredients for Mint Jelly Recipe Jamie Oliver
Seven ingredients create this bright herb-infused spread for roasts and cheese boards alike.
| Ingredient | Amount | Notes |
|---|---|---|
| Fresh Mint Leaves 🌿 | 2 cups | Packed, stems removed |
| Granulated Sugar 🍚 | 1 ½ cups | Fine white sugar preferred |
| White Wine Vinegar 🍷 | ½ cup | Or apple cider vinegar |
| Water 💧 | ½ cup | Filtered for clarity |
| Lemon Juice 🍋 | 2 tbsp | Freshly squeezed preferred |
| Pectin 📦 | 1 package | Powdered, for setting |
| Green Food Coloring 🎨 | 2 drops | Optional, for vibrant color |
[recipe_ingredient_scaler]
The mint must be fresh and vibrant. Farmers market mint has better aroma than grocery store bunches, but either works—just ensure leaves are bright green and bruise-free. Sugar is non-negotiable for texture, so use fine granulated. Domino or C&H are reliable. The vinegar provides the tangy backbone; white wine vinegar is classic, but apple cider works in a pinch.
No pectin? Lemon juice plus extra cooking time can thicken it, but results vary. Ball or Sure-Jell are trusted brands for consistent setting. For a sugar-free version, pectin for low-sugar recipes exists, but texture differs. The food coloring is entirely optional—natural mint color is beautiful. Swap vinegar types, but avoid balsamic; its flavor overpowers.
This keeps beautifully. Seal in sterilized jars for up to 12 months unopened, 6 months once opened. Store in a cool, dark place. The flavor matures over time, making it even better after a few weeks.
Why You’ll Love This Recipe
- One Pot Wonder: I just toss fresh mint, sugar, and vinegar in a saucepan and let it do its thing—no fancy equipment.
- Bright & Zingy: The combo of white wine vinegar and lemon juice gives it that sharp, fresh kick that cuts through rich dishes.
- Pairs With Everything: I slather it on lamb, stir into dressings, or even dollop on cheese boards.
- Keeps For Months: Honestly, I make double batches because it stays perfect in the pantry for ages.
Step-by-Step Instructions for Mint Jelly
This method ensures a perfectly set, vibrant jelly with balanced sweetness and herbaceous character.
Step 1: Infuse the Mint Leaves
Combine the 2 cups Fresh Mint Leaves with the 0.5 cup Water and 0.5 cup White Wine Vinegar in a medium saucepan. Bring the mixture to a gentle boil over medium-high heat, then reduce to low heat and let it simmer for 10 minutes.
This infusion step extracts the essential oils and bright flavor from the mint. You’ll notice the liquid turning a pale green as the herbs steep. Avoid boiling vigorously, as this can make the jelly bitter. After simmering, remove the pan from heat and let it steep for an additional 15 minutes.
Step 2: Strain and Prepare the Liquid Base
Place a fine-mesh sieve over a clean bowl and pour the mint-infused liquid through it, pressing the leaves gently with a spoon to extract all the liquid. Discard the spent leaves. You should have about 1 cup of infused liquid—this is your base for the jelly.
Return the strained liquid to the saucepan and stir in the 1.5 cups Granulated Sugar. Heat over medium heat, stirring constantly, until the sugar dissolves completely. This ensures a smooth, even texture without any graininess in the final product.
Step 3: Add Pectin and Acid for Setting
Once the sugar is fully dissolved, stir in the 1 package Pectin and 2 tbsp Lemon Juice. The pectin acts as the setting agent, while the acidity from the lemon juice helps activate it for a firm gel. Increase the heat to medium-high and bring the mixture to a full rolling boil.
Boil for exactly 1 minute, stirring constantly. This step is critical—under-boiling won’t set the jelly, while over-boiling can break down the pectin. Watch for the mixture to thicken slightly and develop a glossy sheen, which indicates the pectin is working.
Step 4: Add Color and Test for Doneness
Remove the pan from heat and stir in the 2 drops Green Food Coloring, if using. This enhances the vibrant hue, though it’s optional. To test for doneness, place a small spoonful of the jelly on a chilled plate and let it sit for 1 minute. It should wrinkle slightly when pushed with a finger.
If it doesn’t set, return the mixture to the heat and boil for another 30-60 seconds, then test again. This ensures the jelly will firm up properly once cooled.
Step 5: Jar and Cool the Jelly
Ladle the hot jelly into a sterilized jar, leaving ¼ inch of headspace at the top. Seal with a lid and let it cool to room temperature. As it cools, the jelly will thicken further. Once completely cooled, refrigerate for up to 3 weeks.
The jelly should be glossy, slightly translucent, and hold its shape when spooned. For the best texture, wait at least 24 hours before using to allow the pectin to fully set. This yields a bright, herb-infused jelly perfect for pairing with roasted meats or cheeses.
Pro Tips For Making Mint Jelly Recipe Jamie Oliver
- Boil Vigorous and Brief: Once sugar dissolves, let it rip at a full rolling boil for exactly 8-10 minutes—any longer and the jelly turns murky and loses that bright green pop.
- Bruise the Mint: I learned this the hard way—gently crush the mint leaves with a rolling pin before steeping to release more oils, but don’t pulverize them or you’ll get bitter flecks in the final jelly.
- Skip the Stirring: Resist the urge to poke at it while boiling; stirring can cause sugar crystals to form on the sides, and those will ruin your smooth set later.
- Strain Through Cheesecloth: Sounds fussy, but lining your strainer with damp cheesecloth catches the finest mint particles, giving you that crystal-clear jelly Jamie’s known for.
Storing and Reheating mint jelly recipe jamie oliver
Short-Term Refrigeration
Once cooled, transfer your jelly to an airtight container—I prefer Ball mason jars. Store in the fridge for up to 3 weeks. The cold helps maintain that vibrant green color and fresh mint flavor. 💡
Long-Term Pantry Storage
For shelf-stable storage, sterilize jars by boiling for 10 minutes before filling. Seal while hot, then process in a water bath for 10 minutes. This preserves the jelly for 12 months in a cool, dark pantry.
Freezing for Freshness
Freeze in ice cube trays for portion control. Once solid, transfer cubes to a freezer bag. Thaw overnight in the fridge. This method keeps the jelly fresh for 6 months without texture loss.
Reheating for Serving
Gently warm jars in a pot of simmering water for 10-15 minutes to loosen. Avoid microwaving, as uneven heat can break the pectin set. Stir before serving to redistribute any separated liquids.
Reviving Thickened Jelly
If your jelly thickens too much in storage, add 1-2 tsp hot water and stir. Let it sit for 5 minutes to reabsorb. This restores the perfect spreadable consistency without diluting flavor. ❄️
Nutrition Facts
Frequently Asked Questions
Can I use dried mint instead of fresh?
Fresh mint is essential for the best flavor and color in this jelly. Dried mint loses its vibrant aroma and can create a dull, bitter taste. Always use 2 cups of fresh, packed leaves for optimal results.
Why did my jelly not set properly?
This usually happens if the mixture didn’t reach a full rolling boil for the required 1 minute with pectin. Ensure you boil it hard while stirring constantly. Also, measure pectin precisely—too little won’t set the jelly.
How can I make this jelly sugar-free?
Use a low-sugar pectin and replace sugar with a approved sweetener like erythritol. Note that texture and shelf life may differ. For best results, follow package instructions for sugar substitutes.

Trained in classic French technique but raised on slow-cooked ribs and spicy rubs, she blends culinary skill with smoke and soul.
- Recipe for Boneless Pork Chops in Cast Iron Skillet: Sear and Baste to Juicy Perfection - October 3, 2026
- Recipe for Boneless Cross Rib Roast: Slow-Roasted Beef with Herb Crust - October 3, 2026
- Hamburgers in Sauce Recipe Crock Pot: Slow-Cooked Savory Delight - October 3, 2026