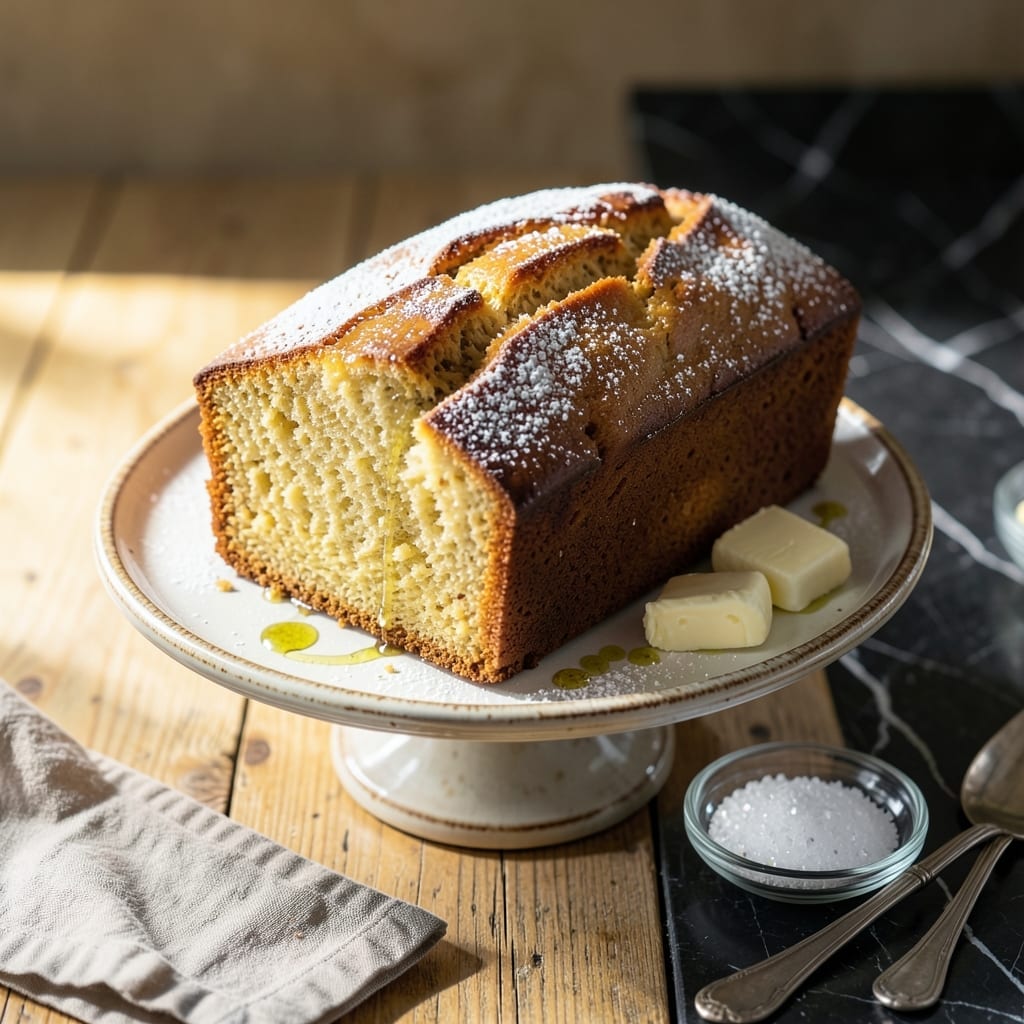
This classic pound cake recipe delivers the perfect balance of dense texture and rich buttery flavor in every slice.
With a simple mix of staple ingredients and precise baking, it creates a timeless dessert that’s impossible to resist.
Ingredients for Miss Dot’s Pound Cake
A handful of pantry staples transforms into a timeless, buttery masterpiece everyone remembers.
| Ingredient | Amount | Notes |
|---|---|---|
| Unsalted Butter 🧈 | 1 lb | Room temperature, high-fat preferred |
| Granulated Sugar 🥣 | 2 ½ cups | Fine white sugar for texture |
| Large Eggs 🥚 | 6 whole | Room temperature for even mixing |
| All-Purpose Flour 🌾 | 3 cups | Sifted for lighter crumb |
| Baking Powder 🧂 | 1 tsp | Fresh for optimal rise |
| Salt 🧂 | ½ tsp | Fine sea salt or table salt |
| Vanilla Extract 🌿 | 2 tsp | Pure extract for best flavor |
| Whole Milk 🥛 | ½ cup | Full-fat for richness |
| Lemon Zest 🍋 | 1 tbsp | Freshly grated for brightness |
[recipe_ingredient_scaler]
The butter is non-negotiable here. Plugrá or European-style (82%+ fat content) gives that signature dense, moist crumb that defines a proper pound cake. Most supermarkets carry it near the baking supplies, but Whole Foods has the best selection. Room temperature is key—cold butter won’t cream properly. If you’re in a pinch, microwave in 5-second bursts until just soft (not melted).
No vanilla extract? Vanilla bean paste adds speckles and more depth, but use the same amount. For a twist, swap the zest for orange or lime—just stick to the same quantity. Milk substitutions work (whole is ideal, but 2% in a pinch), but skip the non-dairy here; this is a classic for a reason. The flour must be all-purpose—cake flour changes the texture entirely.
Baked loaves keep 5 days at room temperature, wrapped tight in plastic. Freeze slices for up to 3 months—thaw overnight. This actually improves the next day, so make it ahead (if you can resist slicing into it fresh).
Why You’ll Love This Recipe
- One Bowl Wonder: I just dump the butter, sugar, eggs, and dry ingredients in one bowl—no fancy steps, no extra dishes.
- Buttery Rich Crumb: The unsalted butter and sugar create this dense, melt-in-your-mouth texture that’s pure comfort in every bite.
- Feeds a Crowd: It’s my go-to for potlucks, birthdays, or just a Sunday dessert—always disappears fast.
- Keeps for Days: Honestly, it tastes even better the next day, and it stays moist for nearly a week if it lasts that long.
Step-by-Step Instructions for Pound Cake
This method ensures a perfectly dense, buttery crumb with a golden crust every time.
Step 1: Cream Butter and Sugar to Ribbon Stage
In a stand mixer fitted with the paddle attachment, beat the 1 lb Unsalted Butter on medium-high speed for 1 minute until smooth and creamy. Gradually add the 2.5 cups Granulated Sugar and continue beating for 5-7 minutes until the mixture turns pale yellow and forms thick ribbons when the paddle is lifted.
This step incorporates air into the fat, which creates the fine, tender crumb characteristic of pound cake. Stop occasionally to scrape down the bowl with a silicone spatula to ensure even mixing. The mixture should look fluffy and nearly double in volume.
Step 2: Incorporate Eggs One at a Time
Reduce mixer speed to medium-low and add the 6 whole Large Eggs one at a time, waiting 30 seconds between each addition to allow full incorporation. This gradual process prevents the batter from curdling and ensures a smooth, stable emulsion.
After all eggs are added, increase speed to medium and beat for an additional 2 minutes. The batter will become thick and glossy. At this stage, it should hold a trail from the paddle for several seconds before dissolving back into the mixture.
Step 3: Alternate Dry and Wet Ingredients
In a separate bowl, whisk together the 3 cups All-Purpose Flour, 1 tsp Baking Powder, and 0.5 tsp Salt. With the mixer on low speed, add one-third of the flour mixture to the butter-sugar-egg batter, mixing just until combined.
Pour in half of the 0.5 cup Whole Milk and mix until incorporated. Repeat with another third of the flour, the remaining milk, and finally the last of the flour. Avoid overmixing—stop as soon as the last streaks of flour disappear. Gently fold in the 2 tsp Vanilla Extract and 1 tbsp Lemon Zest by hand to maintain the air you’ve built into the batter.
Step 4: Bake in a Prepared Pan
Transfer the batter to a greased and floured 10-12 cup Bundt pan or 9×5-inch loaf pan. Smooth the top with a spatula and tap the pan firmly on the counter 2-3 times to remove any large air bubbles.
Bake in a preheated 325°F oven for 1 hour 15 minutes to 1 hour 30 minutes, or until a wooden skewer inserted into the center comes out clean and the top is deep golden brown. Rotate the pan halfway through baking for even browning if your oven has hot spots.
Step 5: Cool Completely Before Slicing
Allow the cake to cool in the pan for 15 minutes, then invert it onto a wire rack. Remove the pan and let the cake cool completely, which typically takes 2-3 hours. This cooling period is crucial—slicing too soon can cause the cake to crumble.
Once fully cooled, the texture should be dense yet tender with a fine crumb. The exterior will develop a slightly crisp crust that softens slightly over time. For best flavor, let the cake rest at room temperature for several hours or overnight before serving.
Pro Tips For Making Miss Dot’S Pound Cake
- Cream Butter Longer: Beat the butter and sugar for at least 5-7 minutes—this isn’t just mixing, it’s aerating. I learned this the hard way when my early cakes came out dense despite following the recipe.
- Room Temp Eggs: Pull your eggs out 30 minutes before starting. Cold eggs can cause the batter to curdle, and nobody wants a lumpy pound cake.
- Don’t Overmix Flour: Fold in the flour just until it disappears. Overmixing develops gluten, and suddenly you’ve got a tough cake instead of Miss Dot’s tender classic.
- Test With a Skewer: Start checking at 50 minutes—when the skewer comes out clean, it’s done. After burning one batch because I relied on the timer, I now go by the toothpick test religiously.
Storing and Reheating Leftovers
Room Temperature Storage
Once completely cooled, wrap your cake tightly in plastic wrap or place in an airtight container. It keeps beautifully at room temperature for up to 5 days—the flavors actually deepen over time. I always make mine a day ahead for this reason. 💛
Freezing for Later
Slice before freezing for easy single servings. Wrap each piece in plastic wrap, then place in a ziplock freezer bag. It stays fresh for up to 3 months. Thaw overnight at room temperature for best texture.
Reheating Slices
For a warm treat, microwave individual slices on medium power for 15-20 seconds. Alternatively, warm in a 300°F oven for 5-10 minutes wrapped in foil to prevent drying. This brings back that fresh-baked feeling. 🔥
Reviving Stale Cake
If your cake dries out slightly, brush slices with a simple syrup made from equal parts sugar and water. Heat the syrup until dissolved, then apply with a pastry brush. This trick adds moisture and a subtle sweetness.
Storage Tips
Keep away from strong odors—pound cake absorbs smells easily. Store in a cool, dark place. If your kitchen is warm, consider refrigerating, but bring to room temperature before serving for best flavor.
Nutrition Facts
Frequently Asked Questions
Can I use salted butter instead?
Best to stick with unsalted to control the salt content precisely. If using salted, reduce added salt to 1/4 tsp. The flavor balance is crucial for this classic.
Why does my cake sink in the middle?
This usually happens from underbaking or opening the oven too soon. Ensure your oven is at 325°F and don’t check until at least 1 hour. Patience is key!
Can I make this in a different pan?
A 10-12 cup Bundt or 9×5-inch loaf works best. For cupcakes, reduce baking time to 20-25 minutes and check frequently.
How can I add extra flavor?
Try adding 1/2 cup toasted pecans or swapping lemon zest for orange. A 1 tsp cinnamon also complements beautifully.

Trained in classic French technique but raised on slow-cooked ribs and spicy rubs, she blends culinary skill with smoke and soul.
- Recipe for Boneless Pork Chops in Cast Iron Skillet: Sear and Baste to Juicy Perfection - October 3, 2026
- Recipe for Boneless Cross Rib Roast: Slow-Roasted Beef with Herb Crust - October 3, 2026
- Hamburgers in Sauce Recipe Crock Pot: Slow-Cooked Savory Delight - October 3, 2026