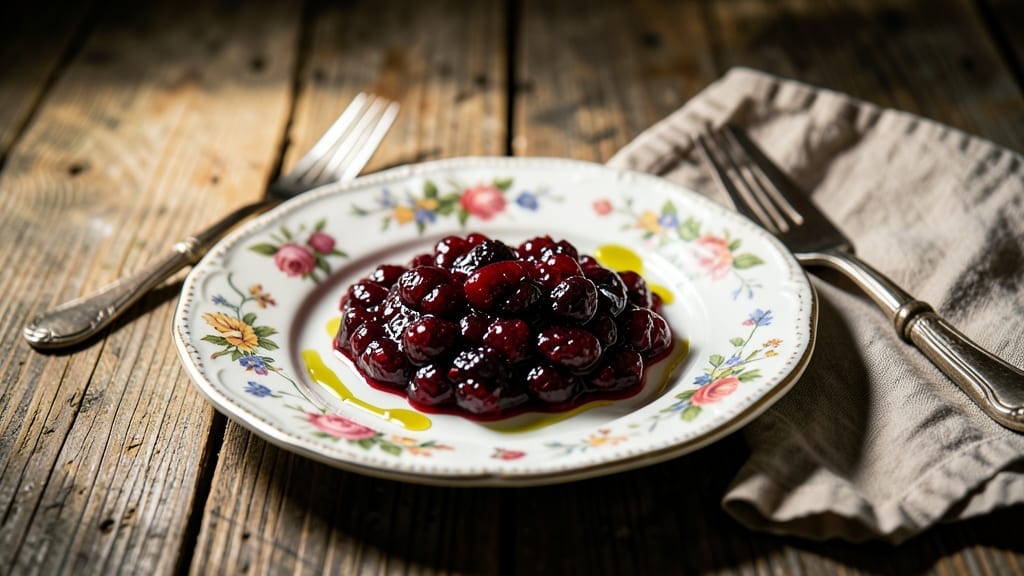
Canning mixed berry jam lets you preserve summer’s vibrant flavors for year-round enjoyment while ensuring a shelf-stable product that’s free from preservatives. The process balances fruit, sugar, and pectin to create a jam with perfect texture and safety—critical for long-term storage without compromising taste.
I’ve refined this method to handle the delicate acidity of berries while maintaining their natural brightness, whether you use strawberries, blueberries, or a seasonal mix.
This recipe follows professional canning guidelines, including proper sterilization and water bath processing to guarantee safe, high-quality results. The key lies in precise measurements and acidity control, which prevent spoilage while preserving that luscious, spreadable consistency we love.
For vegan compliance, we’ll use plant-based pectin and omit honey, proving homemade jam can be just as reliable as store-bought—if not better.
By the time you’re done, you’ll have jars of jam with a glossy sheen and vibrant color, ready to elevate toast, yogurt, or desserts all year. The sterilization process ensures your preserves stay fresh for up to a year, while the acidity balance guarantees safety.
Whether you’re a first-time canner or a seasoned pro, this method delivers restaurant-quality results at home.
We’ll also cover optional variations like vanilla or citrus zest to customize your jam, along with storage tips to maintain freshness after opening. The instructions are designed to be clear and foolproof, so you can confidently create a product that rivals commercial brands—without the additives.
Let’s get started on preserving that summer flavor!
Ingredients for mixed berry jam canning
A vibrant mix of summer berries, sugar, and pectin—everything you need for perfect homemade jam.
| Ingredient | Amount | Notes |
|---|---|---|
| Mixed Berries 🍓🫐 | 4 cups | Strawberries, blueberries, raspberries (fresh or frozen) |
| Granulated Cane Sugar 🍚 | 3 cups | Organic preferred for natural flavor |
| Powdered Pectin 🧪 | 1 package | Low-sugar or no-sugar-needed type |
| Lemon Juice 🍋 | ¼ cup | Freshly squeezed, unsweetened |
| Canning Salt 🧂 | ½ tsp | Non-iodized, fine grain preferred |
| Half-Pint Canning Jars 🍯 | 6 jars | Mason jars with new lids |
| Vanilla Extract 🌿 | 1 tsp | Optional for flavor enhancement |
| Orange Zest 🍊 | 1 tsp | Optional for citrus brightness |
| Filtered Water 💧 | ¼ cup | For sterilization and pectin activation |
[recipe_ingredient_scaler]
The berries are the star here. Farmers markets often have the freshest, most flavorful options—look for deep color and firmness. Frozen berries work too (thaw first), but fresh gives you that bright, summery taste. For pectin, Ball or Sure-Jell are reliable brands. I always buy organic sugar when possible—it makes a subtle difference in flavor. The jars? Ball or Kerr are the gold standard for canning, but any new, unopened jars will do. Just make sure the lids are sealed properly.
No vanilla? Almond extract at half the amount works too—just know it’ll taste different. Running short on berries? Substitute with a mix of frozen berries, but adjust the lemon juice to taste. The sugar is non-negotiable for preservation, but if you’re watching calories, you can reduce it by 1/4 cup and add an extra 1/2 tsp of pectin. For the jars, if you can’t find half-pint, pint jars work too—just halve the recipe. The lemon juice is critical for acidity—don’t skip it, even if your berries are tart.
Once canned, these jars keep for up to 1 year in a cool, dark pantry. After opening, store in the fridge and use within 3 months. I always label mine with the date and contents—trust me, you’ll forget! For extra shine, add a thin layer of water to the jars before sealing. The jam will thicken as it cools, so don’t panic if it looks runny right after canning. It’s normal and will set perfectly.
Why You’ll Love This Recipe
- No-Fuss Preserving: Honestly, the only prep work you’ll do is washing those berries and boiling your jars—no chopping, no peeling, just tossing everything in the pot. The powdered pectin does all the heavy lifting for that perfect, spreadable texture, so you’re not stuck stirring for hours.
- Bright & Balanced: That lemon juice and pinch of canning salt might seem small, but they’re what turn this jam from sweet to interesting—like a little zing that makes every spoonful pop. The vanilla and orange zest? Optional, but honestly, why skip them?
- Gift-Worthy Every Time: You can give these jars as presents (they look so pretty on a shelf), use them to dress up pancakes on lazy Sundays, or even drizzle them over grilled chicken for a fancy touch. Half-pint sizes mean you’re not stuck with a giant jar, either—perfect for sharing or saving for just the right moment.
- Seasonal Treasure: Frozen berries work just as well as fresh, so you’re not stuck with summer-only jam. And once you’ve got those jars sealed, they’ll last a whole year—meaning you can stock up when berries are cheap and enjoy that homemade taste all winter long.
Step-by-step instructions for mixed berry jam canning
Here’s how to transform seasonal berries into luscious preserves that keep beautifully for months.
Prepare the Berries and Sterilize Equipment
Begin by thoroughly washing the 4 cups mixed berries under cold water to remove any dirt or debris. For frozen berries, thaw them completely in a colander before proceeding. I like to remove any stems or tough skins from strawberries at this stage—it makes for a smoother jam texture.
While the berries prepare, sterilize your 6 half-pint canning jars and lids. Place the jars in a large pot and cover with water. Bring to a gentle boil for 10 minutes, then remove and keep them hot until ready to fill. Sterilize the lids separately by simmering them in a small saucepan of water for 5 minutes. This step prevents contamination and ensures your jam stays fresh for months.
Cook the Jam Base
In a large, heavy-bottomed pot, combine the 4 cups mixed berries, 3 cups granulated cane sugar, and ¼ cup lemon juice. Stir gently to distribute the sugar evenly. Place the pot over medium-high heat and bring to a boil, stirring occasionally to prevent sticking. Once boiling, reduce heat to medium and let the mixture simmer vigorously for 5 minutes.
Here’s the thing—you’ll notice the berries begin to break down and release their juices. The mixture should thicken slightly, but it will still look quite loose. This is normal at this stage. I add the 1 package powdered pectin now, stirring it in thoroughly to dissolve completely. The pectin activates during this initial cooking phase, which is crucial for achieving that perfect gel-like consistency in your finished jam.
Thicken and Add Aromatics
Continue cooking the jam for another 8-10 minutes until it reaches a full rolling boil. You’ll know it’s ready when the mixture thickens dramatically and begins to sheet off the spoon. To test, place a small amount on a chilled plate—if it wrinkles when pushed with a finger, it’s ready. If not, cook for another 2-3 minutes and test again.
Once thickened, remove the pot from heat and stir in the 1 teaspoon vanilla extract and 1 teaspoon orange zest. These optional ingredients add depth of flavor that elevates your jam from good to extraordinary. Let the mixture sit off heat for 5 minutes to allow the flavors to meld together. This resting period also helps prevent the jars from sealing improperly when you fill them.
Fill and Seal the Jars
Using a clean funnel, carefully ladle the hot jam into the sterilized half-pint canning jars, leaving about ¼-inch headspace at the top. I use a ruler to measure this gap—it’s critical for proper sealing. Wipe the rims of the jars with a damp cloth to remove any jam residue, then place the lids on top and screw on the bands until they’re fingertip-tight.
Return the filled jars to the pot of boiling water, ensuring they’re completely submerged. Add ¼ cup filtered water to the pot if needed to cover the jars. Process in the boiling water bath for 10 minutes for half-pint jars. This heat treatment creates a vacuum seal that preserves your jam safely. After processing, remove the jars and let them cool undisturbed for 12-24 hours. You’ll hear the satisfying “ping” as the lids seal.
Store and Enjoy
Once the jars have cooled completely, check that the lids have sealed by pressing down on the center of each lid. If it doesn’t pop back up, your jam is properly sealed and ready for storage. Label each jar with the date and contents, then store them in a cool, dark place. Properly canned jam will keep for up to 1 year, though I always find myself reaching for it long before then.
To use, simply spoon the jam onto toast, swirl it into yogurt, or use it as a glaze for meats. The vibrant colors and flavors of your mixed berries will shine through in every bite. The ½ teaspoon canning salt you added earlier might seem like a small amount, but it balances the sweetness and enhances all the flavors—don’t skip it, even if it’s optional in some recipes.
Pro Tips For Making Mixed Berry Jam Canning
- Prep Berries Thoroughly: Skip the stems and tough skins from strawberries before cooking—it cuts down on seeds and makes the jam silky smooth. I learned this the hard way when I left them in and ended up with a gritty texture no amount of stirring fixed.
- Stir Pectin Like Your Jam Depends on It: Whisk the powdered pectin into the boiling berry-sugar mix until it’s fully dissolved before letting it simmer. I’ve seen batches where clumps formed, and no amount of extra cooking later made up for the uneven set.
- Test Thickness on a Cold Plate: The spoon test is unreliable—use a chilled plate instead. If the jam wrinkles when you push it with your finger, it’s done. I used to guess and either ended up with runny jam or overcooked, bitter-tasting batches.
- Rest the Jam Before Filling: Let the jam sit off the heat for those 5 minutes—it’s not just about flavor. The temperature stabilizes, so the jars seal properly without warping. I ignored this once and had three jars fail to vacuum-seal.
Best sauces and condiments for mixed berry jam canning
Classic Toast Elevations
Your mixed berry jam pairs perfectly with classic toast, but the right toppings can turn a simple slice into a gourmet experience. I love spreading a thin layer of homemade jam on sourdough, then adding a dollop of Greek yogurt for creaminess.
For extra richness, sprinkle crushed walnuts or flaky sea salt—just ¼ tsp—to balance the sweetness. 🍞
Yogurt and Cereal Boosters
Stir 1-2 tablespoons of your jam into plain Greek yogurt or cottage cheese for a fruity twist on breakfast. I add ½ cup granola or honeycomb pieces for crunch. For a lighter option, drizzle jam over pancakes or waffles and top with whipped cream and fresh berries.
Savory Meat Glazes
Don’t limit jam to sweet dishes! Thin 1 tablespoon of your jam with 1 teaspoon apple cider vinegar and brush it onto grilled chicken or pork tenderloin for a tangy-sweet glaze.
The acidity in the lemon juice from your jam helps tenderize the meat while adding vibrant color. Try it on roasted ham for a festive touch. 🍖
Baking Enhancers
Fold 2-3 tablespoons of jam into muffin batter or pancake mix for a burst of fruit flavor. I love it in blueberry muffins or banana bread. For a showstopper dessert, swirl jam into vanilla bean ice cream or use it to fill cream puffs before baking.
The jam’s acidity cuts through the richness beautifully.
Drink Pairings
Mix 1 teaspoon of jam into sparkling water with fresh mint for a refreshing summer drink. For a boozy twist, add 1 tablespoon to champagne or prosecco for a fruity aperitif. The berries’ natural sweetness balances the bubbles, making it a crowd-pleaser. 🍾
Nutrition facts
Frequently asked questions
Why does my mixed berry jam look runny after canning?
This is completely normal! The jam will thicken as it cools and sets over the next 12-24 hours. If it still looks too thin after cooling, it likely didn’t reach full gel consistency during cooking. Next time, cook it 2-3 minutes longer until it sheets off a spoon. The ¼-inch headspace in your jars also helps with proper sealing and final texture.
Can I use frozen berries for this recipe?
Frozen berries work perfectly—just thaw them completely in a colander before using. They’ll release moisture as they warm, which helps with the jam’s thickness. Just make sure to remove any excess liquid from the colander before adding them to the pot. The flavor will still be bright and delicious!
What if my jars don’t seal after processing?
Don’t panic! If a jar fails to seal, check for proper headspace (¼-inch) and ensure the lid was fingertip-tight. Store the unsealed jar in the fridge and use it within 1 month. To prevent spoilage, add the jam to a small airtight container and keep it cold. Always check for leaks or mold before using.
How do I know when the jam is ready to jar?
Test for doneness by placing a small spoonful of jam on a chilled plate. If it wrinkles when you push it with your finger, it’s ready! Alternatively, it should sheet off the back of a spoon in a thin, unbroken layer. If it’s still too thin, cook it 2-3 more minutes and test again. Patience here ensures that perfect, spreadable texture.
Can I skip the canning salt?
While the ½ teaspoon canning salt is optional, it’s worth including! It balances the sweetness and enhances the berries’ natural flavors. If you omit it, the jam might taste overly sweet. For a vegan-friendly option, use non-iodized salt—it won’t alter the flavor or texture of your jam.

Trained in classic French technique but raised on slow-cooked ribs and spicy rubs, she blends culinary skill with smoke and soul.
- Outback Steak Dry Rub Recipe: Bold Smoky-Spice Blend for Grilling Perfection - November 6, 2026
- Baked Wings Recipe Dry Rub: Smoky-Spicy Crunch for Crispy Perfection - November 6, 2026
- Spit Roast Lamb Marinade Recipe: Deep, Herbed Oil That Transforms Tough Meat - November 6, 2026