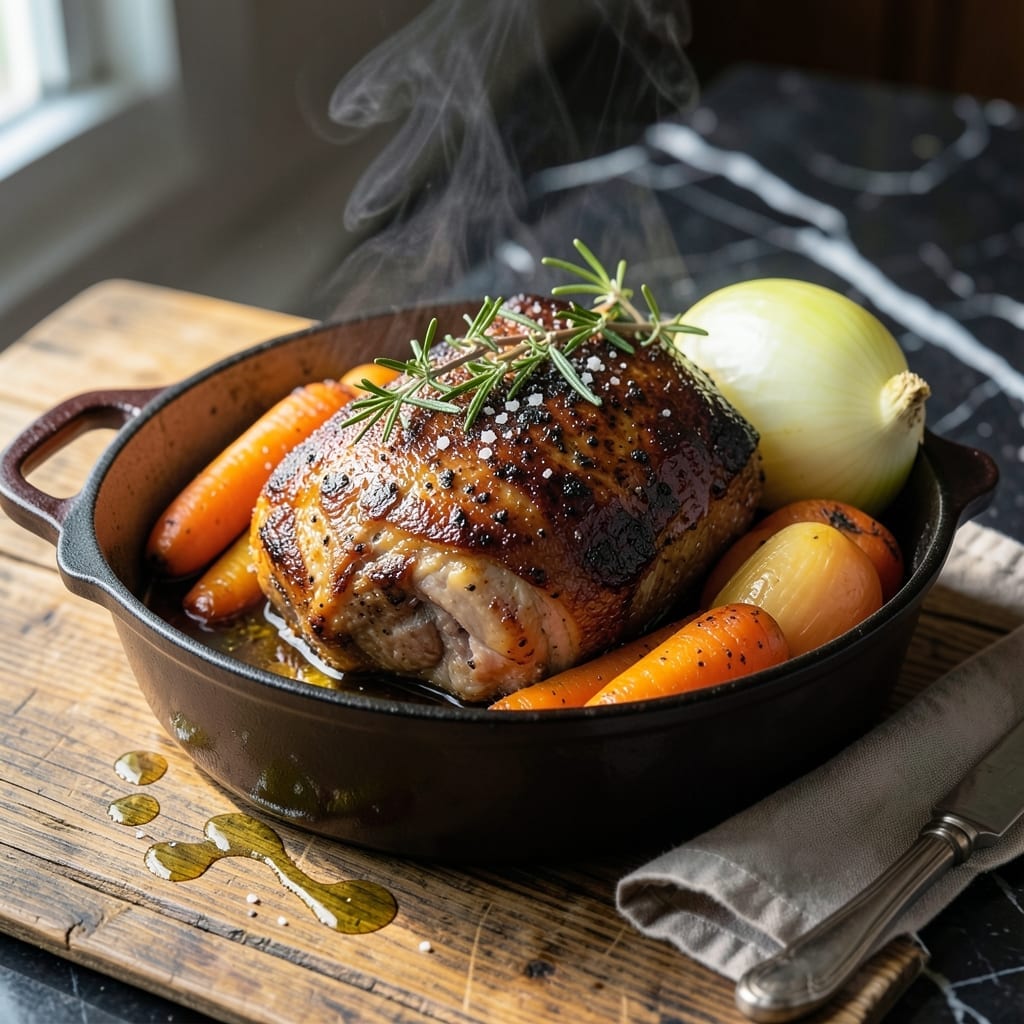
There’s something deeply satisfying about preparing a wild game roast in a Dutch oven, where the slow, even heat coaxes out rich, complex flavors. This method transforms tough cuts into fork-tender perfection with minimal effort.
The key lies in a long, low-temperature braise, allowing the meat to absorb the herb-infused depth of the cooking liquid. A Dutch oven retains moisture and heat better than any other pot, making it ideal for this kind of cooking.
What emerges is a dish that honors the robust character of moose—tender, juicy, and layered with the earthy notes of fresh herbs. The aroma alone signals a meal worth savoring.
Perfect for special occasions or a hearty family dinner, this approach ensures consistent, impressive results every time.
Ingredients for Moose Roast Recipe Dutch Oven
A Dutch oven transforms tough moose roast into fork-tender perfection with herbs and wine.
| Ingredient | Amount | Notes |
|---|---|---|
| Moose Roast 🦌 | 3 lb | Shoulder or rump, tough cut preferred |
| Olive Oil 🫒 | 2 tbsp | For searing meat |
| Kosher Salt 🧂 | 1 ½ tsp | Diamond Crystal preferred |
| Black Pepper 🌶️ | 1 tsp | Freshly cracked for best flavor |
| Fresh Rosemary 🌿 | 2 tbsp | Chopped, stems removed |
| Fresh Thyme 🍃 | 2 tbsp | Leaves stripped from stems |
| Garlic Cloves 🧄 | 6 cloves | Smashed, peeled |
| Large Yellow Onion 🧅 | 1 whole | Roughly chopped into chunks |
| Carrots 🥕 | 3 whole | Peeled, cut into 2-inch pieces |
| Celery Stalks 🥬 | 3 whole | Cut into 2-inch pieces |
| Red Wine 🍷 | 2 cups | Dry variety like Cabernet Sauvignon |
| Beef Stock 🥩 | 2 cups | Low-sodium preferred for control |
| Tomato Paste 🍅 | 2 tbsp | For umami depth in braising liquid |
| Bay Leaves 🌿 | 2 whole | For aromatic infusion |
| All-Purpose Flour 🌾 | 2 tbsp | For thickening sauce at end |
[recipe_ingredient_scaler]
The moose roast is non-negotiable—shoulder or rump cuts have the connective tissue that breaks down beautifully during the long braise. Local butchers or specialty game suppliers are your best bet for quality wild game. Look for meat with good marbling and a deep red color, which indicates freshness. Avoid pre-cut stew meat; a whole roast ensures even cooking and better flavor development throughout the dish.
No fresh herbs? Dried rosemary and thyme at one-third the amount work in a pinch, though the flavor won’t be as bright. Short on red wine? Substitute with an extra cup of beef stock plus 1 tbsp balsamic vinegar for acidity. The tomato paste can be omitted if necessary, but it adds a crucial depth of flavor that complements the wild game’s richness. San Marzano tomato paste is ideal if you want to splurge.
The cooked roast keeps beautifully—store in its braising liquid in the fridge for up to 4 days or freeze for 3 months. The flavors actually deepen overnight, making leftovers taste even better. Reheat gently on the stovetop to prevent drying out the meat. Always bring refrigerated leftovers to room temperature before reheating for even warming.
Why You’ll Love This Recipe
- One Pot Meal: I toss the moose roast with olive oil, salt, pepper, and rosemary straight into the Dutch oven—no extra dishes, no fuss.
- Rich Herb Flavor: That fresh rosemary with the moose creates this deep, earthy taste that’s hard to beat.
- Feeds the Crew: I make this for family dinners, and it’s always a hit—even the picky eaters go back for seconds.
- Leftovers for Days: Honestly, it tastes even better the next day, so I double the batch for easy lunches all week.
Step-by-Step Instructions for Moose Roast Dutch Oven
This method transforms tough wild game into fall-apart tender perfection with deep herb-infused flavor.
Step 1: Sear and Season the Moose Roast
Pat the 3 lb Moose Roast completely dry with paper towels. This ensures a proper sear. Season generously with 1.5 tsp Kosher Salt and 1 tsp Black Pepper on all sides, pressing the seasoning into the meat so it adheres well.
Heat 2 tbsp Olive Oil in your Dutch oven over medium-high heat until shimmering. Sear the roast on all sides for 8-10 minutes total, turning occasionally, until you achieve a deep brown crust. The oil should sizzle aggressively when the meat hits the pan—if it doesn’t, wait for the oil to get hotter. Transfer the seared roast to a plate and set aside.
Step 2: Build the Aromatic Base
In the same Dutch oven, add the 1 whole Large Yellow Onion, 3 whole Carrots, and 3 whole Celery Stalks. Cook for 5-7 minutes over medium heat, stirring occasionally, until the vegetables begin to soften and develop color at the edges.
Add 6 cloves Garlic Cloves, 2 tbsp Fresh Rosemary, and 2 tbsp Fresh Thyme. Stir for 1 minute until fragrant. Then add 2 tbsp Tomato Paste and cook for another 1-2 minutes, stirring constantly, until it darkens slightly. This builds the flavor foundation for your braising liquid.
Step 3: Deglaze and Braise the Roast
Pour in 2 cups Red Wine and scrape up all the browned bits from the bottom of the pot with a wooden spoon. Let the wine reduce by half, about 5-7 minutes. This step extracts maximum flavor from the searing process.
Add 2 cups Beef Stock and 2 whole Bay Leaves, then return the seared moose roast to the pot. The liquid should come about halfway up the meat. Bring to a gentle simmer, then cover tightly with the Dutch oven lid.
Step 4: Slow Cook to Tenderness
Transfer the Dutch oven to a preheated 325°F oven. Braise for 3 to 3.5 hours, turning the roast every 45 minutes and basting with the braising liquid. The meat is done when it’s fork-tender and easily pulls apart with minimal resistance.
If the liquid reduces too much during cooking, add a splash of hot water to maintain the level. The braising liquid should remain at a gentle simmer throughout the cooking process, never a rolling boil.
Step 5: Thicken and Finish the Sauce
Remove the Dutch oven from the oven and transfer the roast to a serving platter. Skim any excess fat from the surface of the braising liquid, then place the pot over medium heat on the stovetop.
Whisk in 2 tbsp All-Purpose Flour and simmer for 5-7 minutes, stirring frequently, until the sauce thickens enough to coat the back of a spoon. Strain the sauce if you prefer a smoother consistency, then serve it over the sliced roast.
Pro Tips For Making Moose Roast Recipe Dutch Oven
- Seal the Moose: Sear the roast in the Dutch oven with olive oil until deeply browned on all sides—this locks in moisture and adds rich flavor. I learned this the hard way after my first attempt turned out dry and pale.
- Salt Generously: Moose meat needs more salt than you think, especially with kosher salt. Coat the roast evenly and let it sit for 30 minutes before cooking to ensure the seasoning penetrates.
- Avoid Overcrowding: If your Dutch oven is too small, the roast will steam instead of brown. Use a vessel that gives the meat at least an inch of space on all sides.
- Rest Before Slicing: After removing the roast from the Dutch oven, let it rest under foil for 15-20 minutes—this keeps the juices inside the meat where they belong. My grandmother swore by this, and she was right.
Troubleshooting Great moose roast recipe dutch oven
Meat Still Tough
If your moose roast isn’t fork-tender after 3.5 hours, don’t panic. Wild game can be stubborn. Return it to the oven for another 30-45 minutes, checking every 15 minutes. I’ve learned the hard way that patience is key with tough cuts like shoulder or rump. 💪
Sauce Too Thin
For a sauce that won’t cling to your meat, create a slurry with 1 tbsp All-Purpose Flour and 2 tbsp cold water. Whisk this into your braising liquid and simmer for 5 minutes. This trick saved many of my early attempts at braising.
Braising Liquid Evaporates
If you notice the liquid level dropping below halfway up the meat, add 1 cup hot water or beef stock to restore it. Keep an eye on this—my grandmother always said, “If it’s looking dry, feed it more liquid.” Maintain that gentle simmer, never a boil.
Sauce Too Salty
If your sauce tastes overly salty, stir in 1 diced potato and simmer for 15 minutes, then remove it. The potato absorbs excess salt. Alternatively, add ½ cup unsalted beef stock to dilute the flavor. I discovered this potato trick from an old family cookbook.
Meat Dries Out
To prevent dryness during braising, ensure your Dutch oven lid fits tightly. If it doesn’t, cover the pot with heavy-duty aluminum foil before placing the lid on top. Also, baste the roast with the braising liquid every 30 minutes to keep it moist.
Uneven Cooking
If one side of your roast is cooking faster, rotate it 180 degrees each time you baste. For particularly uneven pieces, consider cutting the roast into 2-3 large chunks before searing. This ensures all parts cook at the same rate. 🔥
Nutrition Facts
Frequently Asked Questions
What cut works best for braising?
Shoulder or rump cuts are ideal for this method. Their connective tissue breaks down beautifully during the long, slow cook, resulting in tender, flavorful meat. Avoid lean cuts as they can dry out.
Can I use a different cooking liquid?
Yes, substitute red wine with extra beef stock plus 1 tbsp balsamic vinegar for acidity. This maintains the depth of flavor while working with what you have on hand.
How do I know when it’s done?
The roast is ready when it’s fork-tender and pulls apart easily. This typically takes 3 to 3.5 hours at 325°F, but wild game can be stubborn, so check for tenderness.
Can I make this ahead of time?
The flavors actually deepen overnight. Store in its braising liquid in the fridge for up to 4 days or freeze for 3 months. Reheat gently to maintain moisture.

Trained in classic French technique but raised on slow-cooked ribs and spicy rubs, she blends culinary skill with smoke and soul.
- Recipe for Boneless Pork Chops in Cast Iron Skillet: Sear and Baste to Juicy Perfection - October 3, 2026
- Recipe for Boneless Cross Rib Roast: Slow-Roasted Beef with Herb Crust - October 3, 2026
- Hamburgers in Sauce Recipe Crock Pot: Slow-Cooked Savory Delight - October 3, 2026