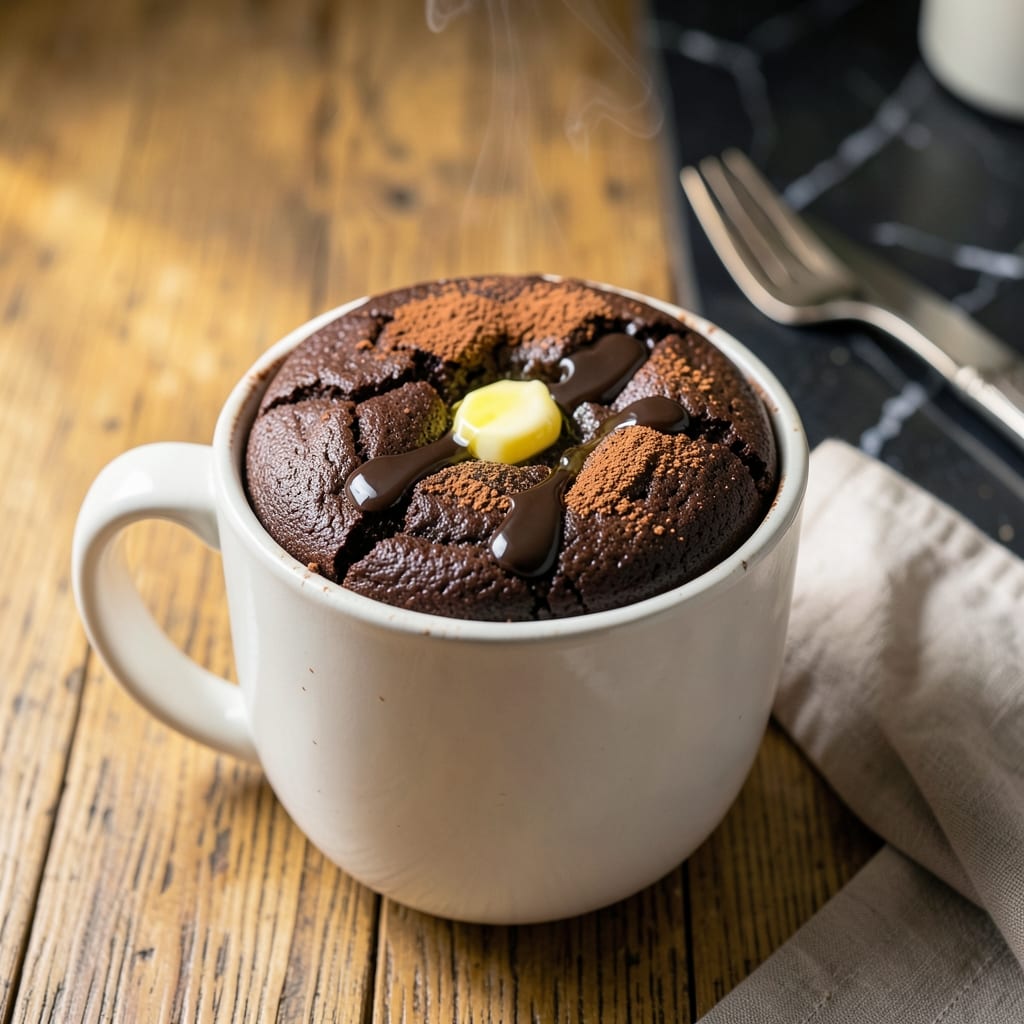
I developed this single-serve cake for nights when cravings hit but the pantry lacks baking powder. A simple chemical reaction creates the lift you need without special ingredients.
The secret is combining vinegar with baking soda—this creates the same leavening effect as baking powder. Just 1 minute of mixing and 90 seconds in the microwave delivers a fluffy texture every time.
You’ll get a warm, tender cake with a perfect crumb that’s ready faster than preheating an oven. The vinegar taste disappears completely, leaving only rich chocolate flavor.
David insists I keep this recipe on hand for late-night emergencies. It’s become our go-to solution for instant dessert satisfaction.
Ingredients for Mug Cake Recipe No Baking Powder
A few pantry staples transform into a warm, fluffy chocolate cake in minutes.
| Ingredient | Amount | Notes |
|---|---|---|
| All-Purpose Flour 🌾 | ½ cup | Sifted for even texture |
| Granulated Sugar 🍚 | ¼ cup | White or raw cane works |
| Unsweetened Cocoa Powder 🍫 | 2 tbsp | Dutch-process preferred for richness |
| Baking Soda 🧂 | ½ tsp | Essential for chemical lift |
| Salt 🧂 | 0.125 tsp | Balances sweetness |
| Vegetable Oil 🫒 | 3 tbsp | Or melted coconut oil |
| Milk 🥛 | ¼ cup | Any percentage works |
| White Vinegar 💧 | 1 tbsp | Or apple cider vinegar |
| Vanilla Extract 🌿 | ½ tsp | Pure extract recommended |
| Large Egg 🥚 | 1 whole | Room temperature preferred |
| Semi-Sweet Chocolate Chips 🍫 | 2 tbsp | Optional for extra richness |
[recipe_ingredient_scaler]
The chemical reaction between baking soda and vinegar is doing all the heavy lifting here. Any white vinegar works—even the cheap stuff you use for cleaning. For the cocoa, Hershey’s Special Dark gives a deeper chocolate flavor, but standard unsweetened is fine. I always keep a bag of Ghirardelli chocolate chips in the freezer for emergencies like this.
No milk? Almond or oat milk works at a 1:1 ratio. Out of vinegar? Lemon juice at the same amount does the trick (but the flavor fades faster). For a richer cake, swap the oil for melted butter. The egg is non-negotiable for structure, but if you’re truly stuck, 1/4 cup applesauce gets you close—texture will be denser though.
Mix the dry ingredients ahead and store in a jar for up to 1 month. The wet ingredients should be fresh each time. Leftovers? Ha. But if somehow you have any, they keep 2 days sealed at room temp (if the cake survives that long).
Why You’ll Love This Recipe
- One Bowl Wonder: I just mix flour, cocoa, sugar, baking soda and salt right in the mug—no extra bowls, no fuss.
- Rich Chocolate Fix: The cocoa powder gives it this deep, fudgy taste that hits the spot every time.
- Midnight Savior: I’ve made this at 11 PM when cravings strike—ready in 90 seconds, no oven needed.
- Pantry Friendly: All the ingredients are already in my cabinet, so it’s my go-to when I’m out of fresh stuff.
Step-by-Step Instructions for a No Baking Powder Mug Cake
Here’s the method I use for a perfectly fluffy mug cake every time.
Step 1: Mix the Dry Ingredients
In a large microwave-safe mug, combine the 0.5 cup all-purpose flour, 0.25 cup granulated sugar, 2 tbsp unsweetened cocoa powder, 0.5 tsp baking soda, and 0.125 tsp salt. Stir with a fork until the mixture is uniform and lump-free.
This ensures the leavening agent is evenly distributed, which is critical for the cake’s rise. The vinegar we’ll add later reacts with the baking soda to create lift, so proper mixing here guarantees a consistent texture.
Step 2: Add Wet Ingredients and Combine
Pour in the 3 tbsp vegetable oil, 0.25 cup milk, 1 tbsp white vinegar, and 0.5 tsp vanilla extract. Stir vigorously for 20-30 seconds until the batter is smooth and no dry spots remain.
The vinegar and milk create a makeshift buttermilk, which reacts with the baking soda to produce air bubbles. This is what gives the cake its fluffiness without baking powder. The batter should be thick but pourable.
Step 3: Incorporate the Egg and Chocolate Chips
Crack the large egg directly into the mug and whisk it into the batter until fully incorporated. This adds structure and richness to the cake. Then, fold in the 2 tbsp semi-sweet chocolate chips so they’re evenly distributed.
If the batter looks too thick, add a splash of milk to loosen it slightly. The chocolate chips will melt into gooey pockets during cooking, so don’t skip them unless you prefer a plain cake.
Step 4: Microwave to Perfection
Microwave the mug on high power for 1 minute and 30 seconds. Check the center with a toothpick—if it comes out with a few moist crumbs, it’s done. If not, microwave in 15-second bursts until the center is set.
The cake will rise significantly as it cooks, so use a mug that’s at least 16 ounces to prevent overflow. Let it rest for 1 minute before digging in. The top should be slightly domed and springy to the touch.
Step 5: Serve Warm and Enjoy
Top with extra chocolate chips or a dusting of cocoa powder if desired. Serve immediately while warm—the texture is best right out of the microwave, with a molten center and a tender crumb.
This recipe makes enough for 2 servings, so split it between two mugs if you prefer individual portions. The cake will deflate slightly as it cools, but the flavor stays rich and chocolatey.
Pro Tips For Making Mug Cake Recipe No Baking Powder
- Whisk the Dry Mix: I learned this the hard way—lumps of cocoa powder or flour ruin the texture. Spend 30 seconds whisking them together before adding wet ingredients.
- Use Fresh Baking Soda: After a flat, sad mug cake, I finally checked the expiration date. Old baking soda won’t give you the lift this recipe needs.
- Microwave in Bursts: Cook it for 30 seconds, stir, then repeat. This prevents the dreaded rubbery center that happens when you blast it all at once.
- Add a Pinch Extra Salt: Sounds weird, but it works: a tiny bit more salt than the recipe calls for makes the chocolate flavor pop.
Storing and Reheating This Recipe
Room Temperature Storage
This cake is best consumed fresh, but if you somehow have leftovers, let it cool completely in the mug first. Then transfer to an airtight container and keep at room temperature for up to 2 days. The texture will be denser the next day. 💡
Refrigerator Storage
For longer storage, seal the cooled cake in an airtight container and refrigerate for up to 4 days. I recommend wrapping the mug in plastic wrap directly if you don’t have a container large enough for the whole cake.
Freezer Storage
Not ideal, but possible. Wrap individual portions tightly in plastic wrap then aluminum foil before freezing for up to 1 month. Thaw overnight in the fridge before reheating. David swears he can tell the difference, though.
Microwave Reheating
Place a single portion on a microwave-safe plate and cover with a damp paper towel. Heat on 50% power for 20-30 seconds, checking frequently. The cake will be softer but still delicious.
Oven Reheating
Preheat oven to 300°F. Wrap the cake in aluminum foil and warm for 10-15 minutes. This method helps restore some of the original texture. Add a sprinkle of milk before reheating to prevent dryness.
Nutrition Facts
Frequently Asked Questions
Why does vinegar work as a substitute?
Vinegar reacts with baking soda to create carbon dioxide bubbles. This chemical lift replaces baking powder’s role, giving your cake a fluffy texture.
Can I make this without an egg?
Yes, use 1/4 cup applesauce instead. The texture will be denser but still delicious. The egg adds structure, so expect a slightly different crumb.
What if my cake overflows?
Use a mug that’s at least 16 ounces. If it still overflows, reduce the batter by half and cook in 2 batches. The cake rises significantly!
How do I know when it’s done?
Insert a toothpick into the center. If it comes out with a few moist crumbs, it’s ready. If wet, microwave in 15-second bursts until set.

Trained in classic French technique but raised on slow-cooked ribs and spicy rubs, she blends culinary skill with smoke and soul.
- Recipe for Cream of Rice: Silky Smooth Breakfast Comfort - October 3, 2026
- Old Fashioned Beef and Noodles Recipe Crock Pot: Set-It-and-Forget-It Hearty Meal - October 3, 2026
- Recipe for Deep Fry Turkey: Crispy Golden Skin and Juicy Meat - October 3, 2026