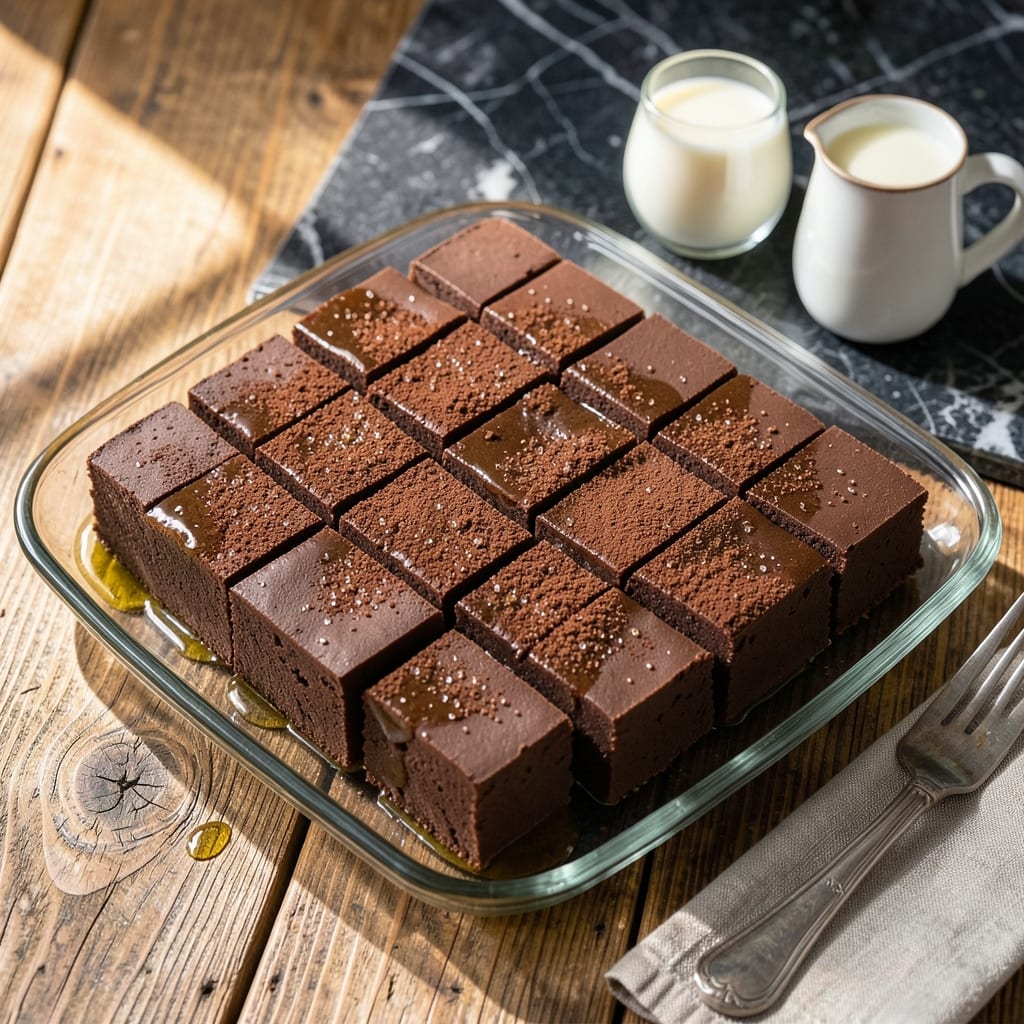
This old-fashioned fudge brings a taste of traditional candy shops into your kitchen with its creamy texture and rich chocolate flavor.
I developed this recipe after testing multiple batches to achieve that signature melt-in-your-mouth quality Murdicks is known for. The key is precise temperature control and patient stirring as the mixture cools.
What emerges is a confection so smooth and velvety that each bite dissolves on the tongue. The process requires attention to detail, but the results are worth every minute of care.
Perfect for gifting or indulging yourself, this fudge keeps its creamy consistency for days when stored properly.
Ingredients for Murdicks Fudge
Rich chocolate and sugar come together for that signature melt-in-your-mouth candy shop quality.
| Ingredient | Amount | Notes |
|---|---|---|
| Granulated Sugar 🍚 | 4 cups | Fine white for smooth texture |
| Unsweetened Cocoa Powder 🍫 | ¾ cup | Dutch-process for richness |
| Whole Milk 🥛 | 1 ½ cups | Full-fat for creaminess |
| Unsalted Butter 🧈 | ½ cup | Cut into small pieces |
| Light Corn Syrup 💧 | 1 ½ cups | Prevents graininess |
| Vanilla Extract 🌿 | 2 tsp | Pure extract preferred |
| Salt 🧂 | ¼ tsp | Fine grain for even distribution |
| Semi-Sweet Chocolate Chips 🍫 | 2 cups | High-quality for best melt |
| Heavy Cream 🥛 | ½ cup | Cold, for smooth finish |
| Marshmallow Fluff ⚪ | 1 jar | 7 oz jar, for creaminess |
[recipe_ingredient_scaler]
The cocoa powder is the soul of this fudge. Hershey’s Special Dark gives that deep, complex chocolate flavor Murdicks is famous for. Use Dutch-process for smoother results—King Arthur or Ghirardelli are my go-tos. The sugar must be fine granulated; larger crystals can make the fudge grainy. Domino or C&H work perfectly (no substitutions here).
Need to swap the corn syrup? Honey or glucose syrup works in a pinch, but corn syrup gives the best texture. For the chocolate, chopped bars at 60% cacao can replace chips—just weigh out 12 oz. Skipping the marshmallow fluff? Extra heavy cream at half the amount keeps it creamy, but the fluff really is the secret to that signature Murdicks consistency.
Store in an airtight container at room temperature—it’ll stay creamy and fresh for up to 2 weeks. For longer storage, freeze for 3 months (thaw in the fridge overnight). Cut into squares only after fully set to avoid smudging those perfect edges.
Why You’ll Love This Recipe
- One Pot Magic: I love that this fudge comes together in a single saucepan—no fancy equipment, just a wooden spoon and those five simple ingredients.
- Rich Cocoa Punch: The combination of unsweetened cocoa powder and butter gives it that deep, velvety chocolate flavor that’s hard to resist.
- Holiday Staple: Honestly, I make this every Christmas, but it’s just as welcome at summer picnics or as a last-minute teacher gift.
- Budget-Friendly Batch: A little goes a long way, and the ingredients are pantry basics. I’ll be real: it’s cheaper than buying fancy chocolates and tastes way better.
Step-by-Step Instructions for Old-Fashioned Fudge
This method delivers that signature smooth, velvety texture you expect from classic candy shop fudge.
Step 1: Combine and Boil the Sugar Mixture
In a heavy-bottomed saucepan, combine the 4 cups Granulated Sugar, 0.75 cup Unsweetened Cocoa Powder, 1.5 cups Whole Milk, 0.5 cup Unsalted Butter, and 1.5 cups Light Corn Syrup. The heavy pan prevents scorching during the long cook time.
Stir constantly over medium heat until the mixture comes to a full rolling boil. Once boiling, stop stirring and let it cook undisturbed until it reaches 234-238°F on a candy thermometer. This is the soft-ball stage—you’ll see the syrup thicken and the surface will look slightly matte rather than shiny.
Step 2: Incorporate the Chocolate and Cool
Remove the saucepan from heat and immediately add the 2 cups Semi-Sweet Chocolate Chips. Let them sit undisturbed for 1 minute to begin melting from the residual heat. This prevents shocking the mixture with cold chocolate.
After the minute, stir gently but thoroughly until the chocolate is completely melted and the mixture is smooth. Avoid scraping the sides of the pan, as sugar crystals there can cause graininess. Let the mixture cool at room temperature for 10-15 minutes, stirring occasionally to distribute heat evenly.
Step 3: Add Flavorings and Marshmallow
Once the mixture has cooled slightly but is still warm, stir in the 2 tsp Vanilla Extract, 0.25 tsp Salt, and 1 jar Marshmallow Fluff. The marshmallow fluff ensures that signature creamy texture Murdicks is famous for.
Mix until the marshmallow fluff is fully incorporated and the mixture looks glossy. The salt enhances all the flavors, so don’t skip it. At this point, the fudge will thicken noticeably as it continues to cool.
Step 4: Whip and Set the Fudge
Pour the warm fudge mixture onto a greased or parchment-lined 8×8-inch or 9×9-inch baking pan. Let it sit at room temperature for 10 minutes to cool slightly.
Using a wooden spoon or spatula, vigorously beat the fudge for 5-7 minutes until it loses its gloss and becomes thick and matte. This step is crucial—it aligns the sugar crystals for that perfect fudge consistency. You’ll notice the mixture lighten slightly in color as air incorporates.
Smooth the top with the spatula and let it set at room temperature for 2-3 hours until firm. For faster setting, refrigerate for 1 hour, but room temperature yields the best texture.
Step 5: Cut and Serve
Once fully set, cut the fudge into 1-inch squares using a sharp knife. For clean cuts, dip the knife in hot water between slices. This prevents dragging the fudge and creates those perfect, professional edges.
Store in an airtight container at room temperature for up to 2 weeks, or refrigerate for longer storage. The fudge will be rich, creamy, and melt-in-your-mouth smooth—just like the old-fashioned candy shop original.
Pro Tips For Making Murdicks Fudge
- Use a Candy Thermometer: I learned this the hard way—guessing the soft-ball stage without one leads to grainy fudge. Aim for 234-238°F for that perfect smooth texture.
- Sift the Cocoa: After burning three batches, I finally figured out that lump-free cocoa dissolves better and prevents those annoying dark specks in your fudge.
- Avoid Stirring While Cooking: Resist the urge to stir once it starts boiling—sugar crystals on the sides can cause the whole batch to seize up.
- Butter the Pan Well: Sounds obvious, but I was skeptical until I tried it: a thorough butter coating (including the sides) makes removal effortless and prevents sticking.
Troubleshooting Great murdicks fudge
Grainy Texture
If your fudge turns out grainy, sugar crystals likely formed. To prevent this, ensure all ingredients dissolve completely before boiling. I recommend using a candy thermometer and avoiding stirring once boiling begins. 💡
Fudge Won’t Set
If it remains too soft, it probably didn’t reach 234-238°F. Return it to heat and cook until the correct temperature. Also, check that you didn’t substitute ingredients like honey for corn syrup, which affects texture.
Overly Hard Fudge
This usually means cooking past the soft-ball stage. Next time, pull it off heat at exactly 238°F. If it’s already hard, try reheating gently with 2 tbsp heavy cream to restore creaminess.
Burnt Bottom
Use a heavy-bottomed saucepan and maintain medium heat. Stir constantly during initial heating. If you notice darkening, immediately reduce heat and switch to a heavier pan.
Dull, Lifeless Color
This often happens with low-quality cocoa. I swear by Hershey’s Special Dark for that deep color. Also, avoid overcooking, which can make the mixture darken but lose vibrancy.
Fudge Separates
If the mixture looks oily or separated, it may have been shocked by cold ingredients. Ensure chocolate chips are room temperature before adding. Stir gently but thoroughly to reincorporate. 🔥
Nutrition Facts
Frequently Asked Questions
Why use marshmallow fluff in fudge?
Marshmallow fluff creates that signature creamy texture and smooth consistency. It acts as a stabilizer, preventing sugar crystallization while adding airiness. Skip it and your fudge might turn out dense or grainy.
Can I use dark chocolate instead of semi-sweet?
Yes, but reduce sugar by 1/4 cup to balance the bitterness. Dark chocolate at 60-70% cacao will give a deeper flavor, though the texture may be slightly firmer.
How do I know when it’s done boiling?
Use a candy thermometer and stop at 234-238°F. The mixture will look matte, not shiny, and thicken slightly. Without a thermometer, test by dropping a bit in cold water—it should form a soft ball.
What if my fudge doesn’t set?
It likely didn’t reach the right temperature. Reheat to 238°F and retry. Also, avoid substitutions like honey for corn syrup, as they affect the setting process.

Trained in classic French technique but raised on slow-cooked ribs and spicy rubs, she blends culinary skill with smoke and soul.
- Recipe For Fried Pork Chops In An Iron Skillet: Crispy Crust With Juicy Centers - October 3, 2026
- Recipe for Fully Cooked Spiral Ham: Sweet Glaze and Effortless Elegance - October 3, 2026
- Recipe for Cream of Rice: Silky Smooth Breakfast Comfort - October 3, 2026