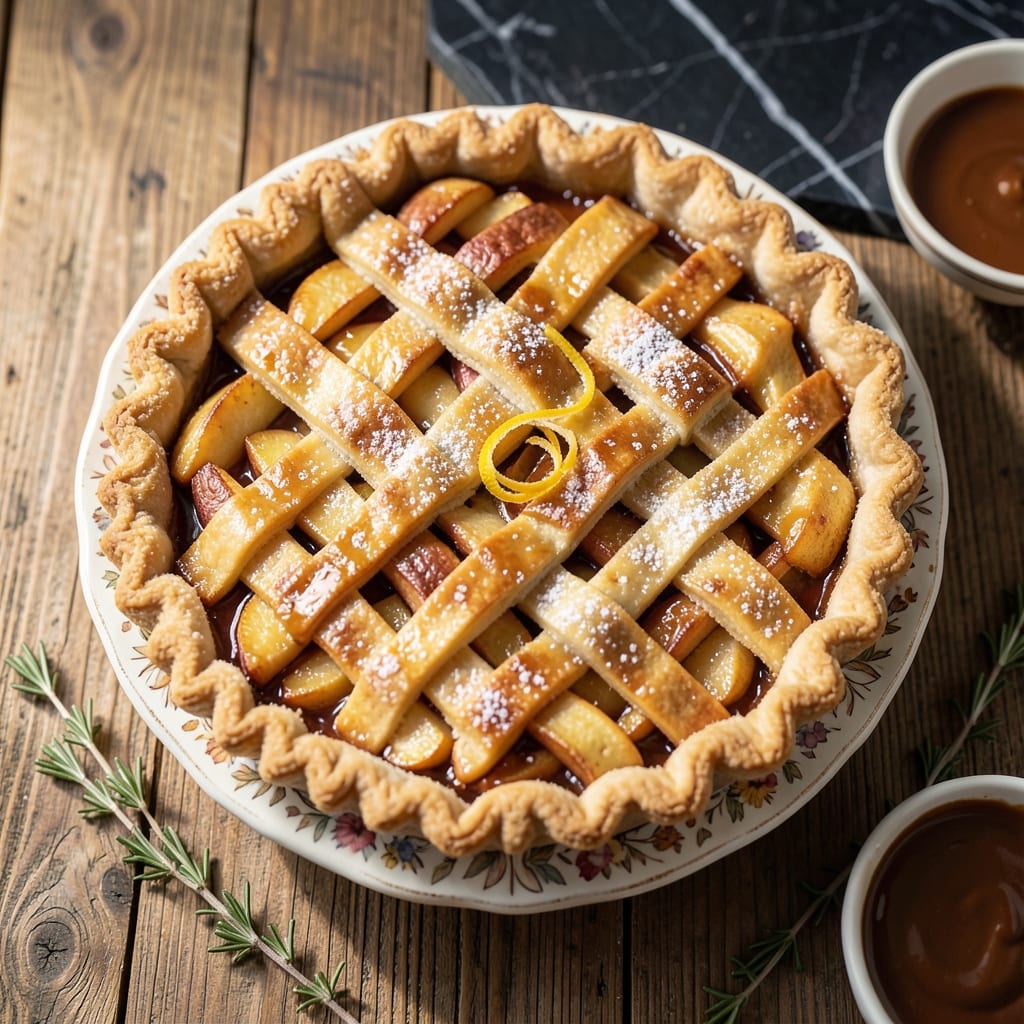
There’s nothing quite like the aroma of a flaky apple pie baking in your kitchen. This recipe delivers the perfect balance of tender, cinnamon-spiced apples nestled in a buttery crust that shatters with every bite.
I’ve refined this method over years to ensure the crust stays flaky while the filling remains juicy without becoming soggy. The secret lies in chilled ingredients and a precise baking temperature that creates that golden, crisp texture.
The apples soften into a fragrant, spiced filling that pairs beautifully with the buttery layers of crust. Each slice reveals the care put into every step, from the first roll of the dough to the final brush of egg wash.
This pie is ideal for holidays, family gatherings, or whenever you crave a taste of home. The results are consistently impressive, with a texture that’s both tender and crisp.
Ingredients for Natashas Kitchen Apple Pie
Pantry staples plus fresh apples create this classic pie with perfect flaky layers.
| Ingredient | Amount | Notes |
|---|---|---|
| All-Purpose Flour 🌾 | 2 ½ cups | Plus extra for dusting |
| Granulated Sugar 🍚 | ¼ cup | For crust sweetness |
| Salt 🧂 | 1 tsp | Fine sea salt preferred |
| Unsalted Butter 🧈 | 1 cup | Cold, cubed for flakiness |
| Ice Water 💧 | ⅓ cup | Plus 1 tbsp as needed |
| Granny Smith Apples 🍏 | 2 lb | Peeled, cored, sliced |
| Honeycrisp Apples 🍎 | 2 lb | Peeled, cored, sliced |
| Granulated Sugar 🍚 | ¾ cup | For apple filling |
| Light Brown Sugar 🍯 | ¼ cup | Packed, for depth |
| Ground Cinnamon 🌿 | 1 ½ tsp | Freshly ground preferred |
| Lemon Juice 🍋 | 1 tbsp | Freshly squeezed |
| Vanilla Extract 🌿 | 1 tsp | Pure extract recommended |
| Cornstarch 🌽 | 2 tbsp | For filling thickening |
| Large Egg 🥚 | 1 whole | For egg wash finish |
| Coarse Sugar 🍚 | 1 tbsp | For sprinkling on crust |
[recipe_ingredient_scaler]
The crust demands cold butter—European-style if you can find it, but standard grocery store butter works fine. King Arthur Flour is my go-to for all-purpose, though any unbleached brand delivers good results. For the apples, Granny Smiths keep their shape while Honeycrisps add sweetness. Look for firm fruit with no bruising (the better the apple, the better the pie).
No Granny Smiths? Braeburn or Jonathan apples hold up well. Short on cornstarch? Instant tapioca at the same amount thickens just as effectively. Use dark brown sugar if that’s what you have—just reduce it slightly. The vanilla can be skipped in a pinch, but real extract makes a noticeable difference.
The dough can rest overnight in the fridge (actually improves texture). Baked pie keeps 2-3 days at room temperature, or freeze slices for up to 2 months. Always bring butter and ice water back to cold before starting.
Why You’ll Love This Recipe
- No Fuss Crust: I love that the buttery all-purpose flour crust comes together in minutes with just ice water and a fork.
- Melts in Your Mouth: The sugar-kissed apples wrapped in that flaky butter crust? Pure comfort in every bite.
- Crowd Pleaser: Honestly, it’s my go-to for potlucks, holidays, or just because Tuesdays need pie.
- Budget Friendly: Five simple ingredients, one incredible dessert that stretches to feed a whole table.
Step-by-Step Instructions for Flaky Apple Pie
Follow this method to achieve a golden crust and perfectly spiced apple filling every time.
Step 1: Prepare the Pie Crust Dough
In a large bowl, combine the 2.5 cups All-Purpose Flour, 0.25 cup Granulated Sugar, and 1 tsp Salt. I always whisk these dry ingredients together first to ensure even distribution of the salt and sugar throughout the flour.
Cut in the 1 cup Unsalted Butter (cold and cubed) using a pastry cutter or your fingers until the mixture resembles coarse crumbs with pea-sized butter pieces visible. This is crucial for flakiness—don’t overwork it. Gradually add the 0.33 cup Ice Water while mixing just until the dough comes together. The dough should hold when pressed but not be sticky.
Divide the dough into two equal portions, flatten into discs, wrap in plastic, and refrigerate for 1 hour. This chilling step prevents shrinking and ensures a tender, flaky crust. I’ve found that resting the dough longer, up to 24 hours, improves the texture even more.
Step 2: Prepare the Apple Filling
Peel, core, and slice the 2 lb Granny Smith Apples and 2 lb Honeycrisp Apples into ¼-inch thick slices. The mix of tart and sweet apples creates the perfect balance. Toss the apples immediately with 1 tbsp Lemon Juice to prevent browning.
In a large bowl, combine the 0.75 cup Granulated Sugar, 0.25 cup Light Brown Sugar, 1.5 tsp Ground Cinnamon, 1 tsp Vanilla Extract, and 2 tbsp Cornstarch. Add this mixture to the apples and toss until every slice is evenly coated. The cornstarch will thicken the juices as the pie bakes, preventing a soggy bottom crust.
Step 3: Assemble the Pie
On a lightly floured surface, roll out one disc of dough to a 12-inch circle. Transfer it to a 9-inch pie dish, pressing gently into the bottom and up the sides. Trim the edges, leaving a ½-inch overhang. Add the apple filling, mounding it slightly in the center.
Roll out the second disc of dough and place it over the filling. Trim and crimp the edges to seal, then cut 4-5 slits in the top crust to allow steam to escape. This prevents the filling from boiling over and ensures even baking. Refrigerate the assembled pie for 20 minutes while preheating the oven to 375°F.
Step 4: Bake to Golden Perfection
Brush the top crust with a beaten Large Egg and sprinkle with 1 tbsp Coarse Sugar for added crunch and shine. Place the pie on a baking sheet to catch any drips and bake in the preheated oven for 50-60 minutes.
The pie is done when the crust is deep golden brown and the filling bubbles visibly through the steam vents. If the edges brown too quickly, cover them with aluminum foil. Let the pie cool for at least 2 hours before slicing—this allows the filling to set completely, ensuring clean slices.
Pro Tips For Making Natashas Kitchen Apple Pie
- Chill the Dough: After mixing the flour, butter, and ice water, refrigerate the dough for at least 1 hour—I learned this the hard way after my first three pies shrank in the pan.
- Use Ice-Cold Butter: Cube and freeze the unsalted butter for 15 minutes before cutting it into the flour; this guarantees flaky layers instead of a dense crust.
- Skip Warm Water: Always use ice water for the dough, or the butter will start melting and ruin the texture—sounds obvious, but I’ve seen it happen.
- Salt the Flour: Mix the salt into the flour before adding butter; it distributes evenly and actually changes the outcome of your crust.
Pro Cooking Tips for This Recipe
Butter Temperature Control
Keep your 1 cup unsalted butter ice-cold and cubed until ready to use. I cut mine into ½-inch pieces and return to the fridge while prepping other ingredients. This prevents the butter from melting into the flour, which is essential for creating those flaky layers in your crust. 💡
Dough Handling Technique
When cutting butter into flour, use your fingertips or a pastry cutter to create pea-sized crumbs. Stop as soon as you achieve this texture—overworking develops gluten, resulting in a tough crust. I find my fingers give me better control than any tool.
Chilling is Non-Negotiable
After forming your dough discs, refrigerate for at least 1 hour, or up to 24 hours for optimal results. This relaxes the gluten and keeps the butter solid. I often make my dough the night before to save time on baking day.
Preventing Soggy Bottoms
Before adding your apple filling, sprinkle 1 tbsp flour or breadcrumbs on the bottom crust. This creates a barrier that absorbs excess juices. Also, ensure your oven is fully preheated to 375°F before baking.
Venting Steam Properly
Cut 4-5 slits in your top crust to allow steam to escape. This prevents the filling from boiling over and helps the crust bake evenly. I use a small paring knife to make clean, precise cuts without tearing the dough. 🔥
Egg Wash Perfection
For a professional golden finish, beat your large egg with 1 tsp water before brushing on the crust. This thinner mixture covers more evenly than egg alone. Sprinkle with coarse sugar just before baking for added crunch.
Nutrition Facts
Frequently Asked Questions
Can I use a different type of apple?
Yes! Try Braeburn or Jonathan for similar texture. Avoid soft varieties like Red Delicious, as they turn mushy when baked.
Why is my crust not flaky?
Overworking the dough or using warm butter are common culprits. Keep ingredients ice-cold and handle the dough minimally for best results.
Can I make this pie ahead of time?
Bake it 1 day in advance and store at room temperature. For longer storage, freeze unbaked pie and bake from frozen, adding 10-15 minutes to bake time.

Trained in classic French technique but raised on slow-cooked ribs and spicy rubs, she blends culinary skill with smoke and soul.
- Recipe for Boneless Pork Chops in Cast Iron Skillet: Sear and Baste to Juicy Perfection - October 3, 2026
- Recipe for Boneless Cross Rib Roast: Slow-Roasted Beef with Herb Crust - October 3, 2026
- Hamburgers in Sauce Recipe Crock Pot: Slow-Cooked Savory Delight - October 3, 2026