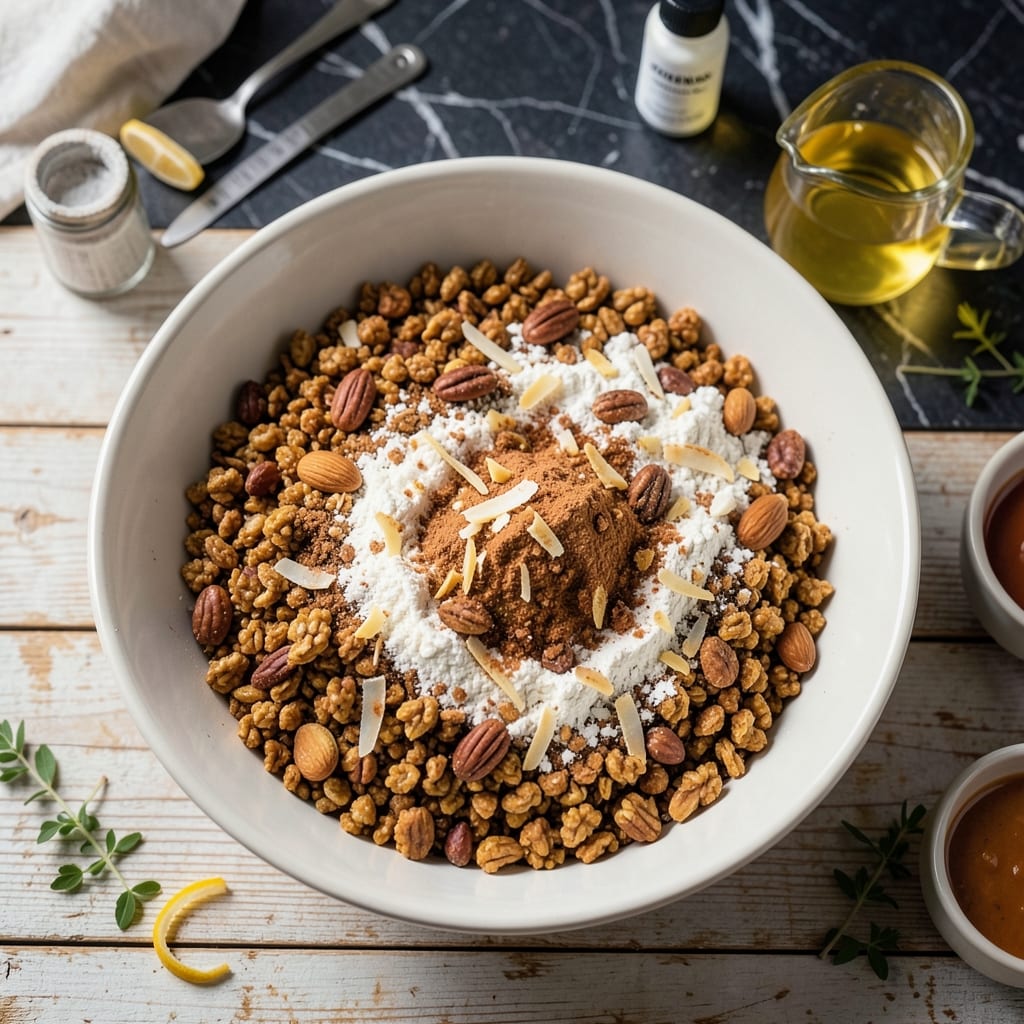
This no-bake crust transforms your favorite granola into a nutty, crispy foundation for any pie. It’s the perfect solution when you want a sturdy base without turning on the oven.
The method is simple: combine granola with melted butter and a touch of sweetness, then press it firmly into your pan. A brief chill sets it into a firm, sliceable crust that holds up to any filling.
Whether you’re making a fruit tart, cream pie, or chocolate dessert, this crust adds texture and depth. It’s a great way to use up leftover granola or customize with nuts, seeds, or spices.
No rolling, no blind baking—just mix, press, and chill. It’s that easy.
Ingredients for Granola Pie Crust
Simple pantry staples create this no-bake, nutty, crispy pie base with ease.
| Ingredient | Amount | Notes |
|---|---|---|
| Granola 🥣 | 3 cups | Any flavor, unsweetened preferred |
| Unsalted Butter 🧈 | ½ cup | Melted and cooled slightly |
| Brown Sugar 🍚 | 2 tbsp | Light or dark variety |
| All-Purpose Flour 🌾 | 2 tbsp | Helps bind the crust |
| Ground Cinnamon 🌿 | ½ tsp | Optional for warmth |
| Vanilla Extract 💧 | ½ tsp | Pure extract preferred |
| Salt 🧂 | ¼ tsp | Fine sea salt |
| Chopped Nuts 🥜 | ¼ cup | Almonds, pecans, or walnuts |
| Shredded Coconut 🥥 | ¼ cup | Sweetened or unsweetened |
| Honey 🍯 | 1 tbsp | Optional for extra sweetness |
[recipe_ingredient_scaler]
The granola is your foundation—pick a chunky, toasted variety for best texture. I grab mine from Trader Joe’s or the bulk bins at Whole Foods (the coconut clusters are my favorite). Unsalted butter keeps the flavor clean, but salted works in a pinch—just skip the added salt. The flour isn’t negotiable—it’s what holds everything together without baking.
No granola? Crushed pretzels or graham crackers work, but you’ll need to add extra nuts for crunch. Swap brown sugar for maple syrup or agave at the same amount. Out of vanilla? A pinch of almond extract adds a nice depth. The coconut is optional but adds a great chewy texture (toast it first if you’re using unsweetened).
Press the crust firmly—it’ll seem like too much, but trust the process. Chills solid in about 2 hours, or speed it up with 30 minutes in the freezer. Keeps 3-4 days at room temp, or freeze for 2 months.
Why You’ll Love This Recipe
- 5-Minute Base: No rolling pins, no chilling—just press the granola-butter mix into the pan and you’re done.
- Warm Spice Hug: That cinnamon and brown sugar combo makes every bite taste like a cozy autumn morning.
- Endless Fillings: Honestly, I’ve used this crust for fruit pies, cheesecakes, even a quiche when I was desperate.
- Budget Stretch: A bag of granola goes further than you think, and it’s way cheaper than store-bought crusts.
Step-by-Step Instructions for Granola Pie Crust
This no-bake crust comes together quickly with just a few simple steps.
Step 1: Combine Dry Ingredients
In a large bowl, stir together the 3 cups Granola, 2 tbsp All-Purpose Flour, 2 tbsp Brown Sugar, 0.25 cup Chopped Nuts, 0.25 cup Shredded Coconut, 0.5 tsp Ground Cinnamon, and 0.25 tsp Salt. I like to press down gently with my hands to break up any large clumps in the granola.
This mixture should look evenly distributed with no dry pockets of flour. The flour helps bind everything together, while the nuts and coconut add texture and flavor. If you’re using unsweetened granola, the brown sugar adds just the right amount of sweetness.
Step 2: Add Wet Ingredients
Pour the 0.5 cup Unsalted Butter (melted and cooled slightly) and 1 tbsp Honey over the dry mixture. Add the 0.5 tsp Vanilla Extract for warmth and depth. Using a silicone spatula, fold everything together until the granola is evenly coated.
The mixture should hold together when pressed between your fingers. If it feels too dry, let it sit for 2-3 minutes to allow the granola to absorb the liquid. The honey adds a touch of stickiness that helps the crust hold its shape when pressed into the pan.
Step 3: Press into Pie Pan
Transfer the mixture to a 9-inch pie pan and press it firmly into the bottom and up the sides using the back of a measuring cup or your fingers. I start with the bottom first, then work my way up the edges, making sure the layer is even.
Press hard—this ensures the crust holds together when sliced. The edges might look crumbly at first, but they’ll set as the crust chills. For a cleaner look, use a small offset spatula to smooth the top edge after pressing.
Step 4: Chill and Set
Place the pie pan in the refrigerator and let the crust chill for at least 1 hour. This step is crucial—it allows the butter to solidify, which binds all the ingredients together into a firm, sliceable crust.
I like to check it after 1 hour by gently pressing the edge. If it holds its shape, it’s ready. If not, give it another 20-30 minutes. The crust will keep in the fridge for up to 2 days before filling, or you can freeze it for longer storage.
Step 5: Pre-Bake (Optional)
For a crispier crust, especially with wet fillings like custards, pre-bake at 350°F for 8-10 minutes until the edges are lightly golden. Keep an eye on it—the sugars in the granola can brown quickly.
Let it cool completely before adding your filling. This step prevents a soggy bottom and adds a delightful toasted flavor. If your recipe calls for a no-bake filling, you can skip this step entirely and fill the crust straight from the fridge.
Pro Tips For Making Granola Pie Crust
- Press Firmly: Pack the granola mixture into the pie pan with the bottom of a measuring cup—this prevents crumbly edges and ensures an even crust that holds together when sliced.
- Melt Butter Slowly: Brown the butter gently over medium-low heat until just golden, then let it cool for 5 minutes before mixing. Hot butter makes the granola soggy instead of crisp.
- Skip the Chunks: Pulse the granola in a food processor first to break up large clusters—otherwise, you’ll end up with uneven texture and weak spots in the crust.
- Chill Before Baking: Pop the pressed crust in the fridge for 20 minutes before blind-baking. I learned this the hard way—skipping it leads to a greasy, sliding mess.
Pro Cooking Tips for This Dish
Butter Temperature Control
Use unsalted butter melted and cooled to room temperature—never hot. I let mine sit for 10 minutes after melting to avoid cooking the granola. Hot butter makes the crust greasy and soft. 💡
Even Pressing Technique
Use the bottom of a measuring cup to press the mixture firmly into the pan. Start at the center and work outward, then up the sides. Press harder than you think—this prevents crumbling when sliced.
Chilling for Structure
Chill for at least 2 hours in the fridge for a firm set. For faster results, pop it in the freezer for 30-45 minutes. I test by pressing the edge—if it holds, it’s ready.
Pre-Baking for Crispness
For wet fillings like custard, pre-bake at 350°F for 8-10 minutes until edges turn light golden. Cool completely before adding filling to prevent sogginess. 🔥
Edge Finishing Trick
After pressing, use a small offset spatula to smooth the top edge for a clean look. Dip the spatula in warm water first to prevent sticking. This makes a professional presentation.
Granola Selection
Pick a chunky, toasted granola for best texture. I love Trader Joe’s vanilla almond or Whole Foods coconut clusters. Avoid fine granola—it won’t hold together as well.
Nutrition Facts
Frequently Asked Questions
Can I use any type of granola?
Yes, but choose a chunky, toasted variety for best texture. Fine granola won’t bind as well. For extra flavor, try vanilla or honey-almond blends.
How long does it need to chill?
Chill for at least 2 hours in the fridge for a firm set. For faster results, freeze for 30-45 minutes. Test by pressing the edge—if it holds, it’s ready.
Will this work for wet fillings?
Yes, but pre-bake at 350°F for 8-10 minutes first. This prevents sogginess and adds a toasted flavor. Let cool completely before adding filling.

Trained in classic French technique but raised on slow-cooked ribs and spicy rubs, she blends culinary skill with smoke and soul.
- Recipe for Boneless Pork Chops in Cast Iron Skillet: Sear and Baste to Juicy Perfection - October 3, 2026
- Recipe for Boneless Cross Rib Roast: Slow-Roasted Beef with Herb Crust - October 3, 2026
- Hamburgers in Sauce Recipe Crock Pot: Slow-Cooked Savory Delight - October 3, 2026