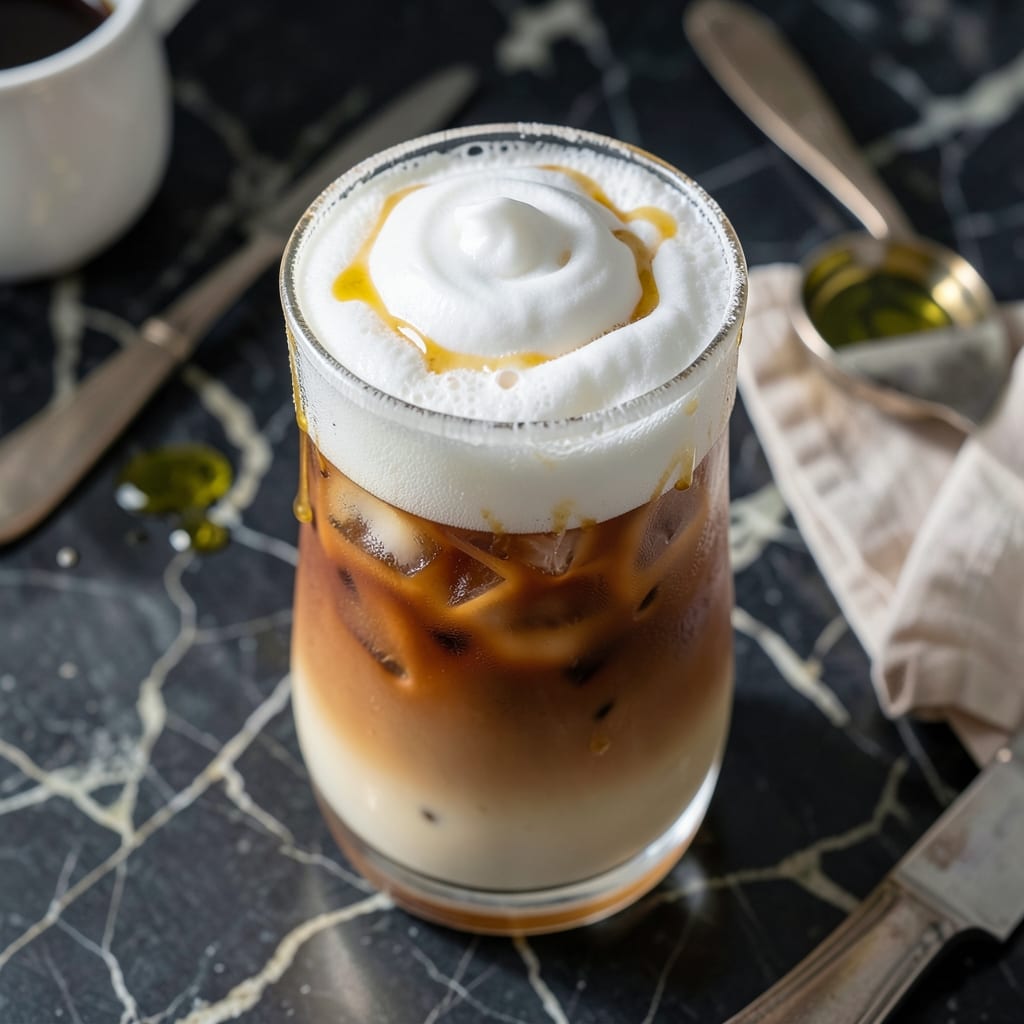
I developed this cold foam recipe after too many coffee shop visits left me craving that velvety topping at home. The secret lies in the perfect balance of cold milk and a touch of sweetness, transformed by vigorous frothing.
Using a Nespresso machine’s frother or a hand-held whisk, you can achieve that signature creamy texture that sits beautifully atop iced coffee. The process takes less than 2 minutes and requires no special skills.
What you get is a light, airy foam that melts slowly into your drink, adding richness without overwhelming it. It’s the small detail that elevates homemade iced beverages to café quality.
This topping works with any milk variety and adapts easily to dietary preferences. Here’s how to make it perfectly every time.
Ingredients for Nespresso Cold Foam
Six simple ingredients create that velvety, barista-style topping for your iced coffee at home.
| Ingredient | Amount | Notes |
|---|---|---|
| Whole Milk 🥛 | ½ cup | Cold, full-fat for best texture |
| Vanilla Syrup 🍯 | 1 tbsp | Or simple syrup alternative |
| Vanilla Extract 🌿 | ½ tsp | Pure extract preferred |
| Granulated Sugar 🧂 | 1 tsp | Optional for extra sweetness |
| Ice Cubes ❄️ | 2 whole | For chilling milk quickly |
| Non-Fat Dry Milk Powder 🥛 | 1 tbsp | Boosts foam stability |
[recipe_ingredient_scaler]
The milk is everything here. Whole milk from a local dairy gives you the richest, most stable foam—avoid ultra-pasteurized if possible (it froths poorly). I always keep a bottle of Organic Valley on hand for this. The vanilla syrup can be store-bought, but Torani or Monin brands hold up best to the frothing process without separating.
No vanilla syrup? Simple syrup with a drop of vanilla extract works in a pinch. Skipping sugar entirely? The foam will be less sweet but still creamy. For dairy-free versions, oat milk or barista-style almond milk froth surprisingly well. The dry milk powder might seem odd, but it’s the professional trick for extra-stable foam that holds its shape.
Use within 1 hour for best texture—it deflates over time. Store-bought vanilla syrup keeps 6-12 months unopened. Dry milk powder lasts 2 years sealed, but use it within 3 months once opened.
Why You’ll Love This Recipe
- 30-Second Magic: I just dump milk, sugar, and vanilla into a frother—no fancy steps, and it’s ready before my coffee cools.
- Velvety Vanilla Cloud: The whole milk whips into this light, sweet foam that tastes like a dessert but pairs perfectly with espresso.
- Cafe Quality at Home: I skip the $7 drink shop version and make this for pennies whenever my friends pop over.
- Leftovers? No Problem: Honestly, I double the batch—it keeps in the fridge and I spoon it over iced coffee all week.
Step-by-Step Instructions for Barista-Style Cold Foam
Here’s the method I use for velvety foam that rivals your favorite coffee shop every time.
Step 1: Chill the Whole Milk with Ice
Pour the 0.5 cup Whole Milk into a frothing pitcher or deep cup. Add the 2 whole Ice Cubes and let it sit for 2-3 minutes until the milk is very cold—this is crucial for achieving stable foam.
Cold milk froths better than room temperature milk because the fat and proteins hold air more effectively. You’ll notice the milk taking on a slightly thicker consistency as it chills. Don’t skip this step; warm milk won’t give you that perfect, long-lasting foam.
I always use full-fat milk here for the creamiest texture, as the higher fat content creates a richer, more stable foam that holds its shape beautifully.
Step 2: Add Sweetness and Flavor Enhancers
Once the milk is chilled, stir in the 1 tbsp Vanilla Syrup, 0.5 tsp Vanilla Extract, and 1 tsp Granulated Sugar. Mix well until the sugar is completely dissolved—you shouldn’t see any granules at the bottom of the pitcher.
The vanilla syrup adds sweetness and depth, while the extract enhances the aromatic profile. The granulated sugar, though optional, gives a subtle sweetness that complements the vanilla beautifully. I’ve found this combination creates a balanced flavor that pairs perfectly with espresso.
At this stage, the mixture should taste slightly sweeter than you want the final foam to be, as the frothing process will mellow the sweetness slightly.
Step 3: Incorporate the Non-Fat Dry Milk Powder
Sprinkle the 1 tbsp Non-Fat Dry Milk Powder evenly over the surface of the milk mixture. Let it sit undisturbed for 1 minute to allow the powder to hydrate and soften. This step is key for achieving that professional, ultra-creamy texture.
The dry milk powder acts as a stabilizer, giving the foam extra body and longevity. It might look like too much at first, but trust me—it dissolves completely and makes a noticeable difference in the final texture. Without it, the foam can collapse more quickly.
After the minute has passed, give the mixture a quick stir to incorporate the powder completely. You should have a smooth, slightly thickened liquid with no lumps or dry spots.
Step 4: Froth to Silky Perfection
Now it’s time to create the foam. If you’re using a handheld frother, submerge it just below the surface of the milk and turn it on. Move it in a circular motion, gradually bringing it closer to the surface as the foam begins to form. You’ll see the volume increase significantly within 20-30 seconds.
For a Nespresso machine with a built-in frother, use the cold frothing setting and stop when the foam has doubled in volume. The ideal texture is thick, velvety, and glossy—like melted marshmallow. You’ll know it’s ready when it holds its shape briefly when the frother is removed.
Be careful not to over-froth, as this can cause the foam to become too stiff and lose its smooth, creamy quality. Stop as soon as you achieve a thick, pourable consistency.
Step 5: Serve Immediately for Best Results
Pour or spoon the cold foam over your prepared espresso or iced coffee immediately. The foam is at its best when fresh, with a light, airy texture and a beautiful white color. You should see it sitting proudly on top of your drink, with a slight sheen that indicates perfect frothing.
For the best presentation, pour the foam slowly and steadily from a slight height—this helps it create a smooth, even layer. The foam should hold its shape for several minutes, gradually melting into the drink without disappearing completely.
Each sip should deliver a creamy, slightly sweet contrast to the rich espresso below. This foam is so good, you might find yourself making extra just to enjoy by the spoonful!
Pro Tips For Making Nespresso Cold Foam
- Chill the Milk First: Use ice-cold whole milk straight from the fridge—room temperature milk won’t whip into that thick, billowy foam you want.
- Skip the Sugar: Granulated sugar won’t dissolve properly in cold foam; use vanilla syrup instead for sweetness that blends in smoothly.
- Don’t Overfill the Frother: I learned this the hard way—fill your frother no more than halfway to give the milk room to expand and avoid a messy overflow.
- Add Vanilla After Frothing: Stir in vanilla extract after frothing to preserve the foam’s structure; adding it before can weigh it down and deflate the bubbles.
Storing and Reheating This Dish
Immediate Use Only
This foam is best used right after frothing while it’s at peak volume and texture. I notice it starts losing its airy quality after about 10-15 minutes at room temperature. The bubbles begin to collapse, and the foam becomes denser. 🥄
Short-Term Storage
If you must store it, keep the foam in a tightly sealed container in the fridge for up to 1 hour. Use a shallow, wide container to minimize crushing the bubbles. I recommend a glass mason jar for this purpose.
When ready to use, give it a gentle stir to revive some of the texture. Don’t expect it to be as perfect as fresh foam, but it will still taste delicious.
Re-Frothing Saved Foam
For slightly flattened stored foam, you can attempt to revive it with a quick re-froth. Use your handheld frother for 10-15 seconds to reintroduce some air. This works best if the foam hasn’t been refrigerated too long.
Freezing Not Recommended
The texture completely breaks down when frozen and thawed. The milk separates, and the foam becomes watery and unappetizing. I’ve tried this in my Boston kitchen experiments—it’s not worth the effort.
Equipment Cleanup
Rinse your frothing pitcher or whisk immediately after use to prevent milk residue from drying. A quick wash with warm, soapy water keeps your tools ready for next time. I always keep a bottle of Dawn dish soap under my sink for this. ❄️
Nutrition Facts
Frequently Asked Questions
Can I make this without a frother?
Yes! A whisk and strong arm can work. Pour milk into a jar, seal, and shake vigorously for 30-45 seconds until frothy.
Why does the foam collapse quickly?
Warm milk or over-frothing causes this. Always use ice-cold milk and stop frothing as soon as volume doubles.
Can I use almond milk instead?
Barista-style almond milk works best. Regular almond milk lacks protein and fat, resulting in thin foam. Shake well before use.
How sweet should the foam be?
Taste before frothing. Adjust sweetness with 1-2 tsp more syrup if needed, but remember it will taste milder once foamed.

Trained in classic French technique but raised on slow-cooked ribs and spicy rubs, she blends culinary skill with smoke and soul.
- Recipe for Boneless Pork Chops in Cast Iron Skillet: Sear and Baste to Juicy Perfection - October 3, 2026
- Recipe for Boneless Cross Rib Roast: Slow-Roasted Beef with Herb Crust - October 3, 2026
- Hamburgers in Sauce Recipe Crock Pot: Slow-Cooked Savory Delight - October 3, 2026