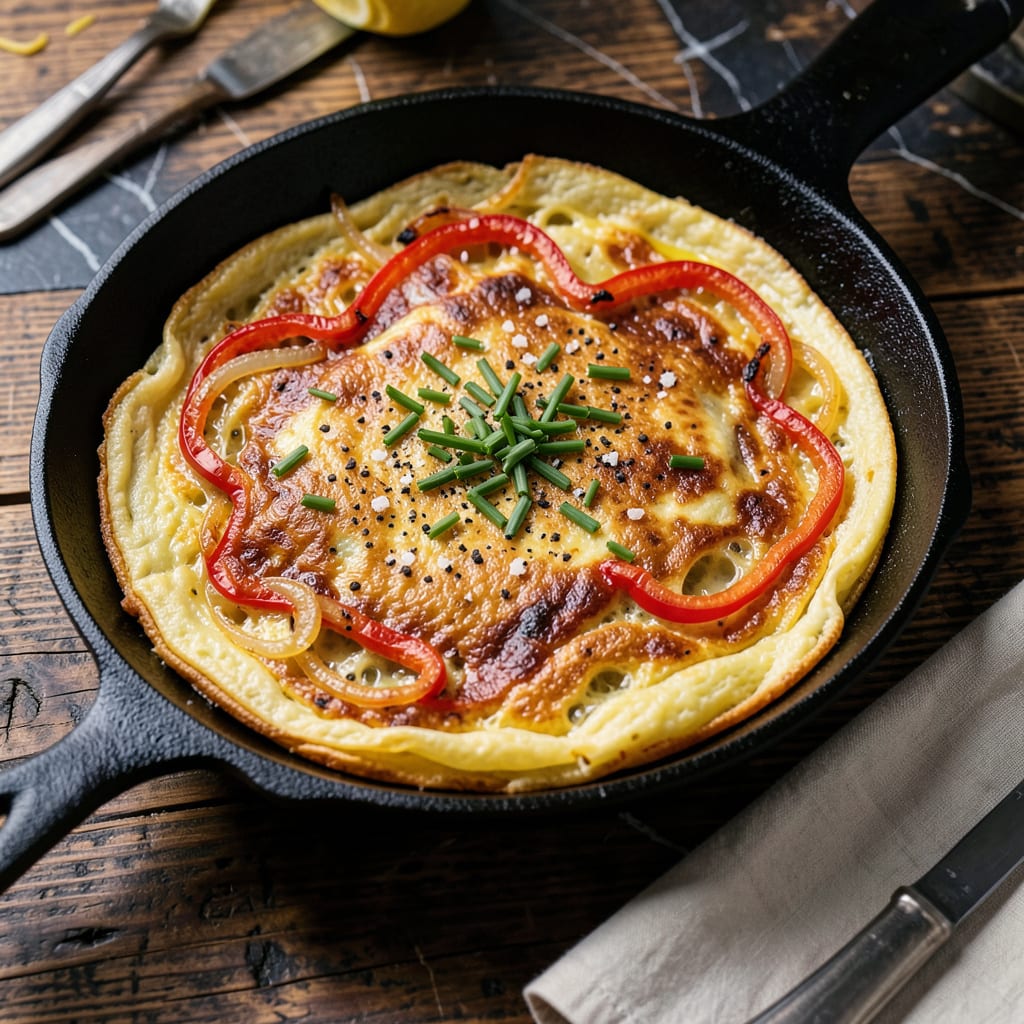
Confession: I used to think omelettes were just scrambled eggs in disguise—until I tried making one in my trusty cast iron. That first bite of fluffy interior with crispy, golden edges changed my breakfast game forever. There’s something about cast iron that transforms simple eggs into something extraordinary, with its even heat and natural non-stick surface when properly seasoned.
Here’s the thing—most home cooks overlook how cast iron’s heat retention creates that perfect contrast between tender, custardy eggs and a shatteringly crisp crust. I’ve burned through my fair share of omelettes learning this lesson. The key is medium-low heat and patience, letting the edges set while the center stays soft. And yes, butter matters (don’t even think about using oil for this one).
What you’ll end up with is an omelette that’s restaurant-quality but made in your kitchen. The cast iron gives you those coveted golden-brown edges that stay crispy even after plating, while the center remains light and airy. Add your favorite fillings—sharp cheddar, fresh herbs, or caramelized onions—and you’ve got a breakfast that’s worth waking up for.
Serve it with crusty toast to soak up any runny bits and a cup of strong coffee. This isn’t just breakfast; it’s a weekend ritual that’ll make you the hero of your own kitchen. Now, let’s get that skillet hot.
📚 In This Guide
- What You’ll Need
- Instructions
- Tips and Common Mistakes
What Youll Need
- ● Ingredients (serves 1-2): 3 large fresh eggs (room temperature for best results)
- ● 1 tbsp unsalted butter (or ½ tbsp olive oil for dairy-free)
- ● 2 tbsp whole milk, cream, or water (for fluffiness)
- ● ¼ tsp salt (adjust to taste)
- ● ⅛ tsp black pepper (freshly ground preferred)
- ● Fillings of choice (e.g., ¼ cup shredded cheese, 2 tbsp diced veggies, or 1 tbsp cooked meat)
- ● Tools & Equipment: 1 8-10 inch cast-iron skillet (well-seasoned for non-stick magic ✨)
- ● 1 medium mixing bowl
- ● 1 fork or whisk (for beating eggs)
- ● 1 spatula (heat-resistant, preferably silicone)
- ● Measuring spoons (for precision)
- ○ Optional (But Helpful!): Non-stick spray (for extra insurance on sticky spots)
- ● Kitchen tongs (for folding larger omelettes)
- ● Instant-read thermometer (to check pan temp—aim for 350°F)
- ● Fresh herbs (like chives or parsley for garnish)
Instructions
Here’s how to nail that perfect balance between fluffy interior and crispy edges every time.
Preheat Your Cast Iron Skillet Properly
Place your 10-12 inch cast iron skillet over medium heat and let it warm up for at least 5 minutes. You want it hot enough that a drop of water sizzles and dances across the surface, but not so hot that it evaporates instantly. This even heat distribution is what gives you that beautiful crispy crust while keeping the inside tender.
While the pan heats, crack your eggs into a bowl and whisk them vigorously until no streaks of white remain. I like to add a splash of water (1 tablespoon) to the eggs—this creates steam that helps fluff up the omelette. Season with salt and pepper to taste, but don’t overdo it; you can always adjust later.
Add Fat and Create the Perfect Base
Once your skillet is properly heated, add 1 tablespoon of butter and let it melt completely, swirling it around to coat the bottom and sides of the pan. The butter should foam up and then subside—this is your cue that it’s ready. For extra crispiness, I sometimes use a combination of butter and a neutral oil, but butter alone gives that classic rich flavor.
Pour in your beaten eggs and let them sit undisturbed for about 20 seconds. You’ll see the edges start to set and turn lightly golden. This is when you want to start gently pushing the cooked edges toward the center with a silicone spatula, tilting the pan to let the uncooked egg flow to the edges. Repeat this process until the top is mostly set but still slightly runny.
Build the Filling and Create the Crispy Crust
Now’s the time to add your fillings—whether it’s cheese, veggies, or cooked meats. Sprinkle them evenly over one half of the omelette, leaving the other half plain. I like to use shredded cheddar or goat cheese for a creamy texture, but you can customize this to your preference. Just make sure any fillings are cooked or prepped ahead of time; raw veggies will release moisture and make your omelette soggy.
Let the omelette cook for another 30-45 seconds until the edges are deep golden brown and crispy. You’ll notice the omelette starts to pull away from the sides of the pan—that’s your signal it’s ready to flip. If you’re adding cheese, this is when it should be fully melted and bubbly.
Fold and Finish for Maximum Crispiness
Using your spatula, carefully lift the plain side of the omelette and fold it over the filled side, creating a half-moon shape. Press down gently with the spatula to help seal the edges. Let it cook for another 15-20 seconds to crisp up the bottom, but don’t walk away—the line between perfectly crispy and burnt is thin!
Tilt the pan slightly and use your spatula to guide the omelette onto a plate, crispy side up. The bottom should have a beautiful golden-brown crust that’s crispy to the bite, while the top remains soft and fluffy. If you’ve done it right, the omelette will hold its shape but still have a slightly creamy interior.
Rest Briefly and Serve Immediately
Let the omelette rest for just 1-2 minutes before serving. This brief pause allows the residual heat to finish cooking the center without overdoing it, and it helps the fillings set so they don’t all spill out when you cut into it. I like to garnish with a sprinkle of fresh herbs or a drizzle of hot sauce for extra flavor.
Cut into the omelette to reveal that perfect contrast: crispy, golden edges with a fluffy, tender center. The first bite should give you that satisfying crunch, followed by the creamy, rich egg interior. Serve immediately while it’s at its peak—omelettes wait for no one!
Tips and Common Mistakes
Getting that perfect balance of crispy edges and fluffy interior takes practice, but these insights will help you master it faster.
Heat Control: The 5 minutes of preheating your cast iron skillet over medium heat isn’t just a suggestion—it’s crucial. I’ve learned the hard way that rushing this step leads to uneven cooking. Test the heat by sprinkling water droplets; they should sizzle and dance, not evaporate instantly. This even heat distribution is what creates that signature crispy crust while keeping the center tender.
Timing Secret: When you pour in the eggs in Step 2, those 20 seconds of undisturbed cooking might feel long, but resist the urge to stir immediately. This brief pause allows the edges to set properly, creating the foundation for that golden-brown crust. I like to watch for the edges to turn lightly golden before gently pushing them toward the center—this technique builds layers of crispiness.
The Technique That Changed Everything: In Step 4, when folding the omelette, use your spatula to press down gently on the folded edge for those final 15-20 seconds. This isn’t just about sealing—it’s about creating maximum contact between the omelette and the hot skillet, which develops that satisfying crunch. I always tilt the pan slightly to ensure the entire folded edge gets equal heat exposure.
What to Watch For: The 1-2 minutes of resting time in Step 5 might seem insignificant, but it’s when the magic happens. This brief pause allows the residual heat to finish cooking the center while the fillings set. I’ve found that cutting into the omelette immediately causes the fillings to spill out, but that short rest keeps everything perfectly contained while maintaining the crispy texture.
Pro Tips for Omelette In Cast Iron
- Getting that perfect balance of crispy edges and fluffy interior takes practice, but these insights will help you mas…
- Heat Control: The 5 minutes of preheating your cast iron skillet over medium heat isn’t just a suggestion—it’s crucia…
- Timing Secret: When you pour in the eggs in Step 2, those 20 seconds of undisturbed cooking might feel long, but resi…
Frequently Asked Questions
Can I use a nonstick pan instead of cast iron for an omelette?
You can, but cast iron gives a superior crispy crust and even heat distribution! Nonstick pans work for delicate omelettes (like French-style), but they won’t achieve that golden, slightly crispy edge. If using nonstick, skip preheating as long—just warm it over medium-low heat to avoid overheating the coating.
Why does my omelette stick to the cast iron pan?
Sticking usually means the pan wasn’t hot enough or properly seasoned. Always preheat your cast iron for 3–5 minutes on medium and use enough fat (butter or oil). If the seasoning is worn, re-season the pan before cooking. A well-seasoned cast iron should release eggs easily with a gentle nudge!
How do I know when to flip or fold the omelette?
Watch for two cues: 1) The edges look set but the top is still slightly runny (about 2–3 minutes in), and 2) the bottom is golden brown. Use a spatula to lift an edge—if it’s firm but not burnt, it’s time to fold or flip. No peeking too early, or you’ll break the crust! Both work, but they behave differently! Butter adds rich flavor and helps browning but burns faster (use medium heat). Oil (like avocado or ghee) has a higher smoke point for crispier edges. For the best of both, use 1 tbsp oil + 1 tbsp butter—the oil prevents burning while the butter boosts taste. The key is controlled heat. Preheat on medium, then lower to medium-low once the eggs hit the pan. If the edges brown too fast, briefly lift the pan off the heat or reduce the flame. Cast iron retains heat well, so patience (and a watchful eye) prevents burning while ensuring a fluffy interior.What’s the best fat to use for a cast iron omelette—butter or oil?
Can I make an omelette in cast iron without burning it?
Mastering the omelette in cast iron is all about patience and heat control—now you’ve got the secrets to that perfect fluffy center and crispy, golden edges! 🌟 Whether it’s a quick weekday breakfast or a leisurely brunch, your cast iron is the MVP for restaurant-worthy results every time.
Ready to put your skills to the test? Grab those eggs, fire up the skillet, and experiment with fillings—cheese, herbs, or even leftovers—to make it your own. Don’t forget to share your omelette wins (or funny flips!) with #CastIronOmelette. Happy cooking! 🍳

Trained in classic French technique but raised on slow-cooked ribs and spicy rubs, she blends culinary skill with smoke and soul.
- Recipe for Boneless Pork Chops in Cast Iron Skillet: Sear and Baste to Juicy Perfection - October 3, 2026
- Recipe for Boneless Cross Rib Roast: Slow-Roasted Beef with Herb Crust - October 3, 2026
- Hamburgers in Sauce Recipe Crock Pot: Slow-Cooked Savory Delight - October 3, 2026