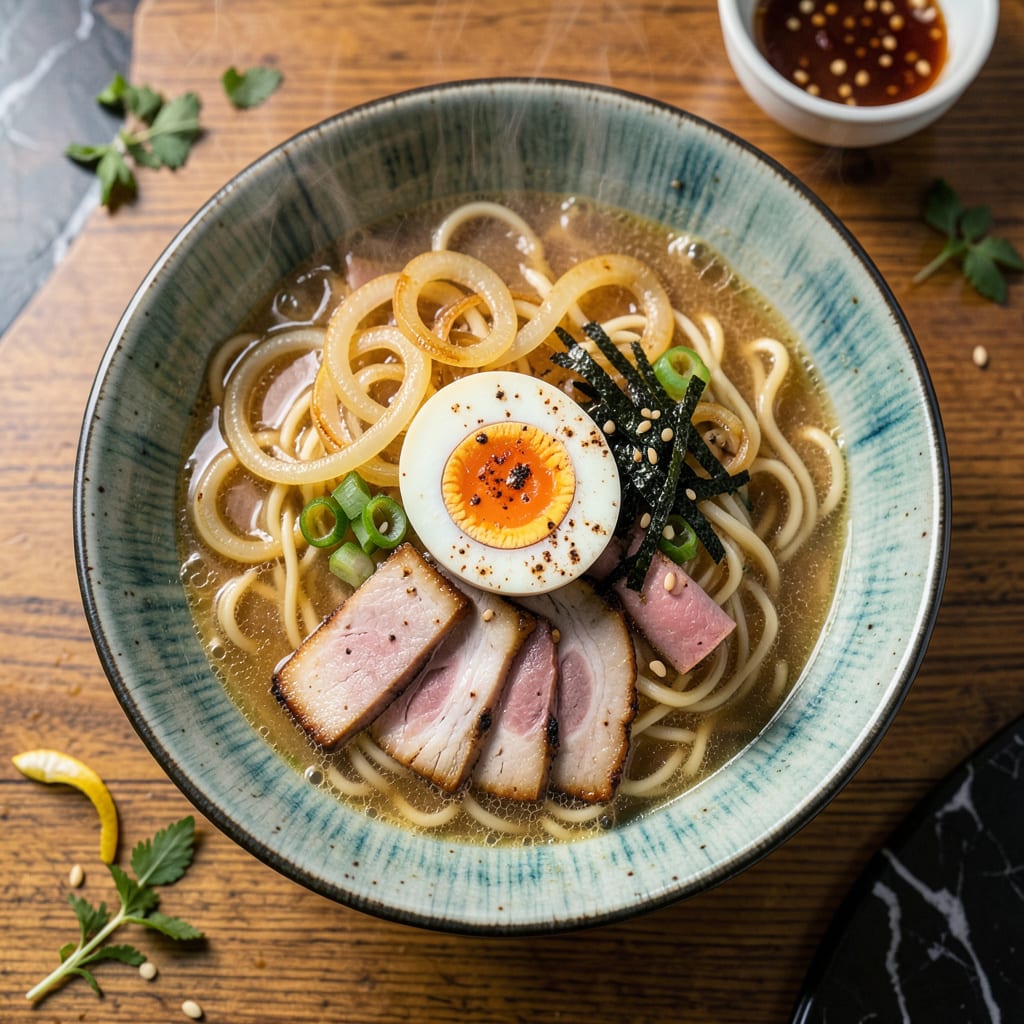
I’ll be real with you—ramen without onions is like a campfire without smoke. It’s missing that deep, caramelized soul that turns a good bowl into something unforgettable. This recipe isn’t just about dropping noodles in broth; it’s about building layers of flavor where onions play the starring role. We’re talking slow-cooked caramelized onions that melt into the broth, quick-pickled red onions for tangy crunch, and fresh green onions to finish it all off.
Here’s the thing—most ramen recipes treat onions as an afterthought, but I’ve found they’re the secret weapon for creating that rich, complex broth you crave. The caramelized onions simmer in the broth for at least an hour, breaking down into sweet, jammy goodness that transforms even basic chicken stock into something restaurant-worthy. Meanwhile, the quick-pickled onions add that bright, vinegary kick that cuts through all the richness.
You’ll end up with a bowl that’s got it all: chewy noodles swimming in a deeply flavorful broth, tender chashu pork (or mushrooms for vegetarians), and those onions working double duty—both in the broth and as toppings. The caramelized ones make the broth taste like it’s been simmering all day, while the pickled version adds that perfect tangy contrast with every slurp.
Between you and me, this is the kind of ramen that’ll make you forget about takeout menus. The onions are what take it from good to “I could eat this every day” territory. Let’s build this bowl step by step—it’s easier than you think, and the payoff is massive.
📚 In This Guide
- What You’ll Need
- Instructions
- Tips and Common Mistakes
What Youll Need
- ● Yellow or white onions – 2 large (about 2 lbs), thinly sliced for even caramelization 🧅
- ● Neutral oil – 2 tbsp (avocado, vegetable, or canola oil works best)
- ○ Butter (optional) – 1 tbsp for richer flavor
- ○ Sugar (optional) – 1 tsp to speed up caramelization
- ● Ramen broth – 4 cups (homemade or store-bought—tonkotsu or shoyu pairs best)
- ● Ramen noodles – 2 servings (fresh or dried, ~7 oz total)
- ● Tools: Large, heavy-bottomed skillet or pot (stainless steel or cast iron preferred)
- ● Wooden spoon or spatula for stirring
- ● Sharp chef’s knife & cutting board
- ● Timer (for perfect caramelization control ⏰)
- ● Fine-mesh strainer (if blending caramelized onions into broth)
- ○ Optional upgrades: Soy sauce or miso paste – 1 tbsp for umami depth
- ● Garlic – 2 cloves, minced
- ● Ginger – 1-inch piece, grated
- ● Green onions – 2 stalks, sliced for garnish
Instructions
Transforming simple onions into rich, caramelized layers for your ramen is easier than you think—just follow these steps.
Select and Prepare Your Onions
Start with yellow onions for the best balance of sweetness and depth—they caramelize beautifully without becoming overly sharp. Peel and slice them into thin, even half-moons (about ⅛-inch thick). I like to cut them from root to stem because it keeps the layers intact, which helps them soften evenly.
You’ll need enough onions to fill your skillet in a single layer—about 2 large onions for every 4 servings of ramen. Don’t worry if it seems like a lot; they’ll shrink dramatically as they cook. Place them in a bowl of cold water for 5 minutes to mellow their bite, then drain well and pat dry. This step ensures they’ll caramelize faster without burning.
Start Low and Slow for Deep Caramelization
Heat a heavy-bottomed skillet (cast iron works best) over medium-low heat and add just enough neutral oil to lightly coat the bottom—about 1 tablespoon. When the oil shimmers, add the onions in a single layer. Sprinkle with a pinch of salt to draw out moisture and help break them down.
Cook the onions for 45-60 minutes, stirring every 5-10 minutes to prevent sticking. The key here is patience—rushing with higher heat will burn them instead of caramelizing. You’ll know they’re ready when they turn a deep, amber-brown color and develop a sweet, jammy texture. If they start to dry out, add a splash of water to deglaze the pan and keep them cooking evenly.
Deglaze and Build Flavor Layers
Once the onions are deeply caramelized, pour in ¼ cup of water, broth, or sake to lift all those browned bits from the bottom of the pan. Scrape with a wooden spoon to incorporate every bit of flavor. This step adds complexity to the onions and ensures nothing goes to waste.
Let the liquid simmer for 2-3 minutes until it reduces by half, leaving the onions glossy and concentrated. Taste and adjust seasoning with a bit more salt or a splash of soy sauce if you want to deepen the umami. At this point, the onions should be tender enough to melt into the broth but still hold their shape slightly.
Incorporate into Your Ramen Broth
Add the caramelized onions directly to your simmering ramen broth during the last 10 minutes of cooking. This gives them time to infuse the broth with their rich, sweet flavor without losing their texture. If you’re using a lighter broth, like shio or shoyu, the onions will add a beautiful golden hue and depth.
For a richer presentation, reserve some onions to garnish each bowl. Ladle the hot broth over your noodles and toppings, then spoon the onions on top. The contrast of their sweetness against the savory broth is what makes this addition so special. Serve immediately while everything is piping hot.
Tips and Common Mistakes
Perfect caramelized onions for ramen take patience, but these insights will help you avoid common pitfalls and achieve that deep, sweet flavor every time.
The Slice Matters: When cutting your onions in Step 1, aim for ⅛-inch thick half-moons—thinner slices caramelize faster but risk burning, while thicker slices take too long to soften. Cutting from root to stem keeps the layers intact, which helps them break down evenly during the 45-60 minutes of cooking. Trust me, uniform slices make all the difference in texture.
Low and Slow is Non-Negotiable: In Step 2, maintaining medium-low heat is crucial. Higher heat might seem faster, but it burns the sugars before they caramelize properly. Stir every 5-10 minutes to prevent sticking, and if the onions start to dry out, add a splash of water to deglaze. The goal is a deep amber-brown color, not blackened bits.
Deglazing for Maximum Flavor: When you add the ¼ cup of liquid in Step 3, scrape the bottom of the pan thoroughly—those browned bits are packed with flavor. Let it simmer for the full 2-3 minutes until the liquid reduces by half. This step transforms good onions into extraordinary ones, adding complexity that will shine in your broth.
Timing in the Broth: Adding the onions during the last 10 minutes of cooking (Step 4) lets them infuse the broth without turning mushy. If you’re using a delicate broth like shio, this timing ensures they add richness without overpowering. Reserve some for garnish—the contrast of their sweetness against the savory broth is what makes this dish special.
Pro Tips for Onions In Ramen
- Perfect caramelized onions for ramen take patience, but these insights will help you avoid common pitfalls and achiev…
- The Slice Matters: When cutting your onions in Step 1, aim for ⅛-inch thick half-moons—thinner slices caramelize fast…
- Low and Slow is Non-Negotiable: In Step 2, maintaining medium-low heat is crucial. Higher heat might seem faster, but…
Frequently Asked Questions
Can I use raw onions in ramen instead of cooking them?
You can, but raw onions add sharpness rather than sweetness. For broth depth, always cook them—sautéed, caramelized, or simmered. Raw works best as a crispy garnish (thinly sliced red onions in ice water for 10 mins to mellow them). Avoid raw white/yellow onions—they’ll overpower your bowl!
How long should I caramelize onions for ramen broth?
Low and slow is key! Cook sliced onions in oil (or butter) on medium-low for 30–45 minutes, stirring occasionally, until deep golden brown. For broth, stop at light caramelization (20 mins) to avoid bitterness. Pro tip: Add a pinch of sugar to speed up the process!
What’s the best onion type for ramen—white, yellow, or red?
Yellow onions are the MVP—balanced sweetness and pungency for broth. Use:
- White onions: Sharper, better for quick pickles or garnishes.
- Red onions: Mild and pretty; great raw or lightly cooked.
- Shallots: Luxe option for delicate, aromatic broths.
My caramelized onions turned bitter—how do I fix my ramen broth?
Bitterness happens when onions burn or over-caramelize. Fix it by:
- Balancing with 1 tsp honey or mirin per cup of broth.
- Adding umami (soy sauce, miso, or bonito flakes) to distract taste buds.
- Diluting with extra stock or water (adjust seasoning after!).
Are there quick alternatives to caramelized onions for ramen?
Short on time? Try these hacks:
- Onion powder: Stir 1 tsp into broth for instant depth.
- Store-bought caramelized onions: Look for no-added-sugar versions.
- Sautéed onion paste: Blend cooked onions with oil, then freeze in cubes!
From sweet caramelized layers to bold raw bites, onions are the unsung heroes of ramen broth—adding depth, aroma, and that just-right complexity. 🧅✨ Whether you’re simmering them for hours or quick-pickling for a bright finish, a little extra effort with onions transforms good ramen into an unforgettable bowl.
Ready to level up your broth? Grab a fresh yellow onion and try our foolproof caramelizing trick—your next slurp might just be your best yet! 🍜💛

Trained in classic French technique but raised on slow-cooked ribs and spicy rubs, she blends culinary skill with smoke and soul.
- Recipe for Boneless Pork Chops in Cast Iron Skillet: Sear and Baste to Juicy Perfection - October 3, 2026
- Recipe for Boneless Cross Rib Roast: Slow-Roasted Beef with Herb Crust - October 3, 2026
- Hamburgers in Sauce Recipe Crock Pot: Slow-Cooked Savory Delight - October 3, 2026