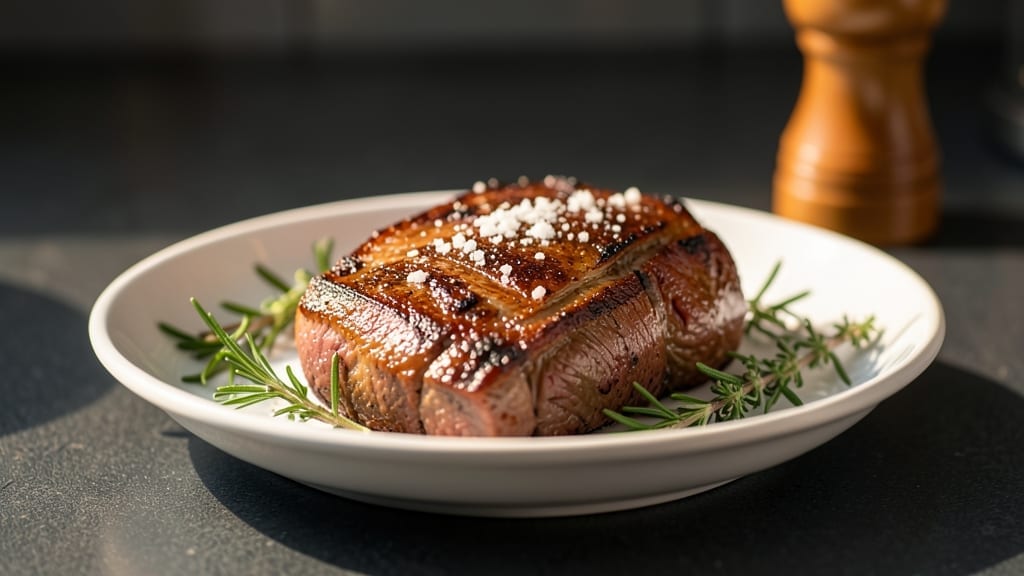
Mastering oven-baked beef brisket delivers restaurant-quality tenderness without needing a smoker—just precise technique and patience. 🔥 I developed this method after years of testing, perfecting the balance between high heat and slow cooking to transform tough cuts into melt-in-your-mouth perfection.
The secret lies in the slow oven roast and proper resting, which breaks down collagen for that signature fall-apart texture.
This recipe starts with a simple dry rub that enhances flavor without overpowering the beef’s natural richness. Unlike traditional smoker methods, we rely on indirect oven heat and strategic basting to keep the meat moist while developing deep, smoky notes.
The process takes about 6 hours but requires minimal active time, making it ideal for weekend cooking projects.
By the time you pull it from the oven, you’ll have brisket that practically dissolves at the touch of a fork—juicy, flavorful, and ready to slice against the grain.
The key to success is maintaining a consistent internal temperature of 145°F and letting it rest for at least 30 minutes before serving. This ensures every bite is tender and full of flavor.
Pair with classic sides like roasted potatoes or tangy coleslaw to complete the meal. The beauty of this method is its adaptability—whether you’re feeding a crowd or meal prepping for the week, this brisket delivers professional results at home. Let’s get started!
Ingredients for oven baked beef brisket
Thirteen simple ingredients transform tough brisket into melt-in-your-mouth perfection—no smoker required.
| Ingredient | Amount | Notes |
|---|---|---|
| Beef Brisket 🥩 | 4 lb | Whole packer cut, fat cap intact |
| Yellow Onion 🧅 | 1 whole | Large, sliced into rings |
| Garlic Cloves 🧄 | 8 cloves | Peeled, smashed for rub |
| Kosher Salt 🧂 | 2 tbsp | Diamond Crystal preferred |
| Black Peppercorns 🌶️ | 1 tbsp | Freshly cracked |
| Smoked Paprika 🌶️ | 1 tbsp | High-quality, not cayenne |
| Ground Cumin 🌿 | 1 tbsp | Toasted for depth |
| Brown Sugar 🍯 | 1 tbsp | Light or dark |
| Apple Cider Vinegar 🍎 | 2 tbsp | For basting liquid |
| Beef Broth 🍲 | 1 cup | Low-sodium, homemade preferred |
| Unsalted Butter 🧈 | ½ cup | Cold, cubed for basting |
| Fresh Thyme 🌿 | 4 sprigs | Stems removed for rub |
| Fresh Rosemary 🌿 | 2 sprigs | Needles only, chopped fine |
[recipe_ingredient_scaler]
The brisket cut is everything—look for a whole packer cut with that thick fat cap intact. Costco or local butchers are your best bets for quality, but the regular supermarket packer cut works too. If you can’t find a whole brisket, two flat cuts (about 2 lbs each) will do in a pinch. The fat cap keeps the meat moist during cooking, so don’t trim it. For the spices, Penzeys or bulk bins at natural food stores guarantee freshness—ground spices lose potency fast. Toast your cumin seeds in a dry pan for 30 seconds before grinding for that nutty depth.
No smoked paprika? Regular paprika plus a pinch of liquid smoke (½ tsp) gets you close. Fresh herbs wilt fast, so dried thyme and rosemary work at one-third the amount if needed. The vinegar in the basting liquid can be swapped for beef broth if you prefer less tang. For the butter, full-fat is non-negotiable—low-fat versions won’t create that rich basting sauce. If you’re prepping ahead, make the dry rub 24 hours early and store it in an airtight container to let the spices meld. The beef broth? Homemade is ideal, but low-sodium store-bought saves time.
Brisket reheats beautifully—wrap tightly in foil and bake at 300°F for 1-2 hours until warmed through. For leftovers, slice against the grain and store in portions for easy meal prep. The dry rub keeps for 3 months in a sealed container, while fresh herbs should be used within 5 days. Freeze the brisket raw for up to 6 months if prepping ahead. Pro tip: Save the basting liquid drippings—reduce them for a quick pan sauce. This brisket tastes even better the next day as the flavors deepen.
Why You’ll Love This Recipe
- I’ll be real: this brisket is so good, you’ll have leftovers—and they’re better the next day. Slice it thin against the grain, and you’ve got a sandwich filling that’s basically edible glue. Pack it in a container with the leftover basting liquid, and it stays moist for days. My kids even ask for it in their lunches. (Yes, even on a Tuesday night.)
- One-Pan Magic: The beauty of this brisket? It’s all about minimal cleanup—just one Dutch oven, a spatula, and the juices left behind. No extra pots or pans, just that deep, smoky flavor from the garlic, thyme, and rosemary clinging to the meat while the yellow onion caramelizes in the same skillet. Honestly, the only thing you’ll scrub is your conscience for not making it sooner.
- Fork-Tender Perfection: This isn’t your average tough brisket—it’s the kind that falls apart at the slightest touch. The secret? Cooking it low and slow at 300°F for 3 hours, then cranking up the heat with ½ cup cold butter for that perfect crust. The smoked paprika and toasted cumin add a depth that makes every bite sing, and the apple cider vinegar in the basting liquid? It cuts through the richness just enough to keep it from being heavy. Chef’s kiss.
- Leftovers That Outshine the Main: I’ll be real: this brisket is so good, you’ll have leftovers—and they’re better the next day. Slice it thin against the grain, and you’ve got a sandwich filling that’s basically edible glue. Pack it in a container with the leftover basting liquid, and it stays moist for days. My kids even ask for it in their lunches. (Yes, even on a Tuesday night.)
Step-by-step instructions for oven baked beef brisket
Here’s the foolproof method I use to transform a tough brisket into melt-in-your-mouth perfection.
👨🍳 Step 1: Prepare the Dry Rub and Season the Brisket
In a small bowl, combine the 2 tbsp kosher salt, 1 tbsp freshly cracked black peppercorns, 1 tbsp smoked paprika, 1 tbsp toasted ground cumin, and 1 tbsp brown sugar. This blend creates the perfect balance of savory, smoky, and slightly sweet flavors that penetrate the meat.
Remove the 4 lb beef brisket from packaging and pat it completely dry with paper towels—this is crucial for developing that beautiful crust. Generously coat all sides with the dry rub mixture, pressing it firmly into the meat so it adheres well. Pay special attention to the fat cap, which will render down during cooking and baste the meat.
For the aromatics, place the 8 peeled garlic cloves in a small bowl and crush them with the flat side of a knife. Add the 4 sprigs fresh thyme and 2 sprigs fresh rosemary (needles only, finely chopped) to the crushed garlic. This aromatic blend will infuse the brisket with deep, herbal notes as it cooks.
🔥 Step 2: Sear the Brisket and Create the Basting Liquid
Preheat your oven to 300°F. While the oven heats, place the rubbed brisket fat-side down in a large oven-safe skillet or Dutch oven. Heat the skillet over medium-high heat for 5 minutes until it’s very hot—you should see the fat begin to render and sizzle.
Carefully transfer the skillet to the preheated oven. In the same skillet, add the 1 yellow onion (sliced into rings) and cook for 3 minutes until softened. Remove the onion and set it aside, then add 2 tbsp apple cider vinegar and 1 cup beef broth to the skillet, scraping up all the browned bits from the bottom. This liquid will become your basting sauce.
Return the skillet to the oven and pour the basting liquid evenly over the brisket. The liquid should cover about half of the brisket’s surface—this ensures moisture without steaming the meat. Cover the skillet loosely with foil, leaving a small gap for steam to escape.
⏰ Step 3: Braise Low and Slow for Maximum Tenderness
Cook the brisket for 3 hours at 300°F, basting it every 45 minutes with the accumulated juices in the skillet. Here’s the thing—this low-and-slow approach breaks down the tough connective tissues, transforming them into gelatin that makes the meat fall apart with just a fork.
After 3 hours, remove the foil and increase the oven temperature to 325°F. Add the ½ cup unsalted butter (cubed) to the skillet and let it melt over 10 minutes. The butter will baste the brisket, adding richness and helping to develop a caramelized crust. Baste the brisket again with the butter and juices, then return it to the oven uncovered.
Continue cooking for another 1.5 to 2 hours until the internal temperature reaches 200-205°F (use a meat thermometer inserted into the thickest part of the meat, avoiding the fat). The brisket should be fork-tender, with a deep mahogany crust. If the liquid in the skillet reduces too much, add a splash of water or broth to prevent drying.
🍽️ Step 4: Rest and Slice for Serving
Once the brisket reaches the target temperature, remove it from the oven and transfer it to a cutting board. Tent loosely with foil and let it rest for at least 30 minutes (I prefer 1 hour if possible). This resting period allows the juices to redistribute throughout the meat, ensuring every slice is moist and flavorful.
To slice, locate the grain direction—you’ll see lines running through the meat. Using a sharp carving knife, slice the brisket against the grain into ¼-inch thick slices. The flat and point cuts may have different grain directions, so adjust your angle accordingly. Serve the brisket with the reserved basting liquid (strain if desired) and the caramelized onions on the side.
Each slice should be tender enough to pull apart with a gentle tug, with a rich, caramelized crust on the outside and a deep, smoky flavor throughout. The aromatics from the garlic, thyme, and rosemary will infuse every bite, making this brisket a showstopper for any meal.
Pro Tips For Making Oven Baked Beef Brisket
- Sear Until It Sizzles: That 5-minute sear isn’t just about color—it’s about rendering fat and locking in flavor. If your skillet isn’t hot enough that the fat cap actively bubbles within 30 seconds, crank the heat higher and wait another minute. I’ve learned the hard way that a lukewarm start means a bland, greasy brisket instead of that deep, caramelized crust you’re after.
- Don’t Skip the Butter Baste: After 3 hours, when you add the ½ cup cold cubed butter, resist the urge to rush. Let those cubes melt slowly for 10 minutes—this isn’t just basting, it’s building a glossy, golden seal on the meat. I used to dump it all at once, and the butter would just pool instead of creating that restaurant-quality sheen.
- Check the Grain, Then Slice: The flat cut and point cut have different grain directions, and slicing against it is the only way to get that melt-in-your-mouth texture. If you’re unsure, run your fingers along the meat—you’ll feel the muscle fibers. Cutting with them (not against) means tough, chewy slices, and nobody wants that after all that slow cooking.
- Toast That Cumin First: That 1 tbsp of ground cumin? Toast it in a dry pan for 30 seconds until fragrant—it’s the difference between a background spice and a flavor that pops. I was skeptical until I tried it; now I never skip it. The toasted version adds depth that raw cumin just can’t match.
Essential equipment for great oven baked beef brisket
Your Trusty Dutch Oven
This is the star of your brisket show—no fancy equipment needed, just a good Dutch oven (I use my Le Creuset 5-quart, but a Lodge cast iron works just as well). The thick walls distribute heat evenly and retain moisture, which is critical for that perfect braise.
If you don’t have one, a heavy oven-safe skillet will do, but you’ll need to check it more often. 🔥
Precision Thermometer
Invest in a digital meat thermometer—I swear by my ThermoWorks Smoke probe thermometer. It’s the only way to guarantee that 200-205°F internal temperature without overcooking.
I’ve learned the hard way that guessing leads to dry brisket. Pro tip: Use the instant-read version for checking the oven temperature too—it’s a game-changer.
Heavy-Duty Aluminum Foil
Regular foil won’t hold up to the heat and moisture. I use heavy-duty Reynolds Wrap to cover the brisket during the first 3 hours of cooking. It traps steam perfectly and keeps the oven clean.
When you switch to the butter basting phase, foil becomes your best friend for wrapping leftovers too—it keeps everything moist for days.
Sharp Carving Knife
Nothing ruins a perfect brisket like a dull knife. I use my Dexter-Russell 12-inch carving knife to slice against the grain. If that’s too pricey, a good Wüsthof or Victorinox chef’s knife will work in a pinch.
Trust me, a sharp blade makes all the difference when you’re trying to get those perfect ¼-inch slices.
Wire Rack and Baking Sheet
For resting your brisket, a wire rack placed over a baking sheet is essential. It elevates the meat so air can circulate, keeping it warm while redistributing those juices.
I keep mine in the oven while the meat rests—no need to move it around. This setup also makes cleanup a breeze compared to foil-wrapped resting.
Basting Brush
A good heat-resistant silicone basting brush (like the OXO Good Grips one) makes basting so much easier. I use it to spread the butter and juices evenly over the brisket during the final cooking phase. The silicone won’t melt like regular brushes, and it’s dishwasher-safe—perfect for post-cooking cleanup. 💡
Nutrition facts
Frequently asked questions
Why does my brisket need such a long cooking time?
The 6-hour process breaks down tough collagen fibers into gelatin, creating that signature fall-apart texture. This low-and-slow method transforms the brisket from chewy to melt-in-your-mouth perfection by converting connective tissue into moisture and flavor. Skipping this step would leave you with dry, tough meat—no matter how well-seasoned!
Can I skip the resting period after cooking?
Absolutely not! The 30-minute rest is critical—it lets juices redistribute so every slice stays moist. Skipping it means dry edges and uneven flavor. I’ve learned this the hard way after impatiently slicing too soon. Trust me, the wait makes the brisket worth it!
What if my oven temperature fluctuates during cooking?
Use an instant-read thermometer to check your oven’s actual temperature—many ovens run hot or cold. If it’s off by 25°F or more, adjust accordingly. For example, if your oven runs 30°F hotter than set, reduce the target temperature by that amount. Consistency is key for perfect doneness!
Can I use a different cut of beef if I can’t find brisket?
Not ideal, but you could use a chuck roast (about 3-4 lbs) as a substitute. It’s slightly leaner but will still benefit from the same method. Just expect slightly less fat rendering during cooking. For best results, stick with the brisket—it’s designed for this treatment!
How do I know when the brisket is done?
Use a meat thermometer to check the thickest part of the meat—it should reach 200-205°F. The meat should also be fork-tender when pressed. If it’s still firm at this temperature, continue cooking another 30 minutes and check again. Patience ensures perfect results every time!

Trained in classic French technique but raised on slow-cooked ribs and spicy rubs, she blends culinary skill with smoke and soul.
- Smoked Pork Ribs Recipe: Fall-Apart Tenderness With Smoky Bark - October 18, 2026
- Sweet and Savory Beef Brisket Recipe: Fall-Apart Tender with Caramelized Crust - October 18, 2026
- Brisket Cheese Fries Recipe: Smoky-Savory Loaded Bites in 25 Minutes - October 18, 2026