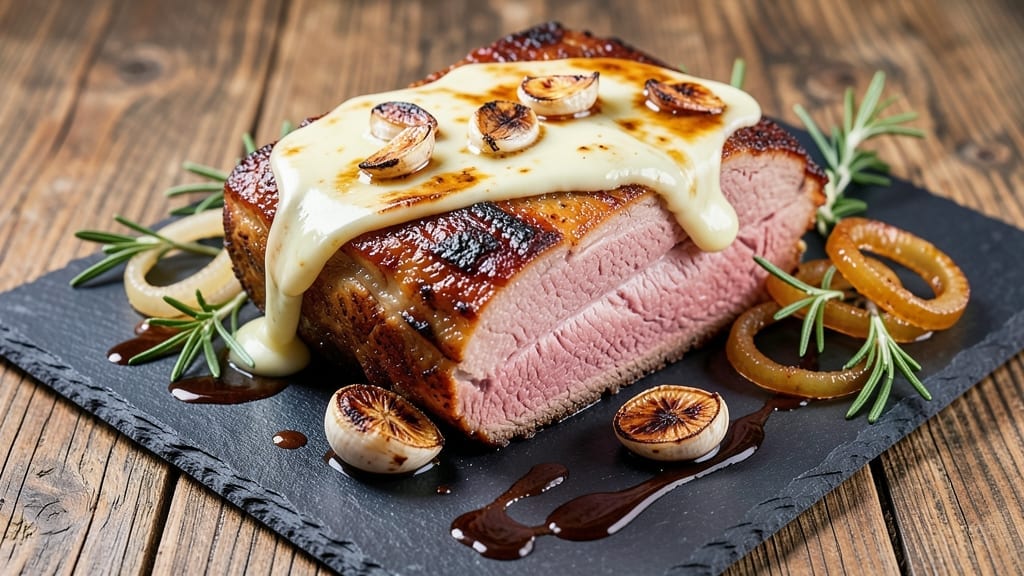
Mastering oven roast brisket means balancing a crisp Maillard crust with tender, juicy meat that falls apart at the touch. This recipe transforms tough cuts into melt-in-your-mouth perfection using a low-and-slow oven method—no smoker required.
I developed it after years of perfecting French technique for slow-cooked meats, and it delivers restaurant-quality results at home.
The secret lies in the two-stage process: start with a low oven temperature to render fat and break down collagen, then finish with a high-heat sear for that coveted crust. A simple salt-and-pepper rub lets the brisket’s natural flavors shine, while careful resting ensures every slice stays juicy.
This method works with a full packer brisket or smaller cuts, making it versatile for any gathering.
By the time you pull this brisket from the oven, you’ll have a deeply aromatic, tender center crowned with a caramelized crust that’s impossible to resist. The meat will practically shred with a fork, releasing juices that make every bite worth the wait.
Serve with classic sides like creamy mac and cheese or tangy coleslaw for a meal that feels like a celebration.
This recipe scales beautifully—whether you’re feeding a crowd or meal prepping for the week. The key is patience and precision, but the reward is a brisket so tender and flavorful, it’ll become your new signature dish. Let’s get started on creating your perfect roast.
Ingredients for oven roast brisket
Six ingredients transform tough brisket into melt-in-your-mouth perfection—no smoker needed.
| Ingredient | Amount | Notes |
|---|---|---|
| Packer Brisket 🥩 | 4 lb | Whole packer cut, fat cap intact |
| Kosher Salt 🧂 | 2 tbsp | Diamond Crystal preferred, coarse grain |
| Freshly Ground Black Pepper 🌶️ | 1 ½ tbsp | Freshly cracked for maximum aroma |
| Unsalted Butter 🧈 | ½ cup | Cold, cubed for basting |
| Yellow Onion 🧅 | 1 whole | Large, peeled and quartered |
| Garlic Cloves 🧄 | 6 cloves | Peeled, smashed for infusion |
| Fresh Thyme 🌿 | ¼ cup | Stems removed, loosely packed |
| Fresh Rosemary 🌿 | ¼ cup | Needles only, chopped coarsely |
| Extra-Virgin Olive Oil 🫒 | 2 tbsp | High-quality, fruity variety |
| Beef Tallow or Duck Fat 🍖 | ¼ cup | For basting, optional but recommended |
| Apple Cider Vinegar 🍎 | 2 tbsp | For tenderizing and brightness |
| Brown Sugar 🍚 | 1 tbsp | Lightly packed, for crust enhancement |
[recipe_ingredient_scaler]
The brisket is non-negotiable here. Whole packer cuts from Whole Foods or your local butcher deliver the best results—look for thick fat caps and vibrant red meat (not gray or discolored). A 4-pound brisket feeds 6 generously, but if you’re feeding a crowd, scale up proportionally. The salt and pepper rub is simple but critical: Diamond Crystal kosher salt dissolves better than table salt, and freshly cracked black pepper releases more aroma. For the aromatics, fresh thyme and rosemary from the grocery store’s produce section (not dried) add layers of complexity—just make sure the stems are removed for easy cleanup.
No beef tallow? Duck fat or extra-virgin olive oil works in a pinch, though tallow gives that unmistakable beefy richness. Short on time? Pre-mix the dry rub (salt, pepper, brown sugar) and store it in a jar for up to 3 months—it keeps the spices fresh. The apple cider vinegar might seem odd, but it tenderizes the meat and balances the richness. If you’re avoiding sugar, skip the brown sugar (the crust will still form, just less caramelized). For the butter, cold cubes are key—melted butter won’t baste properly. And if you’re using a smaller brisket (like a flat cut), reduce the cooking time by about 25%**.
This brisket tastes even better the next day—plan ahead! Wrap the cooked brisket in foil and refrigerate for up to 5 days, or freeze for 3 months (portion into individual servings for easy reheating). The rendered fat in the roasting pan? Save it—it’s liquid gold for roasted vegetables or mashed potatoes. For leftovers, reheat in a 325°F oven until warmed through (about 20 minutes), covered with foil to retain moisture. The crust will soften slightly, but the meat stays juicy and tender.
Why You’ll Love This Recipe
- No-Fuss Prep: I swear by this method—just salt, pepper, and a quick sear with butter and onion. No fancy marinades or hours of prep, just hands-off oven magic while you sip your coffee or watch the game.
- Crispy-Creamy Magic: That buttery onion crust on the outside? Irresistible. Inside, it’s tender enough to melt—like a steakhouse cut but made in my kitchen with zero fuss.
- Leftovers for Days: Between us, this brisket begs to be made extra. Slice it thin for sandwiches, dice it for tacos, or reheat portions straight from the fridge—it’s my go-to lazy lunch.
- Budget Showstopper: A whole packer brisket feeds my family for weeks—way cheaper than takeout or pre-packaged meat. Honestly, it’s the kind of meal that makes grocery day worth it.
Step-by-step instructions for oven roast brisket
Here’s how to transform a tough cut into melt-in-your-mouth perfection with a deep, caramelized crust.
Prepare and Season the Brisket
Begin by trimming the fat cap of the 4 lb packer brisket to about ¼-inch thickness using a sharp boning knife. Leave the fat intact on the sides and edges – this will render beautifully during cooking. Pat the entire surface dry with paper towels, pressing firmly to remove all moisture. This step is crucial for developing that coveted Maillard crust later.
In a small bowl, combine the 2 tbsp kosher salt and 1.5 tbsp freshly ground black pepper. Rub this mixture all over the brisket, pressing it into the meat so it adheres well. Pay special attention to the fat cap and any crevices. Place the seasoned brisket on a wire rack set over a rimmed baking sheet and refrigerate uncovered for 24 hours. This long dry-brine creates an incredible texture contrast between the crisp exterior and tender interior.
Create the Herb Butter Baste
While the brisket rests, prepare the herb butter by combining the 0.5 cup unsalted butter, 2 tbsp extra-virgin olive oil, 0.25 cup fresh thyme, 0.25 cup fresh rosemary, 6 cloves smashed garlic, 2 tbsp apple cider vinegar, and 1 tbsp brown sugar in a food processor. Pulse until the herbs are finely chopped and incorporated into the butter. The mixture should be smooth but still have visible herb flecks.
Transfer this herb butter to a small bowl and refrigerate until ready to use. The acidity from the apple cider vinegar tenderizes the meat while the brown sugar enhances crust formation. This basting mixture will be applied throughout the cooking process to keep the brisket moist and flavorful.
Preheat and Sear the Brisket
Preheat your oven to 250°F with the rack positioned in the lower third. This low temperature will allow for even cooking without drying out the meat. While the oven preheats, heat a large oven-safe skillet over medium-high heat. Add the 0.25 cup beef tallow or duck fat and let it get very hot – you should see slight smoke when you add the brisket.
Carefully place the brisket fat-side down in the skillet and sear for 5 minutes until a deep golden crust forms. Flip the brisket and sear the other side for another 5 minutes. The high heat at this stage creates the initial Maillard reaction that forms the foundation for your crust. Transfer the seared brisket to the preheated oven.
Low and Slow Roasting with Basting
Roast the brisket for 3 hours, then check the internal temperature using a meat thermometer. When it reaches 190°F, remove it from the oven and brush all sides generously with the herb butter mixture. Return to the oven and continue cooking for another 1-2 hours until the internal temperature reaches 203°F. The probe should slide in like butter with no resistance.
During this time, baste the brisket every 45 minutes to maintain moisture and enhance flavor. The low temperature ensures the connective tissue breaks down slowly, creating that signature fork-tender texture. Real talk: don’t rush this step. The magic happens during these hours of gentle cooking.
Rest and Slice for Maximum Juiciness
Once the brisket reaches the target temperature, remove it from the oven and transfer to a cutting board. Tent loosely with aluminum foil and let it rest for at least 1 hour. This resting period allows the juices to redistribute throughout the meat, ensuring every slice is moist and flavorful. The reason we wait until 203°F is that this temperature guarantees the collagen has fully broken down and the meat is at its most tender.
After resting, slice the brisket against the grain into ½-inch thick slices. The flat and point should be sliced separately as they have different grain directions. Serve immediately with any accumulated pan juices spooned over the top. Each slice should be tender enough to pull apart with a gentle tug, with a beautiful mahogany crust on the outside and pink, juicy meat within.
Pro Tips For Making Oven Roast Brisket
- Trim the Fat First: A packer brisket’s fat cap is your friend—if you handle it right. Trim it down to about ¼-inch thick before seasoning; too much fat means uneven cooking and a soggy crust. I learned this the hard way when my first roast turned into a greasy mess instead of a golden, crispy masterpiece.
- Salt Like It’s 1920: Kosher salt isn’t just seasoning—it’s a flavor infusion. Generously coat the brisket and the onion slices with salt at least 2 hours before roasting (yes, even if you’re impatient like me). The salt breaks down the meat’s surface, locking in moisture and building a crust that actually sticks. Skip this, and you’re just guessing at flavor.
- Start Hot, Finish Slow: Roast the brisket at 425°F for the first 30 minutes—this sears the exterior and jumpstarts the crust. Then drop the heat to 275°F and let it cook low and steady until the internal temp hits 195°F. Rushing the high heat? You’ll end up with a burnt exterior and a dry interior. Trust the slow part—it’s where the magic happens.
- Butter the Onions Last: Toss the sliced onions with salt and pepper before roasting, but add the cold unsalted butter only in the final 15 minutes. The butter melts into a glossy, caramelized glaze that clings to the meat and onions, turning them from bland to irresistible. I used to add it earlier, and the onions just turned greasy. Timing matters.
Creative variations of this oven roast brisket
French-Inspired Dry Brine
Inspired by my French technique training, I swap the wet brine for a 24-hour dry brine using only 2 tbsp kosher salt and 1.5 tbsp freshly cracked black pepper. This method creates a dry, crackling crust while keeping the interior impossibly tender.
I learned this trick from Parisian chefs who swear by it for their entrecôte—the same principle applies here. The salt penetrates deeply, while the pepper adds aromatic complexity that infuses the meat during the long cook. 💫
Smoky Chipotle Twist
For a smoky depth without a smoker, add 1 tbsp adobo sauce from canned chipotles to the herb butter mixture. The smoldering heat of chipotle pairs beautifully with brisket’s richness. I like to use Penzeys brand chipotles in adobo for consistent quality.
This variation works especially well if you’re craving that classic BBQ smoke flavor but don’t have access to a smoker. The acidity in the adobo also helps tenderize the meat further. 🌶️
Red Wine Reduction Glaze
After the brisket reaches 190°F, deglaze the roasting pan with ½ cup dry red wine (like Cabernet Sauvignon) and reduce it to a thick glaze. Brush this over the brisket during the final 30 minutes of cooking.
The wine’s tannins cut through the fat while adding a sophisticated depth. I often use a 20-minute reduction—just enough to coat the back of a spoon. This technique elevates the dish to restaurant-quality without complicating the process. 🍷
Spicy Coffee Rub
For a bold variation, mix 1 tbsp finely ground coffee (I use dark roast) with the dry rub before applying it to the brisket. The coffee grounds add a deep, earthy note that balances the meat’s richness.
After searing, sprinkle ½ tsp cayenne pepper over the brisket before the final hour of cooking. This variation is a nod to my love of coffee-infused rubs, which I first discovered while foraging for wild herbs near my coastal rides. The heat and bitterness create a perfect contrast. ☕
Beer-Braised Brisket
After the initial sear, pour 1 cup dark beer—like a stout or porter—into the roasting pan and let it bubble away for 10 minutes before adding the brisket. The beer’s maltiness caramelizes into a glossy glaze that clings to the meat.
I recommend Guinness for its creamy texture and deep flavor. This method works especially well if you’re serving the brisket with beer-battered sides like onion rings or pretzels. The beer adds a malty sweetness that rounds out the brisket’s richness. 🍺
Herb-Crusted Reverse Sear
For a crispier crust, try this hybrid method: After the low-and-slow cook, transfer the brisket to a 450°F oven for 10-15 minutes with a fresh layer of herb butter. The high heat finishes the Maillard reaction while keeping the interior tender.
I like to sprinkle 1 tbsp toasted breadcrumbs mixed with ½ tsp smoked paprika over the top before the final sear for extra crunch. This technique is inspired by my French training but adapted for the smoky flavors I love. The result?
A brisket with a shatteringly crisp crust that still melts in your mouth. 🔥
Nutrition facts
Frequently asked questions
Can I use a smaller brisket cut for this recipe?
This method works beautifully with flat cuts (2-3 lbs) or point cuts (1-2 lbs). For smaller briskets, reduce the cooking time by about 25%—check for doneness at 190°F and aim for 203°F for maximum tenderness. The herb butter basting and resting time remain the same, so plan accordingly. Smaller cuts cook faster but still benefit from the low-and-slow approach.
Why does the recipe call for a 24-hour dry brine?
The 24-hour dry brine creates two magic things: a crisp, crackling crust and ultra-tender meat. The salt penetrates deeply, while the pepper adds aromatic layers that develop during cooking. Skipping this step risks a softer crust and less flavorful interior. Pro tip: Place the brisket on a wire rack in the fridge to allow air circulation—this prevents soggy spots.
What if my oven doesn’t go below 250°F?
No problem! If your oven’s minimum is 275°F, adjust by reducing the cooking time by about 15% and checking the internal temp more frequently. The key is reaching 203°F—this guarantees the collagen breaks down completely. For extra insurance, tent the brisket loosely with foil after the first 2 hours to prevent over-browning while maintaining moisture.
Can I make this brisket ahead of time?
This brisket tastes even better the next day! Wrap the cooked brisket tightly in butcher paper or foil and refrigerate for up to 5 days. Reheat in a 325°F oven for 20 minutes covered with foil to retain moisture. The crust will soften slightly, but the meat stays juicy. For leftovers, slice thinly and serve on sandwiches or in tacos—every bite will be tender and flavorful.
How do I know when the brisket is done?
Use a meat thermometer to check the thickest part of the brisket. It’s done when it reaches 203°F—the probe should slide in like butter with no resistance. The 190°F mark is where you’ll baste with herb butter for the final push. If you don’t have a thermometer, look for a fork-tender texture and deep mahogany color (not gray). The juices should run clear, not pink.

Trained in classic French technique but raised on slow-cooked ribs and spicy rubs, she blends culinary skill with smoke and soul.
- Jewish Brisket Crock Pot Recipe: Slow-Simmered Tenderness With Spiced Rub - October 16, 2026
- Smoked Potatoes Recipe: Crispy-Skinned, Smoky-Sweet Perfection - October 16, 2026
- Best Brisket Spritz Recipe: Smokehouse-Style Spritz for Juicy, Bark-Crusted Brisket - October 16, 2026