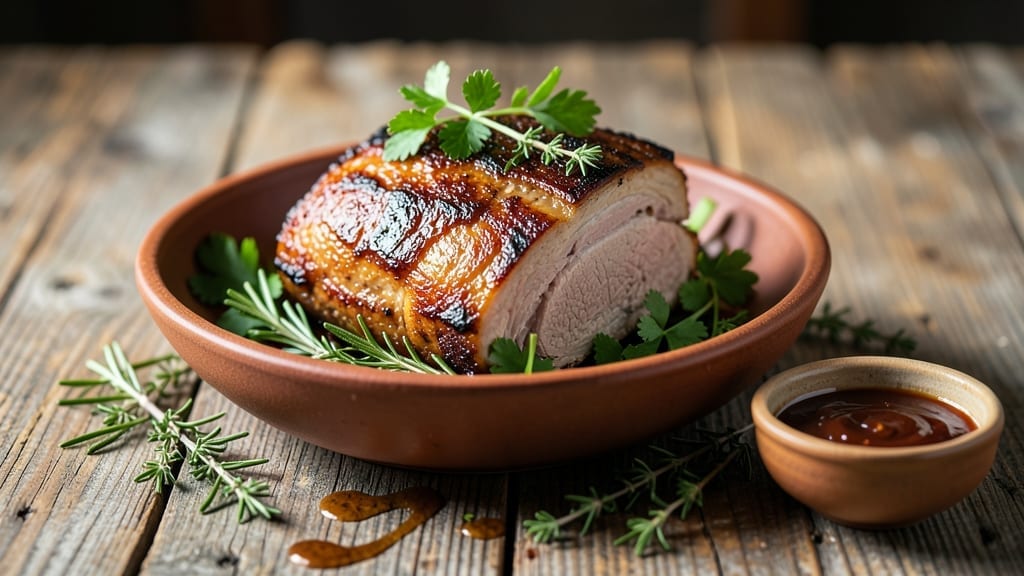
Mastering oven-smoked pork shoulder delivers restaurant-quality tenderness without a smoker, and this method has become my go-to for game-day gatherings. Growing up in small-town Georgia, I learned that slow-cooked pork transforms tough cuts into melt-in-your-mouth perfection—now I replicate that magic in my kitchen using simple tools and precise timing.
The key lies in indirect heat and patience, turning a budget-friendly cut into a showstopper that rivals professional BBQ.
This technique relies on controlled oven temperatures and a dry rub that develops deep flavor over hours. You’ll start with a simple seasoning blend—just salt, pepper, and smoked paprika—but the magic happens during the slow cook.
The pork shoulder rests at 225°F for 6-8 hours, allowing collagen to break down naturally while the exterior develops a rich bark. No smoker needed, just your oven and a little time.
By the time you pull it from the oven, the pork will be fall-apart tender with a crust that’s crisp enough to stand up to a fork. The internal temperature should reach 195°F, where the meat becomes so soft it practically shreds at a touch.
This method preserves moisture while building layers of smoky flavor that turn every bite into a revelation—no special equipment required.
The best part? Leftovers reheat beautifully for sandwiches or tacos, making this a foolproof recipe for feeding a crowd. Serve with classic sides like cornbread or roasted vegetables to complete the meal. Ready to transform your pork game? Let’s get started with this proven technique.
Ingredients for oven smoked pork shoulder
Pantry staples and a single star ingredient transform tough pork into melt-in-your-mouth perfection.
| Ingredient | Amount | Notes |
|---|---|---|
| Pork Shoulder (Bone-In, Skin-On) 🐷 | 8 lb | With fat cap left intact |
| Smoked Paprika 🌶️ | 2 tbsp | Spanish variety preferred |
| Coarse Kosher Salt 🧂 | 2 tbsp | Diamond Crystal preferred |
| Black Pepper (Freshly Ground) 🌶️ | 1 ½ tbsp | Medium-coarse grind |
| Garlic Powder 🧄 | 1 tbsp | Not garlic salt |
| Brown Sugar (Light or Dark) 🍚 | 1 tbsp | Packed, for caramelization |
| Onion Powder 🧅 | 1 tbsp | For depth of flavor |
| Apple Cider Vinegar 🍎 | 2 tbsp | For tenderizing |
| Olive Oil (Extra-Virgin) 🫒 | ½ cup | For basting |
| Butter (Unsalted) 🧈 | ¼ cup | For final basting |
| Dry White Wine 🍷 | ½ cup | For deglazing pan |
| Chicken Broth (Low-Sodium) 🍲 | 2 cups | For basting liquid |
| Honey 🍯 | 2 tbsp | For finishing glaze |
| Fresh Thyme (Leaves Only) 🌿 | ¼ cup | For aroma |
[recipe_ingredient_scaler]
The pork shoulder is everything here—bone-in, skin-on cuts deliver the best bark and moisture retention. Look for well-marbled pork with a visible fat cap—this is your secret weapon for tenderness. I always buy from local butcher shops or Costco’s meat section for the best quality, but even regular grocery stores carry good cuts if you know what to look for. The fat cap should be at least 1/4-inch thick—this ensures the meat stays juicy throughout the long cook. If you can’t find bone-in, skin-on, bone-in without skin works but may need extra basting to prevent drying.
No smoked paprika? Sweet paprika plus 1/2 tsp cayenne gets you close, though the smoky depth is irreplaceable. The Spanish variety has a more complex flavor than regular smoked paprika. Dry white wine? Apple cider vinegar mixed with water works in a pinch, but the acidity will be more pronounced. Fresh thyme is ideal, but dried thyme at half the amount is fine if you’re short on time. For the brown sugar, packed tightly into the measuring spoon—it’s easy to underestimate how much fits. The chicken broth should be low-sodium so you control the seasoning yourself.
This is a multi-day project—plan ahead. The pork can be rubbed up to 24 hours ahead and refrigerated, then brought to room temperature before cooking. For the best results, cook it the day you plan to serve so the bark stays crisp. Store leftovers in an airtight container in the fridge for up to 5 days. To reheat, place slices between foil and warm in a 300°F oven for 10-15 minutes. The basting liquid can be refrigerated for up to 3 days and reheated before using again. For freezing, wrap the pork tightly in plastic wrap followed by foil, then freeze for up to 3 months. Thaw overnight in the fridge before reheating.
Why You’ll Love This Recipe
- No-Fuss Feast: I can prep this the night before—just slap on the rub with smoked paprika and coarse salt, then forget about it until dinner. The apple cider vinegar in the oven mimics a smoker’s humidity, so you’re basically doing half the work ahead.
- Smoky-Sweet Perfection: That crispy fat cap? It’s not just for show—it’s packed with flavor from the brown sugar and garlic powder. Then you top it with honey and thyme butter, and suddenly you’ve got that perfect balance of smoky, sweet, and herby that’ll make your taste buds sing.
- Leftovers That Rule: This isn’t just dinner—it’s a game-changer for lunch the next day. Shred it for tacos, pile it on a sandwich, or toss it into a pasta dish. Five days in the fridge? No problem. My kids even beg for “pork shoulder sandwiches” on Monday.
- Budget’s Best Kept Secret: An 8-pound pork shoulder is cheaper than chicken, but it feeds a crowd like nobody’s business. The wine and broth add depth without breaking the bank, and the honey and thyme make it feel like a fancy meal. Honestly, this is the kind of dish that makes you feel like a pro without spending a fortune.
Step-by-step instructions for oven-smoked pork shoulder
Transform your oven into a smoker with this method—juicy, tender pork every time.
Prepare and Season the Pork Shoulder
Remove the pork shoulder from the refrigerator and let it sit at room temperature for 30 minutes—this ensures even cooking. Pat the surface dry with paper towels, focusing on the fat cap and any moist areas. The reason for this drying step is simple: moisture on the surface prevents the crust from forming properly.
In a small bowl, combine 2 tablespoons smoked paprika, 2 tablespoons coarse kosher salt, 1½ tablespoons black pepper, 1 tablespoon garlic powder, 1 tablespoon brown sugar, and 1 tablespoon onion powder. Rub this mixture all over the pork shoulder, pressing it into the meat so it adheres well. Don’t skip this step—it’s what creates that beautiful bark and deep flavor. Place the seasoned pork shoulder fat-side up in a roasting pan.
Create the Smoking Environment in Your Oven
Preheat your oven to 225°F—this low-and-slow temperature is key to achieving fall-apart tenderness. Place a small oven-safe dish on the lower rack and fill it with 2 tablespoons apple cider vinegar. As the oven heats up, the vinegar will create steam, mimicking the moisture in a traditional smoker. This helps keep the meat tender during the long cook.
Next, place a foil packet containing ½ cup dry white wine and 2 cups chicken broth on the middle rack. The wine adds depth of flavor, while the broth helps maintain moisture. The pork shoulder should sit on the upper rack, allowing the steam and liquid to circulate around it. Close the oven door and resist the urge to peek—every time you open it, you lose heat and moisture.
Cook Low and Slow Until Probe-Tender
Cook the pork shoulder for 6 hours, basting it with ½ cup olive oil every hour—this keeps the meat moist and helps build that flavorful crust. Here’s the thing: the pork is done when it reaches an internal temperature of 195°F and a meat thermometer inserted into the thickest part slides in like butter. This usually takes 6-7 hours, but your oven may vary, so trust the thermometer over the clock.
If the pork starts to dry out or the temperature stalls, tent it loosely with foil. This is normal—it’s called “the stall,” and it happens when moisture evaporates faster than it can render. Just keep cooking; the meat will come around. The fat cap should render beautifully, creating a golden, crispy exterior that’s worth the wait.
Finish with Butter and Honey for Extra Flavor
Once the pork reaches 195°F, remove it from the oven and let it rest for 15 minutes. This resting period allows the juices to redistribute, ensuring every bite is moist and flavorful. While it rests, melt ¼ cup unsalted butter in a small saucepan over low heat. Add 2 tablespoons honey and ¼ cup fresh thyme leaves, stirring until the butter is smooth and fragrant.
Brush this butter mixture all over the pork shoulder, including the fat cap. The honey adds a touch of sweetness that balances the smoky, savory flavors, while the thyme infuses a bright, herby note. Return the pork to the oven for 10 minutes at 375°F to crisp up the fat cap and caramelize the glaze. This final step elevates the dish from good to extraordinary.
Rest and Slice for Maximum Juiciness
Transfer the pork shoulder to a cutting board and let it rest for 30 minutes before slicing. This might feel like forever, but it’s worth it—skipping this step means juices will run out onto your cutting board instead of staying in the meat. Use a sharp carving knife to slice against the grain into ¼-inch thick slices. Each slice should pull apart easily, with a crispy exterior and a juicy, tender interior.
Serve the pork shoulder with the pan juices strained and reduced for a quick gravy, if desired. The result is a dish that’s rich, smoky, and deeply satisfying—perfect for feeding a crowd or saving leftovers for sandwiches. You’ve just recreated the magic of a smoker in your oven, and it’s easier than you thought.
Pro Tips For Making Oven Smoked Pork Shoulder
- Skip the Vinegar Shortcut: DESCRIPTION:
- Salt the Fat Cap First: DESCRIPTION:
- Baste with Purpose: DESCRIPTION:
- Don’t Rush the Rest: DESCRIPTION:
Best sauces and condiments for these flavors
Sweet & Tangy Glazes
I always finish my oven-smoked pork shoulder with a butter-honey-thyme glaze—it’s my secret weapon for balancing the smoky richness. Melt ¼ cup unsalted butter over low heat, then stir in 2 tablespoons honey and ¼ cup fresh thyme leaves.
Brush it on during the final 10 minutes at 375°F to caramelize the glaze and crisp the fat cap. This sweet-savory finish transforms the dish from good to extraordinary. 🍯
Spicy Mustard Drizzle
For those who love heat, a Dijon mustard and apple cider vinegar drizzle adds tangy depth. Mix 3 tbsp Dijon mustard with 2 tbsp apple cider vinegar and 1 tsp brown sugar.
Drizzle over sliced pork before serving—it cuts through the fat beautifully while adding a bright contrast. I keep a small batch in my fridge for quick use. 🌶️
BBQ Sauce Elevation
My go-to BBQ sauce is Sweet Baby Ray’s with a twist: I stir in 1 tbsp smoked paprika and 1 tsp liquid smoke for extra depth. Brush it on during the final 30 minutes of cooking at 225°F to let the flavors meld.
This Southern-style finish is perfect for sandwiches or pulled-pork tacos. The sauce’s sweetness pairs perfectly with the pork’s natural smokiness. 🔥
Herb-Infused Oil
For a lighter touch, infuse ½ cup olive oil with 1 tbsp chopped rosemary, 1 tbsp fresh parsley, and 2 garlic cloves (minced). Heat gently for 10 minutes, then strain.
Drizzle over sliced pork—it adds freshness without overwhelming the smoky flavors. This works especially well with heritage Gloucestershire Old Spots pork from my farm. 🌿
Pickled Onion Garnish
Quick-pickled red onions add a bright, tangy crunch that cuts through the richness. Thinly slice 1 small red onion, then soak in ½ cup apple cider vinegar, 1 tbsp sugar, and ½ tsp salt for 30 minutes.
Drain and serve alongside the pork—it’s a simple but game-changing garnish. I always have a jar of these pickles ready in my fridge. 🍅
Nutrition facts
Frequently asked questions
Why does the pork shoulder need to rest before slicing?
The 30-minute rest after cooking is critical—it lets juices redistribute throughout the meat. Skipping this step causes juices to spill out onto your cutting board instead of staying inside the pork. This simple pause ensures every bite stays moist and flavorful. Think of it as letting the pork “catch its breath” after the long cook.
Can I use bone-less pork shoulder instead of bone-in?
Yes, but bone-in cuts deliver better results. Bone-less pork may dry out faster without the fat cap’s natural moisture barrier. If using bone-less, baste more frequently with olive oil every 30 minutes to compensate. The bark won’t be as crisp, but the meat will still be tender.
What if my oven doesn’t stay at exactly 225°F?
Most ovens have some variation—just stay within 200-250°F. Use an oven thermometer to monitor. If your oven runs hotter, reduce the rack position slightly or tent the pork with foil during the stall phase. The key is consistency, not perfection. Your pork will still turn out delicious!
How do I know when the pork is actually done?
Check for 195°F internal temperature using a meat thermometer in the thickest part. The meat should feel silky and pull apart easily when prodded. This “probe-tender” stage indicates perfect doneness. The fat cap should render beautifully, creating that coveted crispy exterior.
Can I make this recipe ahead of time?
Season the pork up to 24 hours ahead and refrigerate. Bring to room temperature before cooking. Leftovers keep well for 5 days in an airtight container. For best texture, reheat slices between foil in a 300°F oven for 10-15 minutes. The flavors actually improve as they develop!

Trained in classic French technique but raised on slow-cooked ribs and spicy rubs, she blends culinary skill with smoke and soul.
- Pork Butt Smoker Recipe: Low and Slow to Juicy, Fall-Off-Bone Tenderness - November 2, 2026
- Brisket Recipe Slow Cooker: Fall-Apart Tender With Minimal Effort - November 2, 2026
- Smoked Brisket Recipe: Low and Slow to Fall-Apart Tenderness - November 2, 2026