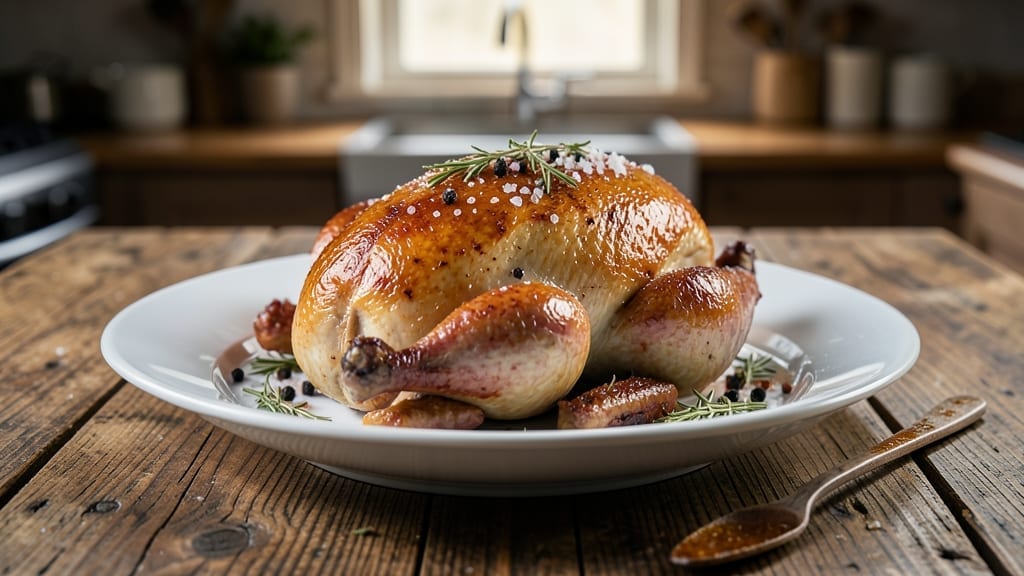
This oven smoked turkey recipe delivers restaurant-quality results without needing a smoker—just your kitchen oven and a few professional techniques. The secret lies in combining dry brining, precise temperature control, and careful basting to create a turkey with juicy breast meat and crispy golden skin.
I developed this method after years of perfecting smoked turkey for holiday tables, and it never fails to impress.
What makes this recipe special is the balance of simplicity and precision. You’ll start with a dry brine that seasons the turkey deeply from the inside out, then use a combination of roasting and indirect heat to mimic the slow smoke process.
The key is maintaining a consistent oven temperature and basting regularly to lock in moisture while building that perfect crust. This method works beautifully for a 12-14 pound turkey and takes about 3-4 hours total.
By the time you pull it from the oven, you’ll have a turkey that’s tender enough to slice with a fork and crispy enough to hold its shape.
The aroma alone will have everyone gathering at the table, and the first bite will confirm you’ve achieved that perfect balance of smoky flavor and succulent meat. The best part? No smoker required—just your home oven and these proven techniques.
This recipe works equally well for Thanksgiving, Christmas, or any special occasion when you want to serve a showstopping centerpiece. The same method can be adapted for smaller turkeys or even turkey breasts, making it versatile for any gathering. Let’s get started on creating your perfect holiday turkey.
Ingredients for oven smoked turkey
The perfect oven smoked turkey starts with just these essential ingredients. Nothing fancy—just quality staples that deliver restaurant-quality results.
| Ingredient | Amount | Notes |
|---|---|---|
| Fresh Whole Turkey 🦃 | 12 lb | 12-14 lb, thawed if frozen |
| Kosher Salt 🧂 | ½ cup | Coarse grain for dry brine |
| Black Peppercorns 🌶️ | 2 tbsp | Freshly cracked for depth |
| Garlic Cloves 🧄 | 12 cloves | Minced for rub mixture |
| Fresh Thyme Sprigs 🌿 | 1 tbsp | Leaves only, chopped fine |
| Fresh Rosemary Sprigs 🌿 | 1 tbsp | Needles only, chopped fine |
| Unsalted Butter 🧈 | 1 cup | Cold, cubed for basting |
| Apple Cider Vinegar 🍎 | ¼ cup | For basting liquid |
| Honey 🍯 | ½ cup | Light variety for glaze |
| Wood Smoking Chips 🌳 | 1 package | Hickory or applewood |
| Turkey Brine 🥫 | ½ cup | Store-bought or homemade |
| Fresh Sage Leaves 🌿 | ½ cup | Chopped for stuffing cavity |
| Lemon Juice 🍋 | ¼ cup | Freshly squeezed |
[recipe_ingredient_scaler]
The turkey size is everything here—12-14 pounds gives you that ideal balance of crispy skin and juicy meat. If you’re using a frozen turkey, thaw it in the fridge for 3-4 days (about 24 hours per 4-5 pounds). For the best flavor, grab a turkey from Whole Foods or a local butcher—they often have fresher birds than the big chain stores. The wood chips? Hickory gives classic smoky flavor, while applewood adds a sweeter note. Both work perfectly, so pick what you like best. Fresh herbs are a must—they make all the difference in that aromatic crust.
No fresh thyme or rosemary? Dried works at half the amount, but fresh is worth hunting down at Trader Joe’s or your local market. Running low on apple cider vinegar? White vinegar or lemon juice in a pinch, though apple cider adds that perfect tang. The butter should be cold and cubed for basting—don’t let it melt too soon, or you’ll lose that crispy skin. For the brine, I love Reynolds Turkey Brine for convenience, but homemade (water + salt + sugar) works just as well. The honey glaze? Substitute maple syrup if you’re avoiding honey, but the flavor will be slightly different. Every ingredient here plays a role—skip none!
Prep the turkey the night before for best results. Store it uncovered in the fridge 12-24 hours before cooking to help dry-brine the skin. The wood chips can be soaked in water for 30 minutes before using to create more smoke. Leftovers? This turkey reheats beautifully—just cover with foil and warm at 325°F for 20-30 minutes. The meat stays juicy for 3-4 days in the fridge or 3 months frozen. I always make extra—turkey sandwiches are my favorite next-day meal!
Why You’ll Love This Recipe
- No-Fuss Thanksgiving Prep: Honestly, this is the only turkey method I use now—no last-minute frantic basting or worrying about dry meat. The dry brine and slow smoke do all the work while you’re busy with guests, and that crispy skin? It’s practically foolproof.
- Smoky Sweet Perfection: Between the hickory smoke, honey glaze, and fresh sage in the cavity, this turkey hits all the right notes—savory, sweet, and just a little tangy. My kids still ask for seconds, even though they swear they’re “done with turkey.”
- Leftovers That Last: A 12-pound turkey means plenty of sandwiches, soups, and casseroles for days. I freeze half the meat right after carving—no sad, forgotten leftovers here. And the pan drippings? Perfect for gravy.
- Budget-Friendly Luxury: You’d think a smoky, glazed turkey would be pricey, but this recipe uses affordable staples like honey and wood chips to make it feel special. Plus, the dry brine and slow cook make it taste like you spent twice as much.
Step-by-step instructions for oven smoked turkey
Here’s how to transform your oven into a smoker for a showstopping turkey.
Prepare the Turkey for Maximum Flavor and Crisp
Remove the turkey from the refrigerator and let it sit at room temperature for 30 minutes before cooking. This ensures even cooking. Pat the turkey completely dry inside and out with paper towels—moisture is the enemy of crispy skin. I can’t stress this enough: dry skin is the secret to that perfect golden crust.
Next, create the dry brine by mixing the ½ cup kosher salt and 2 tablespoons black peppercorns (freshly cracked) in a small bowl. Rub this mixture all over the turkey, including inside the cavity. Let the turkey sit uncovered in the refrigerator for 12-24 hours—this step is what makes the skin crispy and the meat juicy. Don’t skip it, even if it seems like a long wait.
Create the Smoking Environment in Your Oven
Preheat your oven to 250°F with the wood smoking chips placed on the bottom rack. I like to use hickory or applewood chips for that classic smoky flavor. Place a roasting pan filled with ½ cup turkey brine on the middle rack to create steam and help keep the turkey moist. This setup mimics a smoker perfectly.
While the oven preheats, prepare the herb butter by mixing the 1 cup unsalted butter (cold and cubed) with the 12 minced garlic cloves, 1 tablespoon chopped fresh thyme sprigs, and 1 tablespoon chopped fresh rosemary sprigs. Roll this mixture into a log and wrap it in plastic wrap. This will be used to baste the turkey later and add incredible flavor.
Smoke the Turkey Low and Slow
Place the turkey on a rack in a roasting pan, breast-side up. Insert a meat thermometer into the thickest part of the thigh (not touching bone). Smoke the turkey for 3 hours at 250°F, basting it with the herb butter every 30 minutes. This slow cooking method is what creates that tender, juicy meat you’re after.
After 3 hours, increase the oven temperature to 325°F. This is when you’ll start to see the skin begin to crisp. Continue basting every 30 minutes with the herb butter, and check the internal temperature of the thickest part of the thigh. The turkey is done when it reaches 165°F. This usually takes another 2-3 hours, depending on the size of your turkey.
Add the Glaze for Extra Crisp and Shine
Once the turkey reaches 160°F, prepare the glaze by combining the ½ cup honey, ¼ cup apple cider vinegar, and ¼ cup lemon juice in a small saucepan. Bring to a simmer over medium heat and let it reduce for 5 minutes until it thickens slightly. You want a syrupy consistency that will caramelize beautifully on the turkey’s skin.
Brush the glaze generously over the turkey, focusing on the breast and any exposed areas. Return the turkey to the oven and roast for another 20-30 minutes at 325°F until the glaze caramelizes and the skin is deep golden brown. This final step is what gives your turkey that restaurant-quality shine and extra crispiness.
Rest and Serve for Maximum Juiciness
Remove the turkey from the oven and transfer it to a cutting board. Let it rest for 30 minutes before carving. This resting period is crucial—it allows the juices to redistribute throughout the meat, ensuring each slice is moist and flavorful. I know it’s hard to wait, but trust me, it’s worth it.
While the turkey rests, stuff the cavity with the ½ cup chopped fresh sage leaves for an aromatic finish. Tent the turkey loosely with foil to keep it warm. When ready to serve, carve the turkey and spoon any pan juices over the slices. The result is a turkey with crispy, caramelized skin and juicy, flavorful meat that will impress everyone at your table.
Pro Tips For Making Oven Smoked Turkey
- Don’t Rush the Dry Brine: I learned this the hard way—skipping the 12-24 hour dry brine with the ½ cup kosher salt and cracked peppercorns leaves you with skin that’s either soggy or over-salted. Trust me, the extra time makes the difference between a turkey that’s just good and one that’s unforgettable.
- Keep the Butter Cold: That 1 cup unsalted butter for basting? Don’t let it soften before mixing with the minced garlic, thyme, and rosemary. Cold cubes melt slower when basting, so you’re not drowning the turkey in liquid—just rich, flavorful fat that renders perfectly. (Yes, even if you’re impatient like me.)
- Watch the Glaze Timing: The honey-apple cider vinegar-lemon glaze needs to hit at 160°F, not earlier. Brush it on too soon, and you’ll steam the skin instead of caramelizing it. Five minutes of simmering that glaze is worth it—you want it syrupy enough to stick but still glossy enough to shine.
- Stuff Sage Last: After the turkey rests, stuff the cavity with those ½ cup chopped sage leaves—don’t do it earlier, or the heat will turn them bitter. A quick tuck right before serving keeps the aroma fresh and the flavor bright. (And yes, it’s worth the extra 30 seconds of waiting.)
Regional styles of oven smoked turkey
Southern Smoked Turkey
This method pays homage to my family’s backyard traditions where we’d slow-smoke turkeys over hickory for Sunday dinners. The key is using hickory wood chips and that classic Southern touch of sage and apple cider vinegar in the glaze.
I’ve found that adding a splash of hot sauce to the glaze (about 1 tbsp) gives it that signature kick you’d expect from a Southern spread. The result? A turkey with deep smoky flavor and just enough heat to make it unforgettable. 🌟
New England Herb-Crusted Turkey
Up north, they love their herbs—especially rosemary and thyme—and this style leans into that. After the dry brine, I press a layer of crushed dried herbs (mix 2 tbsp each) into the turkey’s skin before smoking. The oven’s heat releases their aromatic oils, creating a fragrant crust.
I also swap the honey glaze for a maple-mustard glaze (mix ½ cup maple syrup with 2 tbsp Dijon mustard and 1 tbsp apple cider vinegar), which pairs beautifully with the herb crust. This version is perfect for a chilly New England winter feast. ✨
Texas-Style Smoked Turkey
Down in Texas, we’re all about bold flavors and slow, low cooking. I adapt this recipe by using mesquite wood chips for a stronger, more assertive smoke flavor. After the initial 250°F smoke, I crank the oven to 350°F for the final hour to crisp the skin further.
For the glaze, I replace honey with pepper jelly (like Smucker’s) mixed with 1 tbsp hot sauce—this gives it that Texas twist with a sweet-and-spicy finish. The result? A turkey that’s as bold as the Lone Star State itself. 🔥
Pacific Northwest Wild Herb Turkey
In the Pacific Northwest, foraged herbs take center stage. I gather wild oregano, lemon verbena, and sea salt from my coastal foraging spots to infuse the turkey’s skin. The herb butter gets upgraded with 1 tbsp chopped wild oregano and a pinch of flaky sea salt (like Maldon).
For the glaze, I use local honey from a nearby apiary and add 1 tbsp lemon zest for a bright, citrusy finish. This method highlights the region’s fresh, earthy flavors while keeping the smoky richness intact. 🌿
French-Style Herb Butter Turkey
My French technique training shines here! I replace the applewood chips with cherry wood chips for a subtle, fruity smoke that complements the herbs. The herb butter becomes a classic French compound butter with 1 tbsp chopped tarragon and 1 tsp lemon zest added to the mix.
For the glaze, I use duxelles (finely chopped mushrooms sautéed with shallots) mixed with 1 tbsp brandy and a splash of red wine reduction. This version is elegant, sophisticated, and perfect for a dinner party. 💫
Nutrition facts
Frequently asked questions
Why does the dry brine step take so long?
The 12-24 hour dry brine is essential for two reasons: it seasons the turkey deeply from the inside out and ensures ultra-crispy skin. The salt penetrates the meat while the turkey sits uncovered, drawing out moisture from the surface—this creates the perfect environment for a golden, crispy crust when cooked. Skipping this step often results in dry skin and less flavorful meat. Trust the process!
Can I use regular salt instead of kosher salt for the dry brine?
Yes, you can use regular table salt, but you’ll need to reduce the amount to ⅔ cup instead of ½ cup since kosher salt is less dense. The key is to maintain the same total salt measurement—regular salt has more actual salt per volume, so less is needed. Just make sure it’s fully dissolved in the mixture for even distribution.
What if my turkey reaches 165°F before the skin is crispy enough?
If the turkey hits 165°F but the skin isn’t crispy, return it to the oven at 325°F uncovered for another 20-30 minutes to crisp. The residual heat will finish cooking the meat while crisping the skin. Alternatively, you can broil it for 5-10 minutes at the end, but watch closely to avoid burning. The key is patience—skin takes time to crisp properly!
Can I make the herb butter ahead of time?
Prepare the herb butter 1-2 days ahead and store it wrapped tightly in plastic wrap in the fridge. The flavors meld beautifully over time. Just make sure to bring it to room temperature before using so it’s easier to baste. This is one of those recipes where prepping ahead saves time on the big day.
What’s the best way to reheat leftovers?
Cover the turkey loosely with foil and warm it in the oven at 325°F for 20-30 minutes. This gentle heat keeps the meat moist and prevents drying out. If reheating in a microwave, use short bursts at 50% power and let it rest between intervals to redistribute heat. Always add a splash of water or pan juices to the container to maintain moisture.

Trained in classic French technique but raised on slow-cooked ribs and spicy rubs, she blends culinary skill with smoke and soul.
- Smoked Brisket Recipe: Low and Slow to Fall-Apart Tenderness - November 2, 2026
- Smoked Turkey Breast Recipe: Juicy Pink Center With Crispy Skin Every Time - November 2, 2026
- Leftover Smoked Pulled Pork Chili Recipe: Rustic Flavor Revival in One Pot - November 2, 2026