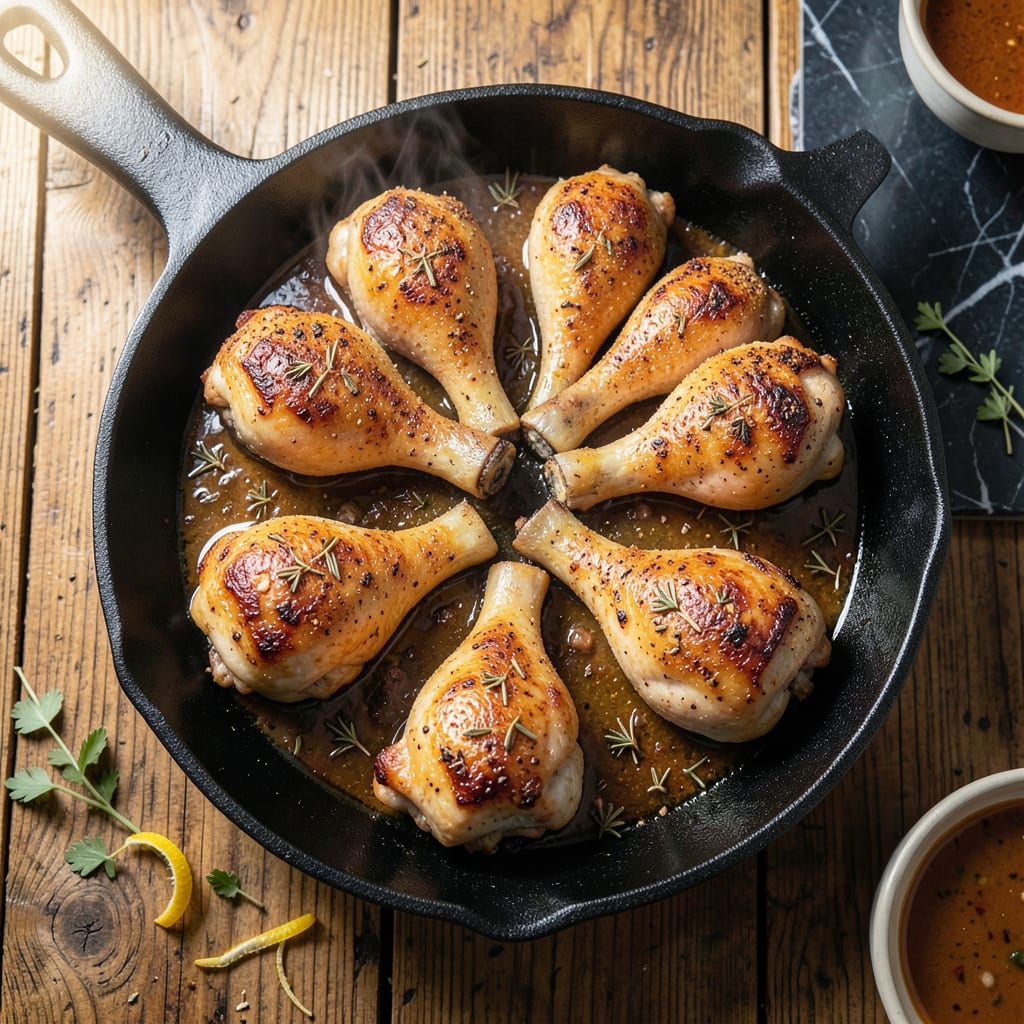
Achieving golden crispy skin and succulent meat in pan fried chicken legs requires precision, not luck. This method delivers restaurant-quality results with a simple yet foolproof technique.
The secret lies in the two-step cooking process: first searing the skin to render fat and create a crisp exterior, then finishing with gentle heat to cook the meat through without drying it out.
What emerges is chicken with shatteringly crisp skin that gives way to tender, juicy meat underneath. The seasoning is simple, allowing the natural flavor of the chicken to shine through.
Perfect for weeknight dinners or casual gatherings, this recipe proves that exceptional fried chicken doesn’t require deep frying or complicated techniques.
Ingredients for Pan Fried Chicken Legs
Precise ingredients for restaurant-quality pan fried chicken with shatteringly crisp skin and succulent meat every time.
| Ingredient | Amount | Notes |
|---|---|---|
| Chicken Legs 🍗 | 8 whole | Skin-on, bone-in, drumstick and thigh attached |
| Kosher Salt 🧂 | 1 ½ tbsp | Diamond Crystal preferred for even seasoning |
| Freshly Ground Black Pepper 🌶️ | 1 tsp | Coarse grind for texture |
| Garlic Powder 🧄 | 1 tsp | Not garlic salt for pure flavor |
| Onion Powder 🧅 | 1 tsp | Balances seasoning blend |
| Smoked Paprika 🌶️ | 1 tsp | Adds depth and color |
| Dried Thyme 🌿 | ½ tsp | Crushed between fingers to release oils |
| Dried Oregano 🍃 | ½ tsp | Mediterranean variety preferred |
| Cayenne Pepper 🔥 | ¼ tsp | Optional for subtle heat |
| All-Purpose Flour 🌾 | ½ cup | For light dusting for extra crisp |
| Neutral Oil 🫒 | ¼ cup | High smoke point, like avocado or vegetable |
| Unsalted Butter 🧈 | 2 tbsp | For basting and richness |
| Fresh Rosemary Sprigs 🌿 | 2 whole | Optional for aromatic basting |
| Fresh Thyme Sprigs 🌿 | 2 whole | Optional for aromatic basting |
| Lemon 🍋 | ½ whole | Zested and juiced for brightness |
[recipe_ingredient_scaler]
The chicken legs are non-negotiable—skin-on, bone-in is essential for both flavor and texture. Source from a reputable butcher or Whole Foods for consistent sizing. Diamond Crystal kosher salt is the professional standard for even seasoning distribution. For the oil, avocado oil has the highest smoke point, but any neutral oil will work. The herbs should be fresh if possible, but dried are perfectly acceptable when time is limited.
No smoked paprika? Regular paprika plus a pinch of liquid smoke works in a pinch. Fresh garlic can replace the powder at a 1:3 ratio (1 clove = 1 tsp powder). For extra crunch, cornstarch can replace half the flour. The cayenne is optional but recommended for balance—half the amount if you’re heat-sensitive. If using fresh herbs for basting, tie them with twine for easy removal.
Store raw chicken in the coldest part of your fridge for up to 2 days. Cooked chicken keeps 3-4 days refrigerated or freezes beautifully for 3 months. Always bring chicken to room temperature before cooking for even results. The basting butter can be replaced with ghee for a nuttier flavor if preferred.
Why You’ll Love This Recipe
- One Pan Meal: I love that it all cooks in a single skillet—just season, sear, and serve.
- Crispy & Savory: That golden crust from the garlic and onion powder? Ridiculously good with every bite.
- Weeknight Hero: Honestly, it’s my go-to for busy evenings when I need dinner fast.
- Budget Friendly: Chicken legs are cheap, and this recipe stretches them into a meal the whole family fights over.
Step-by-Step Instructions for Pan Fried Chicken Legs
Master the technique for achieving impossibly crisp skin while keeping the meat juicy and flavorful.
Step 1: Season and Dredge the Chicken Legs
Pat the 8 whole Chicken Legs completely dry with paper towels—this is non-negotiable for achieving crispy skin. In a bowl, combine the 1.5 tbsp Kosher Salt, 1 tsp Freshly Ground Black Pepper, 1 tsp Garlic Powder, 1 tsp Onion Powder, 1 tsp Smoked Paprika, 0.5 tsp Dried Thyme, 0.5 tsp Dried Oregano, and 0.25 tsp Cayenne Pepper.
Rub this seasoning blend evenly over all surfaces of the chicken legs, pressing gently to adhere. Then, lightly dredge each piece in the 0.5 cup All-Purpose Flour, shaking off any excess. The flour creates a delicate crust that enhances the crispiness without overwhelming the seasoning.
Step 2: Pan-Fry to Golden Perfection
Heat the 0.25 cup Neutral Oil in a large, heavy skillet over medium-high heat until it shimmers. Carefully place the chicken legs skin-side down in the pan, leaving space between pieces to prevent steaming. Cook undisturbed for 8-10 minutes until the skin is deep golden brown and crisp.
Resist the urge to move the chicken during this time—this ensures even browning and allows the skin to develop that coveted crunch. You’ll know it’s ready to flip when the edges appear crispy and the chicken releases easily from the pan.
Step 3: Finish with Aromatic Basting
Flip the chicken legs and reduce the heat to medium. Add the 2 tbsp Unsalted Butter, 2 whole Fresh Rosemary Sprigs, and 2 whole Fresh Thyme Sprigs to the pan. As the butter melts, tilt the pan slightly and spoon the foaming butter over the chicken repeatedly for 2-3 minutes to baste.
This basting technique infuses the chicken with herbal aroma while promoting even cooking. The chicken is done when the internal temperature reaches 175°F and the juices run clear. For extra brightness, squeeze the juice from the 0.5 whole Lemon over the chicken in the final minute of cooking.
Step 4: Rest and Serve Immediately
Transfer the chicken legs to a wire rack set over a baking sheet to maintain crispiness. Let them rest for 5 minutes—this allows the juices to redistribute while preventing the skin from becoming soggy. The skin should remain crisp and golden, with a rich, savory aroma from the herbs and spices.
Serve hot, with any pan juices spooned over the top. The contrast between the crispy skin and tender, succulent meat is what makes this dish exceptional. For best results, enjoy immediately while the skin is at its peak texture.
Pro Tips For Making Pan Fried Chicken Legs
- Pat Them Dry: I learned this the hard way—wet chicken steams instead of sears. Use paper towels to dry the legs thoroughly before seasoning, or you’ll end up with pale, soggy skin.
- Hot Pan, Cold Oil: Start with a screaming-hot pan and add the oil just before the chicken. This prevents sticking and gives you that deep golden crust you’re after.
- Skip the Crowding: Resist the urge to cram all the legs in at once. Overcrowding drops the pan temp, and you’ll get uneven cooking—do it in batches if needed.
- Rest Before Serving: Give the chicken a solid 5-10 minutes under foil after cooking. It keeps the juices from running all over the plate when you cut in.
Common Mistakes When Making This Recipe
Overcrowding the Pan
Never crowd your chicken in the skillet—this causes steaming instead of crisping. I use a 12-inch cast iron for 8 legs, leaving 2 inches between pieces. If needed, cook in batches to maintain medium-high heat and proper browning. 🔥
Skipping the Drying Step
Wet chicken equals soggy skin, every time. I pat each leg with 3-4 paper towels until completely dry before seasoning. This step takes 2 minutes but makes all the difference in achieving that shatteringly crisp texture.
Moving Chicken Too Soon
Let the chicken cook undisturbed for the full 8-10 minutes skin-side down. I set a timer and resist the urge to peek. The skin needs this uninterrupted contact to form that perfect golden crust and prevent sticking.
Incorrect Heat Control
Too high and you’ll burn the skin before the meat cooks. Too low and you’ll get greasy chicken. I maintain medium-high heat for searing, then drop to medium when basting. A good skillet distributes heat evenly—I swear by Lodge cast iron.
Skipping the Rest
Resting isn’t just for show—it’s science. I transfer legs to a wire rack for 5 minutes after cooking. This lets juices redistribute and keeps the skin crisp. Serve directly from the rack to avoid any steam buildup.
Using Cold Chicken
Room temperature chicken cooks more evenly. I take mine out of the fridge 30 minutes before cooking. Cold chicken can lead to uneven cooking and tough meat, even if the skin looks perfect.
Nutrition Facts
Frequently Asked Questions
Do I need to marinate the chicken first?
No, the dry seasoning rub provides plenty of flavor. For extra tenderness, you can marinate in buttermilk for 2-4 hours beforehand.
What oil works best for frying?
Use a neutral oil with a high smoke point like avocado, vegetable, or canola. Avoid olive oil as it can burn at medium-high heat.
How do I keep the skin crispy when serving?
Place cooked legs on a wire rack, not a plate. This prevents steam from making the skin soggy. Serve within 10 minutes for best results.
Can I use boneless thighs instead?
Yes, but reduce cooking time to 4-5 minutes per side. Bone-in pieces are preferred as they stay juicier during cooking.

Trained in classic French technique but raised on slow-cooked ribs and spicy rubs, she blends culinary skill with smoke and soul.
- Recipe for Boneless Pork Chops in Cast Iron Skillet: Sear and Baste to Juicy Perfection - October 3, 2026
- Recipe for Boneless Cross Rib Roast: Slow-Roasted Beef with Herb Crust - October 3, 2026
- Hamburgers in Sauce Recipe Crock Pot: Slow-Cooked Savory Delight - October 3, 2026