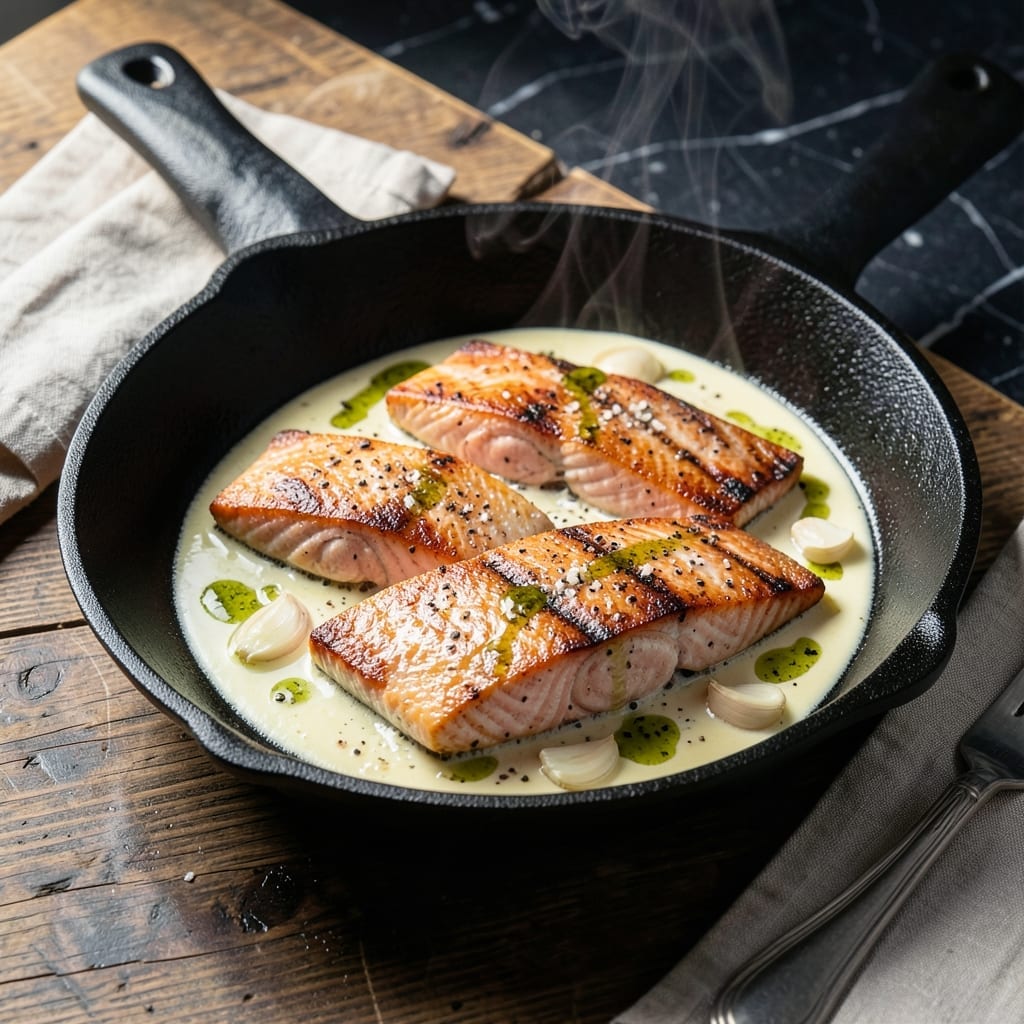
There’s nothing like the sizzle of salmon hitting a hot cast iron skillet—it’s the sound of crispy skin in the making. I’ve perfected this method over years of testing, and it never fails to deliver restaurant-quality results at home.
The key is patience and precision: start with a screaming-hot pan, dry skin, and a light press to ensure even contact. A zesty lemon finish brightens the rich, buttery fish without overpowering its natural flavor.
In just 12 minutes, you’ll have salmon with shatteringly crispy skin and tender, flaky flesh. The cast iron creates an unmatched sear, locking in moisture while forming that coveted golden crust.
Serve it straight from the pan for a dish that’s as impressive as it is simple. This technique works every time.
Ingredients for Salmon Cast Iron Skillet
Quality salmon, a screaming-hot pan, and a few aromatics create this restaurant-worthy dish.
| Ingredient | Amount | Notes |
|---|---|---|
| Salmon Fillets 🐟 | 4 pieces | Skin-on, about 6 oz each |
| Kosher Salt 🧂 | 1 ½ tsp | Diamond Crystal preferred |
| Black Pepper 🌶️ | ½ tsp | Freshly ground for best flavor |
| Extra-Virgin Olive Oil 🫒 | 2 tbsp | High smoke point variety |
| Unsalted Butter 🧈 | 2 tbsp | For basting while cooking |
| Garlic Cloves 🧄 | 3 cloves | Lightly crushed, peeled |
| Fresh Thyme Sprigs 🌿 | 4 whole | Optional for aromatic basting |
| Lemon 🍋 | 1 whole | Zested and juiced |
| Fresh Dill 🌿 | ¼ cup | Chopped, for garnish |
| Fresh Parsley 🌿 | ¼ cup | Chopped, for garnish |
[recipe_ingredient_scaler]
The salmon must be skin-on, center-cut fillets for even cooking. Wild-caught sockeye or king salmon gives the best flavor and texture. Whole Foods or Trader Joe’s consistently stock high-quality options. Pat the skin thoroughly dry before cooking—this is non-negotiable for achieving that shatteringly crispy result. Always buy fillets the same thickness so they finish at the same time.
No fresh herbs? Dried thyme at one-third the amount works in a pinch. Out of lemon? Lime juice and zest offers a bright alternative. For a richer finish, swap the butter for ghee—it has a higher smoke point. Avoid nonstick pans; the cast iron is essential for that golden crust. If your salmon has pin bones, remove them with tweezers before cooking.
Cooked salmon keeps in the fridge for up to 2 days—gently reheat in a skillet to preserve the crispy skin. The zest and juice can be prepped 1 day ahead and stored separately. Fresh herbs are best used immediately but can be wrapped in damp paper towels for 3-4 days.
Why You’ll Love This Recipe
- I’ll be real: this is my go-to when I need a solid dinner on the table in 15 minutes flat.
- One Pan Magic: Honestly, I just heat the skillet, sear the salmon, and let the butter and oil do the work—no fancy techniques.
- Buttery Perfection: That crispy skin with the rich, melty butter pooling around the fillets? Pure satisfaction.
- Weeknight Hero: I’ll be real: this is my go-to when I need a solid dinner on the table in 15 minutes flat.
Step-by-Step Instructions for Salmon Cast Iron Skillet
Master the technique for crispy skin and moist flesh using your cast iron skillet.
Step 1: Season and Prepare the Salmon Fillets
Pat all 4 pieces of Salmon Fillets completely dry with paper towels. Any moisture will prevent the skin from crisping properly in the skillet.
Season both sides evenly with 1.5 tsp Kosher Salt and 0.5 tsp Black Pepper. I use Diamond Crystal kosher salt for its clean flavor and even distribution. Let the seasoned fillets sit at room temperature for 10-15 minutes while you prepare the pan—this ensures even cooking.
Step 2: Heat the Cast Iron and Sear the Salmon
Place your cast iron skillet over medium-high heat and add 2 tbsp Extra-Virgin Olive Oil. You want the oil to shimmer but not smoke—that’s your signal the pan is at the perfect temperature for searing.
Carefully place the salmon fillets skin-side down in the hot oil. Press down gently with a fish spatula for the first 30 seconds to ensure full contact between the skin and the pan. Cook undisturbed for 4-5 minutes until the skin is golden brown and crispy.
Step 3: Baste with Aromatic Butter
Reduce heat to medium and add 2 tbsp Unsalted Butter, 3 cloves Garlic Cloves, and 4 whole Fresh Thyme Sprigs to the skillet. Tilt the pan slightly and use a spoon to baste the salmon with the foaming butter continuously for 2-3 minutes.
The butter will turn a light golden brown and smell incredibly fragrant. This basting process infuses the fish with flavor and helps cook the top side gently. The garlic should soften but not brown—if it starts to darken, reduce the heat immediately.
Step 4: Finish Cooking and Check Doneness
Flip the salmon fillets and cook for an additional 1-2 minutes until just opaque throughout. The total cooking time should be 7-9 minutes depending on thickness. For perfect doneness, the internal temperature should reach 125-130°F—the flesh should flake easily with a fork but still appear slightly translucent in the center.
Squeeze 1 whole Lemon‘s juice over the fillets during the last minute of cooking. The acidity brightens the rich butter and complements the salmon beautifully. Remove the skillet from heat once the fish is done to prevent overcooking.
Step 5: Rest and Garnish Before Serving
Transfer the salmon to a serving platter and let rest for 2-3 minutes. This brief rest allows the juices to redistribute, ensuring moist, tender flesh. The skin should remain crispy if you’ve followed the technique correctly.
Garnish with 0.25 cup Fresh Dill and 0.25 cup Fresh Parsley, both chopped. The fresh herbs add a vibrant finish that complements the rich, buttery salmon. Serve immediately with lemon wedges on the side for those who want an extra zesty kick.
Pro Tips For Making Salmon Cast Iron Skillet
- Heat the Skillet First: Crank your cast iron to medium-high until it’s screaming hot—about 5 minutes—before adding the oil. I learned this the hard way after too many batches stuck because the pan wasn’t ready.
- Pat Salmon Dry: Use paper towels to remove every bit of moisture from the fillets. Sounds tedious, but it guarantees a crispy skin instead of a sad, steamed mess.
- Skip the Overcrowding: Leave at least an inch between fillets so they sear, not steam. After ruining two dinners with soggy salmon, I finally accepted that patience pays off.
- Baste with Butter: Tilt the skillet and spoon that melted butter over the salmon for the last 2 minutes. My grandmother swore by this, and the flavor difference is undeniable.
Troubleshooting This Dish
Skin Sticking
If your salmon skin sticks, your pan wasn’t hot enough or the skin wasn’t dry. Pat it thoroughly with paper towels and heat the cast iron until the oil shimmers. I learned this the hard way at my first BBQ competition. 🔥
Uneven Cooking
For consistent results, ensure fillets are the same thickness. If some pieces are thicker, cook them 1-2 minutes longer on the skin side. I always buy center-cut fillets from my local butcher for uniformity.
Burnt Butter
If your butter browns too quickly, reduce heat to medium-low and move the pan off direct heat occasionally. The garlic should soften but never darken. I keep a ThermoWorks thermometer handy to monitor pan temperature.
Dry Salmon
Overcooking is the enemy of moist salmon. Pull it off at 125-130°F internal temperature. The flesh should flake easily but still look slightly translucent in the center. Resting for 2-3 minutes is crucial.
Lack of Crispy Skin
Press the fillets gently with a fish spatula for the first 30 seconds to ensure full contact. Don’t move them for 4-5 minutes—patience is key. I use a Lodge cast iron skillet for the best sear.
Nutrition Facts
Frequently Asked Questions
Do I need to preheat the cast iron skillet?
Heat the skillet over medium-high heat for 5 minutes until the oil shimmers. This ensures a proper sear and prevents sticking.
Can I use frozen salmon for this recipe?
Yes, but thaw it completely in the fridge overnight. Pat the skin very dry before cooking to achieve that perfect crispy texture.
How do I know when the salmon is done?
The internal temperature should reach 125-130°F. The flesh will flake easily but still look slightly translucent in the center.
What can I use instead of fresh herbs?
Dried thyme works at one-third the amount. For garnish, skip dried parsley or dill as they lack freshness and color.

Trained in classic French technique but raised on slow-cooked ribs and spicy rubs, she blends culinary skill with smoke and soul.
- Recipe for Boneless Pork Chops in Cast Iron Skillet: Sear and Baste to Juicy Perfection - October 3, 2026
- Recipe for Boneless Cross Rib Roast: Slow-Roasted Beef with Herb Crust - October 3, 2026
- Hamburgers in Sauce Recipe Crock Pot: Slow-Cooked Savory Delight - October 3, 2026