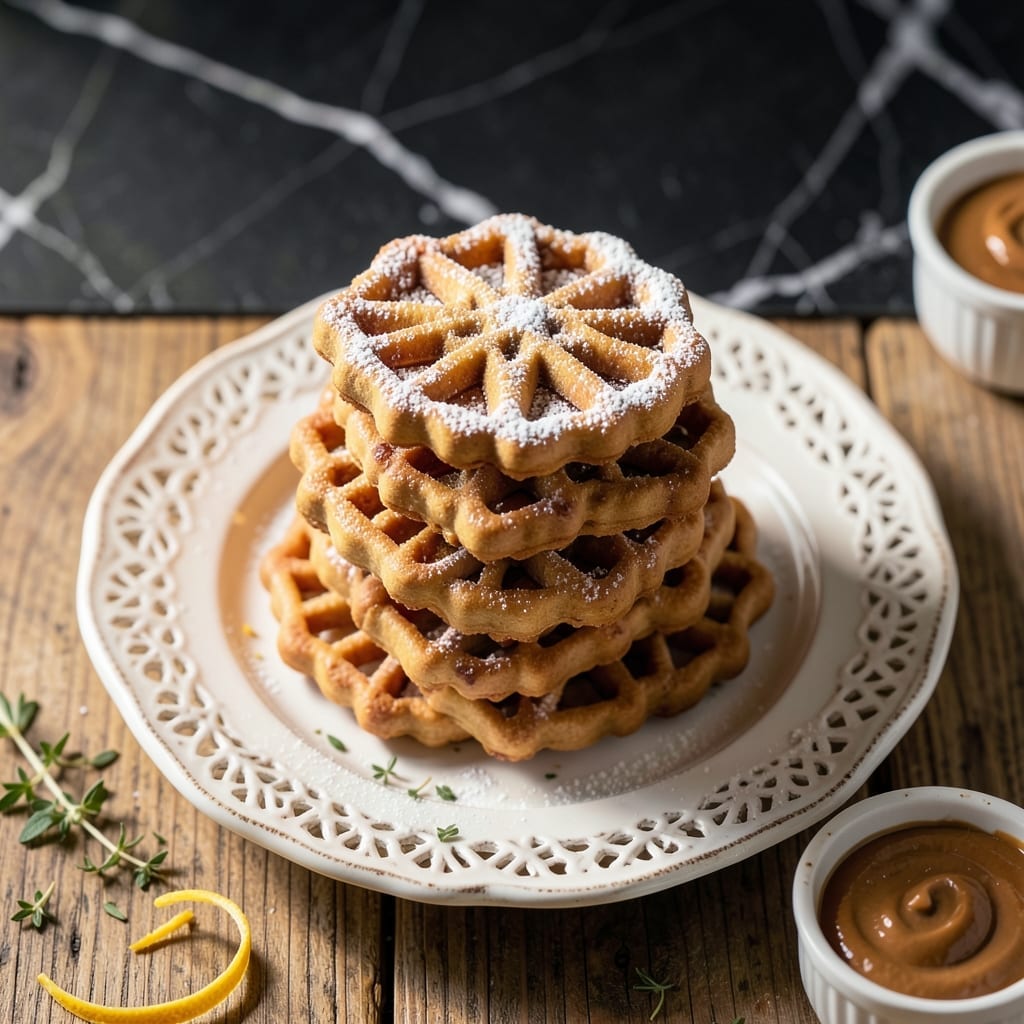
Achieving perfect pizzelle with peanut butter richness requires precision and the right iron. These delicate Italian wafers demand exact temperature control and timing.
This recipe delivers crisp, nutty perfection every time. The peanut butter adds depth while maintaining the classic pizzelle texture we all love.
Ingredients for Peanut Butter Pizzelle
Pantry raid plus peanut butter. Classic Italian meets American comfort in these crisp wafers.
| Ingredient | Amount | Notes |
|---|---|---|
| All-Purpose Flour 🌾 | 1 ¾ cups | Sifted for smooth texture |
| Granulated Sugar 🍚 | ¾ cup | Fine white sugar preferred |
| Unsalted Butter 🧈 | ½ cup | Melted and cooled slightly |
| Large Eggs 🥚 | 3 whole | Room temperature for best results |
| Creamy Peanut Butter 🥜 | ½ cup | Natural or commercial both work |
| Vanilla Extract 💧 | 1 tsp | Pure extract, not imitation |
| Baking Powder ⚗️ | 1 tsp | Ensures proper rise and crispness |
| Salt 🧂 | ¼ tsp | Fine table salt recommended |
| Powdered Sugar ✨ | ¼ cup | For dusting finished pizzelle |
| Vegetable Oil 🫒 | ¼ cup | For greasing iron if needed |
[recipe_ingredient_scaler]
The peanut butter is the soul here—Jif or Skippy work great, but natural PB (the well-stirred kind) gives a more pronounced nutty flavor. King Arthur flour if you’re baking often, but any all-purpose does the trick. Butter quality matters—Plugrá or Land O’Lakes are my go-tos. Don’t sub margarine; the flavor won’t be the same (trust me on this one).
No peanut butter? Almond butter at a 1:1 swap works, though the flavor shifts. Eggs are non-negotiable for structure, but if you’re desperate, flax eggs might hold up—no promises. The baking powder can’t be swapped for baking soda; the chemistry’s different. For a deeper flavor, toast the flour for 5 minutes at 350°F before mixing.
Dough keeps 2 days refrigerated, but it’s best used fresh. Finished pizzelle stay crisp 1 week in an airtight container at room temp. Freeze for 3 months if you’re making ahead—re-crisp in a warm oven before serving (worth the extra minute).
Why You’ll Love This Recipe
- One Bowl Wonder: I just dump flour, sugar, eggs, butter, and peanut butter in a bowl, mix, and cook—no fancy steps.
- Nutty & Sweet: The creamy peanut butter gives these pizzelle a rich, almost cookie-dough-like flavor that’s addictive.
- Crowd Pleaser: Honestly, these disappear faster than any other cookie I make, whether it’s a holiday platter or a Tuesday snack.
- Budget Friendly: A batch costs pennies compared to store-bought, and the ingredients are all pantry staples I already keep on hand.
Step-by-Step Instructions for Peanut Butter Pizzelle
Here’s the method for achieving those signature crisp, nutty wafers with a perfect golden hue.
Step 1: Prepare the Batter Base
In a large mixing bowl, whisk together the 1.75 cups All-Purpose Flour, 1 tsp Baking Powder, and 0.25 tsp Salt until fully combined. I always sift my flour first to prevent any lumps in the batter, which is crucial for those delicate pizzelle patterns.
In a separate bowl, melt the 0.5 cup Unsalted Butter and let it cool slightly. You want it warm but not hot—adding hot butter to eggs will cook them prematurely. This temperature control ensures a smooth, lump-free batter every time.
Step 2: Combine Wet Ingredients for Rich Flavor
To the cooled melted butter, add the 0.75 cup Granulated Sugar and 0.5 cup Creamy Peanut Butter. Mix until the peanut butter is fully incorporated and the mixture is smooth. The natural oils in the peanut butter will blend perfectly with the butter.
Next, beat in the 3 whole Large Eggs one at a time, ensuring each is fully emulsified before adding the next. Then stir in the 1 tsp Vanilla Extract. I use a hand mixer for this step to achieve a light, airy texture that contributes to the crispness of the finished pizzelle.
Step 3: Create the Final Batter
Gradually add the dry ingredients to the wet mixture, folding gently with a spatula until just combined. The batter will be thick and sticky—that’s exactly what you want. Overmixing at this stage develops gluten, which can make your pizzelle tough instead of tender and crisp.
Let the batter rest for 15-20 minutes at room temperature. This allows the flour to fully hydrate and the flavors to meld together. You’ll notice the batter becomes slightly smoother during this time.
Step 4: Cook the Pizzelle to Golden Perfection
Preheat your pizzelle iron according to manufacturer instructions. Lightly brush the iron plates with Vegetable Oil to prevent sticking, even if your iron is non-stick. The oil helps create that perfect golden color and crisp texture.
Drop 1 tablespoon of batter onto each pizzelle pattern. Close the iron and cook for 30-45 seconds or until the pizzelle are golden brown and crisp. The exact timing depends on your iron’s temperature and the desired level of browning.
Step 5: Finish and Serve
Carefully remove the hot pizzelle from the iron using a fork or heatproof spatula. They’ll be soft at first but will crisp up as they cool. Place them on a wire rack in a single layer to cool completely—stacking them while warm can cause them to steam and lose their crispness.
Once completely cooled, dust generously with 0.25 cup Powdered Sugar for that classic finishing touch. The contrast between the crisp wafer and the sweet, fine sugar is what makes these so irresistible. Serve immediately or store in an airtight container for up to a week.
Pro Tips For Making Peanut Butter Pizzelle
- Preheat the Iron: Give your pizzelle iron a full 5-10 minutes to heat up—after burning my first batch on a lukewarm iron, I now wait until it’s properly hot to guarantee even browning.
- Soften the Butter: Use room-temperature butter, about 65°F, so it creams smoothly with the peanut butter and sugar; cold butter leaves lumps that ruin the batter’s texture.
- Don’t Overfill: A scant tablespoon of batter per pizzelle is plenty—any more spills over the edges, makes a mess, and leaves you with unevenly cooked waffles.
- Use Natural Peanut Butter: Skip the hydrogenated stuff and go for natural creamy peanut butter; the oil separation blends right into the batter and adds a richer, toastier flavor.
Troubleshooting This Recipe
Batter Too Thick
If your batter seems too thick to spread, add 1-2 tbsp milk and mix gently. The peanut butter makes this batch thicker than traditional pizzelle batter, but it shouldn’t be dough-like. I’ve found this small adjustment maintains the perfect consistency. 💡
Sticking to Iron
Even non-stick irons need a light vegetable oil brushing between batches. If pizzelle tear when removing, your iron may need more oil or a longer preheat. Let the iron heat for 5-7 minutes before first use to ensure proper temperature.
Uneven Browning
Rotate your iron 180 degrees halfway through cooking if one side browns faster. My first pizzelle iron had hot spots—this simple rotation fixed the issue. Also, ensure your batter portions are equal, about 1 tbsp per pattern. 🔥
Not Crisp Enough
Undercooked pizzelle stay soft. Cook until they’re deep golden brown, not just light tan. If they soften after cooling, return them to the iron for 10-15 seconds to re-crisp. A wire rack is essential for cooling—never stack while warm.
Peanut Butter Separating
If your peanut butter separates in the batter, ensure it’s well-stirred before mixing. For natural peanut butter, warm it slightly in the microwave for 10-15 seconds to blend smoothly. This prevents oily pockets in your finished pizzelle.
Nutrition Facts
Frequently Asked Questions
Can I use crunchy peanut butter instead?
Yes, but texture will be different. Crunchy adds extra bite, while creamy blends smoothly into the batter. For best results, use creamy peanut butter to maintain the classic pizzelle texture.
How do I know when they’re done cooking?
Watch for deep golden brown color and steam stopping. Cook for 30-45 seconds per batch, but timing varies by iron. They’ll crisp as they cool on a wire rack.
Why did my pizzelle turn out soft?
Undercooking or stacking while warm causes softness. Cook until golden brown and cool in a single layer. To fix, re-crisp in the iron for 10-15 seconds.
Can I make these without a pizzelle iron?
A waffle cone maker works in a pinch, but the pattern won’t be as intricate. Use the same batter and cook for 1-2 minutes until golden. Results will be thicker.

Trained in classic French technique but raised on slow-cooked ribs and spicy rubs, she blends culinary skill with smoke and soul.
- Recipe for Boneless Pork Chops in Cast Iron Skillet: Sear and Baste to Juicy Perfection - October 3, 2026
- Recipe for Boneless Cross Rib Roast: Slow-Roasted Beef with Herb Crust - October 3, 2026
- Hamburgers in Sauce Recipe Crock Pot: Slow-Cooked Savory Delight - October 3, 2026