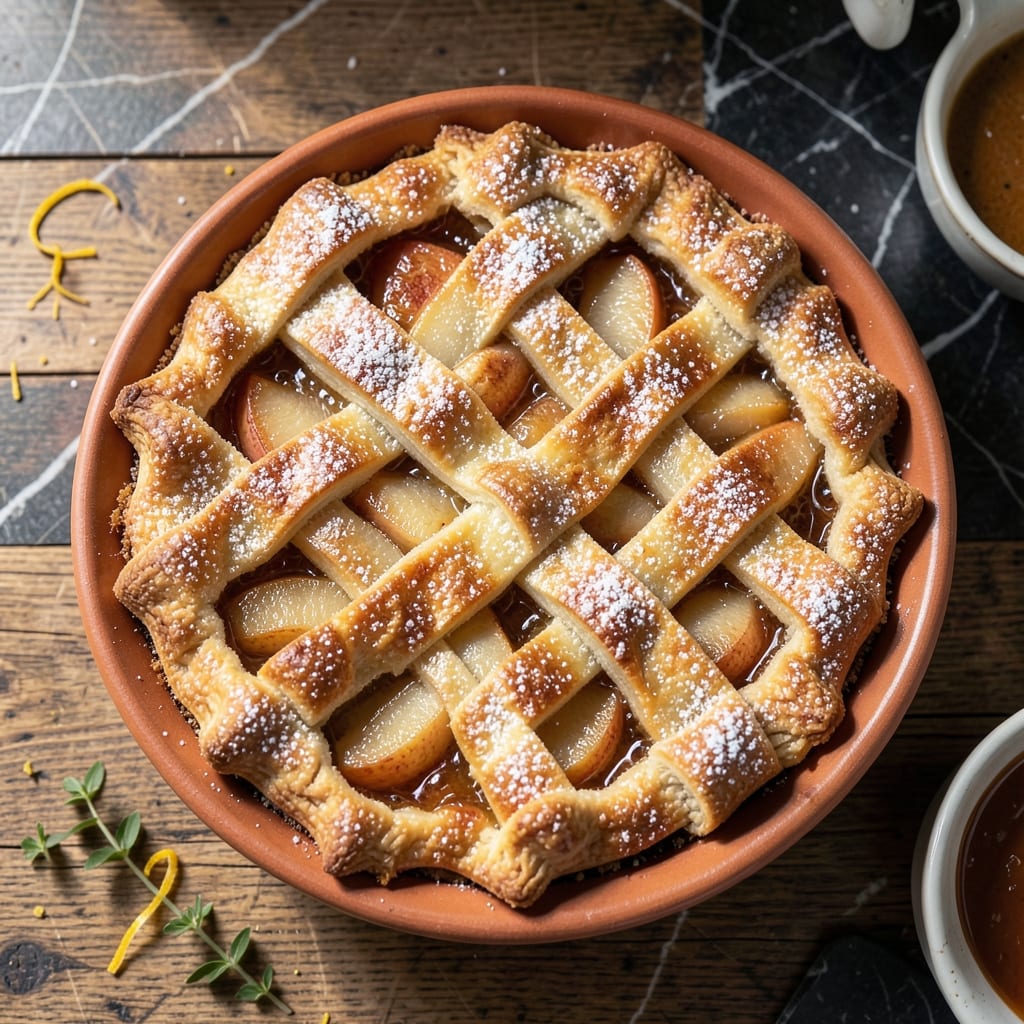
This pie proves that canned pears can deliver flaky, delicious results with minimal effort. I developed this method to create a dessert that tastes homemade without requiring fresh fruit or complex techniques.
The spiced filling transforms tender pear slices into a warm, fragrant mixture that pairs perfectly with buttery pastry. A well-chilled crust is key to achieving those coveted flaky layers that shatter with each bite.
What emerges from the oven is a golden pie with a filling that’s tender yet holding its shape, encased in a crust that’s crisp and delicate. The spices add depth without overpowering the natural sweetness of the pears.
Perfect for any occasion, this recipe makes it easy to enjoy a classic dessert year-round. Here’s how to achieve it.
Ingredients for Pear Pie Recipe with Canned Pears
A well-stocked pantry plus a couple canned goods is all it takes.
| Ingredient | Amount | Notes |
|---|---|---|
| Canned Pear Halves 🍐 | 4 cans | Drained, sliced into strips |
| All-Purpose Flour 🌾 | 2 ½ cups | Plus extra for dusting |
| Granulated Sugar 🍚 | ¾ cup | Divided for filling and crust |
| Light Brown Sugar 🟤 | ½ cup | Packed, for filling |
| Unsalted Butter 🧈 | 1 cup | Cold, cubed for crust |
| Ground Cinnamon 🌿 | 1 tsp | For warm spice flavor |
| Ground Nutmeg 🌰 | ¼ tsp | Freshly grated preferred |
| Salt 🧂 | ½ tsp | Divided for crust and filling |
| Cornstarch 🌾 | 2 tbsp | To thicken filling |
| Lemon Juice 🍋 | 1 tbsp | Fresh, for brightness |
| Vanilla Extract 🌿 | 1 tsp | Pure for best flavor |
| Ice Water 💧 | ½ cup | For flaky crust layers |
| Large Egg 🥚 | 1 whole | For egg wash finish |
[recipe_ingredient_scaler]
The pears are the hero here. Any brand of canned pear halves works, but look for ones packed in juice, not syrup (less sweet, better texture). Drain them really well—pat them dry with paper towels so the filling isn’t watery. That flaky crust comes from cold butter and minimal handling. I keep a bag of Gold Medal flour in the freezer just for pie dough. It’s a game changer for texture.
No canned pears? Fresh pears peeled and sliced will work, but you’ll need about 8 cups—poach them first in lemon water to soften. Out of cornstarch? Instant tapioca at half the amount thickens just as well. The spices can be swapped too—allspice or ginger in place of nutmeg. And that egg wash? Skip it if you’re out of eggs, but the crust won’t be as shiny.
The dough can chill in the fridge for up to 2 days or freeze for 3 months. Once baked, the pie keeps at room temp for 2 days—if it lasts that long. Reheat slices in the oven to crisp the crust (microwave makes it soggy).
Why You’ll Love This Recipe
- No-Peel Pears: I skip the tedious peeling step entirely—canned pear halves are ready to go straight from the can.
- Buttery Crust: That flaky, golden crust made with butter and a touch of brown sugar is the perfect sweet, crisp complement to the soft pears.
- Weeknight Dessert: I bake this on a random Tuesday when we’re craving something warm and comforting without a big time commitment.
Step-by-Step Instructions for Pear Pie With Canned Pears
Here’s how I make this pie with a flaky crust and perfectly spiced filling every time.
Step 1: Prepare the Filling
Drain the 4 cans Canned Pear Halves thoroughly and slice them into ¼-inch strips. In a large bowl, toss the pears with the 0.5 cup Light Brown Sugar, ½ of the 0.75 cup Granulated Sugar, the 2 tbsp Cornstarch, 1 tbsp Lemon Juice, 1 tsp Vanilla Extract, 1 tsp Ground Cinnamon, 0.25 tsp Ground Nutmeg, and ¼ tsp Salt.
Let this mixture sit for 15 minutes—this draws out some liquid so the filling thickens properly. You should see about ½ cup of liquid in the bottom of the bowl. Stir once more before using to evenly distribute the spices and thickeners.
Step 2: Make the Crust Dough
In a food processor, pulse the 2.5 cups All-Purpose Flour with the remaining ¼ tsp Salt and the remaining ½ of the 0.75 cup Granulated Sugar. Add the 1 cup Unsalted Butter, cubed and cold, and pulse until the mixture resembles coarse crumbs with some pea-sized butter pieces visible.
With the processor running, drizzle in the 0.5 cup Ice Water through the feed tube. Stop as soon as the dough just begins to come together—it’ll look shaggy but hold when pressed. Divide the dough into two equal portions, shape into discs, wrap in plastic, and refrigerate for 1 hour to relax the gluten for that flaky texture.
Step 3: Assemble the Pie
On a lightly floured surface, roll one dough disc into a 12-inch circle. Transfer it to a 9-inch pie dish, pressing it gently into the bottom and up the sides. Trim the edges, leaving a ½-inch overhang.
Pour the pear filling into the crust, mounding it slightly in the center. Roll out the second dough disc the same way and place it over the filling. Crimp the edges together, then cut 4-5 slits in the top crust to allow steam to escape. Brush the top with a beaten Large Egg for a golden finish.
Step 4: Bake to Golden Perfection
Place the pie on a baking sheet to catch any drips and bake at 375°F for 45-50 minutes. You’ll know it’s done when the crust is deep golden brown and the filling is bubbling through the vents.
If the edges brown too quickly, cover them with aluminum foil. Let the pie cool for at least 2 hours before slicing—this gives the filling time to set so it doesn’t run out when you serve it.
Pro Tips For Making Pear Pie Recipe With Canned Pears
- Drain and Pat: Drain the canned pear halves thoroughly and pat them dry with paper towels—this prevents a soggy pie filling and helps the sugar caramelize better.
- Chill the Dough: After mixing the flour and butter for the crust, let it rest in the fridge for at least 30 minutes. I learned this the hard way—warm dough shrinks and loses its flaky texture.
- Skip the Syrup: Resist the urge to use the canned pear syrup in the filling; it’s too watery and will make your pie runny. Stick to the sugar and butter mixture for a richer texture.
- Brown the Butter: Before mixing it into the filling, brown the unsalted butter for a nutty depth of flavor. Sounds weird, but it works and takes less than 5 minutes on medium heat.
Serving Suggestions for Leftovers
Warm with Ice Cream
I love serving slices warm with a scoop of vanilla bean ice cream—the cold cream against the warm, spiced filling is magical. Use 1 scoop per serving for the perfect ratio. The contrast of temperatures and textures makes every bite unforgettable. 💛
Drizzle with Caramel
A store-bought caramel sauce drizzle adds a luxurious touch. I warm ¼ cup in the microwave for 15 seconds to make it pourable. Smucker’s brand works well here. Let guests add their own drizzle at the table.
Top with Whipped Cream
For a lighter option, serve with homemade whipped cream. Whip 1 cup heavy cream with 2 tbsp powdered sugar and ½ tsp vanilla until soft peaks form. Dollop generously over each slice.
Add Crunch with Nuts
Sprinkle chopped toasted pecans or walnuts over the top for texture. Toast ½ cup nuts in a dry skillet over medium heat for 3-4 minutes until fragrant. This adds a delightful contrast to the soft filling.
Serve with Coffee
A hot cup of coffee pairs beautifully with this dessert. The bitterness cuts through the sweetness. I recommend a medium roast like Starbucks House Blend served black or with a splash of cream. 🔥
Garnish with Fresh Herbs
For an elegant touch, garnish each plate with a sprig of fresh mint or thyme. The herbal notes complement the spices in the filling. This simple addition makes the dish look restaurant-worthy.
Nutrition Facts
Frequently Asked Questions
Do I need to adjust the baking time for canned pears?
No, the baking time remains 45-50 minutes at 375°F. Canned pears are already tender, so they won’t require extra time. Just ensure the crust is deep golden brown and the filling is bubbling.
Can I use a store-bought crust instead?
Yes, a pre-made crust works well for convenience. Use 1 refrigerated pie crust for the bottom and top. The texture won’t be as flaky, but it saves time.
Why does my filling turn out runny?
This usually happens if the pears weren’t drained well or the cornstarch wasn’t fully incorporated. Always pat pears dry and let the filling sit for 15 minutes before baking.
How should I store leftovers?
Keep the pie covered at room temperature for up to 2 days. For longer storage, refrigerate for 4 days. Reheat in the oven to restore crust crispness.

Trained in classic French technique but raised on slow-cooked ribs and spicy rubs, she blends culinary skill with smoke and soul.
- Recipe for Boneless Pork Chops in Cast Iron Skillet: Sear and Baste to Juicy Perfection - October 3, 2026
- Recipe for Boneless Cross Rib Roast: Slow-Roasted Beef with Herb Crust - October 3, 2026
- Hamburgers in Sauce Recipe Crock Pot: Slow-Cooked Savory Delight - October 3, 2026