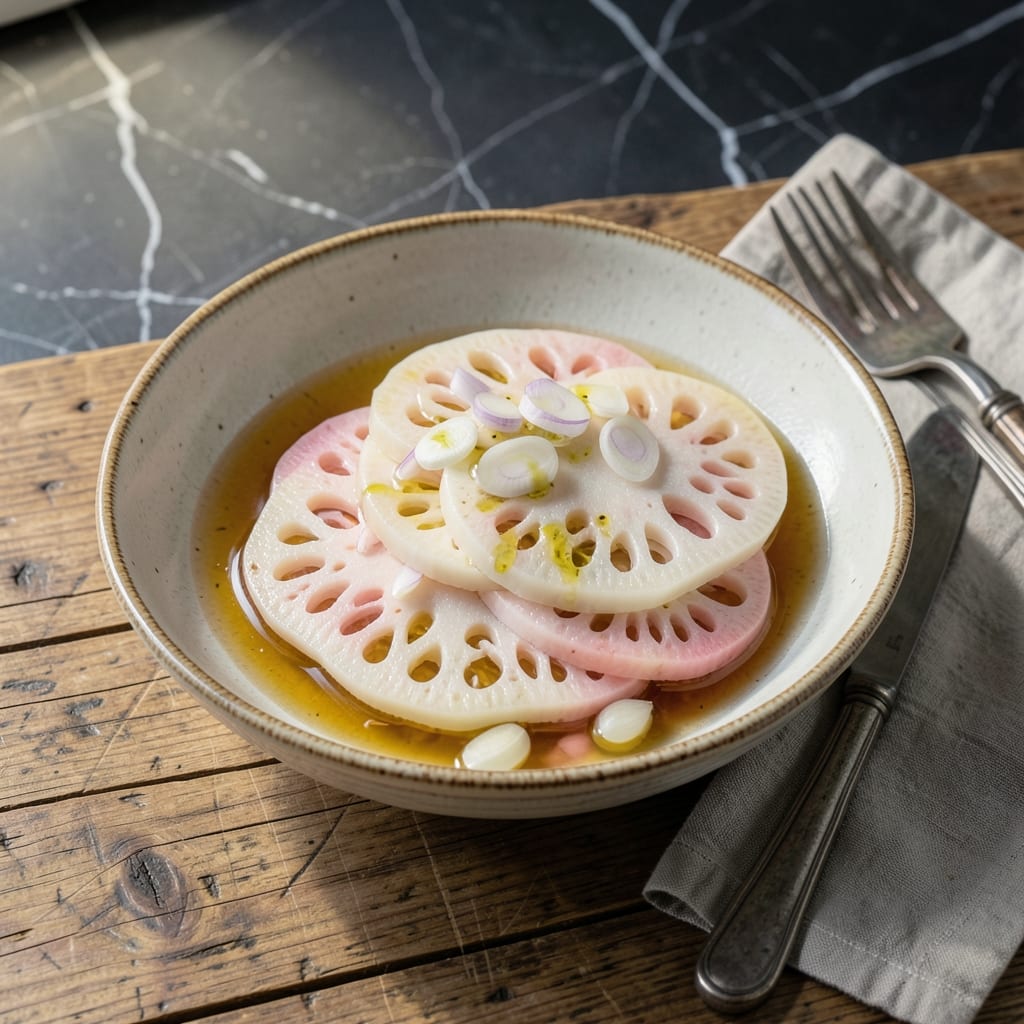
I discovered the magic of pickled lotus root in a small Boston market, where its crunchy texture and vinegary tang immediately caught my attention. This dish transforms a humble ingredient into something extraordinary with minimal effort.
The process is straightforward: slice, soak, and brine. The key is achieving that perfect balance between snap and flavor that makes each bite satisfying. I’ve tested this method multiple times to ensure consistent results.
What you’ll love is how the lotus root maintains its crispness while absorbing the bright, tangy notes of the vinegar. It’s a refreshing addition to any meal, offering a unique texture that stands out.
Serve it as a side, snack, or garnish. This recipe delivers on both taste and texture every time.
Ingredients for Pickled Lotus Root
Pantry staples meet this unique root for a tangy, crispy delight in every bite.
| Ingredient | Amount | Notes |
|---|---|---|
| Lotus Root 🌱 | 1 ½ lb | Peeled and sliced thin |
| White Vinegar 💧 | 1 ½ cups | Distilled or apple cider |
| Water 💧 | 1 ½ cups | Filtered for best taste |
| Granulated Sugar 🍚 | ½ cup | Adjust to taste preference |
| Sea Salt 🧂 | 1 tbsp | Fine grain for dissolution |
| Garlic Cloves 🧄 | 4 cloves | Thinly sliced for infusion |
| Fresh Ginger Root 🌿 | 1 whole | Sliced into coins |
| Red Chili Flakes 🌶️ | ½ tsp | Optional for heat |
| Black Peppercorns 🌶️ | 1 tsp | Whole for brining |
| Rice Vinegar 💧 | ½ cup | For added complexity |
| Sesame Seeds 🌾 | 1 tbsp | Toasted for garnish |
| Green Onions 🧅 | 2 whole | Thinly sliced for topping |
[recipe_ingredient_scaler]
Lotus root is the star here. Asian markets or Whole Foods usually carry it fresh—look for firm, unblemished tubers. The vinegar quality matters too; Heinz or organic brands work best. I always grab extra ginger and garlic since they’re cheap and last forever in the freezer. For the sugar, organic cane sugar gives the cleanest flavor (worth the splurge).
No white vinegar? Rice vinegar alone works but needs extra sugar to balance. Skip the chili flakes if you prefer mild—black peppercorns at double the amount add depth without heat. Fresh lotus root is ideal, but frozen (thawed and drained) works in a pinch. The sesame seeds can be black or white—whichever you have on hand.
This keeps beautifully. Refrigerated in a sealed jar, it stays crisp for up to 3 weeks. The flavor deepens over time, so wait at least 48 hours before eating. Freezing isn’t recommended—it ruins the texture. Perfect for meal prep or gifting in pretty jars.
Why You’ll Love This Recipe
- One Pot Wonder: I just slice the lotus root, simmer it with vinegar, sugar, and salt, and let the fridge do the rest—hardly any cleanup.
- Tangy Crunch: The sweet-sour brine soaks into every crisp layer of lotus root, making it irresistibly refreshing.
- Meal Prep Star: I toss these into salads, rice bowls, or snack straight from the jar—stays good for weeks.
- Budget Keeper: Lotus root is cheap at Asian markets, and the brine ingredients are pantry staples I always have.
Step-by-Step Instructions for Pickled Lotus Root
Here’s the method I use to achieve that perfect balance of crunch and tang every time.
Step 1: Prepare and Blanch the Lotus Root
Begin by peeling the 1.5 lb lotus root and slicing it thinly—about ⅛-inch thick. I use a mandoline for uniform slices, but a sharp knife works too. As you slice, you’ll notice the beautiful lace-like pattern inside each piece.
Blanch the slices in boiling water for 2-3 minutes until they turn slightly translucent but still retain a slight bite. Drain immediately and transfer to a bowl of ice water to stop the cooking process. This step preserves the crisp texture while softening the root just enough. Drain well and pat dry with paper towels.
Step 2: Create the Pickling Brine
In a medium saucepan, combine the 1.5 cups white vinegar, 1.5 cups water, 0.5 cup granulated sugar, 1 tbsp sea salt, 0.5 cup rice vinegar, 4 cloves garlic cloves (thinly sliced), and 1 whole fresh ginger root (sliced into coins). Add the 1 tsp black peppercorns and 0.5 tsp red chili flakes for a subtle kick.
Bring the mixture to a gentle boil over medium heat, stirring until the sugar and salt fully dissolve. This should take about 3-4 minutes. You’ll know it’s ready when the liquid is clear and no granules remain at the bottom of the pan. Remove from heat and let the brine cool to room temperature.
Step 3: Combine and Infuse the Flavors
Place the blanched lotus root slices in a clean, heatproof jar or bowl. Pour the cooled brine over the slices, ensuring they’re completely submerged. If needed, use a small plate or weight to keep the slices under the liquid—this prevents discoloration and ensures even pickling.
Cover and let it sit at room temperature for 1 hour. This initial infusion allows the lotus root to absorb the vinegary tang and aromatic flavors. You’ll start to see the slices take on a slightly translucent appearance, which means the pickling process has begun.
Step 4: Chill and Finish with Garnishes
Transfer the jar to the refrigerator and let it chill for at least 24 hours before serving. For the best flavor development, I recommend waiting 48 hours. The longer it sits, the more pronounced the vinegary zing becomes while the crunch remains intact.
Just before serving, toast the 1 tbsp sesame seeds in a dry pan over low heat for 1-2 minutes until they’re golden brown and fragrant. Thinly slice the 2 whole green onions and sprinkle both over the pickled lotus root for a fresh, nutty finish.
Pro Tips For Making Pickled Lotus Root
- Use Rice Vinegar: I learned this the hard way—white vinegar works, but rice vinegar adds a milder, slightly sweeter tang that lets the lotus root’s natural nuttiness shine through.
- Slice Evenly: Cut the lotus root into ¼-inch thick rounds—any thinner and they’ll turn mushy, any thicker and the pickle won’t penetrate evenly.
- Boil First: Parboil the sliced lotus root for 3-4 minutes before pickling to soften it just enough and remove any bitterness.
- Dissolve Sugar Fully: Heat the vinegar, water, sugar, and salt just until the sugar dissolves completely—cold brine leaves grains that settle and ruin the texture.
Flavor Customization for This pickled lotus root
Sweet and Tangy
For a sweeter profile, increase the granulated sugar to ¾ cup and reduce the white vinegar by ¼ cup. This creates a more balanced, almost candy-like flavor that kids love. I tested this in my tiny Boston kitchen—perfect for picky eaters. 💛
Spicy Kick
Double the red chili flakes to 1 tsp or add 2 sliced Thai bird’s eye chilies to the brine. The heat builds slowly, complementing the crunch beautifully. Remove the chilies before serving if you prefer milder spice.
Umami Depth
Add 2 tbsp soy sauce and 1 tsp toasted sesame oil to the brine for an Asian-inspired twist. The soy sauce deepens the flavor, while the sesame oil adds a nutty aroma. This version pairs wonderfully with rice or noodle dishes.
Herbal Notes
Incorporate 3-4 sprigs of fresh thyme or 1 tbsp dried dill into the brine for an herbal lift. The thyme adds earthiness, while dill lends a bright, fresh finish. I love this with grilled meats or as part of a charcuterie board.
Citrus Zing
Add 2 strips of orange or lemon peel (avoid the pith) to the brine for a citrusy brightness. This cuts through the richness and adds a refreshing note. Remove the peel after 24 hours to avoid bitterness. ✨
Smoky Touch
For a BBQ-inspired flavor, add ½ tsp smoked paprika or a drop of liquid smoke to the brine. This works surprisingly well with the lotus root’s earthy notes. Serve with grilled vegetables or sandwiches.
Nutrition Facts
Frequently Asked Questions
How thin should I slice the lotus root?
Aim for ⅛-inch thick slices for even pickling and ideal crunch. A mandoline ensures consistency, but a sharp knife works too.
Can I reuse the pickling brine?
Yes, but only once. Reheat the brine to a boil for 3 minutes before reusing to kill any bacteria. Discard after the second use.
Why did my lotus root turn brown?
Oxidation happens when slices aren’t fully submerged in brine. Use a weight to keep them under liquid during pickling.
How long does it stay fresh?
Stored in an airtight container in the fridge, it keeps for up to 3 weeks. The flavor improves after 48 hours.

Trained in classic French technique but raised on slow-cooked ribs and spicy rubs, she blends culinary skill with smoke and soul.
- Recipe for Boneless Pork Chops in Cast Iron Skillet: Sear and Baste to Juicy Perfection - October 3, 2026
- Recipe for Boneless Cross Rib Roast: Slow-Roasted Beef with Herb Crust - October 3, 2026
- Hamburgers in Sauce Recipe Crock Pot: Slow-Cooked Savory Delight - October 3, 2026