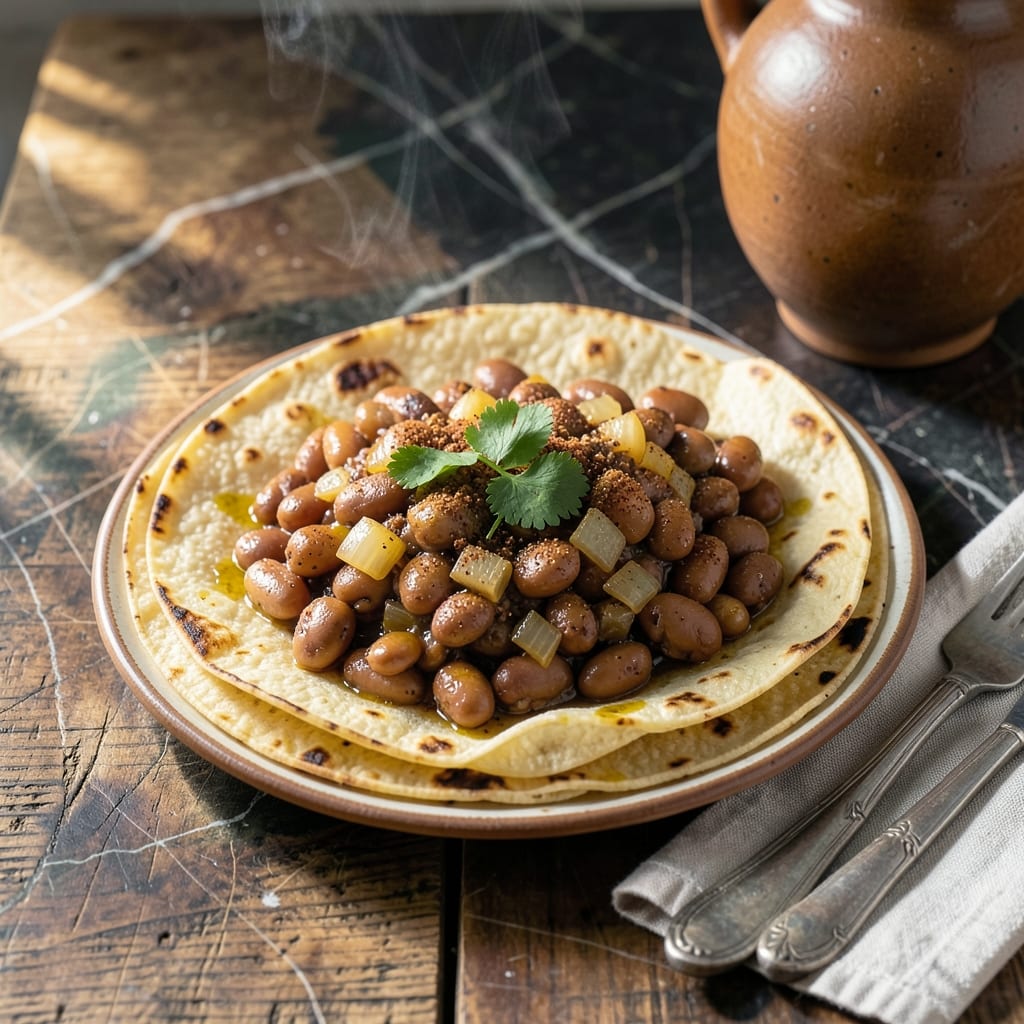
I created this vegan taco filling to prove that plant-based meals can be just as satisfying as traditional ones. The smoky spices transform simple pinto beans into something truly special.
No fancy ingredients or techniques required—just canned beans, a few pantry spices, and 15 minutes of your time. I use pre-minced garlic and ground cumin for convenience without sacrificing flavor.
What you get is a smoky, hearty filling that holds its own in soft or crispy tortillas. The beans stay intact but absorb all those warm spices, creating a texture that’s both tender and substantial.
Serve with your favorite toppings for a quick weeknight dinner that even meat-lovers will enjoy. Here’s how to make it.
Ingredients for Pinto Bean Taco
Pantry staples and a few spices create this vibrant, smoky filling in no time.
| Ingredient | Amount | Notes |
|---|---|---|
| Canned Pinto Beans 🌱 | 2 cans | 15 oz each, drained and rinsed |
| Olive Oil 🫒 | 2 tbsp | Extra-virgin preferred for richness |
| Yellow Onion 🧅 | 1 whole | Medium-sized, finely diced |
| Pre-Minced Garlic 🧄 | 4 tsp | From jar or freshly minced |
| Ground Cumin 🌿 | 2 tsp | Toasted for deeper aroma |
| Smoked Paprika 🌶️ | 1 ½ tsp | Key for smoky depth |
| Chili Powder 🌶️ | 1 tbsp | Mild or hot variety |
| Dried Oregano 🍃 | 1 tsp | Mexican oregano ideal |
| Sea Salt 🧂 | 1 tsp | Adjust to taste |
| Black Pepper 🌶️ | ½ tsp | Freshly ground preferred |
| Vegetable Broth 🥣 | ½ cup | Low-sodium for control |
| Lime Juice 🍋 | 2 tbsp | Freshly squeezed for brightness |
| Fresh Cilantro 🌿 | ¼ cup | Chopped, for garnish |
[recipe_ingredient_scaler]
The pinto beans are the foundation—canned works perfectly (look for low-sodium if you’re watching salt). Goya or Bush’s are reliable brands, but store brands are fine too. The smoked paprika is non-negotiable for that deep, smoky flavor (I grab mine from Penzeys or the bulk section). Ground cumin loses potency fast, so if yours smells like dust, replace it. Pre-minced garlic saves time, but fresh cloves work if you’ve got them.
No smoked paprika? Regular paprika plus a dash of liquid smoke gets you close. Swap chili powder for a mix of cayenne plus cumin if needed. Fresh onion can be replaced with onion powder at one-third the amount (about 1 tsp). For extra heat, add a pinch of cayenne pepper. Vegetable broth can be water in a pinch, but the broth adds depth.
Leftovers keep for 4-5 days in the fridge or freeze for 3 months (portion into airtight containers first). The flavors actually improve overnight as the spices meld. Cilantro stays fresh longer if you trim the stems and store it in a jar of water.
Why You’ll Love This Recipe
- One batch feeds us twice: tonight’s dinner and tomorrow’s lunch burritos with zero extra work.
- 5-Minute Prep: I dump the canned pintos, onion, and pre-minced garlic straight into the pan—no chopping, no fuss.
- Smoky Cumin Kick: That ground cumin blooms in the olive oil and wraps every bite in this warm, earthy depth I can’t get enough of.
- Taco Night Hero: Honestly, it’s my veggie stand-in for tacos, burrito bowls, or even nacho topping on a whim.
Step-by-Step Instructions for Pinto Bean Tacos
Here’s the method. Straightforward, tested, works every time.
Step 1: Sauté Aromatics for a Flavor Foundation
Heat the 2 tbsp Olive Oil in a large skillet over medium heat. Add the finely diced 1 whole Yellow Onion and cook for 5-6 minutes until softened and translucent, stirring occasionally. You want it to turn just light golden at the edges.
Add the 4 tsp Pre-Minced Garlic and cook for 30 seconds until fragrant. Here’s the thing—don’t let the garlic burn. If it starts to brown too quickly, reduce the heat slightly. This base builds the flavor profile for your filling.
Step 2: Bloom the Spices for Maximum Depth
Stir in the 2 tsp Ground Cumin, 1.5 tsp Smoked Paprika, 1 tbsp Chili Powder, 1 tsp Dried Oregano, 1 tsp Sea Salt, and 0.5 tsp Black Pepper. Cook for 1 minute, stirring constantly, until the spices become fragrant and slightly toasted.
This blooming step is critical—it wakes up the spices and deepens their flavors. You’ll notice the mixture darken slightly and the aroma become more intense. That’s how you know it’s working.
Step 3: Simmer Beans with Broth for Creamy Texture
Add the drained and rinsed 2 cans Canned Pinto Beans and 0.5 cup Vegetable Broth to the skillet. Stir well to combine, then bring to a gentle simmer. Reduce heat to medium-low and let it cook for 8-10 minutes, stirring occasionally.
The broth will mostly absorb into the beans, creating a creamy, flavorful mixture. Use a wooden spoon to mash about half the beans lightly against the side of the skillet—this thickens the filling and gives it a satisfying texture.
Step 4: Finish with Brightness and Serve
Remove the skillet from heat and stir in the 2 tbsp Lime Juice. Taste and adjust seasoning if needed—you might want a pinch more salt depending on your broth. The lime adds a bright, zesty note that balances the smoky spices perfectly.
Spoon the warm bean mixture into tortillas and top with 0.25 cup Fresh Cilantro. I know it seems simple, but this combination of smoky, spiced beans with fresh cilantro and lime is what makes these tacos irresistible. Serve immediately while warm.
Pro Tips For Making Pinto Bean Taco
- Rinse the Beans: Drain and rinse the canned pinto beans well to remove excess starch—I learned this the hard way after my first batch turned to mush.
- Sauté Onions First: Cook the yellow onion in olive oil until soft and golden, about 5 minutes, before adding anything else. This builds the base flavor.
- Bloom the Cumin: Add the ground cumin to the hot oil for 30 seconds before the garlic goes in. Sounds weird, but it works to wake up the spice.
- Skip the Garlic Burn: Stir in the pre-minced garlic only after the onions are done and heat is medium-low—after burning three batches, I finally figured out it cooks in seconds.
Essential Equipment for This Dish
Skillet Selection
I always reach for my 12-inch cast iron skillet for this recipe—its even heat distribution and natural non-stick surface when seasoned properly make it ideal. A stainless steel sauté pan works too if you’re comfortable with deglazing. Avoid non-stick if you can, as the fond from the spices adds depth. 🔥
Wooden Spoon
A sturdy wooden spoon is essential for mashing the beans and stirring without scratching your pan. I use one from OXO—it’s affordable and lasts forever. The flat edge helps press the beans against the skillet for that perfect creamy texture.
Garlic Press
Though the recipe calls for pre-minced, I sometimes use fresh cloves with my garlic press from Zyliss. It crushes cloves in one quick motion and gives a more intense flavor. If using fresh, you’ll need about 6-8 cloves to equal 4 tsp minced.
Citrus Juicer
For the 2 tbsp lime juice, a hand-held citrus juicer makes quick work of extracting every last drop. I like the OXO Good Grips version—it’s dishwasher-safe and fits comfortably in my small Boston kitchen drawers. Fresh lime juice is non-negotiable for that bright finish.
Tortilla Warmer
Keep your tortillas warm and pliable with a cloth-lined tortilla warmer. I found mine at a local Mexican market for under $10. Just wrap your stack in a clean kitchen towel and place inside—it retains heat beautifully while you finish the filling.
Measuring Spoons
Accurate spice measurements matter here, so I use my trusty magnetic measuring spoons from Cuisinox. They nest together and stay organized in my tiny kitchen. The smoky paprika especially needs precise measurement—1.5 tsp makes all the difference.
Nutrition Facts
Frequently Asked Questions
Can I use dried beans instead of canned?
Yes, but soak 1 cup dried pinto beans overnight first. Drain, rinse, then cook in 3 cups water for 45-60 minutes until tender before using.
How do I make this spicier?
Add 1/4 tsp cayenne pepper with the spices or a dash of hot sauce at the end. For milder heat, reduce the chili powder to 1 tsp.
What’s the best way to warm tortillas?
Heat in a dry skillet over medium heat for 30 seconds per side. Or wrap in a damp towel and microwave for 20-30 seconds.
Can I make this ahead of time?
The filling tastes even better the next day. Store in an airtight container in the fridge for up to 4 days. Reheat gently before serving.

Trained in classic French technique but raised on slow-cooked ribs and spicy rubs, she blends culinary skill with smoke and soul.
- Recipe for Boneless Pork Chops in Cast Iron Skillet: Sear and Baste to Juicy Perfection - October 3, 2026
- Recipe for Boneless Cross Rib Roast: Slow-Roasted Beef with Herb Crust - October 3, 2026
- Hamburgers in Sauce Recipe Crock Pot: Slow-Cooked Savory Delight - October 3, 2026