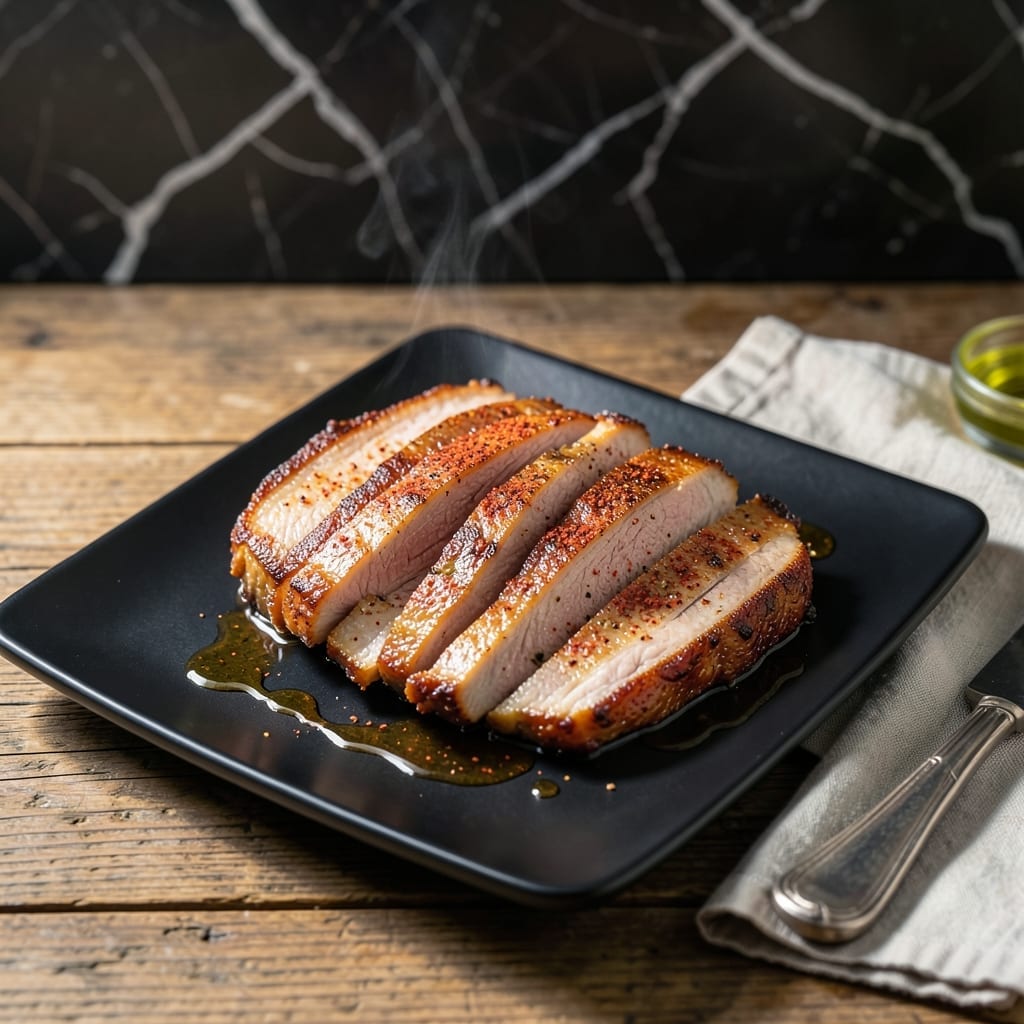
Mastering pork belly steak at home is simpler than you might think. The key lies in achieving that crispy fat cap while keeping the meat succulent and flavorful underneath.
This method involves scoring the skin to render the fat evenly, then cooking at high heat to create a golden, shatteringly crispy exterior. A simple dry rub enhances the natural richness without overpowering it.
The result is a dish with perfect contrast—tender meat beneath a layered, crispy top. Each bite delivers deep, savory flavor with a satisfying crunch that makes this cut truly special.
Serve with light sides to balance the richness. This technique ensures professional results every time.
Ingredients for Pork Belly Steak
These carefully selected ingredients deliver restaurant-quality results with a crispy fat cap and tender meat.
| Ingredient | Amount | Notes |
|---|---|---|
| Pork Belly 🥓 | 2 lb | Skin-on, cut into 1-inch thick slices |
| Kosher Salt 🧂 | 2 tbsp | Diamond Crystal preferred for even curing |
| Black Pepper 🌶️ | 1 tbsp | Freshly ground for maximum aroma |
| Smoked Paprika 🌶️ | 1 tsp | Adds depth to the crust |
| Garlic Powder 🧄 | 1 tsp | Fine grind for even distribution |
| Onion Powder 🧅 | 1 tsp | Balances the dry rub blend |
| Dried Thyme 🍃 | ½ tsp | Crushed to release essential oils |
| Dried Rosemary 🌿 | ½ tsp | Finely chopped for texture |
| Olive Oil 🫒 | 1 tbsp | High smoke point for searing |
| Apple Cider Vinegar 🍏 | 1 tbsp | For acidity and balance |
| Brown Sugar 🍚 | 1 tsp | Optional for caramelization |
[recipe_ingredient_scaler]
The pork belly is non-negotiable—source skin-on, high-quality cuts from a trusted butcher or Whole Foods. Look for pieces with even fat-to-meat ratios and avoid pre-sliced versions, as they won’t hold up to the crisping process. The fat cap should be at least 1/2-inch thick for proper rendering. For the dry rub, Penzeys or bulk spices ensure freshness and potency (the good stuff, not that dusty jar from 2018).
No smoked paprika? Regular paprika plus a pinch of cayenne works, though you’ll lose some depth. Swap fresh garlic and onion for powders at 1:3 ratio—just mince them finely. Brown sugar can be omitted for a savory-only crust, or replaced with maple syrup brushed on during cooking. The vinegar balances the fat, but lemon juice is a fine substitute in a pinch.
Pork belly keeps 3-4 days wrapped in the fridge before cooking, or freeze for 3 months. The dry rub can be mixed ahead and stored in an airtight container for 6 months. Cooked steaks are best served immediately but reheat well in a hot skillet (worth the extra minute).
Why You’ll Love This Recipe
- One Pan Magic: Honestly, it’s just pork belly, salt, and a few spices—toss it in a pan and let the oven do the work.
- Crispy & Smoky: That combo of smoked paprika and garlic powder gives it a deep, crave-worthy flavor with every bite.
- Weeknight Hero: I throw this together after work and still have leftovers for tacos or rice bowls the next day.
- Budget Friendly: Pork belly stretches further than you’d think, and a little goes a long way for a hearty meal.
Step-by-Step Instructions for Pork Belly Steak
Master this technique for perfectly crispy fat caps and tender, succulent pork belly slices every time.
Step 1: Season the Pork Belly Generously
Pat the 2 lb Pork Belly slices completely dry with paper towels. This removes excess moisture that would prevent proper browning. The skin-on surface should be as dry as possible for optimal crispiness.
Combine the 2 tbsp Kosher Salt, 1 tbsp Black Pepper, 1 tsp Smoked Paprika, 1 tsp Garlic Powder, 1 tsp Onion Powder, 0.5 tsp Dried Thyme, and 0.5 tsp Dried Rosemary in a small bowl. Rub this mixture aggressively over every surface of each pork belly slice, pressing it into the meat and skin. The salt will begin curing the pork immediately, enhancing both flavor and texture.
Step 2: Cure and Rest for Maximum Flavor
Arrange the seasoned pork belly slices on a wire rack set over a baking sheet. Drizzle the 1 tbsp Apple Cider Vinegar evenly over the top, then sprinkle with the 1 tsp Brown Sugar. The vinegar adds subtle acidity while the sugar promotes caramelization.
Let the pork belly cure uncovered in the refrigerator for 1-2 hours. This step is crucial for developing flavor and ensuring the seasoning penetrates the meat. The surface will become slightly tacky as the cure works its magic, which helps create that coveted crispy crust.
Step 3: Sear the Pork Belly to Perfection
Heat the 1 tbsp Olive Oil in a large skillet over medium-high heat until shimmering. Carefully place the pork belly slices in the pan, skin-side down. The fat will begin rendering immediately, so be prepared for some splattering.
Sear undisturbed for 6-8 minutes until the skin develops a deep golden brown crust. The edges should be crispy and the fat cap should have rendered slightly. Flip and sear the other side for 3-4 minutes until equally browned. The pork should release easily from the pan when properly seared.
Step 4: Finish and Rest Before Serving
Reduce heat to medium-low and continue cooking for 2-3 minutes per side, basting the pork belly with the rendered fat and pan juices. This step ensures even cooking and maximum flavor development. The internal temperature should reach 145°F for perfect doneness.
Transfer the pork belly to a cutting board and let rest for 5-10 minutes before serving. This allows the juices to redistribute throughout the meat, ensuring each bite is moist and flavorful. The fat cap should remain crispy while the interior stays tender and succulent.
Pro Tips For Making Pork Belly Steak
- Score the Skin: Cut 1/4-inch crosshatches into the pork belly skin before seasoning—this lets the fat render out and gives you that crispy crackling everyone fights over.
- Dry It Well: Pat the pork belly completely dry with paper towels before seasoning; I learned this the hard way after my first three batches came out steamed instead of seared.
- Skip the Overcrowding: Give each piece at least an inch of space in the pan—crowding drops the temperature and turns your steaks into sad, greasy puddles.
- Rest Before Slicing: Let the cooked pork belly rest 5-10 minutes under foil, or all those beautiful juices will end up on your cutting board instead of in the meat.
Troubleshooting Perfect Results
Uneven Crisping
If your fat cap isn’t crisping evenly, the skin likely wasn’t dry enough before searing. Pat the pork belly with paper towels for 5 minutes and score the skin in ¼-inch intervals to help render fat uniformly. 🔥
Overcooked Interior
This happens when the heat is too high. Use medium-high heat for searing, then reduce to medium-low to finish. Pull the steaks when internal temp hits 145°F—they’ll carry over to perfect doneness while resting.
Soggy Crust
Soggy fat caps often result from covering during resting. Always rest pork belly steaks uncovered on a wire rack. If reheating, use a 400°F oven for 5-7 minutes to revive crispiness.
Excessive Smoke
Smoke occurs when fat drippings burn. Use a heavy-bottomed skillet like Lodge cast iron and pour off excess fat between batches. Open windows and turn on the vent before starting.
Sticking to Pan
If steaks stick, your pan isn’t hot enough or you’re moving them too soon. Heat the pan until oil shimmers, then wait 2 minutes before flipping. A well-seasoned cast iron pan works best.
Bland Flavor
Bland results usually mean under-seasoning. Be generous with the dry rub—press it into all surfaces. For extra punch, add ½ tsp cayenne to your spice mix or finish with flaky sea salt. ✨
Nutrition Facts
Frequently Asked Questions
Do I need to score the skin before cooking?
Scoring helps render fat evenly for crispier results. Use a sharp knife to make shallow cuts ¼-inch apart in a crosshatch pattern. Avoid cutting into the meat itself.
Can I use a different cooking method?
For oven cooking, sear first then finish at 375°F for 20-25 minutes. A grill works too—use indirect heat after initial searing to prevent burning the fat cap.
How do I know when it’s done?
Use a meat thermometer—the internal temp should reach 145°F. The fat cap will be golden brown and crispy when properly cooked. Rest for 5-10 minutes before serving.
What if my fat cap isn’t crispy?
Pat the skin completely dry before cooking and ensure your pan is hot enough. If needed, finish under a broiler for 1-2 minutes to crisp the top.

Trained in classic French technique but raised on slow-cooked ribs and spicy rubs, she blends culinary skill with smoke and soul.
- Recipe for Boneless Pork Chops in Cast Iron Skillet: Sear and Baste to Juicy Perfection - October 3, 2026
- Recipe for Boneless Cross Rib Roast: Slow-Roasted Beef with Herb Crust - October 3, 2026
- Hamburgers in Sauce Recipe Crock Pot: Slow-Cooked Savory Delight - October 3, 2026