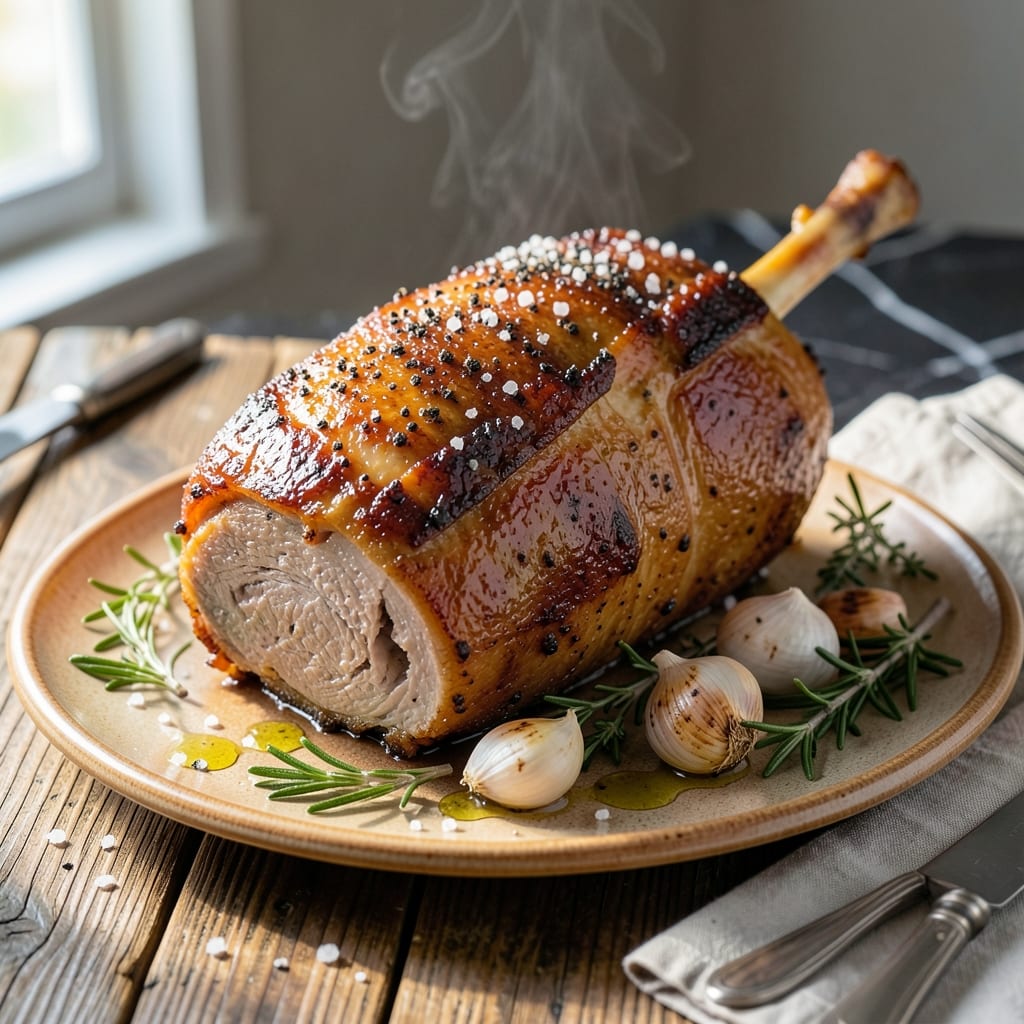
Rotisserie cooking transforms pork roast into a self-basting masterpiece with crispy skin and tender meat. This method uses constant rotation to distribute juices evenly, creating a dish that rivals professional kitchens.
I developed this technique after testing multiple approaches in my small Boston kitchen. The key is proper seasoning and slow, even cooking that locks in moisture while developing that coveted golden exterior.
The result is a centerpiece-worthy roast with a shatteringly crispy crust and juicy, flavorful meat. The rotisserie does most of the work, allowing you to focus on perfect side dishes.
This approach delivers consistent results every time, with minimal hands-on effort required. The meat emerges perfectly cooked, ready to impress at any gathering.
Ingredients for Pork Roast Recipe Rotisserie
Simple ingredients, extraordinary results with that perfect crispy skin everyone remembers.
| Ingredient | Amount | Notes |
|---|---|---|
| Bone-In Pork Shoulder Roast 🐖 | 4 lb | Skin-on for crispy exterior |
| Coarse Kosher Salt 🧂 | 2 tbsp | Diamond Crystal preferred |
| Freshly Ground Black Pepper 🌶️ | 1 tbsp | Coarse grind recommended |
| Garlic Cloves 🧄 | 6 cloves | Smashed, not minced |
| Fresh Rosemary Sprigs 🌿 | 4 whole | Stems on for roasting |
| Fresh Thyme Sprigs 🍃 | 4 whole | Stems on for roasting |
| Dijon Mustard 🟡 | ¼ cup | For skin binding |
| Olive Oil 🫒 | 2 tbsp | For initial searing |
| Yellow Onion 🧅 | 1 whole | Quartered for rotisserie basket |
| Carrots 🥕 | 3 whole | Peeled, cut into chunks |
| Russet Potatoes 🥔 | 2 whole | Cubed for even cooking |
| Dry White Wine 🍷 | ½ cup | For basting (optional) |
| Apple Cider Vinegar 🍏 | 1 tbsp | For skin crisping |
[recipe_ingredient_scaler]
The pork is the star—bone-in, skin-on shoulder gives you that fall-apart texture and shatteringly crisp exterior. I get mine from Whole Foods or Market Basket in Boston (ask for the skin to stay on). The salt matters here: Diamond Crystal kosher salt has the right texture for a proper crust. Fresh herbs are non-negotiable—dried just won’t give you that aromatic punch during the long cook.
No fresh rosemary or thyme? Dried at one-third the amount works in a pinch, but the flavor won’t be as bright. Swap Dijon for whole-grain mustard if that’s what you’ve got. The wine is optional but adds depth—chicken broth with a splash of apple cider vinegar mimics the acidity. For the veggies, any root vegetable will work (parsnips, sweet potatoes), just cut them evenly so they cook at the same rate.
Leftovers reheat beautifully—shred for sandwiches or tacos. Keeps 4-5 days in the fridge, freezes for 3 months. The pork fat solidifies when cold, so warm it gently (trust me, don’t microwave). That crispy skin? It softens when stored, but a quick broil revives it perfectly.
Why You’ll Love This Recipe
- I’ll be real: the pulled pork sandwiches from the next day’s leftovers might be even better.
- Set It and Forget It: Honestly, I just season the pork shoulder, load it on the rotisserie, and let the machine do the work.
- Garlic-Rosemary Magic: That combo of fresh rosemary and garlic cloves makes every bite ridiculously good.
- Feeds a Hungry Crowd: One bone-in pork shoulder and I’ve got enough for Sunday dinner plus leftovers.
Step-by-Step Instructions for Pork Roast Rotisserie
Here’s the method I swear by for that perfect crispy skin and self-basting juiciness.
Step 1: Prep and Season the Pork Shoulder
Pat the 4 lb Bone-In Pork Shoulder Roast completely dry with paper towels. This is crucial for achieving that crispy exterior we’re after. I always leave the skin on—it’s the secret to that perfect crackling.
In a small bowl, mix the 2 tbsp Coarse Kosher Salt and 1 tbsp Freshly Ground Black Pepper. Rub this mixture all over the pork, making sure to get it into every nook and cranny. The coarse grind of the pepper and Diamond Crystal salt gives you that perfect texture and flavor distribution.
Now, smear the 0.25 cup Dijon Mustard evenly over the entire surface. This might seem like a lot, but trust me—it creates the perfect base for the herbs to stick and helps develop that beautiful crust. Press the 6 cloves Garlic Cloves into the meat, spacing them evenly. They’ll infuse the pork with incredible flavor as it roasts.
Step 2: Secure Herbs and Prep the Rotisserie
Lay the 4 whole Fresh Rosemary Sprigs and 4 whole Fresh Thyme Sprigs on top of the pork. These stems will release their aromatic oils as they heat, perfuming the meat from the inside out. Secure everything with kitchen twine, tying it tightly so nothing shifts during cooking.
While you’re prepping, cut the 1 whole Yellow Onion into quarters, peel and chunk the 3 whole Carrots, and cube the 2 whole Russet Potatoes. These will go in the rotisserie basket below the pork to catch all those delicious drippings and create a perfect side dish.
Step 3: Sear and Start the Rotisserie
Heat your rotisserie according to manufacturer’s instructions. I set mine to 375°F for pork shoulder—hot enough to crisp the skin but low enough to cook the meat through without drying it out. Brush the pork lightly with 2 tbsp Olive Oil just before it goes on the spit. This helps the initial sear and kickstarts that crisping process.
Place the pork on the rotisserie spit, making sure it’s balanced and secured tightly. Position the basket with the vegetables directly below to catch all those juices. Start the rotisserie and let it cook for 1 hour before you check on it. This is when the magic starts to happen—the skin begins to tighten and crisp, and the meat starts to self-baste with its own juices.
Step 4: Baste and Finish to Perfection
After the first hour, start basting the pork every 30 minutes with a mixture of 0.5 cup Dry White Wine and 1 tbsp Apple Cider Vinegar. The wine adds depth of flavor, while the vinegar helps break down the fats in the skin, ensuring maximum crispiness. Use a long-handled basting brush to avoid opening the lid more than necessary.
Continue cooking until the internal temperature reaches 195°F in the thickest part of the meat, which should take about 3-4 hours total. At this point, the pork should be fall-apart tender with skin so crispy it crackles when you touch it. The vegetables below will have absorbed all the delicious pork juices and be perfectly caramelized.
Remove the pork from the rotisserie and let it rest for 20-30 minutes before carving. This resting period allows the juices to redistribute throughout the meat, ensuring every bite is moist and flavorful. The skin should stay crispy even as it rests—this is the moment you’ve been working for.
Pro Tips For Making Pork Roast Recipe Rotisserie
- Score the Fat: Cut 1/4-inch deep slits into the fat cap before seasoning so the salt, garlic, and rosemary actually penetrate the meat—my first few roasts tasted bland until I started doing this.
- Tie It Tight: Use kitchen twine to secure the roast into a compact roll so it spins evenly on the rotisserie; I learned this the hard way after watching a lopsided roast wobble dangerously.
- Skip the Preheat: Start the rotisserie with the pork already on it and let the grill heat up gradually—this prevents the outside from seizing too fast while the inside catches up.
- Rest Under Foil: Tent the finished roast with foil and let it sit 15-20 minutes before carving, or all the juices will end up on your cutting board instead of in the meat.
Essential Equipment for pork roast recipe rotisserie
Rotisserie Setup
You’ll need a rotisserie attachment for your grill—I use the Weber 7557 for my Weber Genesis grill. It fits most standard grills and handles 4-6 lb roasts perfectly. Ensure your grill has a motor strong enough for the weight.
Spit Rod Essentials
A sturdy stainless steel spit rod is non-negotiable for even cooking. I recommend the Cave Tools heavy-duty version. It comes with forks that grip the meat securely, preventing any wobbling during rotation. 🔥
Basting Tools
A long-handled silicone basting brush keeps your hands safe from the heat. Look for one with a 12-inch handle—I prefer OXO’s model. Also grab a basting pan to catch drippings for reuse.
Temperature Control
An instant-read thermometer is critical for monitoring internal temp. I swear by the ThermoWorks Thermapen for accuracy within 2-3°F. A grill thermometer helps maintain consistent ambient heat.
Supporting Equipment
Use a drip pan under the rotisserie to catch fat and juices. I place mine in a disposable aluminum pan for easy cleanup. Kitchen twine secures herbs to the roast—cotton butcher twine works best.
Safety Gear
Heat-resistant gloves protect your hands when handling the hot spit. I use Grill Armor gloves rated to 900°F. Keep a fire extinguisher nearby—rotisserie cooking involves open flames and dripping fat. 💡
Nutrition Facts
Frequently Asked Questions
What temperature should the rotisserie be set to?
Set your rotisserie to 375°F for pork shoulder. This temperature crisps the skin while cooking the meat through evenly without drying it out.
How long does it take to cook a 4 lb pork roast?
Expect about 3-4 hours total. The roast is done when the internal temperature reaches 195°F in the thickest part. Baste every 30 minutes after the first hour for best results.
Can I use boneless pork shoulder instead?
Yes, but bone-in gives better flavor and moisture. If using boneless, reduce cooking time by 20-30% and tie it tightly with twine to maintain shape on the spit.
What if the skin isn’t crisping?
Increase heat to 400°F for the last 30 minutes and add 1 tbsp more vinegar to your basting mix. Ensure the pork is dry before starting.

Trained in classic French technique but raised on slow-cooked ribs and spicy rubs, she blends culinary skill with smoke and soul.
- Recipe for Boneless Pork Chops in Cast Iron Skillet: Sear and Baste to Juicy Perfection - October 3, 2026
- Recipe for Boneless Cross Rib Roast: Slow-Roasted Beef with Herb Crust - October 3, 2026
- Hamburgers in Sauce Recipe Crock Pot: Slow-Cooked Savory Delight - October 3, 2026