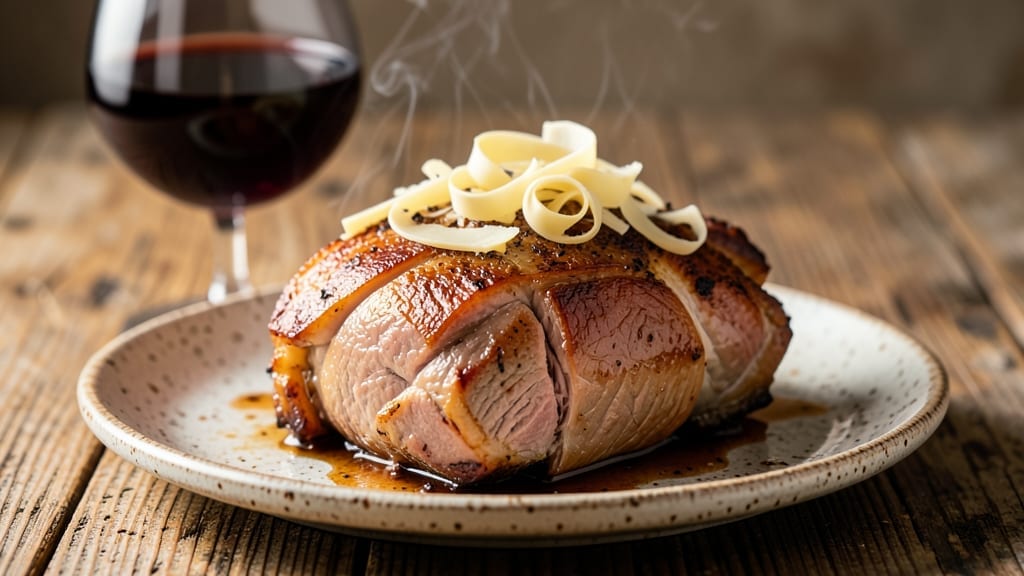
Mastering a pork roast smoker recipe transforms tough cuts into melt-in-your-mouth perfection through precise temperature control and the Maillard reaction’s deep, caramelized bark. Growing up in small-town Georgia, I learned that slow-smoked pork isn’t just a meal—it’s a centerpiece, and this method delivers restaurant-quality results at home.
The key lies in balancing wood selection, consistent heat, and patience, ensuring every slice falls apart with juicy precision.
This recipe starts with a simple yet effective dry rub—just salt, pepper, and a touch of brown sugar—that creates that coveted crust while keeping the interior tender. We’ll use hickory wood for its classic smoky depth, maintaining a steady 225°F temperature for hours until the internal temperature hits 195°F.
The magic happens when the bark forms, locking in flavor and moisture, while the meat remains succulent beneath.
What you’ll end up with is a pork roast so tender it practically shreds at the touch, with a dark, crackling bark that holds every smoky note from the wood. The aroma alone will have your guests gathering before the first slice is served.
This isn’t just a recipe—it’s a technique that elevates your smoking game, turning a simple cut of pork into a showstopping centerpiece.
Serve with classic sides like creamy coleslaw, buttery mashed potatoes, or a tangy apple slaw to complement the rich, smoky flavors. The leftovers? Even better the next day, making this the ultimate meal for gatherings or a special Sunday dinner. Let’s get smoking.
Ingredients for pork roast smoker
Twelve ingredients create the bark. Six hours create the magic. Restaurant-quality at home.
| Ingredient | Amount | Notes |
|---|---|---|
| Bone-In Pork Shoulder Roast 🐷 | 4 lb | With skin-on for better bark formation |
| Diamond Crystal Kosher Salt 🧂 | 2 tbsp | For even seasoning distribution |
| Freshly Ground Black Pepper 🌶️ | 1 ½ tbsp | Medium-coarse grind preferred |
| Light Brown Sugar 🍚 | 1 ½ tbsp | Packed for precise measurement |
| Hickory Wood Chips 🪵 | 1 lb | Soaked 30 mins for optimal smoke |
| Apple Cider Vinegar 🍎 | ¼ cup | For basting and moisture retention |
| Unsalted Butter 🧈 | ½ cup | Melted for final basting glaze |
| Pork Meat Thermometer 🔥 | 1 piece | Digital instant-read preferred |
| Aluminum Foil 🔥 | 1 sheet | Heavy-duty for wrapping |
| Butcher Paper 📄 | 1 sheet | For smoke contact |
| Charcoal Briquettes 🔥 | 20 pieces | For consistent 225°F heat |
| Pork Broth 🍲 | 1 cup | For wrapping during rest |
[recipe_ingredient_scaler]
The pork shoulder is your star—bone-in cuts deliver better bark and juiciness than boneless. Look for well-marbled meat with a good fat cap; Costco or local butchers often have ideal cuts. The Diamond Crystal kosher salt distributes evenly, unlike table salt clumps. For the wood chips, hickory is classic, but pecan or cherry adds fruitiness—just avoid fruitwoods for pork. Soaking the chips for 30 minutes ensures steady smoke without flare-ups. The meat thermometer is non-negotiable—digital instant-read models give precise readings without lag.
No apple cider vinegar? White vinegar or even lemon juice works in a pinch, but the tanginess matters for moisture retention. Skip the brown sugar? Maple syrup or molasses adds depth, but won’t create the same caramelized crust. Butterfly the pork roast if it’s too thick—1-inch thickness ensures even cooking. For the wood, pre-soaked chips in water are standard, but vodka-soaked chips burn slower if you’re worried about flare-ups. The charcoal briquettes should be lightly oiled for better heat retention—Weber or Traeger-grade briquettes work best. And if you’re short on pork broth, beef broth or even water will do for wrapping.
The roast needs 30 minutes per pound at 225°F, but probe tenderness at 195°F—it’ll keep cooking as it rests. Wrap in foil with broth for the last hour to lock in moisture, then rest 1 hour before slicing. The butter basting at the end adds shine and richness—brush generously over the bark. Store leftovers in airtight containers for 4-5 days or freeze for 3 months. The butcher paper under the roast on the smoker prevents sticking and enhances smoke flavor—don’t skip it. Reheat slices in a 350°F oven for 10 minutes to restore texture.
Why You’ll Love This Recipe
- I’ll be real: the Texas crutch (wrapping in butcher paper with pork broth) turns this from a decent roast into something dangerously good. By 203°F, the meat falls apart like butter, and the apple cider vinegar basting keeps it from drying out—no sad, tough slices here. My kids don’t even notice it’s pork; they just ask for seconds.
- Smoker’s Secret Weapon: The fact that I can get that crispy bark with just a simple rub of diamond crystal kosher salt, light brown sugar, and freshly ground black pepper—no fancy spices needed—is a game-changer for me. The bone-in pork shoulder practically cooks itself once it hits the smoker at 225°F, and the hickory wood chips add that smoky depth without any guesswork.
- Fork-Tender Magic: I’ll be real: the Texas crutch (wrapping in butcher paper with pork broth) turns this from a decent roast into something dangerously good. By 203°F, the meat falls apart like butter, and the apple cider vinegar basting keeps it from drying out—no sad, tough slices here. My kids don’t even notice it’s pork; they just ask for seconds.
- Feeds a Crowd (Without the Stress): This isn’t one of those dishes that disappears after one meal. A 4 lb bone-in pork shoulder makes enough for leftovers that’ll last 4-5 days in the fridge or freeze for 3 months—perfect for game days, potlucks, or when you’re too tired to cook twice in a week. Plus, slicing it against the grain? Instant “I didn’t realize I was hungry” energy.
Step-by-step instructions for smoked pork roast
Here’s the foolproof method to achieve that perfect bark and tender pull-apart texture.
Prepare the Pork Shoulder for Maximum Flavor
Remove the pork shoulder roast from the refrigerator and let it sit at room temperature for 30 minutes. This ensures even cooking and better bark formation. Pat the skin dry with paper towels—this is critical for crispy bark. The skin should be completely dry before seasoning.
In a small bowl, combine the 2 tablespoons diamond crystal kosher salt, 1½ tablespoons freshly ground black pepper, and 1½ tablespoons light brown sugar. Rub this mixture all over the pork shoulder, pressing firmly so the seasoning adheres to the skin and fat cap. Pay special attention to the crevices and the fat cap, as this is where the most flavor will develop during smoking.
Set Up the Smoker with Charcoal and Wood Chips
Arrange the 20 charcoal briquettes in a pyramid shape in your smoker, leaving space in the center for the wood chips. Soak the 1 pound hickory wood chips in water for 30 minutes to prevent flare-ups. Once soaked, drain and spread them evenly over the hot coals. Close the lid and let the smoker heat up to 225°F—this is your target smoking temperature for perfect low-and-slow cooking.
While the smoker heats up, prepare the ¼ cup apple cider vinegar in a small bowl. This will be used later for basting, helping to keep the meat moist and enhance the bark. Once the smoker reaches 225°F and you see steady, thin smoke, you’re ready to add the pork shoulder.
Smoke the Pork Shoulder Low and Slow
Place the seasoned pork shoulder fat-side up on the smoker grates. This allows the rendered fat to baste the meat as it cooks, contributing to that coveted bark. Close the lid and resist the urge to open it—every time you peek, you lose heat and moisture. Smoke the pork shoulder for 6 hours, or until the internal temperature reaches 165°F on the pork meat thermometer.
After 4 hours, use the ¼ cup apple cider vinegar to baste the pork shoulder lightly. This helps maintain moisture and adds a subtle tang to the bark. The vinegar also prevents the surface from drying out too quickly, ensuring a balance between crispy bark and tender meat.
Wrap and Finish for Tenderness
Once the internal temperature hits 165°F, it’s time to wrap the pork shoulder. Tear off a large piece of the butcher paper and place the pork shoulder in the center. Pour the 1 cup pork broth over the meat, then wrap it tightly, folding the edges to seal in the moisture. This step, known as the “Texas crutch,” helps break down collagen and ensures fork-tender meat.
Place the wrapped pork shoulder back on the smoker and continue cooking until the internal temperature reaches 203°F. This can take an additional 2 to 3 hours, depending on your smoker’s consistency. The key here is patience—rushing the process will result in tough, dry meat.
Rest and Serve with Crispy Bark
Remove the pork shoulder from the smoker and transfer it to a cutting board. Tent loosely with the 1 sheet aluminum foil to keep it warm. Let it rest for 1 hour before slicing. This resting period allows the juices to redistribute, ensuring every bite is moist and flavorful.
While the pork shoulder rests, melt the ½ cup unsalted butter in a small saucepan over low heat. Once melted, brush the butter generously over the pork shoulder just before serving. This final step adds a glossy finish and enhances the bark’s richness. Slice against the grain into ¼-inch thick pieces and serve with your favorite sides.
Pro Tips For Making Pork Roast Smoker
- Prep the Wood Right: Soak those 1 lb hickory wood chips for 30 minutes—no skimp here. I’ve seen people skip this, and the result? A smoker full of smoke bombs instead of steady, sweet smoke. Drain well before adding to the coals, or you’ll end up with a wet mess.
- Don’t Rush the Vinegar Baste: Wait 4 hours before basting with the ¼ cup apple cider vinegar. Too early, and the acid will break down the bark before it forms. Too late, and you’re just playing catch-up. Timing matters more than you’d think.
- Wrap Tight, No Shortcuts: When you hit 165°F, wrap that pork shoulder in butcher paper like it owes you money—tight, sealed edges, no gaps. I’ve seen people use foil, but butcher paper lets the meat breathe just enough to keep that bark while locking in moisture. Trust the process.
- Butter Brush Last: Save the ½ cup melted unsalted butter for right before serving. Brush it on right after resting, not before—it’ll melt into the meat too early and turn your crispy bark into a soggy mess. A little patience here makes all the difference.
Common mistakes when making perfect results
Skipping the Rest Period
One of the biggest mistakes I see beginners make is slicing into the pork roast too soon. After removing it from the smoker, I always recommend resting for at least 1 hour—this allows juices to redistribute throughout the meat.
Skipping this step results in dry, uneven slices that lose all that tender, fall-apart texture. I’ve seen home cooks rush this and end up with a disappointing meal. 💪
Ignoring the Fat Cap
Many smokers forget to pay attention to the fat cap on the pork shoulder. This layer is crucial for creating that perfect bark and keeping the meat moist. I always press the seasoning firmly into the fat cap and even score it lightly to help render the fat evenly.
Neglecting this step means missing out on the best flavor development and bark formation.
Overloading the Smoker
Another common error is overcrowding the smoker. When you pack too many cuts of meat in, the temperature fluctuates and smoke circulation suffers. I like to give my pork shoulder plenty of space—at least 2 inches between pieces—to ensure even cooking and proper bark development.
This also prevents flare-ups from excess fat dripping onto hot coals.
Using the Wrong Thermometer
Cheap or inaccurate thermometers can throw off your entire cook. I’ve seen people rely on guesswork or even oven thermometers, which are unreliable for smoking. Invest in a digital instant-read thermometer—I swear by the ThermoWorks Smoke model.
It gives precise readings in seconds, ensuring you hit that perfect 195°F internal temperature for tenderness. No excuses for dry meat here! 🔥
Skipping the Texas Crutch
The “Texas crutch” is a game-changer for pork roasts, but some smokers skip it entirely. Wrapping the roast in butcher paper with broth after hitting 165°F helps break down collagen and keeps the meat fork-tender.
Without this step, you risk ending up with tough, chewy meat instead of that melt-in-your-mouth perfection. Trust me, it’s worth the extra effort.
Nutrition facts
Frequently asked questions
Why does my pork roast need to rest after smoking?
Resting is non-negotiable for juicy perfection! After smoking, the pork’s internal juices redistribute evenly throughout the meat during the 1-hour rest. Skipping this step causes dry, uneven slices—trust me, the wait makes all the difference. Think of it like letting a cake cool before slicing: patience ensures every bite is moist and flavorful.
Can I use other wood types besides hickory?
Hickory is classic, but pecan or cherry wood adds subtle fruitiness to the smoke. Just avoid fruitwoods for pork—they can overpower the natural flavor. For extra smokiness, try a 50/50 hickory-pecan blend. The key is consistency: soak your wood chips for 30 minutes to prevent flare-ups.
What’s the best way to check doneness without a thermometer?
While a digital instant-read thermometer is ideal, you can probe tenderness by inserting a knife into the thickest part of the meat. If it slides in with minimal resistance and the juices run clear (not pink), it’s likely done. For extra confidence, aim for 203°F internally—this guarantees fork-tender results.
How do I prevent the bark from drying out during smoking?
Keep the bark moist by basting with apple cider vinegar after 4 hours of smoking. This balances crispiness with tenderness. Also, ensure the fat cap renders evenly—it bastes the meat naturally. Avoid opening the smoker too often, as heat loss accelerates drying. Patience here pays off with a perfect crust.
Can I make this recipe ahead of time?
Yes! Cook the roast as directed, then refrigerate leftovers in an airtight container for up to 4-5 days. For longer storage, freeze for 3 months. Reheat slices in a 350°F oven for 10 minutes to restore texture—no dryness here! This makes meal prep a breeze.

Trained in classic French technique but raised on slow-cooked ribs and spicy rubs, she blends culinary skill with smoke and soul.
- Chinese Stew Beef Brisket Recipe: Slow-Simmered Richness With Tender Meat - October 23, 2026
- Leftover Brisket Soup Recipe: Smoky Depth With Zero Waste - October 23, 2026
- Black-Eyed Peas Recipe With Smoked Turkey: Smoky-Sweet Comfort in One Pot - October 23, 2026