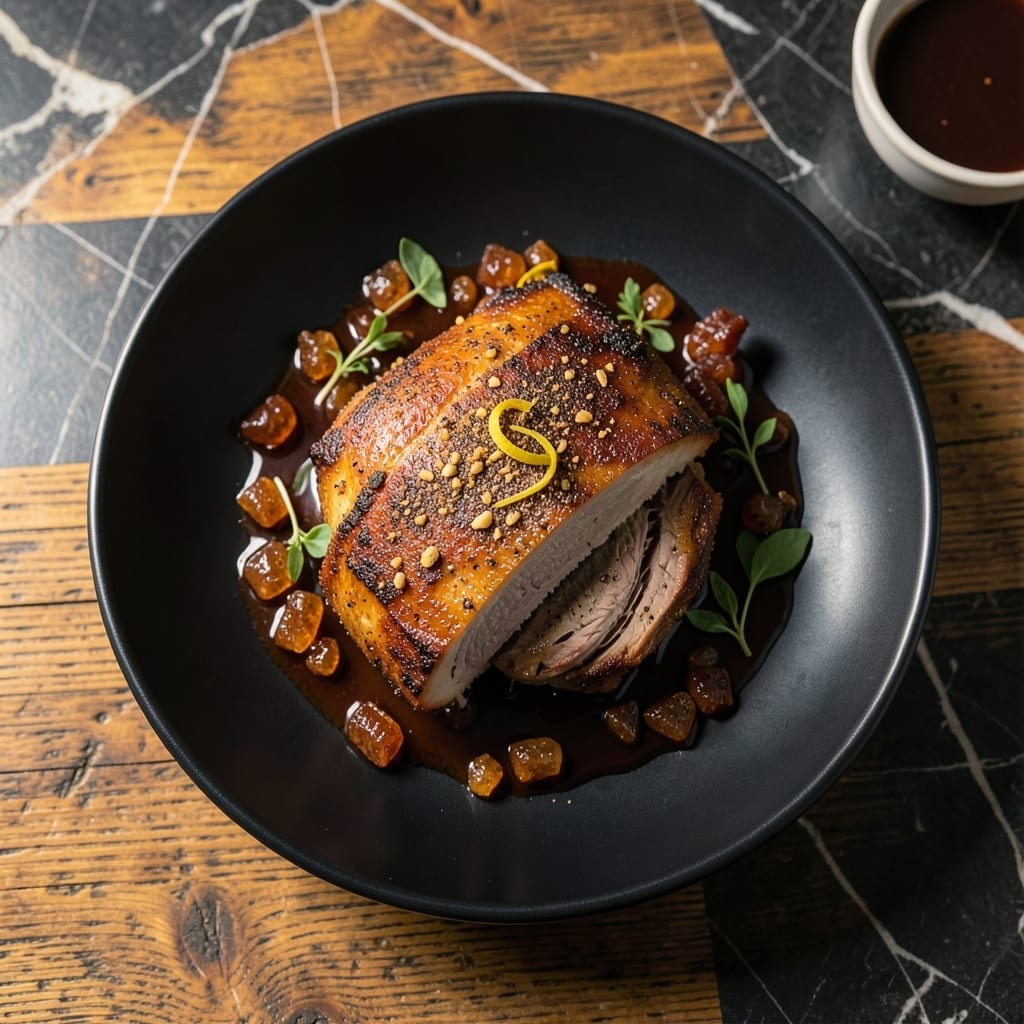
Transform your Sunday dinner with this slow-cooked pork shoulder that falls apart at the touch of a fork. The secret lies in patience, allowing the connective tissue to melt into rich, velvety tenderness over hours of gentle cooking.
This method works in the oven, slow cooker, or on the stovetop, each delivering that signature pull-apart texture. A simple dry rub of salt, pepper, and smoked paprika enhances the pork’s natural richness without overpowering it.
What emerges is tender meat that absorbs every bit of its cooking juices, creating a dish that’s as comforting as it is impressive. The meat practically shreds itself, ready for tacos, sandwiches, or a hearty plate with roasted vegetables.
Perfect for feeding a crowd or meal prepping for the week ahead.
Ingredients for Pork Shoulder Recipe Ideas
These quality ingredients transform pork shoulder into tender, fall-apart perfection ready for any meal.
| Ingredient | Amount | Notes |
|---|---|---|
| Pork Shoulder 🥩 | 4 lb | Bone-in preferred for flavor |
| Kosher Salt 🧂 | 2 tbsp | Diamond Crystal preferred |
| Freshly Ground Black Pepper 🌶️ | 1 tbsp | Coarse grind for texture |
| Smoked Paprika 🌶️ | 2 tsp | Sweet or hot variety |
| Garlic Powder 🧄 | 1 tbsp | Not garlic salt |
| Onion Powder 🧅 | 1 tbsp | Fresh ground preferred |
| Brown Sugar 🍚 | ½ cup | Light or dark variety |
| Apple Cider Vinegar 🍏 | ¼ cup | Balances richness of pork |
| Olive Oil 🫒 | 2 tbsp | For searing pork |
| Chicken Broth 🍲 | 2 cups | Low-sodium preferred |
| Yellow Onions 🧅 | 2 whole | Large, sliced thick |
| Carrots 🥕 | 3 whole | Peeled, cut into chunks |
| Celery Stalks 🌿 | 3 whole | Cut into large pieces |
| Bay Leaves 🍃 | 2 pieces | Dried, whole |
[recipe_ingredient_scaler]
The pork shoulder is the foundation—bone-in yields superior flavor and moisture. Source from Costco or Whole Foods for consistent quality. Look for good marbling and a thick fat cap, which renders down beautifully during cooking. The dry rub spices should be fresh; Penzeys offers excellent smoked paprika and garlic powder. For the broth, Better Than Bouillon provides depth without overpowering saltiness.
No pork shoulder? Pork butt works identically (it’s the same cut, just different naming). Short on time? Country-style ribs offer similar texture in less time. For a sweeter profile, swap brown sugar with maple syrup. Apple cider vinegar can be replaced with white vinegar in a pinch, though the flavor will be sharper. The onion and celery form the aromatic base—leeks or shallots work as substitutes.
Store raw pork in the fridge for up to 3 days or freeze for 6 months. Cooked pork keeps 4-5 days refrigerated or 3 months frozen. The dry rub can be mixed ahead and stored in an airtight container for up to 1 month.
Why You’ll Love This Recipe
- Set It and Forget: I rub the shoulder with salt, pepper, and smoked paprika, pop it in the oven, and let the spices do the work.
- Smoky, Garlicky Depth: The garlic powder and smoked paprika give it that deep, rich flavor without any fancy techniques.
- Feeds the Whole Crew: One pork shoulder stretches across tacos, sandwiches, and nachos for the whole family.
- Leftovers for Days: Honestly, I make this just for the sandwiches and quesadillas it turns into the next day.
Step-by-Step Instructions for Pork Shoulder
Master this technique for fall-apart tender pork with rich, developed flavor in every bite.
Step 1: Create the Dry Rub and Season the Pork
In a small bowl, combine 2 tbsp Kosher Salt, 1 tbsp Freshly Ground Black Pepper, 2 tsp Smoked Paprika, 1 tbsp Garlic Powder, 1 tbsp Onion Powder, and 0.5 cup Brown Sugar. Mix thoroughly until the spices are evenly distributed and the brown sugar has no clumps.
Pat the 4 lb Pork Shoulder dry with paper towels to ensure the rub adheres properly. Massage the spice mixture all over the pork, pressing firmly so it creates a crust. I focus on getting the rub into every crevice for maximum flavor penetration. Let the seasoned pork sit at room temperature for 30-45 minutes while you prepare the remaining ingredients.
Step 2: Sear the Pork and Prepare the Aromatics
Heat 2 tbsp Olive Oil in a large Dutch oven over medium-high heat until it shimmers. Add the pork shoulder and sear on all sides for 8-10 minutes total, turning occasionally, until you achieve a deep golden-brown crust. This step builds the foundation of flavor for your dish.
While the pork sears, slice the 2 whole Yellow Onions into thick wedges, peel and cut the 3 whole Carrots into large chunks, and cut the 3 whole Celery Stalks into large pieces. These vegetables will create a flavorful bed for the pork to braise in. Remove the pork from the Dutch oven and set it aside temporarily.
Step 3: Deglaze and Begin the Braising Process
In the same Dutch oven, add the sliced onions, carrots, and celery. Cook over medium heat for 5 minutes, stirring occasionally, until the vegetables begin to soften and develop some color. This builds additional flavor layers before the long cooking process.
Pour in 0.25 cup Apple Cider Vinegar and scrape the bottom of the pot to release all the browned bits—this is where intense flavor lives. Add 2 cups Chicken Broth and 2 pieces Bay Leaves, then return the pork to the pot. The liquid should come about halfway up the pork. If needed, add a bit more broth to maintain this level.
Step 4: Slow Cook to Melting Tenderness
Cover the Dutch oven and transfer it to a preheated 325°F oven. Braise for 3-4 hours, turning the pork over halfway through the cooking time. You’ll know it’s ready when the pork shreds easily with a fork and reaches an internal temperature of 195-200°F.
Check occasionally to ensure the liquid hasn’t reduced too much—add a splash of broth if needed. The pork is done when it’s fork-tender and the collagen has melted into the cooking liquid, creating a rich, velvety sauce. This low-and-slow method transforms the tough cut into something extraordinary.
Step 5: Rest and Serve
Carefully remove the pork from the Dutch oven and place it on a cutting board. Let it rest for 15-20 minutes before shredding or slicing. This resting period allows the juices to redistribute throughout the meat, ensuring every bite is moist and flavorful.
Skimming excess fat from the cooking liquid and reducing it slightly on the stovetop creates a perfect sauce to serve with the pork. The vegetables will have melted into the broth, infusing it with their essence. Serve the pork with the cooking liquid spooned over the top for maximum flavor impact.
Pro Tips For Making Pork Shoulder Recipe Ideas
- Rub Overnight: I learned this the hard way—coat the pork shoulder with kosher salt, black pepper, smoked paprika, and garlic powder at least 12 hours before cooking. It lets the spices penetrate deep, not just sit on the surface.
- Low and Slow: Keep the temperature between 225°F and 250°F for pulled pork texture. Any hotter and the fat won’t render properly, leaving it greasy instead of tender.
- Skip the Trimming: Resist the urge to trim all the fat cap—it bastes the meat as it cooks and keeps it moist. Just pat the shoulder dry before seasoning so the rub sticks.
- Rest Before Pulling: After cooking, let it rest under foil for 30-45 minutes. Sounds tedious, but it redistributes the juices so they don’t all end up on the cutting board.
Common Mistakes When Making This Recipe
Skipping the Sear
I know it’s tempting to skip searing to save time, but this step builds the Maillard reaction that creates deep, complex flavors. Without it, your pork will taste bland. Sear the pork shoulder for 8-10 minutes total in 2 tbsp Olive Oil over medium-high heat until deeply browned. 🔥
Insufficient Liquid
Using too little braising liquid causes the pork to steam rather than braise, resulting in dry meat. Your liquid should come about halfway up the pork. I recommend 2 cups Chicken Broth minimum, adding more if needed during cooking.
Rushing the Cook
Pork shoulder needs time for collagen to break down. Pulling it out at 165°F (chicken temp) means tough meat. Aim for 195-200°F internal temperature and 3-4 hours in a 325°F oven. Patience is key here.
Neglecting the Fat Cap
That thick fat cap isn’t waste—it renders down during cooking, basting the meat from within. Don’t trim it off before cooking. I leave the fat cap intact and let it work its magic. The result is self-basting, moist pork.
If you’re watching fat intake, skim the rendered fat from the cooking liquid after braising rather than removing it beforehand.
Skipping the Rest
Resting allows juices to redistribute throughout the meat. Slicing immediately causes all those precious juices to spill onto the cutting board. I always rest my pork for 15-20 minutes before shredding or serving. 💡
Nutrition Facts
Frequently Asked Questions
Can I use a slow cooker instead of the oven?
Cook on low for 8-10 hours or high for 5-6 hours. Add all ingredients as directed, but skip the Dutch oven searing for convenience.
What’s the best way to shred the pork?
Use two forks to pull the meat apart after resting. Discard any large fat chunks or bones, then toss the shreds in the cooking liquid. This keeps it moist.
Can I make this ahead of time?
Yes! Cooked pork stays fresh refrigerated for 4-5 days or frozen for 3 months. Reheat gently with extra broth to prevent drying out.
Why is my pork tough?
It likely didn’t cook long enough. Pork shoulder needs to reach 195-200°F internally for collagen to melt. Always check with a meat thermometer.

Trained in classic French technique but raised on slow-cooked ribs and spicy rubs, she blends culinary skill with smoke and soul.
- Recipe for Boneless Pork Chops in Cast Iron Skillet: Sear and Baste to Juicy Perfection - October 3, 2026
- Recipe for Boneless Cross Rib Roast: Slow-Roasted Beef with Herb Crust - October 3, 2026
- Hamburgers in Sauce Recipe Crock Pot: Slow-Cooked Savory Delight - October 3, 2026