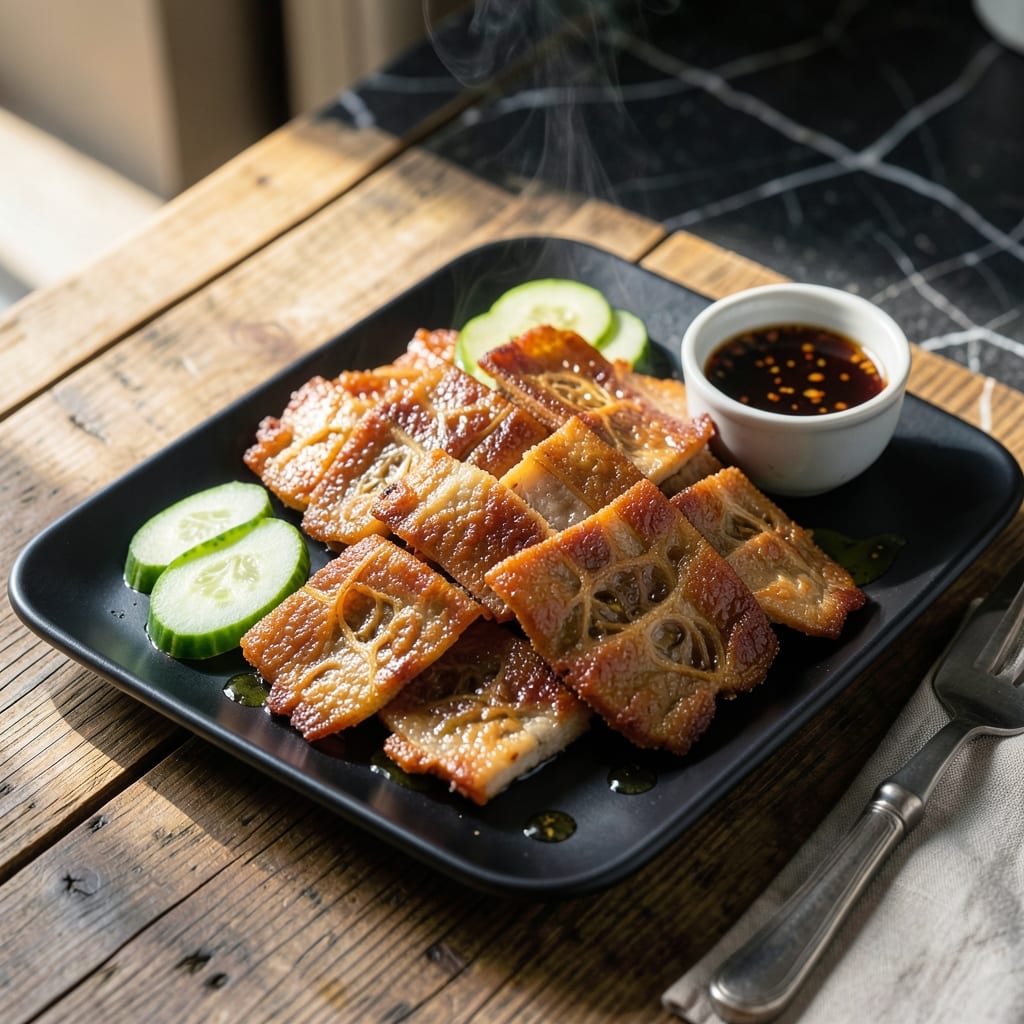
This traditional Filipino chicharon delivers crispy, golden pork skin with a satisfying crunch in every bite. I developed this method after studying my grandmother’s handwritten notes, which emphasized patience and proper drying.
The secret lies in the preparation: boiling the pork skin first to remove impurities, then drying it thoroughly before frying. This ensures maximum crispiness and that signature puffed texture that makes chicharon irresistible.
What you’ll achieve is a batch of perfectly crispy pork cracklings that shatter when you bite into them. The flavor is pure and salty, with just the right amount of chew at the edges.
Serve as a snack, appetizer, or alongside your favorite Filipino dishes. This technique guarantees restaurant-quality results at home.
Ingredients for Pork Skin Recipe Panlasang Pinoy
Fresh pork skin and a few pantry staples transform into that irresistible crispy chicharon.
| Ingredient | Amount | Notes |
|---|---|---|
| Pork Skin 🐖 | 2 lb | Fresh, with fat trimmed off |
| White Vinegar 🍶 | 1 cup | For boiling and cleaning |
| Water 💧 | 8 cups | For initial boiling process |
| Salt 🧂 | 2 tbsp | Kosher or coarse sea salt |
| Baking Soda 🧪 | 1 tsp | Optional for extra crispiness |
| Cooking Oil 🫒 | 4 cups | Neutral high-smoke-point oil |
| Black Pepper 🌶️ | 1 tsp | Freshly ground preferred |
| Garlic Powder 🧄 | 1 tsp | Optional for seasoning |
| Bay Leaf 🌿 | 2 pieces | For boiling aroma |
| Peppercorns 🌶️ | 1 tsp | Whole, for boiling |
[recipe_ingredient_scaler]
The pork skin is everything here. Ask your butcher for fresh, untrimmed skin with fat still attached—you’ll trim it yourself. Look for pieces with even thickness, about 1/8-inch, for consistent puffing. Asian markets often carry pre-cut skin perfect for this. Avoid pre-salted or cured skin (like for bacon), as it won’t crisp properly. Trim off all fat and membrane—this is tedious but non-negotiable.
No white vinegar? Apple cider vinegar works too, but avoid dark vinegars like balsamic. The baking soda step is optional but highly recommended—it raises the pH for extra puff. If you’re skipping the oven-drying step, a fan on high for 4-5 hours gets skin bone-dry. For seasoning, swap garlic powder for onion powder or a pinch of MSG for umami depth.
Store raw skin in the fridge for up to 2 days or freeze for 3 months. Finished chicharon keeps in an airtight container for 1 week—if it lasts that long. Re-crisp in a 350°F oven for 5 minutes if it softens. Always cool completely before storing.
Why You’ll Love This Recipe
- Five-Ingredient Wonder: I love that this only needs pork skin, vinegar, water, salt, and baking soda—no last-minute grocery runs.
- Crispy Perfection: The baking soda trick gives it that addictive crunch every time, and the vinegar cuts through the richness beautifully.
- Pulutan Star: Honestly, it’s my go-to for gatherings—everyone reaches for seconds, and it pairs with any beer or dip.
- Budget Hero: Pork skin is cheap, and this turns it into something special without breaking the bank.
Step-by-Step Instructions for Crispy Pork Skin
Here’s my tested method for achieving that perfect crunch we all love in every bite.
Step 1: Clean and Boil the Pork Skin
Start by thoroughly cleaning the 2 lb Pork Skin under cold running water to remove any impurities. In a large pot, combine the 8 cups Water, 1 cup White Vinegar, 2 tbsp Salt, 2 pieces Bay Leaf, and 1 tsp Peppercorns.
Bring this mixture to a rolling boil, then add the pork skin. Boil for 45-60 minutes until the pork skin becomes tender but still holds its shape. You’ll notice the skin lightens in color and softens significantly. This step removes excess fat and prepares the skin for crisping.
Step 2: Dry and Season the Skin
Drain the boiled pork skin and pat it completely dry with paper towels. I can’t stress this enough—moisture is the enemy of crispiness. Spread the skin pieces on a wire rack set over a baking sheet to allow air circulation on all sides.
Sprinkle the 1 tsp Baking Soda evenly over the skin pieces and rub it in gently. This helps break down proteins for extra crispiness. Then season with 1 tsp Black Pepper and 1 tsp Garlic Powder if using. Let the skin air-dry for 1-2 hours or until completely dry to the touch.
Step 3: First Fry for Puffing
In a deep, heavy-bottomed pot, heat the 4 cups Cooking Oil to 325°F. Working in batches to avoid overcrowding, carefully add the dried pork skin pieces. Fry for 10-12 minutes until they puff up and turn light golden brown.
You’ll see the skin transform from flat pieces to puffed, airy clouds—this is exactly what we want. Remove from the oil with a slotted spoon and drain on a wire rack or paper towels. The skin should be crispy but not yet deeply colored at this stage.
Step 4: Second Fry for Maximum Crispiness
Increase the oil temperature to 375°F. Return the puffed pork skin to the hot oil and fry for another 3-5 minutes until deep golden brown and ultra crispy. This second fry develops that signature crunch and rich color we associate with perfect chicharon.
Watch carefully as the skin can go from golden to burnt quickly at this high temperature. The pieces should be light as air and shatter when you bite into them. Drain on a wire rack to maintain crispiness—paper towels can make them soggy.
Step 5: Cool and Store Properly
Let the crispy pork skin cool completely at room temperature. As it cools, it will become even crunchier. Store in an airtight container at room temperature for up to 3 days, though it’s best enjoyed fresh.
If storing for longer, I recommend keeping it in the refrigerator but be aware it may lose some crispness. To revive, simply reheat in a 350°F oven for 5-10 minutes until crispy again. The texture should be light, airy, and shatteringly crisp in every piece.
Pro Tips For Making Pork Skin Recipe Panlasang Pinoy
- Boil with Baking Soda: Add 1 tablespoon of baking soda to the water when boiling the pork skin for 30-40 minutes—it softens the skin faster and removes impurities. I learned this the hard way after chewing on tough, rubbery skin for way too long.
- Rinse Thoroughly: After boiling, rinse the pork skin under cold water and scrub off any scum or residue. Skipping this leaves a bitter, soapy taste that no amount of vinegar can fix.
- Dry It Completely: Pat the pork skin bone dry with paper towels before frying or baking. Even a little moisture causes splattering or steaming instead of that perfect, airy crisp.
- Fry in Batches: Don’t crowd the pan—fry the skin in single-layer batches to guarantee even crisping. After burning my first few attempts, I finally accepted that patience beats impatience every time.
Storing and Reheating This pork skin recipe panlasang pinoy
Room Temperature Storage
Let your chicharon cool completely before storing—this takes about 30 minutes at room temperature. I use glass jars with tight lids to keep air out. It stays crispy for up to 3 days this way. Honestly, it never lasts that long in my house. 💪
Refrigerator Storage
For longer storage, place in an airtight container and refrigerate for up to 1 week. The cold will make it slightly chewy, but a quick reheat brings back the crunch. I learned this the hard way after my first few batches softened overnight.
Freezer Storage
Freeze chicharon in a single layer on a tray first, then transfer to a freezer bag. It keeps for up to 1 month. The key is removing as much air as possible to prevent freezer burn. I use my vacuum sealer for this.
Oven Reheating
Preheat oven to 350°F and spread pieces on a baking sheet. Warm for 5-10 minutes until crispy again. Watch closely—they can go from perfect to burnt quickly. I set a timer for 7 minutes and check frequently. 🔥
Air Fryer Revival
For small batches, use your air fryer at 375°F for 3-4 minutes. Shake the basket halfway through for even crisping. This method works great when you only need a handful for a snack.
Microwave Warning
I don’t recommend microwaving—it makes the chicharon soggy no matter what. If you must, use 10-second bursts on high power and check constantly. But trust me, the oven or air fryer gives far better results.
Nutrition Facts
Frequently Asked Questions
Why do I need to boil the pork skin first?
Boiling removes impurities and excess fat while softening the skin for even cooking. It also helps achieve that signature puff when fried.
How can I tell when it’s perfectly crisp?
It should be deep golden brown and shatter when you bite into it. If it bends, fry for 1-2 more minutes at 375°F.
Can I use an air fryer instead of deep frying?
Yes! Air fry at 375°F for 12-15 minutes, shaking halfway. It won’t puff as much but will still be crispy.
What’s the best way to store leftovers?
Keep in an airtight container at room temp for up to 3 days. For longer storage, freeze for up to 1 month.

Trained in classic French technique but raised on slow-cooked ribs and spicy rubs, she blends culinary skill with smoke and soul.
- Recipe for Boneless Pork Chops in Cast Iron Skillet: Sear and Baste to Juicy Perfection - October 3, 2026
- Recipe for Boneless Cross Rib Roast: Slow-Roasted Beef with Herb Crust - October 3, 2026
- Hamburgers in Sauce Recipe Crock Pot: Slow-Cooked Savory Delight - October 3, 2026