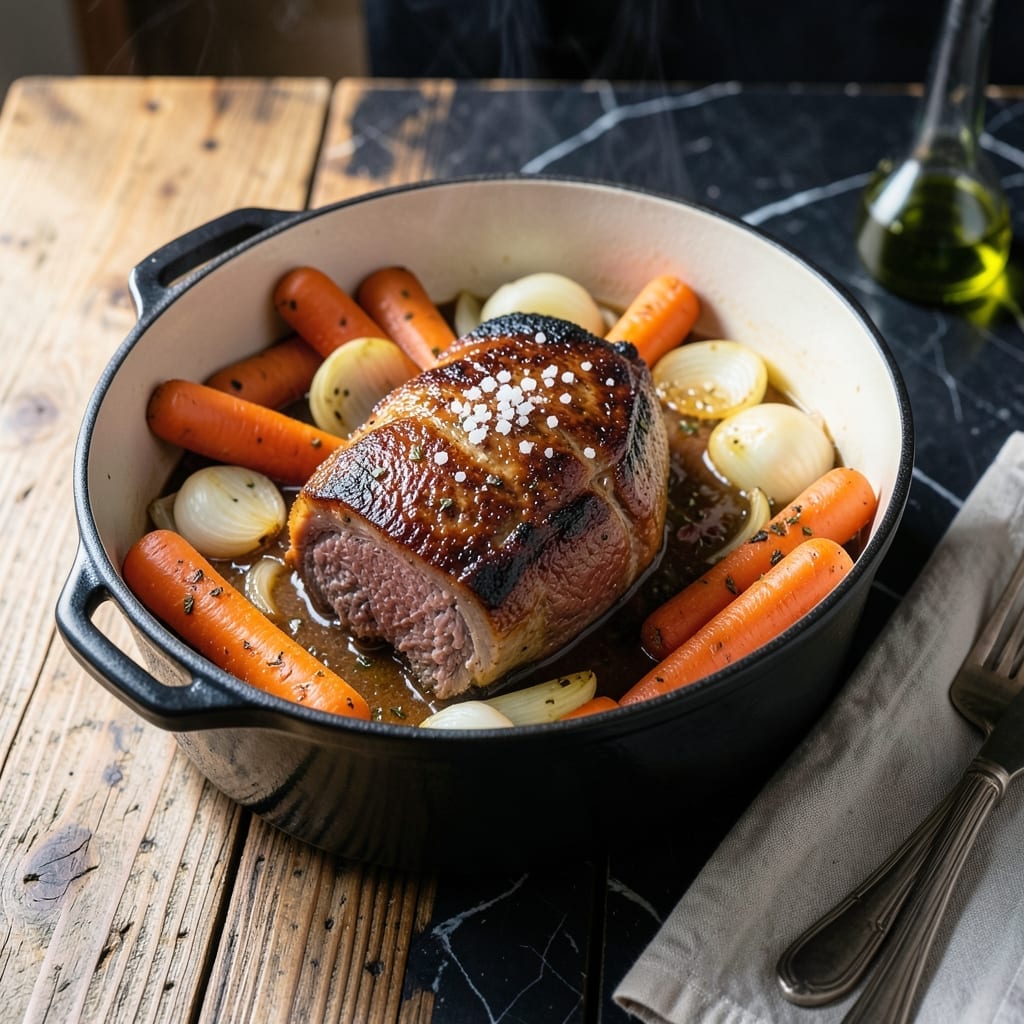
Low and slow is the secret to perfect pot roast, transforming tough cuts into fall-off-the-fork tenderness. I developed this method after years of testing in my tiny Boston kitchen, learning that patience always wins.
Cooking at a low temperature allows the connective tissue to break down gradually, creating meat so tender it nearly melts. The oven does most of the work, filling your home with rich, savory aromas that signal comfort.
This approach guarantees consistent results every time, with deeply flavored gravy from the slow-roasting process. The meat absorbs the seasonings completely, making each bite rich and satisfying.
Perfect for Sunday suppers or special occasions, this method turns an affordable cut into a meal that tastes like a labor of love. The results speak for themselves.
Ingredients for Pot Roast Recipe Oven Low Temperature
Well-marbled beef plus pantry staples create that melt-in-your-mouth magic we all crave.
| Ingredient | Amount | Notes |
|---|---|---|
| Chuck Roast 🥩 | 3 lb | Well-marbled, boneless preferred |
| Kosher Salt 🧂 | 1 ½ tsp | Diamond Crystal preferred for even seasoning |
| Freshly Ground Black Pepper 🌶️ | 1 tsp | Coarse grind for texture |
| Garlic Cloves 🧄 | 6 cloves | Minced or smashed for bold flavor |
| Yellow Onion 🧅 | 2 whole | Large, quartered with skin on |
| Carrots 🥕 | 4 whole | Peeled, cut into 2-inch chunks |
| Celery Stalks 🌿 | 3 pieces | Cut into 2-inch chunks |
| Red Wine 🍷 | 1 ½ cups | Dry bold variety like Cabernet |
| Beef Broth 🥣 | 2 cups | Low-sodium preferred for control |
| Tomato Paste 🍅 | 2 tbsp | For depth of umami flavor |
| Dried Thyme 🍃 | 1 tsp | Crushed between fingers to release oils |
| Dried Rosemary 🌿 | 1 tsp | Crushed to activate flavor |
| Bay Leaves 🍃 | 2 pieces | Dried, for aromatic depth |
| Olive Oil 🫒 | 2 tbsp | Extra-virgin for searing |
| All-Purpose Flour 🌾 | 2 tbsp | For thickening gravy later |
[recipe_ingredient_scaler]
The chuck roast is non-negotiable here—look for heavy marbling (those white fat streaks) at the supermarket. Costco has great pre-cut pieces, but any butcher will cube a whole roast for you. I always grab a slightly larger piece than needed since it shrinks during cooking. The wine should be something you’d actually drink—Cabernet Sauvignon or Merlot both work beautifully (or whatever red you have open).
No red wine? Beef broth with a splash of balsamic vinegar mimics the depth. Fresh thyme or rosemary can replace dried at one-third the amount. The tomato paste is worth opening a new can for—those squeeze tubes at Trader Joe’s are perfect for leftovers. If your butcher has short ribs, they’re a fantastic alternative cut (just extend cooking time by an hour).
This actually tastes better the next day. Store in the fridge for up to 5 days or freeze for 3 months. The gravy thickens as it cools, so reheat gently with a splash of water to loosen.
Why You’ll Love This Recipe
- Hands-Off Cooking: I throw the chuck roast in with salt, pepper, garlic, and onion, then let the oven do all the work for hours.
- Feeds a Crowd: It’s my go-to for Sunday suppers or when I need to stretch one meal into multiple lunches.
- Leftovers for Days: Honestly, it tastes even better the next day—sandwiches, tacos, you name it.
Step-by-Step Instructions for Pot Roast Oven Low Temperature
Low and slow is the secret here—your patience will be rewarded with fork-tender perfection.
Step 1: Season and Sear the Chuck Roast
Pat the 3 lb chuck roast completely dry with paper towels. This step is non-negotiable for achieving a proper sear. Season generously on all sides with the 1.5 tsp kosher salt and 1 tsp freshly ground black pepper, pressing the seasoning into the meat so it adheres well.
Heat the 2 tbsp olive oil in a large Dutch oven over medium-high heat until shimmering. Add the roast and sear undisturbed for 4-5 minutes per side until deeply browned. You’re looking for a rich, mahogany crust—this builds the flavor foundation for your dish. Remove the roast and set aside.
Step 2: Build the Aromatic Base
In the same Dutch oven, add the 2 whole yellow onion (quartered with skin on), 4 whole carrots (peeled and cut into chunks), and 3 pieces celery stalks (cut into chunks). Cook for 5 minutes, stirring occasionally, until the vegetables begin to soften and develop some color.
Add the 6 cloves garlic cloves (minced or smashed) and the 2 tbsp tomato paste, stirring constantly for 1-2 minutes until the tomato paste darkens slightly. This step intensifies its umami flavor. Sprinkle the 2 tbsp all-purpose flour over the vegetables and stir for 1 minute to cook off the raw flour taste.
Step 3: Deglaze and Add Liquids
Pour in the 1.5 cups red wine, scraping the bottom of the pot to release all the browned bits—this is where the magic happens. Let the wine simmer for 3-4 minutes until it reduces by about half. The alcohol will cook off, leaving behind concentrated flavor.
Add the 2 cups beef broth, 1 tsp dried thyme, 1 tsp dried rosemary, and 2 pieces bay leaves. Stir to combine, then return the seared chuck roast to the pot, nestling it into the liquid. The liquid should come about halfway up the roast—this ensures even cooking and maximum tenderness.
Step 4: Slow Roast to Perfection
Cover the Dutch oven and transfer it to the preheated 300°F oven. Roast for 3 to 3.5 hours, turning the roast halfway through the cooking time. This low temperature breaks down the collagen slowly, transforming tough muscle into buttery, fall-apart tenderness.
You’ll know it’s done when a fork slides into the meat with absolutely no resistance. The vegetables will be soft and infused with rich, savory flavor, and the liquid will have reduced slightly into a light gravy. If the liquid level gets too low, add a splash of water or additional beef broth.
Step 5: Rest and Serve
Carefully remove the chuck roast from the Dutch oven and transfer it to a cutting board. Tent it loosely with foil and let it rest for 15 minutes. This allows the juices to redistribute throughout the meat, ensuring every bite is moist and flavorful.
Skim any excess fat from the surface of the cooking liquid, then serve the pot roast with the vegetables and gravy spooned over the top. The meat should pull apart effortlessly with a fork, and the gravy will have a deep, rich flavor that ties everything together beautifully.
Pro Tips For Making Pot Roast Recipe Oven Low Temperature
- Start Low, Stay Slow: Set your oven to 275°F—any higher and the chuck roast tightens up instead of turning buttery. I learned this the hard way after pulling a dry, sad roast out of a 325°F oven.
- Salt the Night Before: Rub the chuck roast with kosher salt at least 12 hours ahead, or even overnight. Sounds weird, but it works: the salt penetrates deep, seasoning every bite, not just the surface.
- Skip the Crowded Pan: If you’re searing the roast first, don’t cram the onions and garlic in the same pan—steer clear of overcrowding or they’ll steam instead of caramelize. Two batches takes 5 extra minutes but makes a real difference.
- Use a Meat Thermometer: Pull the roast when the thickest part hits 195-200°F, not when the timer dings. After burning three batches by guessing, I finally figured out that internal temp is the only way to guarantee fall-apart tenderness.
Essential Equipment for Perfect Results
Dutch Oven Essentials
I swear by my 5.5-quart enameled cast iron Dutch oven from Lodge—it’s the workhorse of my kitchen. The heavy lid creates a perfect seal for low-temperature cooking, locking in moisture. Look for one with sturdy handles that can handle 300°F oven heat. 💪
Thermometer Importance
An instant-read thermometer changed my pot roast game. I use a ThermoWorks ThermoPop to check internal temp—195-203°F is the sweet spot for fall-apart tenderness. The probe tip should slide in like butter when it’s ready.
Prep Tools
A good chefs knife (I love my 8-inch Victorinox) makes quick work of chunks of carrots and celery. Pair it with a sturdy cutting board—my bamboo board from John Boos has lasted years of Sunday suppers.
Oven Considerations
Most home ovens work for this, but I’ve found convection settings can dry out the meat. Stick with conventional bake. If your oven runs hot, set it to 290°F instead. An oven thermometer helps verify accuracy.
Gravy Making
A fat separator is worth its weight in gold for pot roast gravy. I pour the cooking liquid through mine, then skim the fat before thickening. A whisk and small saucepan complete the gravy-making toolkit perfectly. 🍖
Serving Pieces
For serving, I use a slotted spoon to fish out the vegetables and a ladle for the gravy. The meat falls apart so much that tongs aren’t necessary—just lift chunks with a fork or serving spoon.
Nutrition Facts
Frequently Asked Questions
What cut works best for this method?
Chuck roast is ideal due to its marbling and connective tissue. These break down beautifully at 300°F for 3-3.5 hours, creating tender results. Avoid lean cuts like sirloin tip.
Can I cook it longer for more tenderness?
Yes, but monitor the liquid level. Beyond 4 hours at 300°F, add 1 cup broth if it reduces too much. The meat won’t dry out but may fall apart when serving.
Why is the temperature so low?
Low heat slowly breaks down collagen without toughening the meat. At 300°F, the connective tissue melts into gelatin, creating that signature melt-in-your-mouth texture.
Can I use a slow cooker instead?
Use the same ingredients but cook on low for 8-10 hours. The oven method gives better browning and control, but a slow cooker works in a pinch.

Trained in classic French technique but raised on slow-cooked ribs and spicy rubs, she blends culinary skill with smoke and soul.
- Best Smoked Oxtail Recipe: Deep-Rich Flavor After Low-and-Slow Cooking - October 14, 2026
- Pit Boss Smoked Prime Rib Roast Recipe: Bark-to-Bone Crispness in 4 Hours - October 14, 2026
- Smoked Tuna Steak Recipe: Seared Crust Meets Silky Centers - October 14, 2026