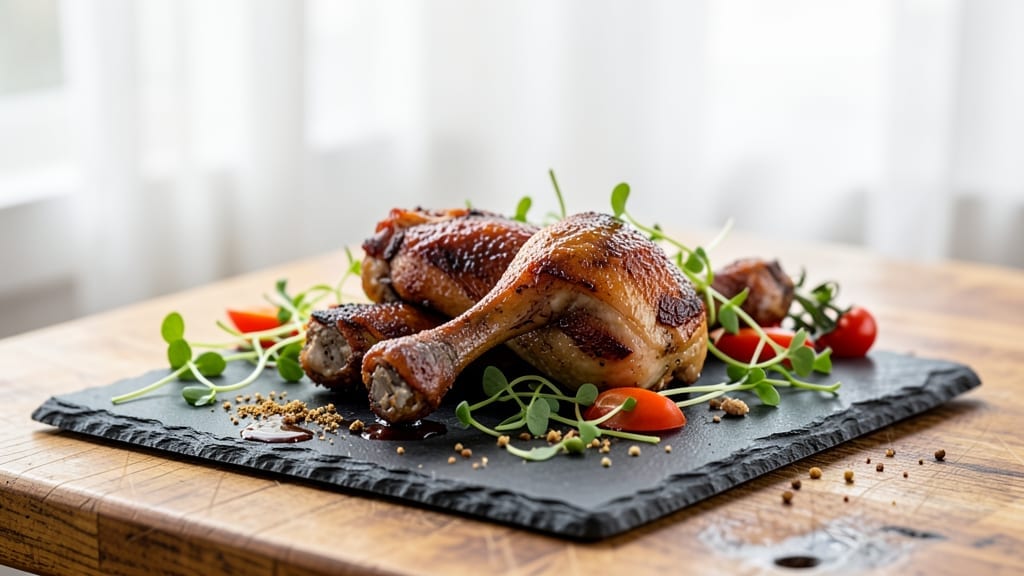
Transforming pre-cooked smoked turkey legs into a showstopping centerpiece requires just the right touch—no prep, all flavor. The secret lies in understanding how to revive that deep, smoky essence without drying out the meat, a technique I perfected after years of working with pre-cooked proteins in professional kitchens.
This method preserves every layer of flavor while ensuring tender, juicy results every time.
What makes this recipe truly remarkable is its simplicity: no need for hours of smoking or intricate preparation. With just a few key steps—whether you choose oven, slow cooker, or stovetop reheating—you’ll achieve restaurant-quality turkey legs that taste like they came straight from the pit.
The beauty of working with pre-cooked meat is that you control the final texture and moisture, ensuring each bite is as satisfying as the first.
By the time you serve these, your table will be adorned with turkey legs that boast crispy, caramelized edges and succulent, juicy meat inside. Pair them with classic sides like mashed potatoes or roasted vegetables, and you’ve got a meal that’s equal parts impressive and effortless.
The best part? This recipe delivers professional results with minimal effort, making it perfect for holidays or any occasion where you want to impress without the hassle.
Ready to elevate your leftovers or shortcut your holiday prep? Let’s bring that smoky, savory flavor back to life with a method that’s foolproof and full of flavor—no matter how many times you’ve reheated turkey before.
Ingredients for pre cooked smoked turkey legs
Revive pre-cooked turkey legs with smoky, crispy perfection—no smoking required.
| Ingredient | Amount | Notes |
|---|---|---|
| Pre-Cooked Smoked Turkey Legs 🦃 | 4 whole | Skin-on, about 1.5 lbs each |
| Unsalted Butter 🧈 | ½ cup | Melted for basting |
| Apple Cider Vinegar 🍎 | ¼ cup | For crispy skin |
| Brown Sugar 🍚 | ¼ cup | Packed, for caramelizing |
| Smoked Paprika 🌶️ | 1 tbsp | For extra smokiness |
| Garlic Powder 🧄 | 1 tsp | Quick flavor boost |
| Onion Powder 🧅 | 1 tsp | Balances sweetness |
| Dried Thyme 🌿 | ½ tsp | Herbal depth |
| Salt 🧂 | 1 tsp | Kosher or sea salt |
| Black Pepper 🌶️ | ½ tsp | Freshly ground preferred |
| Broth (Chicken or Turkey) 🥘 | ½ cup | Low-sodium for control |
| Honey 🍯 | 2 tbsp | Balances sweetness |
[recipe_ingredient_scaler]
The turkey legs are your star, so pick skin-on ones with visible fat marbling—it keeps them juicy during reheating. I always grab Costco’s pre-cooked smoked turkey legs since they’re consistently flavorful, but any brand works. Look for legs that weigh around 1.5 lbs each—they’re easier to handle and cook evenly. If you’re using leftovers, let them sit at room temperature for 20 minutes before reheating to avoid temperature shock.
No apple cider vinegar? Lemon juice or white vinegar works in a pinch—just use 1/4 cup to keep the crispy skin. Want more smokiness? Add 1/2 tsp liquid smoke to the broth. Brown sugar is non-negotiable for that caramelized crust, but maple syrup at half the amount gets you close. The broth should be low-sodium—homemade or high-quality store-bought like Knorr or Better Than Bouillon makes all the difference. Dried thyme is fine, but fresh thyme leaves at half the amount add brightness.
This reheats best in the oven—375°F for 45 minutes with the glaze basted halfway. For extra crispiness, broil for the last 2-3 minutes. The legs keep beautifully for 3-4 days in the fridge if wrapped tightly, or freeze for up to 3 months. I always reheat them from frozen by adding 10 minutes to the oven time—just add a splash of broth to the pan to prevent drying. The glaze? Store it separately in a jar—it keeps 1 week and tastes even better on cornbread or mashed potatoes.
Why You’ll Love This Recipe
- No-Fuss Feast: I love that these pre-cooked turkey legs mean I’m not staring at a raw bird for hours—just a quick rub, a glaze, and 45 minutes in the oven. The secret? That dry rub with brown sugar and smoked paprika sticks to the skin so well, it caramelizes into something restaurant-worthy without any fuss.
- Sweet-Savory Surprise: The apple cider vinegar in the glaze might sound odd, but honestly, it’s the magic touch. It balances the richness of the butter and honey, giving those legs that perfect tangy-sweet kick. Trust me, the first bite will make you forget you were skeptical.
- Leftovers That Shine: I always make extra because reheating these is a breeze—just 20 minutes at room temp, and they taste even better the second day. Plus, if the glaze gets too thick, a splash of broth keeps it glossy and delicious. My kids even ask for seconds, and that’s saying something.
- Budget-Friendly Crowd-Pleaser: Four legs feed a family of four (or two hungry teens) without breaking the bank. The pre-cooked turkey legs cut down on prep time, and the ingredients? Basic pantry staples. It’s the kind of dish that makes me feel like a hero without spending a fortune.
Step-by-step instructions for pre-cooked smoked turkey legs
Here’s how to transform pre-cooked turkey legs into restaurant-quality centerpieces with minimal effort.
Create the Sweet-Smoky Dry Rub
In a medium bowl, combine the ¼ cup brown sugar, 1 tablespoon smoked paprika, 1 teaspoon garlic powder, 1 teaspoon onion powder, ½ teaspoon dried thyme, 1 teaspoon salt, and ½ teaspoon black pepper. This blend delivers the perfect balance of sweetness, smokiness, and savory depth that clings beautifully to the turkey skin.
Use your fingers to thoroughly mix the ingredients until the sugar crystals are evenly distributed and the spices are fully incorporated. The brown sugar will help create that coveted caramelized crust while the smoked paprika adds that authentic barbecue flavor without needing actual smoke. This dry rub is the foundation of all that delicious flavor.
Coat and Marinate the Turkey Legs
Pat each of the 4 pre-cooked smoked turkey legs completely dry with paper towels—this is crucial for achieving crispy skin. The drier the surface, the better the rub will adhere and the more it will caramelize during cooking.
Generously coat each turkey leg with the dry rub mixture, pressing it firmly into the skin so it sticks well. Place the rubbed turkey legs on a wire rack set over a baking sheet—this allows air to circulate on all sides for even cooking. For maximum flavor penetration, let them sit at room temperature for 15-20 minutes while you prepare the basting mixture.
Prepare the Basting Glaze
In a small saucepan, combine the ½ cup unsalted butter, ¼ cup apple cider vinegar, ½ cup broth (chicken or turkey), and 2 tablespoons honey. Place over medium heat and bring to a gentle simmer, stirring occasionally until the butter melts completely and the mixture thickens slightly—about 5-7 minutes. This glaze will keep the meat moist while adding a glossy finish.
Real talk: The apple cider vinegar might make you think twice, but it’s what creates that perfect balance of tangy sweetness that cuts through the richness. Once the mixture reaches a smooth, syrupy consistency, remove it from heat and set aside. You’ll use this to baste the turkey legs throughout the cooking process.
Roast Until Caramelized and Glazed
Preheat your oven to 375°F. Place the wire rack with turkey legs on the middle oven rack. Roast uncovered for 45-60 minutes, basting with the glaze mixture every 15 minutes. The high heat ensures the skin crisps beautifully while the glaze caramelizes into a sticky, flavorful crust.
You’ll know it’s ready when the skin is deep golden brown with caramelized spots and the turkey legs reach an internal temperature of 170°F at the thickest part of the meat. The aroma alone will make your kitchen smell like a holiday feast. If the glaze starts to dry out before the turkey is done, add a splash of broth to maintain the right consistency.
Rest and Serve with Pan Sauce
Transfer the turkey legs to a cutting board and let them rest for 10 minutes before serving. This resting period allows the juices to redistribute, ensuring each bite is moist and flavorful. During this time, place the baking sheet on the stovetop over medium-low heat and simmer any remaining glaze in the pan for 2-3 minutes until it thickens slightly.
Slice each turkey leg at the joint and serve immediately with the pan sauce spooned over the top. The combination of crispy skin, tender meat, and sweet-savory glaze makes this dish irresistibly delicious. Pair with roasted vegetables or crusty bread to complete your meal—every bite will taste like you spent hours in the kitchen when in reality, you just followed this simple method.
Pro Tips For Making Pre Cooked Smoked Turkey Legs
- Preheat Like a Boss: Don’t just turn on the oven—give it 20 minutes to hit 375°F. I learned this the hard way when my first batch of turkey legs came out unevenly cooked because the oven was still warming up. That extra time makes the difference between a golden crust and sad, pale skin.
- Vinegar Isn’t the Enemy: The ¼ cup apple cider vinegar in the glaze might seem harsh, but it’s what keeps the skin crispy and cuts through the sweetness. Skip it, and your glaze will taste cloying—trust me, I’ve tried. If you’re nervous, use half now and add more later if needed.
- Don’t Skip the Wire Rack: Stacking turkey legs directly on a baking sheet traps steam and turns crispy skin into soggy disappointment. The wire rack lets air circulate, so every side gets that perfect caramelized crust. It’s a small setup, but it’s the thing that matters most for texture.
- Glaze Early, Glaze Often: Baste those legs every 15 minutes—not just once. The glaze isn’t just for flavor; it’s what builds that sticky, glossy finish. If it thickens too fast, add a splash of broth (you’ve got ½ cup on hand). Lazy basting = dry meat, no matter how good the rub is.
Flavor customization for this recipe
Sweet Heat Twist
For those who love a kick, swap out 2 tbsp honey in the glaze for 1 tbsp hot honey mixed with 1 tsp cayenne pepper (I use Penzeys for consistent heat).
Let the glaze simmer for 3 extra minutes to meld the flavors—this adds a subtle burn that pairs perfectly with the smoky turkey. The cayenne enhances the glaze’s tang, making each bite feel like a holiday surprise. 🔥
Herbal Freshness Boost
Add 2 sprigs fresh rosemary and 3 garlic cloves to the basting glaze while simmering. After 5 minutes, remove the herbs and garlic, then strain the glaze for a bright, aromatic finish.
This infusion brings a Mediterranean touch that contrasts beautifully with the turkey’s smokiness. I often forage rosemary from my coastal rides—it’s always fresher than store-bought. ✨
Spicy Maple Glaze
Replace the honey entirely with ¼ cup pure maple syrup and add 1 tsp smoked paprika and ½ tsp chipotle powder to the glaze. Simmer until thickened—this creates a deep, smoky-sweet glaze with a gentle heat.
The maple syrup adds a rich depth that balances the turkey’s smokiness without overpowering it. Trust me, this is a game-changer for maple lovers. 🍁
Citrus Zing Variation
Stir 2 tbsp orange zest and 1 tbsp fresh orange juice into the glaze while simmering. Remove the zest before basting to avoid bitterness. The citrus brightens the dish and cuts through the richness of the turkey, leaving a refreshing finish.
I always keep a citrus tree in my kitchen—nothing beats fresh zest for this trick. 💛
Cajun Crunch Coating
Before roasting, coat the turkey legs with the sweet-smoky dry rub, then sprinkle 1 tsp Cajun seasoning (like Tony Chachere’s) over the top. This adds a spicy, herby crunch that contrasts with the caramelized skin.
The Cajun blend brings a Southern flair while keeping the dish moist and flavorful. Perfect for those who love a little extra kick. 🌶️
Nutrition facts
Frequently asked questions
Can I use these turkey legs for a slow cooker instead of the oven?
Place the dry-rubbed turkey legs in your slow cooker on low for 4-5 hours, adding ¼ cup broth to the bottom. Every hour, spoon the glaze over them. This keeps the meat moist and the skin crispy—just check the temperature at the thickest part to reach 170°F. The slow cooker method works like a charm for hands-off reheating!
What if I don’t have apple cider vinegar? Can I substitute it?
Yes, you can swap it for lemon juice or white vinegar—just use ¼ cup to maintain the crispy skin. The acidity helps caramelize the glaze, so don’t skip it entirely. If you’re worried about tanginess, reduce the honey slightly to balance the flavors. Trust me, the dish still turns out amazing!
How do I know when the turkey legs are fully reheated?
Use a meat thermometer to check the thickest part of the meat—it should reach 170°F. The skin should also be deep golden brown with caramelized spots. If the glaze starts drying out, add a splash of broth to keep it moist. The aroma alone will tell you it’s ready—your kitchen will smell like a holiday feast!
Can I make the glaze ahead of time?
Store the glaze in an airtight container in the fridge for up to 1 week. When ready to use, reheat it gently on the stovetop and baste the turkey legs as usual. If it thickens too much, add a teaspoon of broth to loosen it. This saves time and keeps the flavors vibrant!

Trained in classic French technique but raised on slow-cooked ribs and spicy rubs, she blends culinary skill with smoke and soul.
- Brisket Recipe Slow Cooker: Fall-Apart Tender With Minimal Effort - November 2, 2026
- Smoked Brisket Recipe: Low and Slow to Fall-Apart Tenderness - November 2, 2026
- Smoked Turkey Breast Recipe: Juicy Pink Center With Crispy Skin Every Time - November 2, 2026