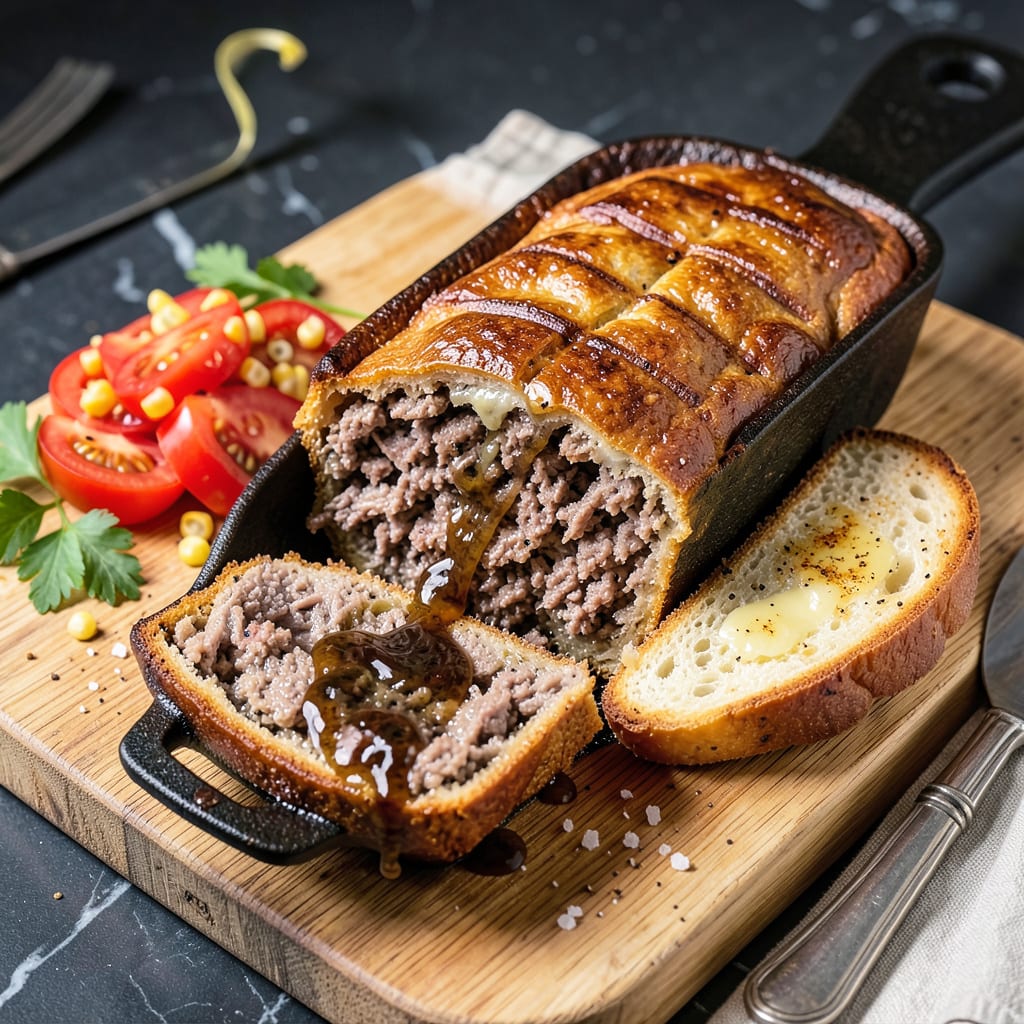
There’s something deeply satisfying about a well-made press meat—its crispy edges giving way to tender, flavorful layers that bring old-school comfort to any meal. This dish carries the warmth of tradition, blending simple ingredients into a creation that’s both hearty and nostalgic. The secret lies in the balance of seasonings and the technique of pressing, which transforms basic ground meat into something extraordinary.
What sets this recipe apart is its versatility. Whether you’re shaping it into a loaf for baking or forming patties for frying, the method ensures a consistent texture that’s crispy on the outside and juicy within. I’ve perfected this over years of testing, focusing on moisture control and proper pressing to maintain shape during cooking. The result is a dish that’s as reliable as it is delicious.
The beauty of press meat is how it adapts to different flavors. Traditional versions rely on classic seasonings like thyme and scallions, while modern twists might incorporate smoked paprika or a touch of heat. No matter the variation, the technique remains foolproof—mix, press, and cook to golden perfection. It’s comfort food that never goes out of style.
Serve it sliced as a main course with rice and peas, or as sliders for a casual gathering. The crispy edges and rich flavor make it a crowd-pleaser every time. Here’s how to achieve that perfect balance of texture and taste in your own kitchen.
📚 In This Guide
- What You’ll Need
- Instructions
- Tips and Common Mistakes
What Youll Need
- ● Meat (the star!): 2 lbs ground beef (80/20 fat ratio for juicy results) or 1.5 lbs ground beef + 0.5 lbs ground pork for extra richness.
- ● Breadcrumbs: ½ cup plain or panko (for binding and crispiness).
- ● Egg: 1 large (acts as a binder—don’t skip!).
- ● Onion: ½ cup finely diced (yellow or white for sweetness).
- ● Garlic: 2 cloves, minced (or 1 tsp garlic powder in a pinch).
- ● Seasonings: 1 tsp salt (adjust to taste).
- ● ½ tsp black pepper.
- ● 1 tsp paprika (smoked or sweet).
- ○ ½ tsp dried thyme or sage (optional but delicious!).
- ● Oil: 2 tbsp neutral oil (vegetable, canola, or avocado) for frying.
- ● Press tool: A heavy cast-iron skillet (10–12 inches) or a bacon press.
- ○ Optional: A second smaller pan + cans (for DIY weight).
- ○ Extras (optional but fun!): 1 tbsp Worcestershire sauce (for umami depth).
- ● ¼ cup grated Parmesan (for a cheesy crust).
- ● 1 tsp hot sauce (if you like a kick!).
Instructions
This method delivers perfectly pressed meat with tender interior and crispy edges every time.
Prepare the Meat Mixture
Begin by selecting your meat—traditionally a combination of ground pork and beef works best for authentic flavor and texture. I recommend using an 80/20 lean-to-fat ratio for the beef to ensure proper moisture retention during cooking.
In a large mixing bowl, combine the ground meats with your chosen seasonings. The key here is thorough but gentle mixing—overworking the meat can lead to a dense final product. Use your hands to incorporate everything evenly, distributing the fat and seasonings throughout the mixture.
Create the Pressing Layer
Line a loaf pan or baking dish with heavy-duty aluminum foil, leaving enough overhang to fold over the top later. This creates a tight seal that helps compress the meat during cooking. Press the meat mixture firmly into the prepared pan, using your hands or a flat spatula to create an even surface.
The pressure applied at this stage determines the final texture. I press down firmly but evenly across the entire surface, paying special attention to the corners where air pockets might form. The goal is a uniformly compacted layer that will hold together when sliced.
Apply Weight for Compression
Cover the meat with another layer of foil, then place a second baking pan or flat tray directly on top. This will serve as your weight distribution system. Add heavy cans or a second brick wrapped in foil to create the necessary pressure—aim for 3-5 pounds of total weight.
Refrigerate the pressed meat for at least 4 hours, though overnight yields the best results. This extended compression time allows the proteins to bind together while the flavors meld. The cold temperature also helps the fat solidify, which contributes to those coveted crispy edges during cooking.
Cook to Crispy Perfection
Preheat your oven to 375°F. Remove the weights and top foil, then bake the pressed meat uncovered for 45-60 minutes. You’re looking for a deep golden-brown crust to form across the entire surface—this indicates proper caramelization and crispiness.
About halfway through cooking, carefully pour off any accumulated fat from the pan. This prevents the meat from steaming in its own juices, which would compromise the crispy texture. The edges should pull away slightly from the pan when fully cooked.
Rest and Serve
Let the pressed meat rest in the pan for 10-15 minutes after removing it from the oven. This brief resting period allows the juices to redistribute throughout the meat, ensuring each slice remains moist and flavorful.
Use the foil overhang to lift the entire block from the pan. Transfer to a cutting board and slice into squares or rectangles while still warm. The exterior should be crispy and caramelized, while the interior remains tender and juicy—a perfect balance of textures that defines great pressed meat.
Tips and Common Mistakes for Perfect Press Meat
The secret to achieving that ideal balance of crispy exterior and tender interior lies in these key techniques.
Weight Distribution: In Step 3, when applying pressure, ensure your weights (3-5 pounds total) are evenly distributed across the entire surface. I use a second baking pan topped with canned goods for uniform compression. Uneven pressure leads to inconsistent texture—some areas may become dense while others remain loose.
Cold Compression Time: The 4-hour refrigeration minimum in Step 3 isn’t arbitrary—this is when the meat’s proteins begin binding together. For optimal results, I recommend the full overnight chill. The extended time allows flavors to penetrate deeply while the fat solidifies, creating those signature crispy edges during baking.
Fat Management During Baking: About halfway through the 45-60 minute bake in Step 4, carefully pour off accumulated fat as instructed. This step is crucial—leaving the fat in the pan causes the meat to steam rather than crisp. I use a turkey baster for precise removal without disturbing the forming crust.
Visual Doneness Cues: Don’t rely solely on time for the 45-60 minute bake. Look for the edges to pull away from the pan and the entire surface to develop a deep golden-brown color. The meat should feel firm when pressed gently in the center, with no soft spots indicating undercooked areas.
Pro Tips for Press Meat
- The secret to achieving that ideal balance of crispy exterior and tender interior lies in these key techniques.
- Weight Distribution: In Step 3, when applying pressure, ensure your weights (3-5 pounds total) are evenly distributed…
- Cold Compression Time: The 4-hour refrigeration minimum in Step 3 isn’t arbitrary—this is when the meat’s proteins be…
Frequently Asked Questions
Got questions about making the perfect press meat? We’ve got answers! Here are the most common queries to help you nail this crispy, flavorful dish every time.
How long should I press the meat before cooking?
Press the meat for at least 4–6 hours (or overnight) in the fridge. This ensures the flavors meld and the texture firms up for crispy edges. Use a heavy weight (like a cast-iron skillet) for even pressure.
Can I use a different cut of meat instead of pork shoulder?
Try beef chuck (for richer flavor) or chicken thighs (lighter option). Adjust cooking time—beef may need 10–15 extra minutes, while chicken cooks faster. Avoid lean cuts; fat = flavor and crispiness!
Why is my press meat falling apart when I slice it?
Two likely culprits: not enough pressing time or slicing too soon. Chill the cooked meat 10–15 minutes before cutting to let it set. If the mix was too wet, add a binder like breadcrumbs or egg next time.
What’s the best way to reheat press meat without drying it out?
Skip the microwave! Warm slices in a skillet with a splash of broth over low heat (covered, 3–4 minutes). For whole loaves, reheat at 300°F (150°C) wrapped in foil for 20–25 minutes. Pro tip: Add a pat of butter for moisture!
Is press meat the same as meatloaf?
Close cousins, but not twins! Press meat is denser, saltier, and crispier (thanks to pressing and high-heat searing), while meatloaf is softer and often glaze-topped. Think of press meat as meatloaf’s bold, caramelized older sibling.
Now you’ve got the secret to perfectly crispy, flavor-packed press meat—just like Grandma used to make! 🍖 Whether you’re serving it as a hearty main or a nostalgic side, this dish brings comfort and crunch in every bite. The key? Patience with the press and a hot skillet for that golden finish.
Ready to impress at your next meal? Grab your cast-iron skillet and try a batch this weekend—your taste buds (and dinner guests) will thank you! For extra flair, pair it with tangy pickles or a drizzle of hot honey. Happy pressing!

Trained in classic French technique but raised on slow-cooked ribs and spicy rubs, she blends culinary skill with smoke and soul.
- Recipe for Boneless Pork Chops in Cast Iron Skillet: Sear and Baste to Juicy Perfection - October 3, 2026
- Recipe for Boneless Cross Rib Roast: Slow-Roasted Beef with Herb Crust - October 3, 2026
- Hamburgers in Sauce Recipe Crock Pot: Slow-Cooked Savory Delight - October 3, 2026