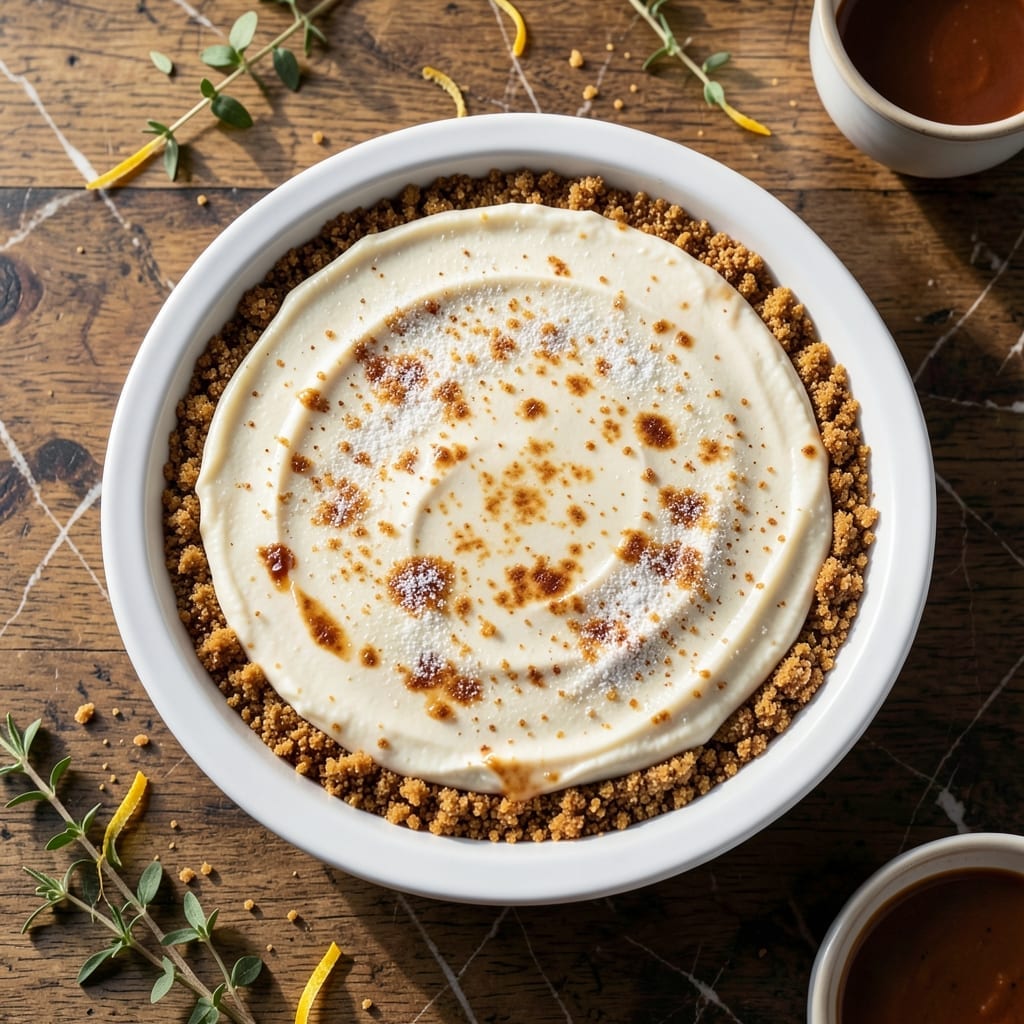
I’ve spent years perfecting a cheesecake that rivals the creamy, velvety texture of Publix’s bakery version. The key lies in patience—slow baking and a gradual cool-down prevent cracks and ensure that signature smooth finish.
This recipe uses simple ingredients but requires precision with temperature and timing. A water bath shields the batter from direct heat, creating an even, bakery-style consistency every time. No special equipment is needed, just attention to detail.
What emerges is a rich, dense cheesecake with a buttery graham crust and a filling that’s neither too sweet nor overly tangy. The result is restaurant-quality dessert that holds its shape yet melts in your mouth.
Serve it plain or topped with fresh berries for the full experience. Here’s how to make it.
Ingredients for Publix Cheesecake
Simple ingredients for that bakery-style cheesecake with signature velvety texture and buttery crust.
| Ingredient | Amount | Notes |
|---|---|---|
| Graham Cracker Crumbs 🍪 | 2 cups | Fine crumbs for crust |
| Unsalted Butter 🧈 | ½ cup | Melted for crust binding |
| Granulated Sugar 🍚 | ¼ cup | For crust sweetness |
| Cream Cheese 🧀 | 4 packages | Full-fat, softened to room temperature |
| Granulated Sugar 🍚 | 1 ¼ cups | For filling sweetness |
| Vanilla Extract 🌿 | 2 tsp | Pure extract for best flavor |
| Large Eggs 🥚 | 4 whole | Room temperature for smooth texture |
| Heavy Cream 🥛 | ½ cup | Full-fat for creamy consistency |
| All-Purpose Flour 🌾 | 2 tbsp | For filling stability |
| Sour Cream 🥛 | ½ cup | Full-fat for tangy richness |
| Salt 🧂 | ½ tsp | Fine sea salt preferred |
| Lemon Juice 🍋 | 1 tbsp | Freshly squeezed for brightness |
[recipe_ingredient_scaler]
The cream cheese is non-negotiable here—Philadelphia brand delivers the smoothest texture. Full-fat is essential (trust me on this), and it must be at room temperature. Most grocery stores carry it in 8-ounce blocks. For the graham crumbs, Honey Maid is reliable, but any plain graham works. Butter quality matters too—use Land O’Lakes or similar for best flavor in the crust.
No graham crumbs? Digestive biscuits or vanilla wafers work in a pinch. Sour cream can be swapped for Greek yogurt at one-to-one ratio, but the tang will be slightly different. Heavy cream is best, but whole milk works if that’s what you have. For the vanilla, pure extract only—imitation has a harsh aftertaste that ruins the filling.
This keeps beautifully in the fridge for up to 5 days or frozen for 2 months. Store covered tightly—plastic wrap pressed directly onto the surface prevents cracks. Always bring to room temperature before serving for that perfect creamy texture.
Why You’ll Love This Recipe
- I’ll be real: it tastes even better the next day, so I can bake it today and serve it tomorrow with zero stress.
- No Fuss Base: I just mix graham cracker crumbs, melted butter, and sugar—no rolling, no chilling, just press and go.
- Velvet Creaminess: The cream cheese and sugar blend into this ridiculously smooth filling that’s rich without being heavy.
- Crowd Pleaser: Honestly, it’s my go-to for potlucks, birthdays, even a random Tuesday when we need something special.
Step-by-Step Instructions for Bakery-Style Cheesecake
Here is the tested method that delivers that signature creamy texture and sturdy crust.
Step 1: Prepare and Press the Graham Cracker Crust
Preheat your oven to 350°F. In a medium bowl, combine the 2 cups Graham Cracker Crumbs, 0.25 cup Granulated Sugar, and 0.5 cup Unsalted Butter that has been melted and slightly cooled.
Mix until the crumbs are evenly moistened and resemble wet sand. Press this mixture firmly into the bottom of a 9-inch springform pan, creating an even layer. Use the bottom of a measuring cup to compact it tightly against the pan—this prevents crumbling when sliced.
Bake for 8-10 minutes until the edges are just beginning to turn light golden brown. Set aside to cool slightly while you prepare the filling. The crust should hold together when pressed with your finger.
Step 2: Beat the Cream Cheese and Sugar Until Smooth
In a large bowl with an electric mixer, beat the 4 packages Cream Cheese on medium speed for 2 minutes until completely smooth and free of lumps. The cream cheese must be at room temperature—cold blocks will create an uneven texture.
Gradually add the 1.25 cups Granulated Sugar, beating for another 2-3 minutes until fully incorporated and fluffy. Scrape down the sides of the bowl occasionally with a silicone spatula to ensure even mixing.
Step 3: Incorporate Remaining Filling Ingredients
Add the 2 tsp Vanilla Extract, 4 whole Large Eggs (one at a time), 0.5 cup Heavy Cream, 2 tbsp All-Purpose Flour, 0.5 cup Sour Cream, 0.5 tsp Salt, and 1 tbsp Lemon Juice. Beat on low speed after each addition just until combined—overmixing incorporates too much air, which can cause cracks.
The batter should be thick, creamy, and glossy with no visible streaks. Pour it over the prepared crust, smoothing the top with the spatula. Tap the pan gently on the counter 2-3 times to release any large air bubbles trapped in the batter.
Step 4: Bake in a Water Bath for Even Cooking
Wrap the bottom of the springform pan tightly with heavy-duty aluminum foil to prevent water seepage. Place it in a large roasting pan and carefully pour hot water into the roasting pan until it reaches halfway up the sides of the springform pan.
Bake at 325°F for 55-65 minutes. The center should still have a slight wobble when gently shaken but the edges will be set. Turn off the oven and crack the door 2 inches, allowing the cheesecake to cool gradually for 1 hour—this prevents sudden temperature changes that cause cracking.
Step 5: Chill Thoroughly Before Serving
After the hour in the cooling oven, transfer the cheesecake to the refrigerator and chill for at least 4 hours, preferably overnight. This chilling time is non-negotiable—the filling needs to fully set and develop its signature creamy texture.
Once chilled, run a thin knife around the edge to loosen it from the pan before releasing the springform. Slice with a hot, dry knife for clean pieces, wiping the blade between cuts. Serve as is or with fresh berries or a fruit compote.
Pro Tips For Making Publix Cheesecake
- Soften the Cream Cheese: Pull it out of the fridge at least 2 hours before starting, or microwave in 10-second bursts at 50% power—I learned this the hard way after ending up with lumpy batter.
- Press the Crust Firmly: Use the bottom of a glass to compact the graham cracker crumb mixture into the pan; a loose crust will crumble when sliced, and nobody wants that.
- Skip the Overmixing: Once the cream cheese and sugar are just combined, stop mixing—overworking it adds air, which can cause cracks during baking.
- Chill Overnight: After baking, let it cool completely at room temperature for an hour, then refrigerate for at least 6 hours—sounds tedious, but it sets the texture perfectly.
Dietary Considerations for These Flavors
Gluten-Free Option
Swap the graham cracker crust for 1.5 cups gluten-free graham crumbs or almond flour. I’ve tested with Schar brand gluten-free crumbs and they hold together beautifully. Press the mixture just as you would the original crust.
Lower Sugar Version
Reduce the filling sugar to 1 cup and add 1 tsp stevia or monk fruit sweetener for extra sweetness. The texture remains smooth, though the flavor will be slightly less rich. I prefer Swerve brand for its clean taste.
Dairy-Free Adaptation
Use vegan cream cheese (like Kite Hill or Miyoko’s) and substitute coconut cream for heavy cream and sour cream. The texture will be slightly denser but still creamy. Ensure all ingredients are at room temperature for best results.
Nut-Free Crust
For nut allergies, stick with traditional graham crumbs or try crushed vanilla wafers. Golden Oreos (without cream) also work well and add a subtle vanilla flavor. Press firmly into the pan to prevent crumbling.
Egg-Free Alternative
Replace the eggs with ½ cup unsweetened applesauce or 4 tbsp cornstarch mixed with ¼ cup water. The cheesecake will be slightly less firm but still delicious. Bake for an additional 5-10 minutes to compensate. 💡
Lactose-Free Option
Use lactose-free cream cheese (like Green Valley Creamery) and lactose-free sour cream. The flavor and texture will be nearly identical to the original. This is my go-to for friends with lactose intolerance.
Nutrition Facts
Frequently Asked Questions
Why do I need a water bath for baking?
The water bath creates a gentle, even heat that prevents cracks and ensures a silky texture. Without it, the edges may overcook while the center stays underdone.
Can I make this without a springform pan?
Yes, use a 9-inch cake pan lined with parchment paper. Just be extra careful when removing the cheesecake to avoid breaking the crust.
How do I prevent cracks on the surface?
Avoid overmixing the batter and don’t open the oven door during baking. The gradual cooling method in the recipe also helps prevent cracks.
Can I use a different crust?
Try vanilla wafers, digestive biscuits, or even crushed Oreos for a chocolate twist. Just keep the butter-to-crumbs ratio the same.

Trained in classic French technique but raised on slow-cooked ribs and spicy rubs, she blends culinary skill with smoke and soul.
- Recipe for Boneless Pork Chops in Cast Iron Skillet: Sear and Baste to Juicy Perfection - October 3, 2026
- Recipe for Boneless Cross Rib Roast: Slow-Roasted Beef with Herb Crust - October 3, 2026
- Hamburgers in Sauce Recipe Crock Pot: Slow-Cooked Savory Delight - October 3, 2026