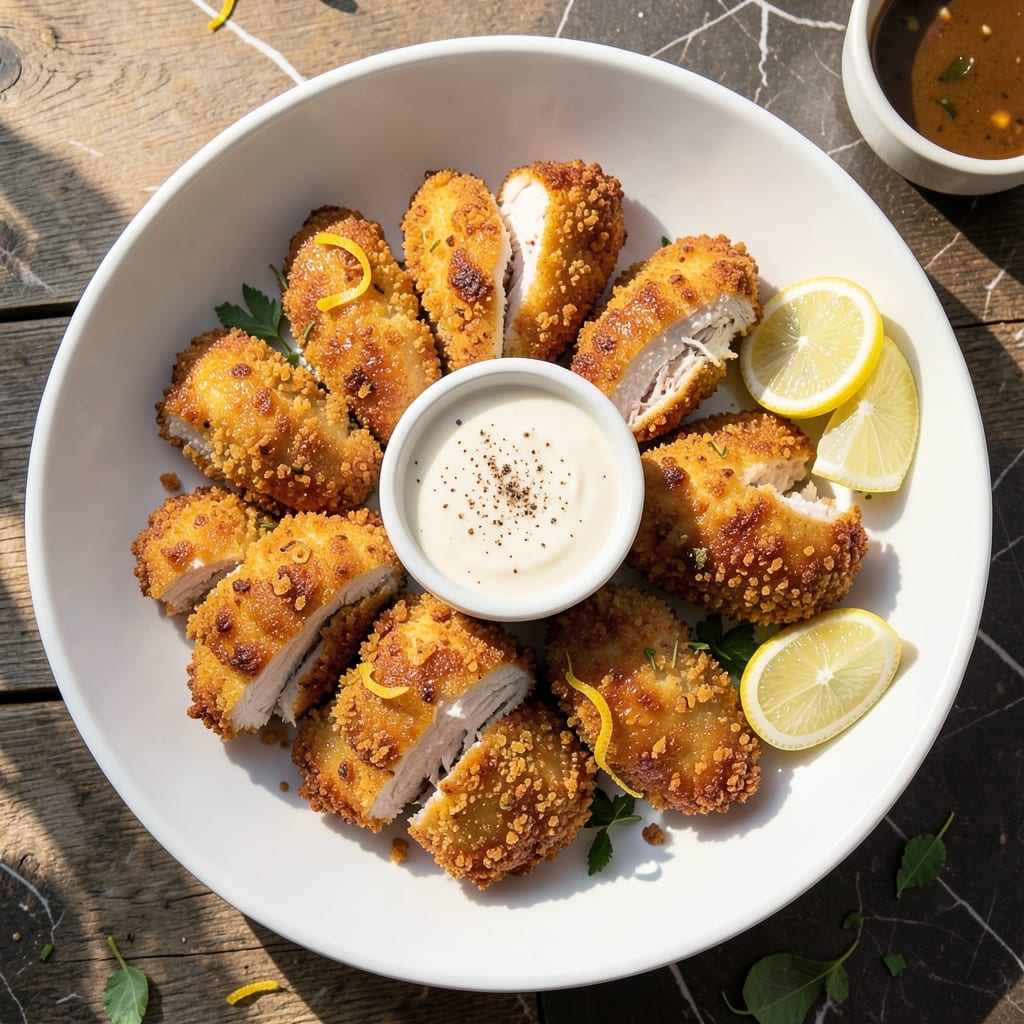
I developed this method after one too many dry, rubbery chicken tenders ruined dinner. The secret lies in a 15-minute brine and a two-step breading process that locks in moisture while creating that coveted crispy crust.
This isn’t just another chicken recipe. The buttermilk brine ensures the meat stays juicy and tender, while panko breadcrumbs deliver shatteringly crisp results without deep frying. It’s a game-changer for busy weeknights.
You’ll get perfectly golden tenders with a texture that’s crisp outside and fork-tender inside. The best part? They stay hot and crispy long enough to serve a crowd. No special equipment required—just a skillet and a few pantry staples.
Serve with honey mustard or your favorite dipping sauce. Here’s how to make them perfectly every time.
Ingredients for Quick Chicken Tenders
Pantry staples meet buttermilk brine for the juiciest, crispiest tenders you’ll ever make.
| Ingredient | Amount | Notes |
|---|---|---|
| Chicken Tenders 🍗 | 1 ½ lb | Boneless, skinless, about 12 tenders |
| Buttermilk 🥛 | 2 cups | Full-fat for best results |
| All-Purpose Flour 🌾 | 1 cup | For first breading layer |
| Large Eggs 🥚 | 2 whole | Beaten for egg wash |
| Panko Breadcrumbs 🍞 | 2 cups | Japanese-style for extra crispiness |
| Garlic Powder 🧄 | 1 tbsp | For savory seasoning |
| Onion Powder 🧅 | 1 tbsp | Balances the garlic flavor |
| Paprika 🌶️ | 1 tsp | Sweet or smoked variety |
| Salt 🧂 | 1 ½ tsp | Divided between brine and breading |
| Black Pepper 🌶️ | 1 tsp | Freshly ground preferred |
| Cayenne Pepper 🔥 | ¼ tsp | Optional for heat |
| Vegetable Oil 🫒 | ½ cup | For shallow frying |
| Honey Mustard 🍯 | ½ cup | For serving (optional) |
[recipe_ingredient_scaler]
The chicken matters here. Boneless, skinless tenders (not breasts cut into strips—tenders stay juicier) are key. Look for uniform thickness so they cook evenly. I grab mine from Costco for bulk savings, but any grocery store works. The buttermilk? Full-fat makes the biggest difference in tenderness (trust me on this one).
No buttermilk? Whole milk plus 1 tbsp vinegar or lemon juice per cup gets you close. Swap panko for regular breadcrumbs if needed, but the texture won’t be as crisp. Want more flavor? Add 1 tsp of poultry seasoning to the flour. The cayenne is optional—skip it for kid-friendly tenders (or add a pinch for a subtle kick).
Breaded tenders keep 2-3 days in the fridge, but they’re best fresh. Reheat in a 350°F oven for 10-12 minutes to revive the crisp. Freeze unbreaded tenders for up to 3 months—brine and bread when ready to cook.
Why You’ll Love This Recipe
- 20-Minute Meal: I can go from fridge to table faster than takeout arrives—just dip, coat, and bake.
- Crispy Outside, Juicy Inside: That panko crunch with the buttermilk-tender chicken? Ridiculously good.
- Kid-Approved Classic: Even my pickiest eater cleans her plate, and I’ll be real: that’s a win.
- Budget Stretcher: One pound of tenders feeds four, and leftovers make tomorrow’s lunch a no-brainer.
Step-by-Step Instructions for Chicken Tenders
Here’s my foolproof method for achieving that perfect crunch without drying out the meat.
Step 1: Marinate the Chicken Tenders in Buttermilk
Place the 1.5 lb Chicken Tenders in a large bowl and pour over all 2 cups Buttermilk. This acidic soak tenderizes the meat while adding moisture that prevents dryness during frying. I marinate mine for 30 minutes to 2 hours in the refrigerator—any longer and the texture can become mushy.
Real talk: this step is non-negotiable for juicy results. The buttermilk also helps the breading adhere better, creating that coveted crunchy coating that stays put. Stir the tenders once halfway through to ensure even coverage.
Step 2: Prepare the Breading Station with Seasoned Layers
Set up three shallow dishes. In the first, add all 1 cup All-Purpose Flour mixed with ½ tsp Salt. In the second, beat the 2 whole Large Eggs until uniform. In the third, combine all 2 cups Panko Breadcrumbs with the remaining 1 tsp Salt, 1 tbsp Garlic Powder, 1 tbsp Onion Powder, 1 tsp Paprika, 1 tsp Black Pepper, and 0.25 tsp Cayenne Pepper.
This triple-dredge system ensures maximum crispiness and flavor in every bite. The flour creates a base layer, the egg acts as glue, and the panko provides that signature crunch. I always use Japanese-style panko for its light, airy texture that fries up perfectly golden.
Step 3: Bread the Tenders with Precision
Working with one tender at a time, remove it from the buttermilk and let excess drip off. Dredge in the flour mixture, shaking off any excess. Next, dip it in the beaten eggs, allowing any excess to drip back into the bowl. Finally, press it firmly into the panko mixture, ensuring complete coverage. Place the breaded tenders on a wire rack set over a baking sheet.
Here’s the thing—don’t rush this process. Each layer needs to adhere properly. I find that pressing the tenders into the panko rather than just sprinkling it on creates a thicker, crunchier coating. Let the breaded tenders rest for 10 minutes before frying; this helps the coating set.
Step 4: Fry to Golden Perfection
Heat all 0.5 cup Vegetable Oil in a large skillet over medium-high heat until shimmering (350-375°F). Working in batches to avoid crowding, carefully add the breaded tenders. Fry for 3-4 minutes per side until deep golden brown and the internal temperature reaches 165°F.
Don’t be tempted to flip too early. You’ll know they’re ready when the edges appear crispy and the coating releases easily from the pan. Use a slotted spoon to transfer the cooked tenders to a paper towel-lined plate to drain excess oil. The tenders should be crispy on the outside and juicy on the inside.
Step 5: Serve Immediately with Honey Mustard
These tenders are best served fresh and hot, while the coating is at its crispiest. Arrange them on a platter and serve with all 0.5 cup Honey Mustard for dipping. The contrast of the cool, tangy mustard with the hot, crispy tenders is irresistible.
If you need to keep them warm for a few minutes, place the cooked tenders on a wire rack in a 200°F oven. This prevents the coating from becoming soggy. But honestly, they’re so good that they rarely last long enough to need reheating.
Pro Tips For Making Quick Chicken Tenders
- Double Dip the Chicken: Dip each tender in buttermilk, then flour, then back in buttermilk before the panko—this extra step makes the coating stick like glue and stay crispy.
- Heat the Oil First: Get the oil shimmering hot before adding the tenders, about 350°F, or the breading will absorb oil and turn soggy instead of golden.
- Pat the Chicken Dry: I learned this the hard way—blot the tenders with a paper towel before dipping or the buttermilk won’t cling properly to the meat.
- Use a Rack: After frying, place the tenders on a wire rack, not paper towels, so air circulates and keeps the bottoms from getting steamy.
Regional Styles of These Flavors
Southern Buttermilk Style
In the South, they often soak the tenders in buttermilk overnight for maximum tenderness. I tested this with a 12-hour brine and was amazed at the difference—just be sure to pat them very dry before breading to prevent a soggy coating. The extra time develops deeper flavor too. 💛
Nashville Hot Chicken
For a spicy kick, Nashville adds cayenne and brown sugar to the breading, then drizzles with hot oil after frying. I recreate this by adding 1 tbsp brown sugar and an extra ½ tsp cayenne to the panko mix. Serve with pickles to cut the heat.
New England Pub Style
Boston pubs serve tenders with a beer batter coating. Replace the buttermilk brine with 1 cup pale ale mixed with 1 cup flour for the dredge. The beer creates a lighter, airier crust. I use Sam Adams for that authentic New England flavor.
Italian Parmesan Crust
My Nonna’s trick was adding ½ cup grated Parmesan to the panko mixture. The cheese melts slightly during frying, creating an extra crispy, savory crust. She also insisted on freshly grated—never the pre-shredded stuff, which doesn’t melt as well.
Asian-Inspired Panko
Swap the seasonings in the panko for 1 tbsp soy sauce, 1 tsp ginger, and 1 tsp sesame seeds. The soy adds umami depth while the ginger gives a subtle kick. I like to serve these with sweet chili sauce instead of honey mustard. 🔥
Nutrition Facts
Frequently Asked Questions
Can I use regular breadcrumbs instead of panko?
Yes, but panko gives a crunchier texture. Regular breadcrumbs work in a pinch, though the coating won’t be as light and crispy.
How do I keep them crispy if serving later?
Place cooked tenders on a wire rack in a 200°F oven. This prevents steam buildup that makes the coating soggy. Serve within 30 minutes for best results.
Can I bake instead of frying?
Bake at 400°F for 15-20 minutes, flipping halfway. Spray with oil first for extra crispiness. The texture will be slightly different but still delicious.
Why did my breading fall off?
This usually happens if the tenders weren’t dry before breading or if the oil wasn’t hot enough. Pat them very dry after the buttermilk soak and ensure oil reaches 350°F before frying.

Trained in classic French technique but raised on slow-cooked ribs and spicy rubs, she blends culinary skill with smoke and soul.
- Recipe for Boneless Pork Chops in Cast Iron Skillet: Sear and Baste to Juicy Perfection - October 3, 2026
- Recipe for Boneless Cross Rib Roast: Slow-Roasted Beef with Herb Crust - October 3, 2026
- Hamburgers in Sauce Recipe Crock Pot: Slow-Cooked Savory Delight - October 3, 2026