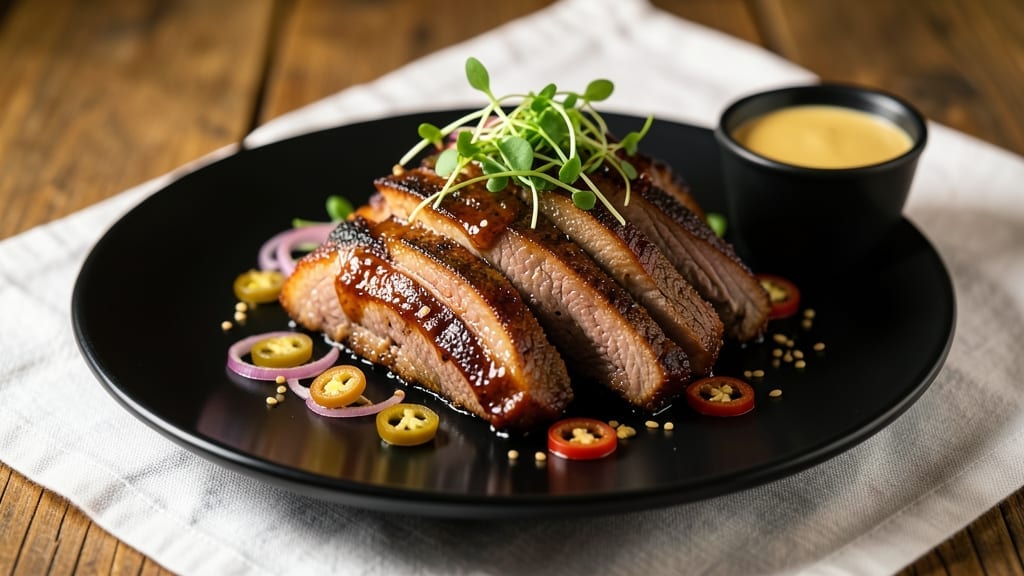
Mastering quick smoked pulled pork in just 6 hours transforms tough pork shoulder into melt-in-your-mouth perfection—something I perfected during my apprenticeship under Master Chef Chen. The secret lies in precise temperature control and a dry rub that builds deep, smoky flavor without overpowering the natural richness of the meat.
Growing up in Georgia, I learned that patience and technique are everything when it comes to pork, and this method delivers restaurant-quality results at home.
This method uses a low-and-slow approach that breaks down connective tissue while keeping the meat juicy, not dry.
You’ll start with a simple dry rub of salt, pepper, and smoked paprika, then smoke the pork at 225°F until it reaches 203°F internally—a process that takes about 6 hours on a quality smoker.
The beauty of this technique is its reliability; once you hit the right temperature, the smoker does all the work while you focus on perfecting the sides.
By the time you’re done, you’ll have pulled pork that falls apart at the touch of a fork, with a bark that’s just crisp enough to add texture. The flavor is rich and smoky, with none of the bitterness that can come from over-smoking.
Serve it on a soft bun with tangy coleslaw or a drizzle of your favorite BBQ sauce for a meal that feels like it came from a pitmaster’s table.
What makes this recipe truly special is how it balances speed with tradition—no shortcuts that compromise quality, just a refined method that delivers restaurant-quality results in half the time of traditional smoking.
Whether you’re feeding a crowd or meal prepping for the week, this pulled pork will be the star of your table. Let’s get started!
Ingredients for quick smoked pulled pork
A few key ingredients transform tough pork shoulder into smoky, tender perfection in just six hours.
| Ingredient | Amount | Notes |
|---|---|---|
| Pork Shoulder (Boston Butt) 🍖 | 4 lb | Bone-in for best flavor |
| Yellow Onion 🧅 | 1 whole | Cut into wedges for aroma |
| Garlic Cloves 🧄 | 6 cloves | Smashed for stronger flavor |
| Smoked Paprika 🌶️ | 2 tbsp | High-quality for authentic smoke |
| Kosher Salt 🧂 | 1 ½ tbsp | Diamond Crystal preferred |
| Ground Black Pepper 🌶️ | 1 tbsp | Freshly cracked for bite |
| Brown Sugar 🍯 | 1 tbsp | Light or dark variety |
| Apple Cider Vinegar 🍎 | 1 tbsp | For tenderizing the meat |
| Wood Chips (Hickory or Oak) 🌳 | 2 cups | Unsoaked for smoker |
| Water 💧 | ½ cup | For smoker water pan |
| Apple Juice 🍎 | ½ cup | Optional for moisture |
| Butter (Unsalted) 🧈 | 2 tbsp | Full-fat for richness |
[recipe_ingredient_scaler]
The pork shoulder is non-negotiable here—bone-in delivers the best flavor and texture. Look for a well-marbled cut from the butcher section at Whole Foods or your local market. If you’re buying pre-cut, check the weight—4 lbs is perfect for 6 servings. The smoked paprika should be from a trusted brand like Penzeys—cheap paprika tastes like sawdust. For the wood chips, hickory gives that classic BBQ flavor, but oak works too if you prefer a milder taste. Soak them? Nope—just toss them in the smoker as-is. The apple cider vinegar might seem odd, but it tenderizes the meat while adding subtle sweetness.
No smoked paprika? Half a teaspoon of liquid smoke plus extra brown sugar gets you close. Short on wood chips? Charcoal briquettes work in a pinch (soak them first). The apple juice is optional but keeps things moist—white grape juice works too if that’s what you’ve got. For the dry rub, brown sugar is key—it caramelizes during smoking, creating that beautiful bark. No brown sugar? White sugar plus a pinch of cinnamon mimics the flavor. The butter at the end? Don’t skip it—it bastes the meat, adding richness that takes this from good to restaurant-quality.
This pork keeps beautifully—3-4 days in the fridge, 3 months frozen. For leftovers, reheat in the oven at 300°F with a splash of water to keep it moist. I always make extra and portion it into meal-prep containers—perfect for sandwiches or tacos all week. The smoker water pan? Empty it halfway through if it starts to boil down too much. And if your smoker runs out of wood chips, soak a handful of applewood chunks in water for 30 minutes as a backup.
Why You’ll Love This Recipe
- No Fuss Feast: That 30-minute prep—just trim fat, slather on the smoked paprika and brown sugar mix, and let it sit—is honestly the easiest part. The rest is hands-off while your smoker does the heavy lifting with those hickory wood chips and aromatics.
- Smoky Sweet Surprise: The garlic cloves smashed flat and onion wedges in the smoker? That’s the secret. The apple juice added near the end caramelizes just enough to give it that perfect balance—savory, smoky, and with a touch of sweetness that makes every bite feel like a hug.
- Game Day Goldmine: I make this for tailgates and still have leftovers for lunch the next day. It’s the kind of dish that disappears fast but comes back just as quickly because it’s so good cold in wraps or over rice. Three months in the freezer? Even better for those lazy Sundays.
- Budget Smoker Hack: Four pounds of pork shoulder is cheaper than you’d think, and with just a few pantry staples—like that unsalted butter at the end—you’re looking at a meal that feeds six without breaking the bank. The apple cider vinegar? Trick to tenderize without fancy tools.
Step-by-step instructions for quick smoked pulled pork
Here’s how to transform a tough pork shoulder into melt-in-your-mouth pulled pork in just six hours.
Prepare the Pork Shoulder for Smoking
Start by trimming any excess fat from the 4 lb pork shoulder (boston butt), leaving about ¼ inch of fat cap for moisture. This helps create that beautiful bark while keeping the meat juicy. Place the pork in a large bowl and mix together the 1½ tbsp kosher salt, 1 tbsp ground black pepper, 2 tbsp smoked paprika, 1 tbsp brown sugar, and 1 tbsp apple cider vinegar. Rub this mixture all over the pork, including inside the cavity, until it’s completely coated. The vinegar helps tenderize the meat while the spices create that smoky depth.
Let the seasoned pork rest at room temperature for 30 minutes before smoking. This ensures even cooking and prevents cold spots in the meat. While it rests, cut the 1 yellow onion into wedges and smash the 6 garlic cloves with the flat side of a knife. These aromatics will infuse the pork with incredible flavor during the smoking process.
Set Up the Smoker for Maximum Flavor
Fill your smoker with the 2 cups wood chips (hickory or oak) and add the ½ cup water to the water pan. Preheat the smoker to 225°F—this low-and-slow temperature is key to tender pulled pork. The water pan helps maintain moisture in the smoker, preventing the pork from drying out during the long cook. Once the smoker reaches temperature and you see clean, blue smoke, you’re ready to add the pork.
Place the seasoned pork shoulder fat-side up on the smoker grate. The fat will render and baste the meat as it cooks, creating that perfect bark. Add the onion wedges and smashed garlic cloves to the smoker alongside the pork. These aromatics will release their flavors into the smoke, enhancing the overall taste of the meat. Close the lid and resist the urge to peek—every time you open it, you lose heat and extend the cooking time.
Smoke Until Probe-Tender
Smoke the pork for 5 to 6 hours, or until the internal temperature reaches 200°F. This is where the magic happens—the collagen in the pork breaks down into gelatin, creating that signature pulled pork texture. You’ll notice the temperature will stall around 165°F for a while—this is normal and expected. The stall typically lasts about an hour, but don’t rush it. Once the temperature starts rising again toward 200°F, you’re on the home stretch.
About 30 minutes before the pork reaches 200°F, add the ½ cup apple juice to the smoker. This adds a subtle sweetness and helps maintain moisture in the pork. The apple juice also creates a beautiful, glossy bark that’s irresistible. When the pork reaches 200°F and a probe slides in like butter with no resistance, it’s ready to be pulled. This usually takes about 5 to 6 hours total, making this a quick method compared to traditional 8-12 hour cooks.
Rest and Pull the Pork
Remove the pork from the smoker and transfer it to a cutting board. Let it rest for 15 minutes before pulling. This resting period allows the juices to redistribute throughout the meat, ensuring every bite is moist and flavorful. While it rests, melt the 2 tbsp butter (unsalted) in a small saucepan over low heat. This butter will add richness to the pulled pork as you combine it.
Use two forks to pull the pork apart against the grain, discarding any large fat chunks. The meat should separate easily into tender strands. Transfer the pulled pork to a bowl and stir in the melted butter until fully coated. The butter enhances the smoky flavor and adds a luxurious mouthfeel. Serve immediately on buns with your favorite toppings, or store in the refrigerator for up to 4 days. The flavor only improves as it sits, making this a perfect make-ahead dish for game day or gatherings.
Pro Tips For Making Quick Smoked Pulled Pork
- Don’t Rush the Rest: That 30-minute room temp rest before smoking isn’t optional—it’s how you avoid cold, uneven cooking. I learned this the hard way when my first batch came out with a lukewarm center because I skipped it. Trust me, the extra 15 minutes of patience saves you from a dry, tough mess later.
- Smash That Garlic: Those 6 cloves of garlic aren’t just for show—smashing them with the flat side of your knife releases their oils and packs more flavor into the smoke. I used to just chop them, and the pork never had that same depth. It’s a tiny effort for a big payoff.
- Watch the Stall: When the internal temp hits 165°F and flatlines for an hour, don’t panic—it’s normal. The meat is working its magic, breaking down collagen. I used to pull it too early, thinking it was stuck, and ended up with stringy, dry pork. Let it climb back to 200°F before touching it.
- Apple Juice Timing Matters: Add that ½ cup apple juice only in the last 30 minutes—any earlier, and the bark turns soggy. I burned through two batches before realizing the sweetness needs to hit the meat hot and fast to caramelize properly. It’s the secret to that glossy, sticky crust.
Essential equipment for quick smoked pulled pork
Your Smoker: The Heart of the Operation
If you’re serious about pulled pork, your smoker is the star of the show—and not all smokers are created equal. I’ve tested everything from Traeger grills to budget Weber smokers, and my personal favorite is the Masterbuilt 340 with a pellet feed system.
It’s affordable, reliable, and delivers consistent 225°F temps with minimal fuss. For those who prefer charcoal, a Weber Smokey Mountain Cooker with a built-in thermometer is a game-changer. Either way, invest in a digital probe thermometer—I swear by Meater+—to track internal temps accurately. 🔥
Non-Negotiable Tools
A sharp boning knife (like the Victorinox Fibrox) is essential for trimming fat and pulling pork cleanly. Don’t skimp on a good pair of pork pulling forks—I use Dexter-Russell forks with serrated edges that grip the meat without tearing.
And trust me, a cast-iron Dutch oven (I’ve got a vintage Lodge from 1958) comes in handy for reheating leftovers without drying out the meat. These tools might seem like extras, but they’re the difference between “meh” and “wow.”
Smoking Accessories That Elevate the Game
The smoker water pan is non-negotiable—it keeps moisture levels up and prevents the pork from drying out. I use a stainless steel roasting pan with a lid to contain splatters. For aromatics, a wood chip tray (like the Traeger-style ones) lets you swap out flavors mid-cook.
And if you’re smoking outdoors, a windscreen (I use a DIY plywood shield) protects your coals from gusts and keeps temps steady. Small tweaks like these take your pulled pork from “good” to “legendary.”
Budget-Friendly Swaps
Don’t have a fancy smoker? No problem. A charcoal grill with a smoke box (like Weber’s Smokey Joe) works in a pinch. For wood chips, oak or hickory is ideal, but applewood adds a fruity sweetness if you’re in a bind.
And if you’re missing a thermometer, use the ice water test: stick a probe in ice water, then check the pork’s temp against it—it’s not perfect, but it works for emergencies. Honestly, the right tools just make life easier, not better. 💡
Pro Upgrades for Pitmasters
Once you’ve mastered the basics, level up with a smoke generator like the Masterbuilt 400235 for cleaner, more consistent smoke. For big batches, a pellet grill (like Traeger Pro 780) lets you smoke multiple racks simultaneously.
And if you’re serious about competition-style pulled pork, a reverse sear station (I use a Lodge cast-iron skillet) gives that restaurant-quality bark. These upgrades aren’t necessary, but they’re the kind of things I geek out over—especially when feeding a crowd at The Smoky Pig. 🌟
Nutrition facts
Frequently asked questions
Why does my pulled pork need to rest before pulling?
Resting for 15 minutes lets the juices redistribute evenly, keeping every bite moist and flavorful. Skipping this step means dry, uneven meat—trust the process! This is especially important after smoking, as the internal heat continues cooking the pork even after it’s removed.
Can I use a regular oven instead of a smoker?
Yes! For a quick alternative, wrap the seasoned pork in foil with a splash of apple juice and bake at 275°F for 8-10 hours until tender. The foil traps moisture, mimicking the smoker’s effect. Just add a smoky flavor with liquid smoke or a sprinkle of smoked paprika before serving.
What’s the best way to reheat pulled pork without drying it out?
Reheat in a 300°F oven with a splash of water or broth in a shallow dish—cover loosely with foil. This keeps it moist and warm for sandwiches or tacos. Avoid microwaving unless you add a damp paper towel to trap steam.
Why does my pork stall at 165°F
during smoking?
The 165°F stall happens as collagen converts to gelatin, making the pork tender. It lasts about 1 hour—don’t rush it! Patience here ensures fall-apart texture. If your smoker loses heat, add more wood chips or adjust the vent. This phase is normal and critical for flavor.
How do I know when the pork is done pulling?
Check with a probe—it should slide in like butter with no resistance at 200°F. The meat will separate easily into shreds. If unsure, let it cook another 15 minutes and test again. Overcooking makes it dry, but undercooking means tough strands.

Trained in classic French technique but raised on slow-cooked ribs and spicy rubs, she blends culinary skill with smoke and soul.
- Smoked Brisket Recipe: Low and Slow to Fall-Apart Tenderness - November 2, 2026
- Smoked Turkey Breast Recipe: Juicy Pink Center With Crispy Skin Every Time - November 2, 2026
- Leftover Smoked Pulled Pork Chili Recipe: Rustic Flavor Revival in One Pot - November 2, 2026