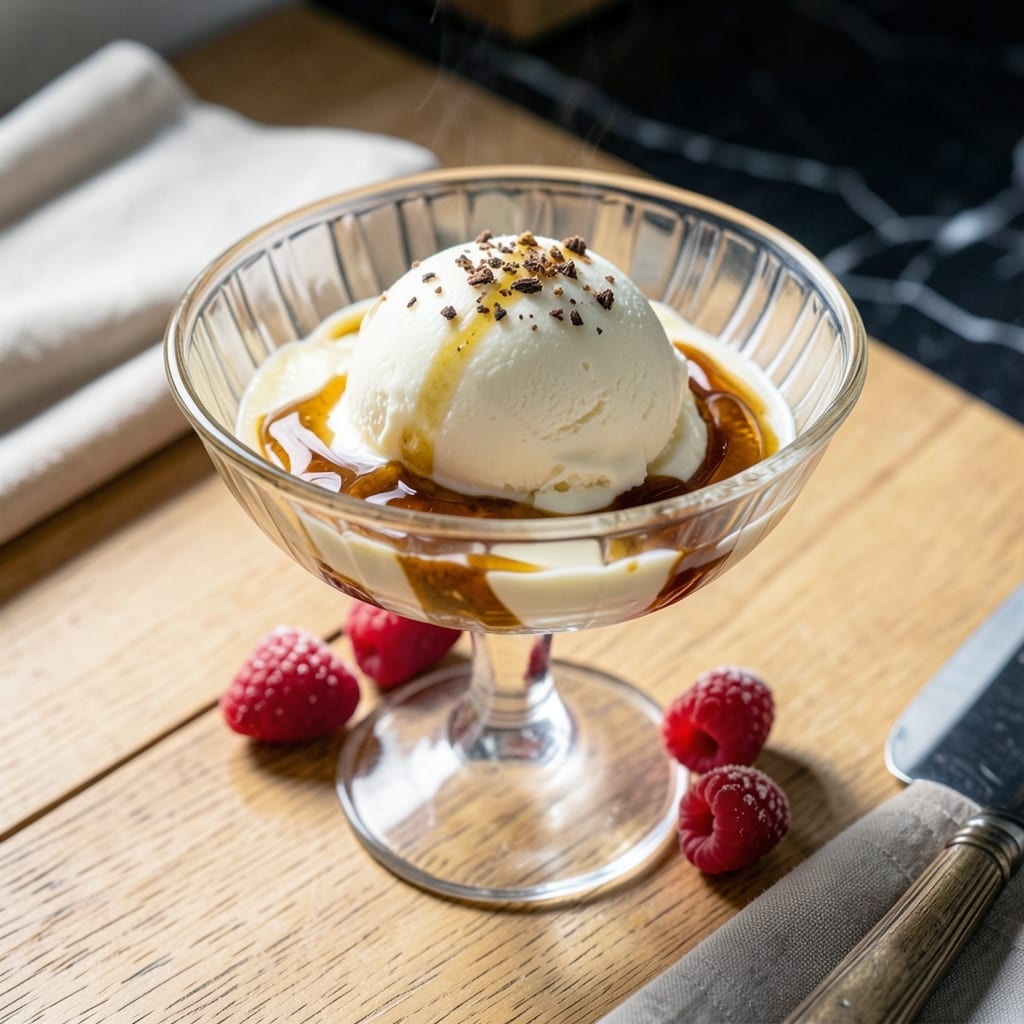
There’s nothing quite like the creamy, unmatched richness of ice cream made with raw milk. This recipe captures that old-fashioned depth of flavor that store-bought versions simply can’t replicate.
The process is straightforward but precise: a custard base made with raw milk and cream, gently cooked to 170°F for safety without losing its natural character. The result is a smooth, velvety texture that’s both luxurious and nostalgic.
What emerges from the churn is ice cream with a depth you can taste—clean, pure, and intensely creamy. The raw milk base allows the true flavor of the dairy to shine through, unmasked by processing.
Serve it plain or with your favorite mix-ins. This is ice cream the way it was meant to be.
Ingredients for Raw Milk Ice Cream
Rich, creamy, and nostalgic—just like the old-fashioned ice cream you remember from childhood.
| Ingredient | Amount | Notes |
|---|---|---|
| Raw Whole Milk 🥛 | 4 cups | Fresh, unprocessed, from trusted source |
| Heavy Cream 🥛 | 2 cups | Full-fat, no substitutes |
| Granulated Sugar 🍚 | ¾ cup | Fine white sugar preferred |
| Large Egg Yolks 🥚 | 6 pieces | Room temperature for best texture |
| Vanilla Bean 🌱 | 1 whole | Split and seeds scraped |
| Pure Vanilla Extract 💧 | 1 tsp | High-quality for depth of flavor |
| Sea Salt 🧂 | ¼ tsp | Fine grain for even distribution |
| Light Corn Syrup 🧈 | 2 tbsp | Optional, for smoother texture |
| Whole Milk 🥛 | ½ cup | For thinning custard if needed |
[recipe_ingredient_scaler]
The raw milk is non-negotiable for that authentic flavor. Source it from a trusted local dairy—check farmers markets or co-ops if you don’t have a direct connection. The cream should be heavy and fresh, nothing ultra-pasteurized. I grab mine from Whole Foods when my usual farm stand is out. Look for milk that’s been cooled quickly post-milking; it tastes sweeter and cleaner.
No raw milk access? Use the highest-fat pasteurized milk you can find, but know the flavor won’t be quite the same. The vanilla bean can be swapped for 2 tsp extract, but the speckles from the real bean are half the charm. Skip the corn syrup if you prefer, but it does help with scoopability. Egg yolks are key—don’t substitute whole eggs, or the texture will suffer.
The custard base keeps in the fridge for 2 days before churning, but it’s best fresh. Once churned, the ice cream holds for 1 week in an airtight container (though it’ll be half-gone by then). Press plastic wrap directly on the surface to prevent ice crystals.
Why You’ll Love This Recipe
- One-Bowl Wonder: I just whisk the yolks, sugar, and cream in one bowl—no fancy equipment, no fuss.
- Velvety Vanilla: That real vanilla bean flecked through the rich raw milk and cream? Pure, creamy heaven in every bite.
- Crowd Pleaser: Between us, it’s the only dessert I make that disappears at potlucks before the store-bought stuff.
- Leftovers? Ha.: Honestly, there never are any, but if by some miracle there were, they keep beautifully for a week.
Step-by-Step Instructions for Raw Milk Ice Cream
Here’s the method I’ve perfected for custard so rich it tastes like childhood memories.
Step 1: Heat the Dairy Base
Combine the 4 cups Raw Whole Milk and 2 cups Heavy Cream in a heavy saucepan. Heat over medium heat until small bubbles form around the edges—this should take about 5-7 minutes. You want the mixture to reach 175°F but not boil.
Watch for a thin film to form on the surface and steam to rise gently. Stir occasionally with a silicone spatula to prevent scorching, especially at the bottom. This slow heating ensures the dairy doesn’t curdle when you add the eggs later.
Step 2: Temper the Egg Yolks with Sugar
While the dairy heats, whisk the 6 pieces Large Egg Yolks with the 0.75 cup Granulated Sugar in a separate bowl until thick, pale, and ribbony. This takes about 2-3 minutes by hand or 1 minute with a mixer.
The mixture should fall in thick ribbons from the whisk and leave trails that hold their shape for a few seconds. This step dissolves the sugar completely and builds the base for your custard. Don’t skip this—it prevents grainy texture in your final ice cream.
Step 3: Create the Custard Base
Once the dairy reaches 175°F, remove it from heat. Slowly pour about 1 cup of the hot dairy mixture into the egg yolks while whisking constantly. This tempers the eggs so they don’t scramble.
After tempering, pour the egg mixture back into the saucepan with the remaining dairy. Return to low heat and cook, stirring constantly, until the custard thickens enough to coat the back of a spoon and reaches 170-175°F—about 8-10 minutes.
Strain through a fine-mesh sieve into a clean bowl to remove any cooked bits. Stir in the 1 whole Vanilla Bean seeds, 1 tsp Pure Vanilla Extract, 0.25 tsp Sea Salt, and 2 tbsp Light Corn Syrup until fully combined.
Step 4: Chill and Mature the Custard
Press plastic wrap directly onto the surface of the custard to prevent a skin from forming. Refrigerate for at least 4 hours (overnight is ideal). Chilling allows the flavors to meld and the custard to thicken further.
If the custard seems too thick after chilling, whisk in the 0.5 cup Whole Milk to reach the perfect consistency for churning. The custard should be cold throughout—test by dipping a spoon in; it should feel icy against the back of your hand.
Step 5: Churn and Freeze to Perfection
Pour the chilled custard into your ice cream maker and churn according to the manufacturer’s instructions—typically 20-25 minutes. The ice cream is ready when it resembles soft-serve and holds its shape when scooped.
Transfer to a lidded container and freeze for at least 4 hours until firm. For the creamiest texture, press plastic wrap against the surface before sealing the lid. This prevents ice crystals from forming and keeps your ice cream velvety smooth.
Pro Tips For Making Raw Milk Ice Cream
- Temper the yolks: Slowly whisk a cup of the hot milk mixture into the egg yolks before combining everything—otherwise you’ll end up with scrambled eggs in your ice cream base. I learned this the hard way after ruining a perfectly good batch.
- Use fresh raw milk: The flavor of raw milk degrades quickly, so use it within 2-3 days of milking for the richest, cleanest taste. After that, the cream starts to take on a funk that overpowers the vanilla.
- Skip boiling the base: Raw milk ice cream doesn’t need to reach a boil—heat it just until it coats the back of a spoon, around 170°F. Boiling can curdle the proteins and mute the delicate raw milk flavor.
- Strain the vanilla: After infusing the cream with the vanilla bean, strain it out before churning. Sounds tedious, but those little black specks can clog your ice cream maker and leave a gritty texture.
Best Sauces and Condiments for raw milk ice cream
Classic Hot Fudge
A rich, warm hot fudge sauce takes this ice cream to another level. I make mine with ½ cup heavy cream, ½ cup unsweetened cocoa powder, and 1 cup semi-sweet chocolate chips melted together. Drizzle it over each scoop for that nostalgic sundae experience. 🔥
Berry Compotes
Simmer 2 cups fresh berries with ¼ cup sugar and 1 tbsp lemon juice for a quick compote. Strawberry, raspberry, or blackberry all work beautifully. The tartness cuts through the creaminess perfectly. Serve it warm or chilled.
Salted Caramel
For a modern twist, I love a salted caramel sauce. Melt 1 cup sugar until amber, then whisk in ½ cup warm cream and 2 tbsp butter. Finish with ½ tsp flaky sea salt for that sweet-salty contrast.
Crunchy Toppings
Add texture with toasted nuts or crushed pretzels. I toast ½ cup pecans in 1 tbsp butter and a pinch of salt for 5 minutes at 350°F. The warmth brings out the oils and adds depth. 💫
Fresh Fruit
Keep it simple with sliced strawberries or peaches. Toss them with a bit of honey and lemon zest to macerate for 10 minutes. The natural sweetness complements the raw milk base beautifully.
Spiced Syrups
A drizzle of maple syrup or honey infused with cinnamon sticks or vanilla beans adds warmth. Heat ½ cup syrup with 1 cinnamon stick for 5 minutes, then cool before serving.
Nutrition Facts
Frequently Asked Questions
Do I need an ice cream maker?
An ice cream maker gives the creamiest results, but you can use the freeze-and-stir method. Pour custard into a shallow dish, freeze for 1 hour, then stir vigorously. Repeat every 30 minutes for 3-4 hours.
Can I use pasteurized milk instead?
Yes, but the flavor won’t be as rich. Use the highest-fat milk available and add an extra 2 egg yolks for creaminess. The texture will still be smooth, though less complex.
Why does my custard look grainy?
Graininess usually means the sugar didn’t dissolve completely or the eggs scrambled. Whisk yolks and sugar until pale and ribbony, and temper eggs slowly with hot dairy to prevent curdling.
How long can I store the finished ice cream?
It keeps for up to 1 week in an airtight container. Press plastic wrap directly on the surface to prevent ice crystals. For best texture, let it sit at room temperature for 5-10 minutes before scooping.

Trained in classic French technique but raised on slow-cooked ribs and spicy rubs, she blends culinary skill with smoke and soul.
- Recipe for Boneless Pork Chops in Cast Iron Skillet: Sear and Baste to Juicy Perfection - October 3, 2026
- Recipe for Boneless Cross Rib Roast: Slow-Roasted Beef with Herb Crust - October 3, 2026
- Hamburgers in Sauce Recipe Crock Pot: Slow-Cooked Savory Delight - October 3, 2026