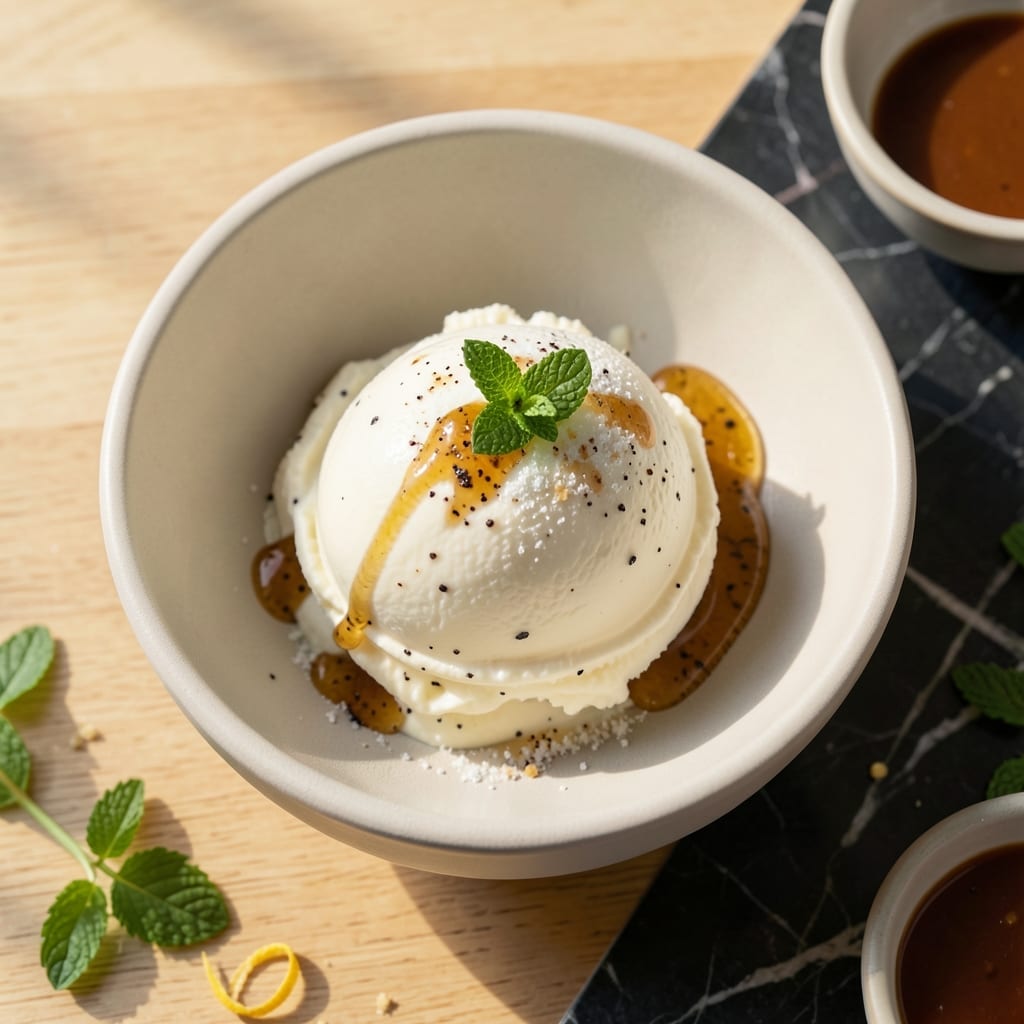
Achieving rich and velvety ice cream without eggs is possible with this proven method.
This approach delivers homemade results using simple ingredients and precise technique for a smooth, creamy texture every time.
Ingredients for Vanilla Bean Ice Cream Recipe No Eggs
Rich, velvety ice cream begins with these simple, high-quality ingredients.
| Ingredient | Amount | Notes |
|---|---|---|
| Heavy Cream 🥛 | 2 cups | Full-fat for smooth texture |
| Whole Milk 🥛 | 1 cup | Cold for best emulsion |
| Granulated Sugar 🍚 | ¾ cup | Fine grain for quick dissolution |
| Vanilla Bean 🌿 | 1 whole | Split and scraped |
| Pure Vanilla Extract 💧 | 1 tsp | For depth of flavor |
| Sea Salt 🧂 | ¼ tsp | Fine grain preferred |
| Corn Syrup 🍯 | 2 tbsp | Light for smoothness |
| Unsalted Butter 🧈 | 2 tbsp | Melted for richness |
| Vanilla Bean Paste 🌿 | 1 tbsp | Optional for extra vanilla |
| Almond Extract 🌰 | ¼ tsp | Optional for complexity |
[recipe_ingredient_scaler]
The vanilla bean is non-negotiable for true vanilla flavor. Nielsen-Massey beans are worth the splurge, but standard grocery store beans work fine. Ensure your heavy cream is ultra-pasteurized for the smoothest texture—check the label. Whole milk adds body without the richness of cream. For the sugar, organic cane sugar gives a cleaner taste than refined white sugar.
No vanilla bean? Use 2 tsp pure vanilla extract instead. Light corn syrup can be swapped for agave nectar or glucose syrup. Unsalted butter can be replaced with coconut oil for a dairy-free version (though texture may vary). The almond extract is purely optional but adds depth—skip if you prefer pure vanilla flavor.
Store vanilla beans in a cool, dark place for up to 6 months. The ice cream base can be chilled for 24 hours before churning for deeper flavor development. Once churned, it keeps for 1 week in an airtight container in the freezer.
Why You’ll Love This Recipe
- No Eggs Needed: I skip the custard step entirely—just cream, milk, sugar, and vanilla. Honestly, it’s the simplest base I’ve ever made.
- Deep Vanilla Flavor: The real vanilla bean and extract combo gives it that rich, speckled taste you can’t fake.
- Endless Mix-Ins: I fold in berries, cookie dough, or caramel swirls depending on the day. My kids beg for it year-round.
- Makes Extra: A double batch fits in my freezer for weeks, so I always have dessert ready. Between us, it’s my secret hostess trick.
Step-by-Step Instructions for Vanilla Bean Ice Cream No Eggs
This professional method ensures a velvety texture with maximum vanilla flavor extraction.
Step 1: Infuse the Cream with Vanilla Bean
In a medium saucepan, combine the 2 cups Heavy Cream and the 1 whole Vanilla Bean, which you’ve split lengthwise and scraped. Heat over medium-low until the mixture reaches 180°F—you’ll see tiny bubbles forming at the edges.
Remove from heat, cover, and let steep for 30 minutes. This allows the vanilla bean’s aromatic compounds to fully infuse into the cream. The longer steep time ensures a more pronounced vanilla flavor than quick methods.
Step 2: Prepare the Sugar Mixture and Combine
In a separate bowl, whisk together the 0.75 cup Granulated Sugar, 2 tbsp Corn Syrup, 1 tsp Pure Vanilla Extract, 1 tbsp Vanilla Bean Paste, and 0.25 tsp Sea Salt until fully dissolved. The corn syrup helps create that signature smooth texture in the final ice cream.
After steeping, remove the vanilla bean pod from the cream. Whisk the 1 cup Whole Milk and 2 tbsp Unsalted Butter into the warm cream, then gradually add the sugar mixture while stirring constantly. This tempering method prevents graininess.
Step 3: Chill the Base Thoroughly
Strain the mixture through a fine-mesh sieve into a clean bowl to remove any undissolved sugar or vanilla specks. Add the 0.25 tsp Almond Extract if using. The almond extract complements the vanilla beautifully, adding subtle depth to the flavor profile.
Cover and refrigerate for at least 8 hours, preferably overnight. This extended chilling is crucial for two reasons: it allows the flavors to meld completely and ensures the mixture is cold enough for proper churning. The mixture should reach 40°F or below before churning.
Step 4: Churn and Freeze to Perfection
Pour the chilled base into your ice cream maker and churn according to the manufacturer’s instructions, typically 20-25 minutes. The mixture will transform from liquid to a thick, soft-serve consistency. You’ll know it’s ready when it holds its shape when scooped but is still slightly malleable.
Transfer the churned ice cream to a freezer-safe container. Press plastic wrap directly against the surface to prevent ice crystals from forming. Freeze for at least 4 hours until firm. For best texture, freeze overnight before serving.
Step 5: Serve with Professional Presentation
Let the ice cream sit at room temperature for 5-10 minutes before scooping. This brief tempering makes it easier to serve while maintaining the perfect texture. Use a warm ice cream scoop for clean, professional-looking portions.
The final product should have a rich, creamy mouthfeel with visible vanilla bean flecks throughout. Each spoonful should deliver pure vanilla flavor with a velvety texture that melts smoothly on the palate. This no-egg method produces an ice cream that’s remarkably similar to traditional custard-based versions.
Pro Tips For Making Vanilla Bean Ice Cream Recipe No Eggs
- Chill the Base: Always refrigerate your cream-milk-sugar mixture for at least 4 hours before churning—cold custard freezes faster and creamier, and I learned this the hard way after ending up with icy, soupy messes.
- Scrape the Bean: Split the vanilla bean lengthwise and scrape out every last speck of seeds; those tiny black flecks carry most of the flavor, and skipping this leaves your ice cream tasting flat.
- Skip the Boil: Heat the dairy just until the sugar dissolves, not a rolling boil, or you’ll risk scorching the mixture and adding a burnt flavor to your finished ice cream.
- Add Extract Late: Stir in the pure vanilla extract after the mixture has cooled slightly—adding it to hot liquid can cause the alcohol to evaporate and take some of that precious vanilla flavor with it.
Wine and Beer Pairings for vanilla bean ice cream recipe no eggs
Dessert Wine Pairings
For a classic match, try Moscato d’Asti from Italy—its light effervescence and honeyed stone fruit notes complement the creamy sweetness without overpowering it. The 5-6% ABV keeps the pairing light and refreshing. 🍷
Fortified Wine Options
Pedro Ximénez Sherry from Jerez offers deep raisin and caramel notes that mirror the vanilla’s richness. Serve it slightly chilled at 55-60°F in small 2-ounce pours to avoid overwhelming the palate.
Craft Beer Pairings
A vanilla porter like Brewery Ommegang’s Abyss brings complementary flavors with its roasted malt base and real vanilla bean addition. The 6.5% ABV beer’s carbonation cuts through the creaminess beautifully.
Fruit-Forward Wines
Late-harvest Riesling from Germany or Washington State provides bright acidity that balances the ice cream’s richness. Look for bottles with 10-12% ABV and notes of peach and apricot. The contrast is magical.
Non-Alcoholic Options
For a booze-free pairing, try sparkling vanilla chai made with 1 cup brewed chai tea, ½ cup vanilla syrup, and 1 cup club soda. The spices enhance the vanilla flavors without competition.
Serving Temperature
Always serve your wine slightly cooler than room temperature—50-55°F for reds, 45-50°F for whites. This temperature range allows the flavors to shine without numbing your taste buds. 💡
Nutrition Facts
Frequently Asked Questions
Can I use vanilla extract instead of a whole bean?
Yes, substitute 2 tsp pure vanilla extract for the bean. Add it when combining the sugar mixture.
Why do we need corn syrup in the recipe?
Corn syrup lowers the freezing point, creating a smoother texture. It also helps prevent ice crystals from forming during storage.
How long can I store this ice cream?
It keeps for up to 1 week in an airtight container in the freezer. For best texture, press plastic wrap against the surface.
What if my mixture doesn’t thicken during churning?
Ensure your base is fully chilled to 40°F before churning. If still too soft, freeze for 1-2 hours then retry.

Trained in classic French technique but raised on slow-cooked ribs and spicy rubs, she blends culinary skill with smoke and soul.
- Recipe for Boneless Pork Chops in Cast Iron Skillet: Sear and Baste to Juicy Perfection - October 3, 2026
- Recipe for Boneless Cross Rib Roast: Slow-Roasted Beef with Herb Crust - October 3, 2026
- Hamburgers in Sauce Recipe Crock Pot: Slow-Cooked Savory Delight - October 3, 2026