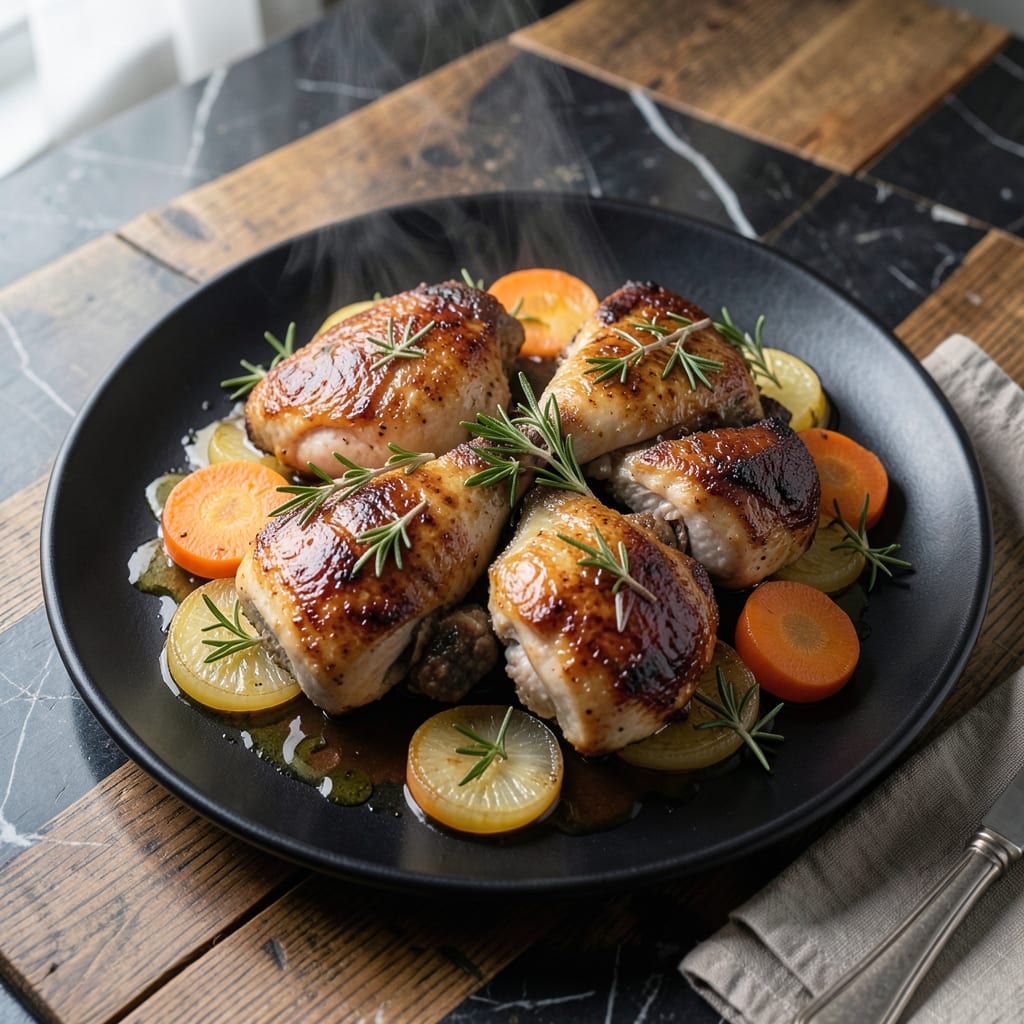
Pressure cookers transform chicken thighs into something extraordinary—tender, juicy, and packed with herb depth in a fraction of the time. This method locks in moisture while infusing bold flavors that slow cooking simply can’t match.
I’ve perfected this technique through years of professional cooking, and the results speak for themselves. The high-pressure environment breaks down connective tissue rapidly, ensuring fall-off-the-bone texture without drying out the meat.
The herb blend penetrates deeply, creating layers of flavor that elevate simple chicken thighs to restaurant-quality status. Each bite delivers the perfect balance of savory meat and aromatic seasoning.
Ready in under 30 minutes, this becomes a weeknight staple that tastes like it took hours. The pressure cooker does all the work while you prepare the sides.
Ingredients for Recipe Chicken Thighs in Pressure Cooker
These ingredients transform humble chicken thighs into a restaurant-worthy dish with minimal effort.
| Ingredient | Amount | Notes |
|---|---|---|
| Chicken Thighs 🍗 | 2 lb | Boneless, skin-on preferred |
| Kosher Salt 🧂 | 1 ½ tsp | Diamond Crystal brand recommended |
| Freshly Ground Black Pepper 🌶️ | 1 tsp | Coarse grind preferred |
| Garlic Cloves 🧄 | 6 cloves | Minced for maximum flavor infusion |
| Fresh Rosemary 🌿 | 2 tbsp | Finely chopped, stems discarded |
| Fresh Thyme 🍃 | 2 tbsp | Leaves stripped from stems |
| Extra-Virgin Olive Oil 🫒 | 2 tbsp | High-quality, cold-pressed |
| Chicken Stock 💧 | 1 cup | Low-sodium preferred |
| Dry White Wine 🍷 | ½ cup | Sauvignon Blanc or Pinot Grigio |
| Dijon Mustard 🟡 | 1 tbsp | Smooth, not whole grain |
| Lemon Juice 🍋 | 1 tbsp | Freshly squeezed |
| Yellow Onion 🧅 | 1 whole | Medium-sized, finely diced |
| Carrots 🥕 | 2 whole | Peeled and sliced into rounds |
| Bay Leaf 🌿 | 1 whole | Dried or fresh |
[recipe_ingredient_scaler]
The chicken thighs are the foundation here. Skin-on, boneless gives the best texture and flavor, though bone-in works too (adjust cook time). Source from Whole Foods or a trusted butcher for consistent quality. Fresh herbs are non-negotiable—organic rosemary and thyme from the produce section offer superior aroma. If using dried, reduce quantities by two-thirds.
No white wine? Substitute additional chicken stock with a splash of apple cider vinegar. Dijon mustard can be replaced with whole-grain mustard for a rustic touch. For the stock, Better Than Bouillon paste mixed with water works in a pinch. Carrots and onions add depth—shallots can swap for onions if preferred.
Store chicken thighs in the coldest part of the fridge for up to 2 days before cooking. Fresh herbs last 5-7 days wrapped in damp paper towels. The dish reheats well and tastes even better the next day—keeps for 4-5 days refrigerated.
Why You’ll Love This Recipe
- Set and Forget: I toss the thighs in with garlic, rosemary, salt, and pepper, lock the lid, and walk away—dinner cooks itself.
- Fallback Flavor: That mix of crispy skin and juicy meat soaked in garlic-rosemary goodness? Ridiculously good.
- Feeds My Week: I make a big batch Sunday and we’re eating well for days—tacos, salads, you name it.
- Budget Hero: Chicken thighs are cheap, and this method turns them into something restaurant-worthy. Honestly, it’s my wallet’s favorite trick.
Step-by-Step Instructions for Chicken Thighs in Pressure Cooker
This method guarantees fall-off-the-bone tenderness with maximum herb infusion.
Step 1: Sear the Chicken Thighs for Depth
Set your pressure cooker to the Sauté function and add the 2 tbsp Extra-Virgin Olive Oil. When it shimmers, season the 2 lb Chicken Thighs with 1.5 tsp Kosher Salt and 1 tsp Freshly Ground Black Pepper.
Working in batches to avoid crowding, sear the chicken for 3-4 minutes per side until deep golden brown. The fond created here will form the flavor base. Transfer seared thighs to a plate and set aside.
Step 2: Build the Aromatic Foundation
In the same pot, add the finely diced 1 whole Yellow Onion, sliced 2 whole Carrots, and minced 6 cloves Garlic Cloves. Sauté for 3-4 minutes until the onion becomes translucent.
Stir in the 2 tbsp Fresh Rosemary, 2 tbsp Fresh Thyme, 1 tbsp Dijon Mustard, and 1 whole Bay Leaf. Cook for 1 minute until fragrant. The herbs should release their oils, creating an intoxicating aroma.
Step 3: Deglaze and Pressure Cook
Pour in the 0.5 cup Dry White Wine and scrape the bottom of the pot to release all browned bits. Let it simmer for 2 minutes until reduced by half. This step ensures no fond burns during pressure cooking.
Return the chicken to the pot along with any accumulated juices. Add the 1 cup Chicken Stock and 1 tbsp Lemon Juice. Secure the lid and set the pressure cooker to High Pressure for 12 minutes.
Step 4: Natural Release and Finish
Allow the pressure to release naturally for 10 minutes, then quick-release any remaining pressure. This gradual release prevents the chicken from toughening. The internal temperature should read 195°F.
Remove the Bay Leaf and discard. Taste the sauce and adjust seasoning if needed. The liquid should have reduced slightly, coating the chicken in a glossy, herb-infused glaze.
Pro Tips For Making Recipe Chicken Thighs In Pressure Cooker
- Brown the Thighs: Sear the chicken thighs in the pressure cooker first—about 3-4 minutes per side until deep golden. I learned this the hard way: skipping this step leaves the meat pale and the flavor flat.
- Smash the Garlic: Lightly crush the garlic cloves with the side of your knife before adding them. Sounds weird, but it works: the flavor infuses better without burning.
- Skip the Overcrowding: Don’t pack the cooker beyond two-thirds full—steer clear of this common mistake. The thighs need space to cook evenly, or you risk underdone meat.
- Use Fresh Rosemary: Dried rosemary just doesn’t cut it here. After burning three batches, I finally figured out fresh sprigs actually changes the outcome—more aromatic and vibrant.
Health Benefits of These Flavors
Rich in Protein
This dish delivers a serious protein punch with about 50 grams per serving from the 2 lb Chicken Thighs. Protein is essential for muscle repair and growth, and chicken thighs offer a more flavorful alternative to breast meat without sacrificing nutritional value. 💪
Iron and Zinc Boost
Chicken thighs are packed with heme iron and zinc, nutrients that support immune function and energy levels. The 1.5 tsp Kosher Salt and 1 tsp Freshly Ground Black Pepper enhance mineral absorption, making every bite as beneficial as it is delicious.
B Vitamin Powerhouse
You’ll get a healthy dose of B vitamins, including B6 and B12, which aid metabolism and brain health. The 6 cloves Garlic Cloves and fresh herbs like rosemary and thyme contribute additional antioxidants, boosting the dish’s overall nutritional profile.
Bone Health Support
The 2 tbsp Extra-Virgin Olive Oil provides heart-healthy fats, while the 1 cup Chicken Stock adds calcium and phosphorus. These nutrients work together to support strong bones and teeth, making this meal a well-rounded choice for overall wellness.
Low-Carb Friendly
With no added sugars or refined carbs, this recipe fits perfectly into low-carb or keto lifestyles. The yellow onion and carrots add natural sweetness and fiber without spiking blood sugar, keeping it balanced and nutritious.
Quick and Nourishing
Ready in under 30 minutes, this pressure cooker method preserves nutrients that longer cooking might degrade. The result is a meal that’s as nourishing as it is convenient—ideal for busy weeknights. 💛
Nutrition Facts
Frequently Asked Questions
Can I use bone-in thighs instead?
Yes, but increase pressure cooking time to 15 minutes for bone-in. The meat will still be tender and juicy, though slightly harder to portion.
Why sear the chicken first?
Searing creates a flavor foundation by developing the fond (browned bits) that dissolves into the cooking liquid. Skipping this step results in a less complex final dish.
What if my sauce is too thin?
After cooking, remove the chicken and reduce the sauce using the Sauté function for 5-7 minutes. This concentrates the flavors beautifully.
Can I make this ahead?
The flavors improve overnight! Store in an airtight container for up to 4 days. Reheat gently on the stovetop.

Trained in classic French technique but raised on slow-cooked ribs and spicy rubs, she blends culinary skill with smoke and soul.
- Smoked Teriyaki Beef Jerky Recipe: Umami-Deep Flavor in Every Chewy Bite - October 15, 2026
- Stewed Beef Brisket Recipe: Deep-Rich Flavor After 8 Hours of Slow Simmering - October 15, 2026
- Beef Brisket Rolls Recipe: Flaky Layers and Smoky Sweet Filling - October 15, 2026