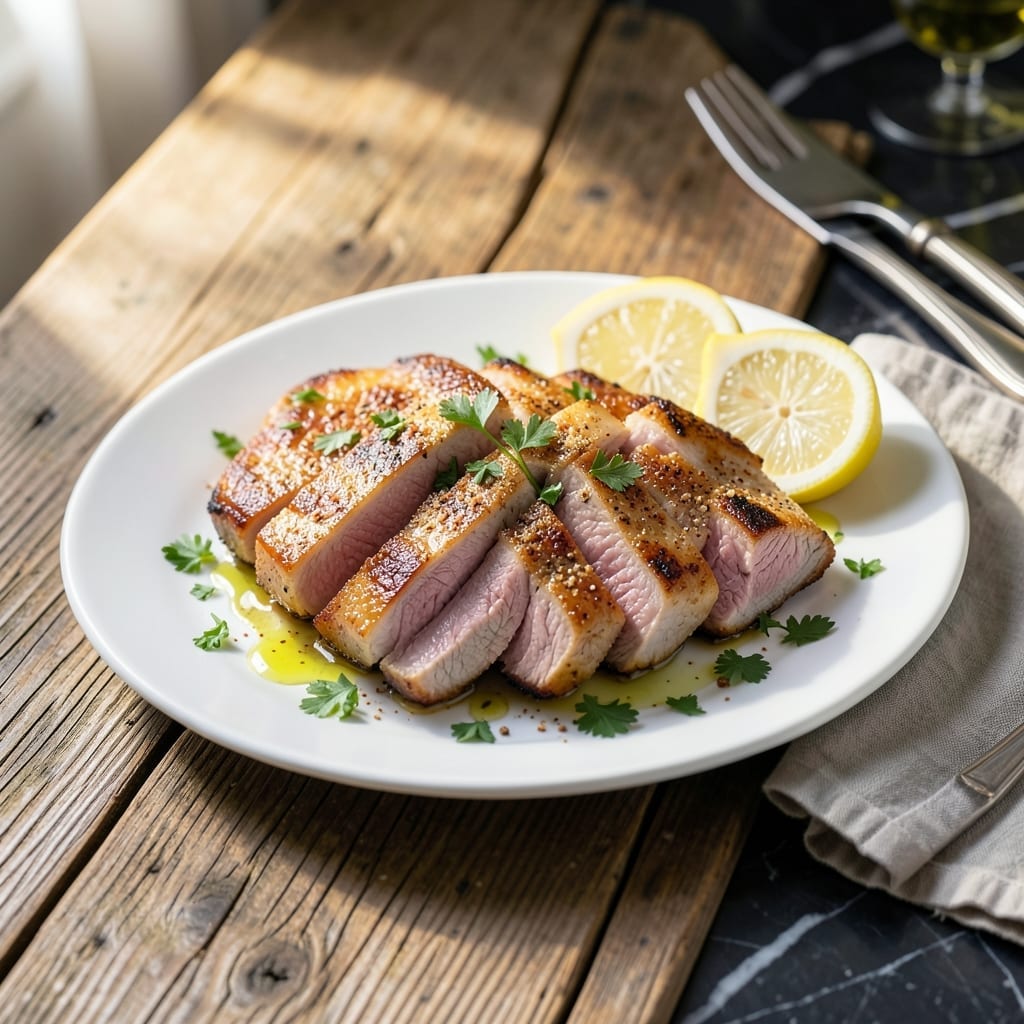
I learned early that tender pork begins with proper prep. My grandmother always pounded cutlets to an even thickness, ensuring even cooking without drying out the edges.
This method delivers juicy results every time. A hot pan, quick sear, and resting period transform simple pork sirloin into a restaurant-worthy main course with minimal effort.
You’ll achieve perfectly browned cutlets with a golden crust and moist interior. The technique is foolproof for busy weeknights when you want quality without complexity.
Pair with roasted vegetables or a simple salad for a complete meal that satisfies without overwhelming your evening.
Ingredients for Recipe for Boneless Pork Sirloin Cutlets
Pantry staples meet premium pork for a dish that feels special without the fuss.
| Ingredient | Amount | Notes |
|---|---|---|
| Boneless Pork Sirloin Cutlets 🥩 | 1 ½ lb | Pounded to 1/4-inch thickness |
| All-Purpose Flour 🌾 | ½ cup | For dredging cutlets |
| Kosher Salt 🧂 | 1 ½ tsp | Diamond Crystal preferred |
| Freshly Ground Black Pepper 🌶️ | 1 tsp | Coarse grind for texture |
| Garlic Powder 🧄 | 1 tsp | For depth of flavor |
| Onion Powder 🧅 | 1 tsp | Balances savory notes |
| Paprika 🌶️ | 1 tsp | Sweet or smoked variety |
| Olive Oil 🫒 | 3 tbsp | Extra-virgin for searing |
| Unsalted Butter 🧈 | 2 tbsp | For basting cutlets |
| Fresh Thyme Sprigs 🌿 | 4 whole | Optional for aroma |
| Fresh Lemon 🍋 | 1 whole | Cut into wedges for serving |
[recipe_ingredient_scaler]
The pork is the star—look for boneless sirloin cutlets at your butcher counter or pre-packaged at Whole Foods. They should be pale pink with a bit of marbling (not too lean or they’ll dry out). My grandmother always said to pound them yourself with a rolling pin for even thickness—a meat mallet works too (worth the extra minute). If buying pre-cut, check they’re consistently 1/4-inch thick.
No pork sirloin? Boneless chicken thighs work in a pinch—just reduce cooking time by half. Swap the flour for cornstarch for a gluten-free crust, or use panko for extra crunch. The butter can be vegan butter if needed, but real butter gives that golden, nutty flavor. Out of fresh thyme? Dried thyme at half the amount works fine (just add it to the flour mix).
Cooked cutlets keep 3-4 days in the fridge—reheat gently in a pan to avoid drying out. They’re best the day they’re made, though. Freezing isn’t ideal (texture suffers), but you can freeze uncooked, pounded cutlets for up to 3 months. Thaw in the fridge overnight before cooking.
Why You’ll Love This Recipe
- Weeknight Hero: Five ingredients, one pan, and 20 minutes is all it takes—honestly, it’s my fastest dinner yet.
- Crispy Garlic Bite: That crust from the flour and garlic powder? Ridiculously good with every juicy bite.
- Feeds thefam: I stretch it for sandwiches, salads, or solo with sides—never a complaint.
- Budget Stretcher: Pork sirloin cutlets stay cheap, and leftovers taste just as solid the next day.
Step-by-Step Instructions for Boneless Pork Sirloin Cutlets
Here’s how I get perfectly tender, juicy cutlets with a golden crust every time.
Step 1: Season and Dredge the Cutlets
Pat the 1.5 lb boneless pork sirloin cutlets dry with paper towels to ensure a good sear. In a shallow dish, combine the 0.5 cup all-purpose flour, 1.5 tsp kosher salt, 1 tsp freshly ground black pepper, 1 tsp garlic powder, 1 tsp onion powder, and 1 tsp paprika. Mix well so the spices are evenly distributed throughout the flour.
Dredge each cutlet in the seasoned flour, pressing gently to adhere on both sides. Shake off any excess—you want a light, even coating that will crisp up beautifully in the pan. This step is crucial for both flavor and texture, so don’t skip it.
Step 2: Sear the Cutlets to Golden Perfection
Heat 2 tbsp olive oil in a large skillet over medium-high heat until it shimmers. Add half the cutlets to avoid crowding the pan. Cook for 3-4 minutes per side until they develop a golden-brown crust and the edges look opaque.
Transfer the cooked cutlets to a warm plate and repeat with the remaining 1 tbsp olive oil and the rest of the cutlets. Don’t rush this step—proper searing locks in the juices and creates that irresistible crispy exterior that makes this dish so satisfying.
Step 3: Baste with Butter and Thyme
Reduce the heat to medium and return all the cutlets to the skillet. Add the 2 tbsp unsalted butter and 4 whole fresh thyme sprigs to the pan. Tilt the skillet slightly and use a spoon to baste the cutlets with the foaming butter continuously for 1-2 minutes.
This basting technique adds rich, nutty flavor and ensures the cutlets stay moist and tender. The thyme infuses the butter with a subtle aromatic note that complements the pork beautifully. Keep an eye on the butter—it should foam but not burn.
Step 4: Rest and Serve with Lemon
Transfer the cutlets to a serving platter and let them rest for 5 minutes before serving. This allows the juices to redistribute throughout the meat, ensuring every bite is as tender and flavorful as possible.
Serve immediately with wedges from the 1 whole fresh lemon on the side. A squeeze of fresh lemon juice just before eating brightens the rich, savory flavors and cuts through the richness of the butter. This simple finishing touch elevates the dish from great to extraordinary.
Pro Tips For Making Recipe For Boneless Pork Sirloin Cutlets
- Pound the Cutlets: Use a meat mallet or rolling pin to flatten the pork to an even 1/4-inch thickness—this guarantees even cooking and prevents chewy spots. I learned this the hard way after serving a few tough bites.
- Season the Flour: Mix the kosher salt, black pepper, and garlic powder right into the flour before dredging. Sounds weird, but it works: every bite gets perfectly seasoned without clumping.
- Skip the Overcrowding: Cook the cutlets in batches if needed—about 2 tablespoons of oil per batch, enough to coat the bottom. After burning three batches, I finally figured out that crowding steams instead of crisps.
- Rest Before Serving: Give the cutlets a solid 5 minutes on a wire rack after cooking. My grandmother swore by this, and she was right: it keeps them juicy instead of dry.
Make-Ahead Tips for This Dish
Prep Ahead Strategy
I always pound and season my cutlets the night before—this saves 10 minutes on cooking day. Store them covered in the fridge with parchment between layers to prevent sticking. The flour coating will absorb moisture, so pat them dry again before cooking. 💡
Dry Mix Storage
Mix your 0.5 cup flour with all the spices in a jar and keep it in your pantry for up to 2 weeks. This way, you can dredge the pork right before cooking while the oil heats. I learned this trick from my grandmother’s handwritten notes.
Cutlet Freezing
Freeze raw, pounded cutlets between parchment paper in a ziplock bag for up to 3 months. Thaw overnight in the fridge before cooking. Avoid freezing after cooking—the texture suffers too much.
Cookware Prep
Have your large skillet and basting spoon ready on the counter. I keep my 2 tbsp butter portioned in the fridge door so it’s easy to grab. This small prep makes the cooking process smoother.
Reheating Method
Reheat cooked cutlets in a dry skillet over medium-low heat for 2-3 minutes per side. Add a splash of water and cover to steam if they seem dry. Never microwave—they’ll turn rubbery. ❄️
Lemon Prep
Wash and dry your 1 whole lemon the day before. It’ll keep well in the fridge and be ready to slice into wedges when needed. This small step makes serving effortless.
Nutrition Facts
Frequently Asked Questions
What thickness should the cutlets be?
Pound them to 1/4-inch thickness for even cooking. This ensures they cook through without drying out while achieving a perfect sear. Use a meat mallet or rolling pin for consistent results.
Can I substitute the flour?
Yes! Try cornstarch for a gluten-free, extra-crispy coating or panko breadcrumbs for more texture. Adjust seasoning to taste. Both work well with the same cooking method.
Why rest the cutlets before serving?
Resting for 5 minutes lets juices redistribute. Skipping this step causes all the moisture to spill out when cut, leaving dry meat. The wait is worth it for tender, flavorful results.
How can I tell when they’re done?
Use a meat thermometer—145°F internal temperature is safe. Visually, they should be golden-brown with opaque centers. Overcooking turns them tough, so pull them off heat just as they reach temp.

Trained in classic French technique but raised on slow-cooked ribs and spicy rubs, she blends culinary skill with smoke and soul.
- Recipe for Boneless Pork Chops in Cast Iron Skillet: Sear and Baste to Juicy Perfection - October 3, 2026
- Recipe for Boneless Cross Rib Roast: Slow-Roasted Beef with Herb Crust - October 3, 2026
- Hamburgers in Sauce Recipe Crock Pot: Slow-Cooked Savory Delight - October 3, 2026