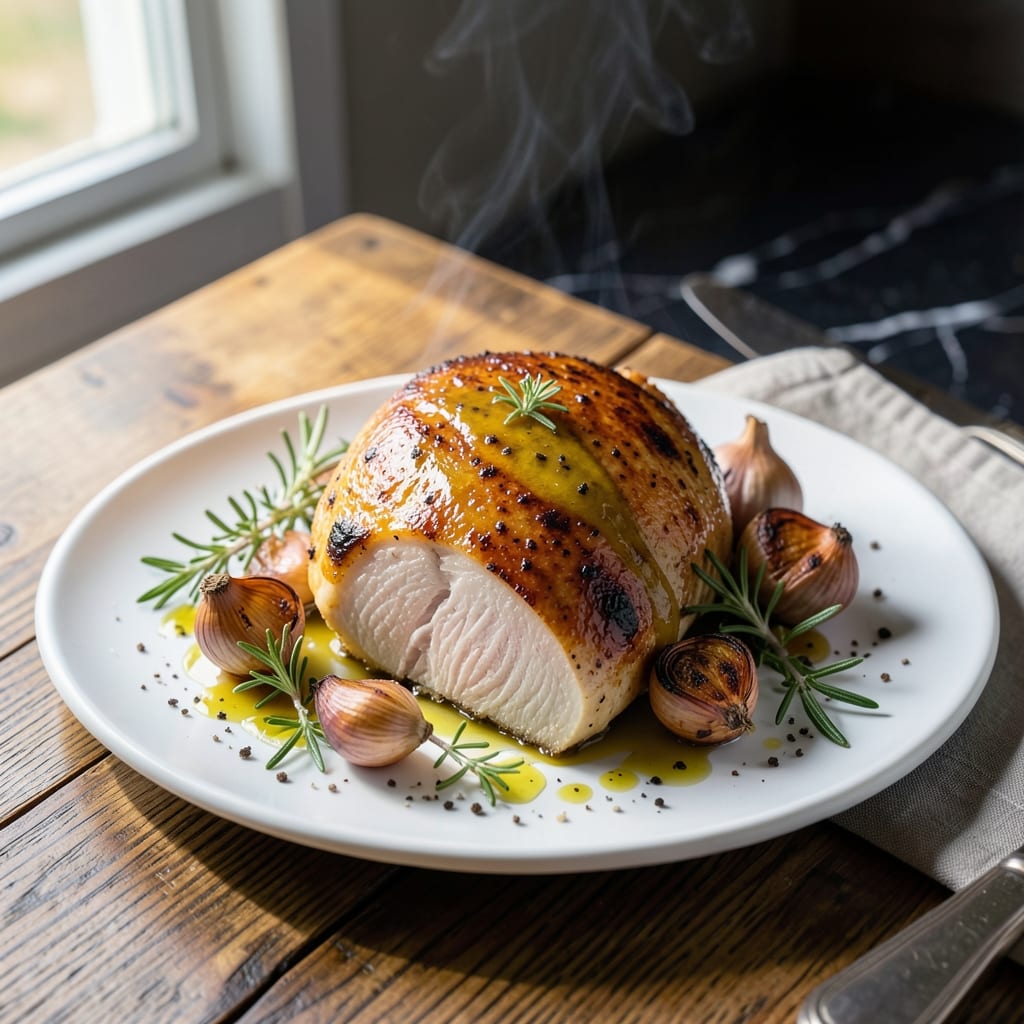
There’s a simple technique that transforms basic chicken breast into a juicy, flavorful centerpiece every time. I developed this method after years of dry, overcooked poultry disappointments.
The key is a hot oven and precise timing. At 425°F, the exterior develops a golden crust while the inside stays tender. A quick herb rub before baking infuses every bite with aroma and flavor.
What emerges is perfectly cooked chicken with a crisp, caramelized exterior and moist interior. The herbs create a fragrant crust that locks in natural juices, making each bite satisfying and delicious.
Serve with roasted vegetables or a fresh salad for a complete meal. This approach works for weeknight dinners or weekend gatherings.
Ingredients for Recipe for Chicken Breast in Oven
Quality chicken plus a few fresh herbs create this golden-crusted centerpiece with ease.
| Ingredient | Amount | Notes |
|---|---|---|
| Boneless Skinless Chicken Breast 🍗 | 1 ½ lb | Pounded to even thickness |
| Olive Oil 🫒 | 2 tbsp | Extra-virgin preferred |
| Garlic Cloves 🧄 | 4 cloves | Minced finely |
| Fresh Rosemary 🌿 | 2 tbsp | Finely chopped |
| Fresh Thyme Leaves 🍃 | 2 tbsp | Stems removed |
| Dijon Mustard 🟡 | 1 tbsp | Smooth variety |
| Lemon Zest 🍋 | 1 tsp | From one medium lemon |
| Kosher Salt 🧂 | 1 tsp | Diamond Crystal preferred |
| Black Pepper 🌶️ | ½ tsp | Freshly ground |
| Paprika 🌶️ | 1 tsp | Sweet or smoked variety |
| Butter 🧈 | 2 tbsp | Unsalted, melted |
| Fresh Parsley 🌿 | ¼ cup | Chopped for garnish |
[recipe_ingredient_scaler]
The chicken breast quality is paramount here. Opt for air-chilled, organic if available—it retains moisture better than conventionally processed. Whole Foods and Trader Joe’s carry excellent options. Pounding to even thickness ensures uniform cooking, which prevents dry edges while the center finishes. For the herbs, fresh is non-negotiable—dried simply won’t deliver the aromatic crust this method promises.
No fresh rosemary or thyme? Dried herbs at one-third the amount can substitute, though the texture will differ. Out of Dijon? Whole-grain mustard adds pleasant texture, or use 1 tsp mustard powder mixed with water. The butter can be replaced with olive oil for a dairy-free approach, though the crust may be less golden. Always bring chicken to room temperature before cooking.
Store fresh herbs wrapped in damp paper towels for up to 5 days. Raw chicken keeps in the fridge for 2 days or can be frozen for 9 months. The herb rub can be prepped ahead—mix and refrigerate for up to 24 hours before use.
Why You’ll Love This Recipe
- One Pan Magic: I toss everything on a single sheet pan—chicken, olive oil, garlic, and herbs—and the oven does the rest.
- Herb-Infused Comfort: That warm garlic-rosemary-thyme aroma fills the kitchen and makes the chicken taste like a cozy Sunday dinner.
- Weeknight Lifesaver: I’ve served this to picky kids and dinner guests alike, and everyone cleans their plate.
- Leftovers Win: Honestly, the next-day sandwiches with the cold, herb-flecked chicken might be even better than the first meal.
Step-by-Step Instructions for Chicken Breast in Oven
Master the technique for perfectly cooked chicken with a golden crust and herb-infused flavor.
Step 1: Prepare and Season the Chicken
Pat the 1.5 lb boneless skinless chicken breast dry with paper towels to ensure a good sear. Pound to an even ½-inch thickness using a meat mallet—this guarantees uniform cooking and prevents dryness.
In a small bowl, mix the 2 tbsp olive oil, 1 tbsp Dijon mustard, 4 cloves minced garlic, 2 tbsp fresh rosemary, 2 tbsp fresh thyme leaves, 1 tsp lemon zest, 1 tsp kosher salt, 0.5 tsp black pepper, and 1 tsp paprika until fully combined. Rub this mixture all over the chicken, coating every surface evenly.
Step 2: Sear for Crispy Texture
Heat a large oven-safe skillet over medium-high heat. Add the 2 tbsp butter and let it melt and foam. Place the chicken breasts in the skillet and sear for 3-4 minutes per side until the surface turns golden brown.
This searing step creates a flavorful crust and locks in juices. The chicken should release easily from the pan when it’s ready to flip—if it sticks, let it cook a bit longer to develop that perfect golden color.
Step 3: Transfer to Oven for Even Cooking
Preheat the oven to 400°F. Once the chicken is seared, transfer the entire skillet to the oven. Bake for 12-15 minutes, or until the internal temperature reaches 165°F on an instant-read thermometer.
Keep an eye on the color—the edges should be deep golden brown, and the juices should run clear when pierced. If the chicken begins to brown too quickly, tent the skillet loosely with foil to prevent over-browning.
Step 4: Rest and Garnish
Remove the chicken from the oven and transfer it to a cutting board. Tent loosely with foil and let it rest for 5-10 minutes. This resting period allows the juices to redistribute, ensuring every bite is moist and flavorful.
Slice the chicken against the grain and garnish with the 0.25 cup fresh parsley for a pop of color and freshness. Serve immediately while warm.
Pro Tips For Making Recipe For Chicken Breast In Oven
- Pound the Thickness: Use a rolling pin to even out the chicken breasts to 1-inch thickness—this guarantees they cook through at the same rate. I learned this the hard way after pulling dry, overcooked edges off thick parts while the centers stayed raw.
- Warm the Herbs: Rub the rosemary and thyme between your palms before sprinkling to release their oils. Sounds weird, but it works—the aroma difference is noticeable, and the flavor sticks to the meat better.
- Skip Cold Chicken: Let the breasts sit at room temperature for 15-20 minutes before baking. After burning three batches, I finally figured out that cold chicken seizes up and cooks unevenly in the oven.
- Rest Under Foil: Tent the cooked chicken with foil and give it a solid 5-10 minutes before slicing. My grandmother swore by this, and she was right: it keeps the juices from pooling on the cutting board instead of in the meat.
Common Mistakes When Making Perfect Results
Overcooking the Chicken
Chicken breast dries out fast—even 5 minutes too long at 400°F turns it into sawdust. I pull mine at 160°F and let carryover cooking bring it to 165°F while resting. That 5-degree difference keeps it juicy. 🌡️
Skipping the Pounding
Uneven thickness means uneven cooking. I use a meat mallet to pound breasts to ½-inch thickness. This ensures the thin end doesn’t turn to leather while waiting for the thick end to finish.
Cold Chicken in the Pan
Starting with cold chicken shocks the meat and leads to uneven cooking. I let mine sit on the counter for 15-20 minutes before searing. Room temperature chicken cooks more evenly and develops a better crust.
Overcrowding the Skillet
Too many breasts in one pan steams instead of sears. I use a 12-inch oven-safe skillet for 1.5 lbs of chicken. If needed, cook in batches—it’s worth the extra few minutes for that golden crust.
Ignoring the Thermometer
Color and texture can lie. I always use an instant-read thermometer to check the thickest part. 165°F is the magic number for safe, juicy chicken. Guessing leads to dry, overcooked results.
Skipping the Rest
Cutting too soon lets all the juices escape onto the cutting board. I tent with foil and rest for 5-10 minutes. This step is non-negotiable for moist, flavorful chicken every time. 💪
Nutrition Facts
Frequently Asked Questions
What temperature should the oven be set to?
Preheat your oven to 400°F for even cooking and a perfect golden crust. This temperature ensures the chicken cooks through without drying out.
How long should I cook the chicken?
Bake for 12-15 minutes after searing, or until the internal temperature reaches 165°F. Always use a meat thermometer for accuracy.
Can I use dried herbs instead of fresh?
Yes, but use one-third the amount since dried herbs are more concentrated. The flavor will be slightly different but still delicious.
Why do I need to rest the chicken?
Resting for 5-10 minutes lets juices redistribute, keeping the meat moist and flavorful. Skipping this step can result in dry chicken.

Trained in classic French technique but raised on slow-cooked ribs and spicy rubs, she blends culinary skill with smoke and soul.
- Best Smoked Oxtail Recipe: Deep-Rich Flavor After Low-and-Slow Cooking - October 14, 2026
- Pit Boss Smoked Prime Rib Roast Recipe: Bark-to-Bone Crispness in 4 Hours - October 14, 2026
- Smoked Tuna Steak Recipe: Seared Crust Meets Silky Centers - October 14, 2026