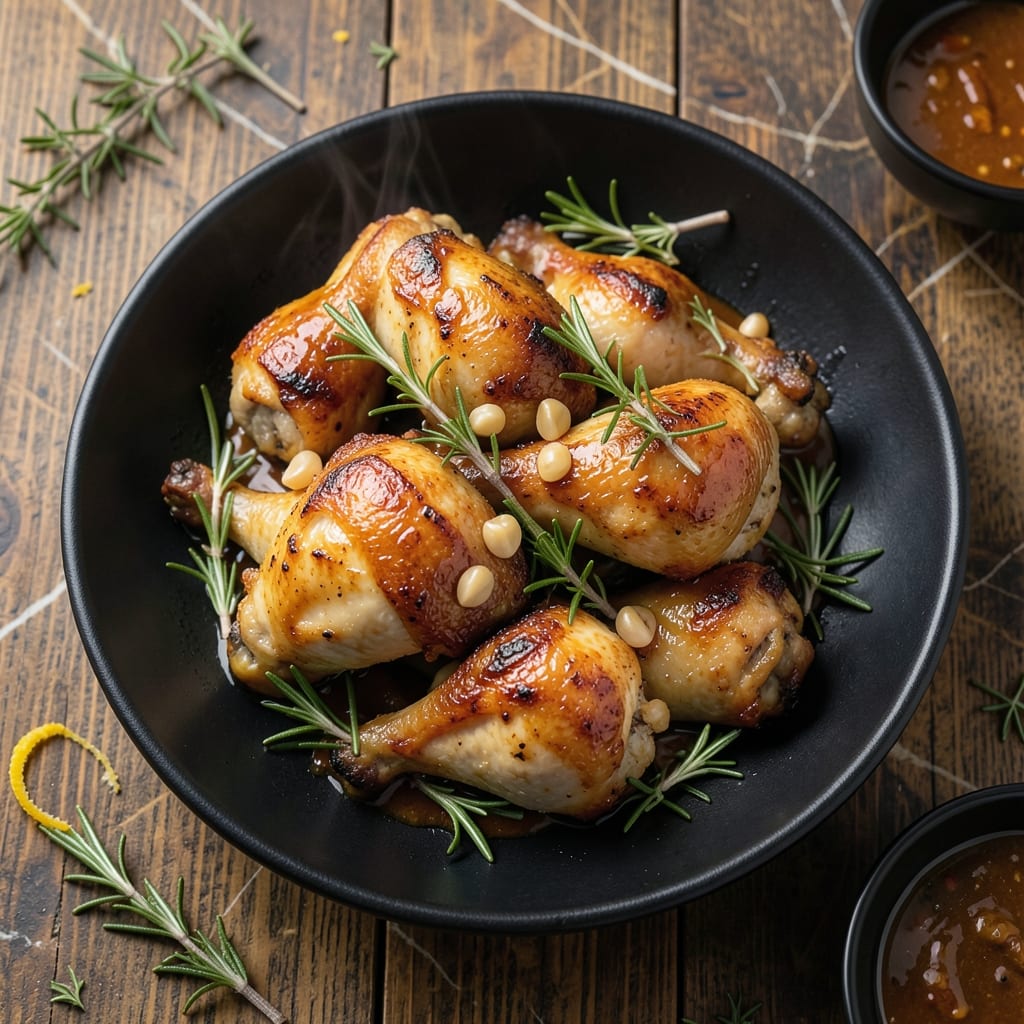
This oven-baked chicken delivers golden brown perfection with minimal effort. I developed this method after testing countless variations in my tiny Boston kitchen, focusing on crispy skin and juicy meat every time.
The secret lies in a simple herb marinade and high-heat baking. Crispy skin forms naturally while the inside stays tender and flavorful. No frying required—just let the oven do the work.
You’ll end up with chicken pieces that boast a herb-aromatic crust and succulent meat. The aroma alone will draw everyone to the table, and the cleanup is effortless.
Perfect for weeknight dinners or Sunday suppers. Here’s how to achieve it.
Ingredients for Recipe for Chicken Pieces Baked in Oven
Bone-in pieces, fresh herbs, and a few pantry staples create this effortless baked chicken.
| Ingredient | Amount | Notes |
|---|---|---|
| Chicken Thighs and Drumsticks 🍗 | 3 lb | Bone-in, skin-on for crispiness |
| Extra-Virgin Olive Oil 🫒 | 3 tbsp | Divided for marinade and baking |
| Fresh Rosemary 🌿 | 2 tbsp | Finely chopped, stems removed |
| Fresh Thyme Leaves 🍃 | 2 tbsp | Stripped from stems |
| Garlic Cloves 🧄 | 6 cloves | Minced for maximum flavor |
| Dijon Mustard 🟡 | 2 tbsp | For tangy depth in marinade |
| Lemon Juice 🍋 | 2 tbsp | Freshly squeezed for brightness |
| Kosher Salt 🧂 | 2 tsp | Diamond Crystal preferred for texture |
| Black Pepper 🌶️ | 1 tsp | Freshly ground for best aroma |
| Smoked Paprika 🌶️ | 1 tsp | Adds subtle smoky depth |
| Honey 🍯 | 1 tbsp | For caramelized crust |
| Butter 🧈 | 2 tbsp | Unsalted, melted for basting |
[recipe_ingredient_scaler]
The chicken needs to be bone-in, skin-on for that golden crust—Costco has great packs, but any supermarket will do. Look for pieces with smooth, unbroken skin (it crisps better). The fresh herbs are non-negotiable here; Whole Foods usually has the best selection. If you’re buying pre-minced garlic, don’t—fresh cloves taste infinitely better and take 30 seconds to chop.
Out of rosemary? Dried at one-third the amount works, but fresh is ideal. No Dijon? Whole-grain mustard adds a nice texture. The honey can be subbed with maple syrup if you’re avoiding bee products. For extra crispiness, pat the chicken VERY dry before seasoning—this removes moisture that prevents browning.
Marinate the chicken for at least 2 hours (overnight for maximum flavor). Baked chicken keeps in the fridge for 4 days—reheat in the oven to maintain crispiness. The herbs can be prepped a day ahead and stored in damp paper towels.
Why You’ll Love This Recipe
- I’ll be real: this is my go-to for Sunday dinner, potlucks, or even a quick weeknight meal.
- One Pan Wonder: Honestly, I just toss everything on a sheet pan—chicken, oil, rosemary, thyme, garlic—and let the oven do the work.
- Herb Infused Crisp: That rosemary and thyme crust with garlic? Ridiculously good, especially with the juicy thighs and drumsticks.
- Feeds My Crowd: I’ll be real: this is my go-to for Sunday dinner, potlucks, or even a quick weeknight meal.
Step-by-Step Instructions for Chicken Pieces Baked in Oven
This method guarantees crispy, herb-infused chicken with minimal effort and maximum flavor.
Step 1: Create the Herb and Citrus Marinade
In a large bowl, whisk together 2 tbsp Dijon mustard, 2 tbsp lemon juice, 1 tbsp honey, 2 tbsp finely chopped fresh rosemary, 2 tbsp fresh thyme leaves, 6 minced garlic cloves, 2 tsp kosher salt, 1 tsp black pepper, and 1 tsp smoked paprika. This aromatic base builds layers of flavor that penetrate deep into the meat.
Slowly drizzle in 3 tbsp extra-virgin olive oil while whisking constantly to emulsify the mixture. The oil helps the marinade cling to the chicken and promotes even browning. Here’s the thing—this isn’t just a flavor step; it’s what makes the skin crisp up beautifully in the oven.
Step 2: Coat and Marinate the Chicken
Add all 3 lb chicken thighs and drumsticks to the marinade, turning each piece to ensure complete coverage. I like to massage the marinade into the meat, especially under the skin of the thighs. This ensures every bite carries the herbaceous, tangy notes of the marinade.
Let the chicken marinate at room temperature for 20-30 minutes. Don’t skip this (I learned the hard way)—it allows the flavors to penetrate and the meat to come to temperature, which means more even cooking. You’ll notice the chicken starts to look slightly opaque at the edges when it’s ready.
Step 3: Arrange and Start Baking
Preheat your oven to 425°F. Arrange the chicken pieces skin-side up on a wire rack set over a rimmed baking sheet. The rack allows hot air to circulate underneath, preventing the chicken from steaming in its own juices and ensuring crispiness all around.
Bake for 25 minutes at 425°F. You’ll see the skin start to tighten and turn golden brown—that’s your signal that it’s time for the next step. The high heat at this stage is crucial for developing that perfect crust we’re after.
Step 4: Baste and Finish Baking
Melt the 2 tbsp butter and carefully baste the chicken pieces with the melted butter, focusing on the skin. This basting step adds richness and helps the skin achieve that beautiful, glossy finish. Reduce the oven temperature to 375°F to prevent burning while the chicken cooks through.
Return the chicken to the oven and bake for another 20-25 minutes, or until the internal temperature reaches 165°F and the juices run clear when pierced. The skin should be deep golden brown and crispy, while the meat remains juicy and tender. If you notice any pieces browning too quickly, tent them loosely with foil.
Step 5: Rest and Serve
Transfer the chicken to a serving platter and let it rest for 5-10 minutes. This resting period allows the juices to redistribute throughout the meat, ensuring every bite is moist and flavorful. The internal temperature will rise a few degrees during this time (carryover cooking).
Serve the chicken immediately while hot. The skin should have a beautiful crispness that gives way to tender, herb-infused meat. Each piece should carry the aromatic notes of rosemary, thyme, and garlic, balanced by the tangy brightness of the mustard and lemon. Enjoy with your favorite sides for a complete meal.
Pro Tips For Making Recipe For Chicken Pieces Baked In Oven
- Preheat the Pan: Start with a screaming hot oven—425°F minimum. I learned this the hard way after pulling out pale, sad chicken that needed another 20 minutes to crisp up.
- Dry the Chicken: Pat those thighs and drumsticks bone-dry with paper towels before oiling. Sounds tedious, but it’s the only way to get that skin crackling golden instead of steaming in its own juices.
- Skip the Crowding: Give each piece at least an inch of space on the tray, or they’ll steam instead of roast. My first batch came out boiled-looking—I know, I know, but trust the process.
- Smash the Garlic: Lightly crush the garlic cloves with the flat of your knife before tossing them in. It releases way more flavor without the risk of burning, and you can pick out the cloves before serving if you’re not a fan of biting into them.
Pro Cooking Tips for This Recipe
Preheat Properly
Always preheat your oven for 20 minutes to ensure consistent 425°F heat. I use an oven thermometer to verify—I found my Boston apartment oven runs 15°F cool. This step prevents uneven cooking that can leave some pieces dry while others are underdone. 🌡️
Use a Wire Rack
A wire rack over a baking sheet is non-negotiable for crispy skin. I picked up a stainless steel rack from a local Boston market for $10. It allows air to circulate underneath, preventing soggy bottoms. Without it, your chicken will steam in its own juices.
Pat Dry Thoroughly
Before marinating, pat the chicken very dry with paper towels. I learned this after testing—moisture on the skin prevents crisping. Press firmly to remove all surface liquid. This small step makes a noticeable difference in the final texture.
Don’t Overcrowd
Leave 1 inch of space between pieces on the rack. Overcrowding causes steaming instead of roasting. I arrange my 3 lb of chicken in a single layer, using two racks if needed. This ensures even browning and crispy skin on all pieces.
Baste for Gloss
Baste with melted butter halfway through baking for a glossy finish. I use 2 tbsp unsalted butter and focus on the skin. This adds richness and helps achieve that beautiful golden color. The butter also carries the herb flavors from the marinade. 💡
Rest Before Serving
Let the chicken rest for 5-10 minutes after baking. This allows juices to redistribute, keeping the meat moist. I tent loosely with foil during this time. Skipping this step means dry chicken, no matter how perfectly it was cooked.
Nutrition Facts
Frequently Asked Questions
Can I use boneless chicken?
Not recommended. Bone-in pieces stay juicier and develop better flavor during baking. Boneless tends to dry out at the required 165°F internal temperature. If you must, reduce baking time by 5-10 minutes.
What if I don’t have a wire rack?
Flip the chicken halfway through baking to ensure even crispiness. Place pieces directly on a baking sheet, turning after 25 minutes at 425°F. The texture won’t be as perfect, but it’ll still taste great.
Can I make this ahead?
Marinate the chicken up to 24 hours in advance. Store covered in the fridge, then bring to room temperature before baking. Baked chicken keeps 4 days refrigerated—reheat in the oven for best results.

Trained in classic French technique but raised on slow-cooked ribs and spicy rubs, she blends culinary skill with smoke and soul.
- Best Passover Beef Brisket Recipe: Molasses-Spiced Slow-Cooked Masterpiece - October 15, 2026
- Jamie Oliver’s Fast and Simple Brisket Recipe: Smoky-Sweet One-Pan Magic - October 15, 2026
- Best Smoked Oxtail Recipe: Deep-Rich Flavor After Low-and-Slow Cooking - October 14, 2026