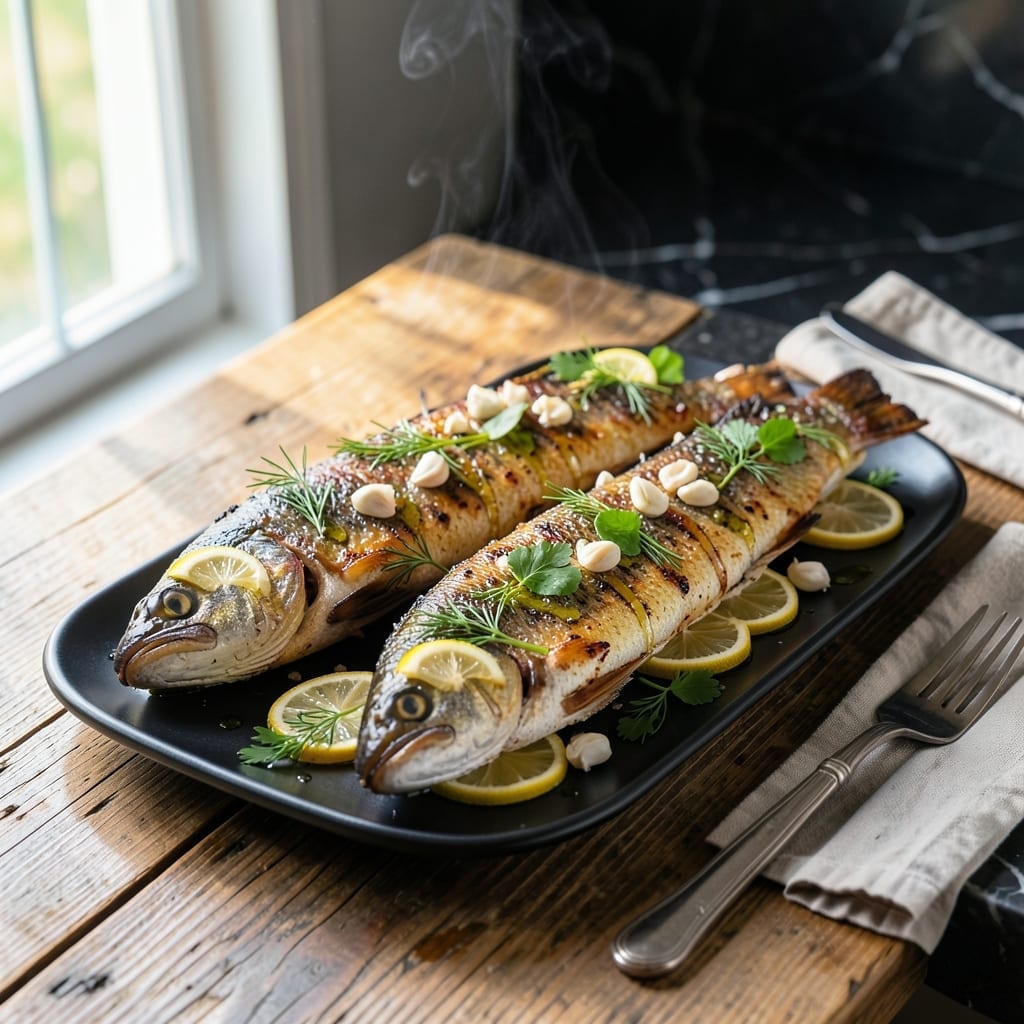
This method transforms fresh trout into a restaurant-worthy dish with crispy skin and flaky flesh every time. I learned the importance of proper technique after my first attempt resulted in dry, overcooked fish.
The key is starting with a hot pan and cooking the trout skin-side down first. This creates a golden, shatteringly crispy exterior while keeping the delicate flesh moist and tender. A simple seasoning of salt, pepper, and fresh herbs enhances the natural flavor.
By the time it’s done, you’ll have perfectly cooked fish that flakes easily with a fork, with skin that’s crisp enough to eat. The aroma alone will have everyone gathering in the kitchen, just like at my dinner parties.
Serve with lemon wedges and fresh herbs for a simple yet elegant presentation. This technique never fails to impress.
Ingredients for Recipe for Cooking Whole Trout
Fresh trout, bright herbs, and a hot pan are all you need for this showstopper.
| Ingredient | Amount | Notes |
|---|---|---|
| Whole Trout 🐟 | 4 whole | Fresh, gutted, scaled, fins trimmed |
| Kosher Salt 🧂 | 1 ½ tsp | Divided for seasoning inside and out |
| Freshly Ground Black Pepper 🌶️ | 1 tsp | Divided for seasoning |
| Lemon 🍋 | 1 whole | Sliced for cavity and garnish |
| Fresh Dill 🌿 | ¼ cup | Chopped, for cavity and garnish |
| Fresh Parsley 🍃 | ¼ cup | Chopped, for cavity and garnish |
| Olive Oil 🫒 | 3 tbsp | For pan-searing, high smoke point |
| Unsalted Butter 🧈 | 2 tbsp | For basting while cooking |
| Garlic Cloves 🧄 | 3 cloves | Smashed, for cavity flavoring |
| Lemon Wedges 🍋 | 4 pieces | For serving alongside |
[recipe_ingredient_scaler]
The trout is the star here—look for whole, fresh fish with bright eyes and firm flesh. Your local fishmonger or Whole Foods seafood counter is ideal, but most supermarkets stock it too (just ask them to clean it for you). I like rainbow trout for its mild flavor and pretty presentation. If you’re buying frozen, thaw it overnight in the fridge (never at room temp).
No fresh dill or parsley? Fresh thyme or tarragon work beautifully. Out of lemon? Lime or orange slices add a nice twist. The butter can be skipped if you prefer, but it adds a rich finish—use vegan butter if avoiding dairy. Garlic is optional, but honestly worth the extra minute. Don’t skip the salt inside the cavity—that’s where the flavor starts.
Cook trout the same day you buy it if possible—it’s best within 24 hours. Store in the coldest part of your fridge until ready to use. Leftovers (if any) keep 2-3 days but are best eaten fresh. The herbs can be prepped ahead and kept in damp paper towels.
Why You’ll Love This Recipe
- One Pan Meal: I love that I can just season the trout with salt, pepper, and dill, toss in lemon slices, and bake—no fuss, no extra dishes.
- Bright and Zesty: The lemon and dill bring this fresh, clean flavor that makes the trout taste like it’s straight from a riverside grill.
- Dinner in Minutes: Honestly, it’s ready faster than ordering takeout—20 minutes start to finish, and that includes prep.
- Budget-Friendly Feast: Whole trout is often cheaper than fillets, and it feels like a fancy meal without the fancy price.
Step-by-Step Instructions for Cooking Whole Trout
Here’s how to get that perfect crispy skin and tender flake with every bite.
Step 1: Season Inside and Out
Pat the 4 whole trout completely dry with paper towels—this is non-negotiable for crispy skin. Season the cavities with half the 1.5 tsp kosher salt and 1 tsp freshly ground black pepper, then stuff each with slices from the 1 whole lemon, the 3 cloves garlic cloves (smashed), and a handful of the 0.25 cup fresh dill and 0.25 cup fresh parsley.
Rub the remaining salt and pepper on the outside of the fish, including the skin. I like to press the seasoning in gently so it adheres well. Let the trout sit at room temperature for 10 minutes while you prep the pan—this takes the chill off for even cooking.
Step 2: Heat the Pan and Start Searing
Heat 2 tbsp olive oil in a large skillet over medium-high heat until it shimmers but doesn’t smoke. Carefully place 2 trout in the pan, skin-side down. Press down lightly with a fish spatula for the first 30 seconds to prevent curling.
Sear undisturbed for 4-5 minutes until the skin is golden brown and crisp. You’ll know it’s ready to flip when the edges look opaque and the skin releases easily from the pan. Don’t rush this—patience is what gives you that restaurant-quality crunch.
Step 3: Flip and Baste with Butter
Flip the trout and immediately add 1 tbsp olive oil and the 2 tbsp unsalted butter to the pan. As the butter melts, tilt the pan slightly and spoon the foaming butter over the fish continuously for 2-3 minutes.
Add the remaining 2 trout to the pan if space allows, or cook in batches to avoid crowding. The butter basting adds rich flavor and helps cook the fish evenly. The trout is done when the flesh flakes easily with a fork and the internal temperature reaches 145°F.
Step 4: Rest and Garnish
Transfer the trout to a serving platter and let them rest for 2-3 minutes. This short rest keeps the juices inside the flesh instead of pooling on the plate. While they rest, scatter any remaining chopped herbs from the fresh dill and fresh parsley over the top.
Serve each trout whole or filleted at the table, with the 4 pieces lemon wedges on the side for squeezing. The skin should stay crisp, and the flesh should pull apart effortlessly—exactly what you promised yourself when you started.
Pro Tips For Making Recipe For Cooking Whole Trout
- Score the Flesh: Make 2-3 shallow diagonal cuts on each side before cooking—this helps the heat penetrate evenly and lets the salt and lemon flavor work deeper into the fish.
- Pat It Dry: I learned this the hard way—dry the trout thoroughly with paper towels before seasoning, or the skin won’t crisp up the way it should.
- Salt the Cavity: Don’t just season the outside; sprinkle a pinch of kosher salt and a few dill sprigs inside the trout’s cavity for flavor that infuses from within.
- Use High Heat: Start with a screaming-hot pan or grill—about 2 minutes per side on high heat gives you that perfect crisp skin without overcooking the delicate flesh.
Common Mistakes When Making This Dish
Skipping the Drying Step
Never skip drying the trout completely with paper towels before seasoning. Even slightly damp skin will steam instead of crisp, giving you rubbery results. I learned this the hard way with my first batch—10 seconds of extra drying saves 10 minutes of disappointment.
Overcrowding the Pan
Cook trout in batches if needed—crowding the pan drops the temperature, causing the fish to steam rather than sear. I use a 12-inch skillet so each of the 4 whole trout has space. The skin needs direct contact with hot oil to crisp properly.
Flipping Too Soon
Resist the urge to peek or flip early. The trout must cook undisturbed for 4-5 minutes skin-side down to develop that golden crust. If it sticks, it’s not ready—wait another 30 seconds and try again. Patience is your best tool here.
Ignoring Internal Temperature
Don’t guess when the fish is done. Use an instant-read thermometer to check for 145°F at the thickest part. Overcooked trout turns dry and stringy. I keep a ThermoWorks thermometer in my drawer for this exact reason.
Skipping the Rest
Always let the trout rest for 2-3 minutes after cooking. This allows the juices to redistribute, keeping the flesh moist. Cutting too soon sends all that flavor onto the plate, not into your bite.
Using Cold Fish
Take trout out of the fridge 10 minutes before cooking. Cold fish cooks unevenly, leading to dry edges and undercooked centers. This small step makes a surprising difference in texture. 💪
Nutrition Facts
Frequently Asked Questions
What’s the best way to check doneness?
Use an instant-read thermometer to check for 145°F at the thickest part. The flesh should flake easily with a fork and appear opaque throughout. No pink or translucent spots should remain.
Can I use frozen trout instead of fresh?
Yes, but thaw it overnight in the fridge first. Pat it completely dry before seasoning to avoid steaming the skin. Never thaw at room temperature, as it can lead to uneven cooking.
How long should I let the fish rest before serving?
Rest the trout for 2-3 minutes after cooking. This allows the juices to redistribute, keeping the flesh moist and flavorful. Skipping this step can result in dry fish.
What pan works best for searing?
A heavy 12-inch skillet with a thick bottom is ideal. Cast iron or stainless steel retains heat well and prevents hot spots. Avoid nonstick pans, as they don’t get hot enough for a good sear.

Trained in classic French technique but raised on slow-cooked ribs and spicy rubs, she blends culinary skill with smoke and soul.
- Recipe For Leftover Fried Fish: Crunchy Leftovers Transformed - October 3, 2026
- Recipe for Crock Pot Swiss Steak: Slow-Cooked Beef With Mushroom Gravy - October 3, 2026
- Recipe for Kabsa Rice: Spiced Middle Eastern Feast in One Pot - October 3, 2026