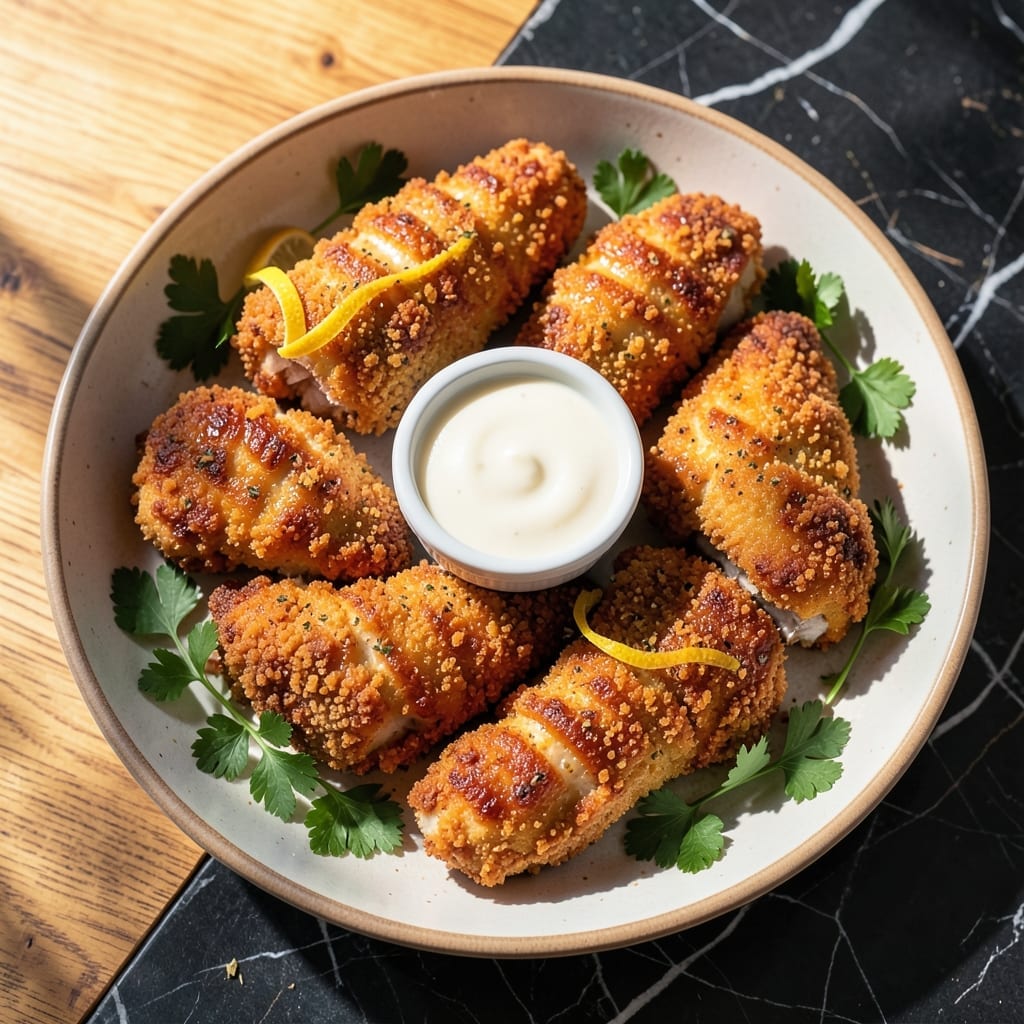
Achieving crispy chicken tenders without frying is absolutely possible with the right technique. This oven-baked method delivers golden, crunchy results every time.
The secret lies in a double-coating process and high heat. A quick dip in buttermilk followed by seasoned flour creates a base layer, while panko breadcrumbs provide the final crunchy texture.
At 425°F, the tenders cook through while developing a perfectly golden exterior. The buttermilk keeps the chicken tender inside, preventing dryness that often plagues baked versions.
You’ll love how these hold their crunch even after cooling. Serve with your favorite dipping sauces for a crowd-pleasing meal that’s surprisingly simple to make.
Ingredients for Recipe for Crunchy Chicken Tenders
Pantry staples meet buttermilk and panko for that golden, crunchy magic. Simple enough for weeknights.
| Ingredient | Amount | Notes |
|---|---|---|
| Chicken Breast Tenderloins 🍗 | 1 ½ lb | Boneless, skinless, pounded to even thickness |
| Buttermilk 🥛 | 1 cup | Full-fat for extra tenderness |
| All-Purpose Flour 🌾 | 1 cup | For initial coating layer |
| Panko Breadcrumbs 🍞 | 2 cups | Japanese-style for maximum crunch |
| Large Eggs 🥚 | 2 whole | Beaten, to bind breadcrumbs |
| Garlic Powder 🧄 | 1 ½ tsp | For savory depth in coating |
| Onion Powder 🧅 | 1 ½ tsp | Complements the garlic perfectly |
| Paprika 🌶️ | 1 tsp | Sweet variety for color |
| Dried Oregano 🍃 | 1 tsp | Mediterranean herb accent |
| Kosher Salt 🧂 | 1 tsp | Diamond Crystal preferred for texture |
| Black Pepper 🌶️ | ½ tsp | Freshly ground for best flavor |
| Olive Oil 🫒 | 2 tbsp | For drizzling before baking |
| Cayenne Pepper 🔥 | ¼ tsp | Optional for subtle heat |
[recipe_ingredient_scaler]
The panko is non-negotiable here—Kikkoman or Progresso brands give that restaurant-quality crunch. Buttermilk matters too; full-fat buttermilk keeps the chicken juicy (low-fat works in a pinch, but don’t expect miracles). For the chicken, grab tenderloins from the meat section—they’re already uniform in size, which means even cooking. Most grocery stores carry them pre-packaged near the chicken breasts.
No buttermilk? Whole milk with a tablespoon of vinegar or lemon juice works as a substitute—let it sit for 5 minutes. Panko can be swapped for regular breadcrumbs, but crush some cornflakes for extra crispiness if you’re feeling creative. The spices are flexible: swap oregano for thyme or add smoked paprika for a deeper flavor. Just don’t skip the double-coating process—it’s what makes the magic happen.
Baked tenders are best eaten fresh, but they’ll keep in the fridge for 3-4 days. Reheat in the oven at 375°F for 10 minutes to revive the crunch (microwaving turns them soggy). Freeze uncooked tenders on a tray first, then transfer to a bag for up to 3 months.
Why You’ll Love This Recipe
- Minimal Effort: I just dip, dredge, and bake—no fancy techniques, just crispy tenders in under 40 minutes.
- That Crunch Though: The panko and buttermilk combo gives it a shatteringly crisp shell with juicy chicken inside. Honestly, it’s the only way I’ll eat tenders now.
- Weeknight MVP: Between us, this is my go-to for picky eaters and last-minute dinner saves.
- Stretches Far: One batch feeds my family of four with leftovers for lunch the next day—budget-friendly and filling.
Step-by-Step Instructions for Crunchy Chicken Tenders
Here’s the method I use to get that perfect crunch every single time.
Step 1: Marinate the Chicken in Buttermilk
Place the 1.5 lb chicken breast tenderloins in a large bowl and pour the 1 cup buttermilk over them. I like to press the tenderloins down gently to ensure they’re fully submerged. This buttermilk soak is the secret to keeping the meat incredibly tender while the exterior gets crispy.
Cover and refrigerate for at least 1 hour, but I prefer 4 hours or overnight for maximum tenderness. The acid in the buttermilk works to break down proteins in the chicken, resulting in juicier meat that’s less likely to dry out during cooking.
Step 2: Set Up Your Breading Station
In a shallow dish, combine the 1 cup all-purpose flour, 1.5 tsp garlic powder, 1.5 tsp onion powder, 1 tsp paprika, 1 tsp dried oregano, 1 tsp kosher salt, and 0.5 tsp black pepper. Mix well so the spices are evenly distributed throughout the flour.
In a second shallow dish, beat the 2 whole large eggs until well combined. In a third dish, place the 2 cups panko breadcrumbs and mix in the 0.25 tsp cayenne pepper if you want a subtle kick. I use Japanese-style panko for its larger, airier crumbs that create that signature crunch.
Step 3: Coat the Chicken for Maximum Crunch
Remove the chicken from the buttermilk, letting any excess drip off. Dredge each piece in the seasoned flour, pressing gently to ensure a good coating. Shake off any excess flour—you want a thin, even layer that will help the egg adhere.
Next, dip the floured chicken into the beaten eggs, again letting any excess drip off. Finally, press each piece into the panko breadcrumbs, turning to coat completely. I use my fingers to press the crumbs into the chicken, ensuring every bit is well coated. Place the breaded tenders on a wire rack set over a baking sheet.
Step 4: Bake to Golden Perfection
Preheat your oven to 400°F. Once hot, drizzle the 2 tbsp olive oil evenly over the breaded tenders. This helps achieve that golden, crispy exterior without frying.
Bake for 15-18 minutes, then flip each tender and bake for another 8-10 minutes until both sides are deep golden brown and the internal temperature reaches 165°F. The tenders should be crispy on the outside and juicy on the inside. For extra crunch, I like to broil for the last 1-2 minutes, watching closely to prevent burning.
Pro Tips For Making Recipe For Crunchy Chicken Tenders
- Double-Dredge for Crunch: Dip each tender in flour, then buttermilk, then flour again before the egg and panko—I learned this the hard way after too many batches with lackluster crunch.
- Dry the Chicken First: Pat the tenderloins completely dry with paper towels before dredging, or the coating won’t stick properly—sounds tedious, but it actually changes the outcome.
- Skip Crowding the Pan: Fry in batches with at least an inch between pieces, or the oil temperature drops and you’ll end up with soggy, greasy tenders instead of crisp ones.
- Rest Before Frying: Let the breaded tenders sit on a wire rack for 10 minutes before frying; this gives the coating time to set, so it doesn’t slide off in the oil.
Regional Styles of This Dish
Southern Buttermilk Style
In the South, we soak our tenders in buttermilk for at least 12 hours for ultra-tender meat. The coating uses self-rising flour mixed with cornmeal for that signature crispy-crusty texture. I grew up eating this version at Sunday suppers. 💛
Nashville Hot Chicken
For spicy lovers, Nashville adds a cayenne-laced oil drizzle after frying. I use 2 tbsp cayenne mixed with ½ cup hot oil for that fiery kick. Serve on white bread with pickles to balance the heat. The oil should be 350°F for perfect frying.
New England Clam Shack
Up North, they use crushed saltine crackers in the breading for a lighter crunch. The tenders are often served in a brown paper bag with a side of tartar sauce. I love this version with a squeeze of lemon for brightness.
Texas Two-Step
Everything’s bigger in Texas—including the crunch. They double-dredge in flour and buttermilk before a final panko coat. I use Progresso panko for extra texture. Fry at 375°F for 6-8 minutes per side for perfect doneness.
Midwest Oven-Baked
Midwestern home cooks prefer oven-baked for ease. They use crushed cornflakes mixed with panko for extra crunch. Bake at 400°F for 20 minutes, flipping halfway through. This version stays crispy even when reheated. 🔥
Nutrition Facts
Frequently Asked Questions
Why use buttermilk for marinating?
Buttermilk tenderizes the chicken with its acidity while keeping it juicy. It also helps the coating adhere better.
Can I bake these at a lower temperature?
Lower temps won’t achieve the same crunch. Stick to 400°F for golden, crispy results. Bake for 15-18 minutes per side.
How do I keep them crispy when reheating?
Reheat in an oven at 375°F for 10 minutes. Avoid microwaves—they make tenders soggy.
What’s the best oil for crispiness?
Olive oil works well, but avocado oil has a higher smoke point. Drizzle lightly before baking.

Trained in classic French technique but raised on slow-cooked ribs and spicy rubs, she blends culinary skill with smoke and soul.
- Recipe For Fried Pork Chops In An Iron Skillet: Crispy Crust With Juicy Centers - October 3, 2026
- Recipe for Fully Cooked Spiral Ham: Sweet Glaze and Effortless Elegance - October 3, 2026
- Recipe for Cream of Rice: Silky Smooth Breakfast Comfort - October 3, 2026