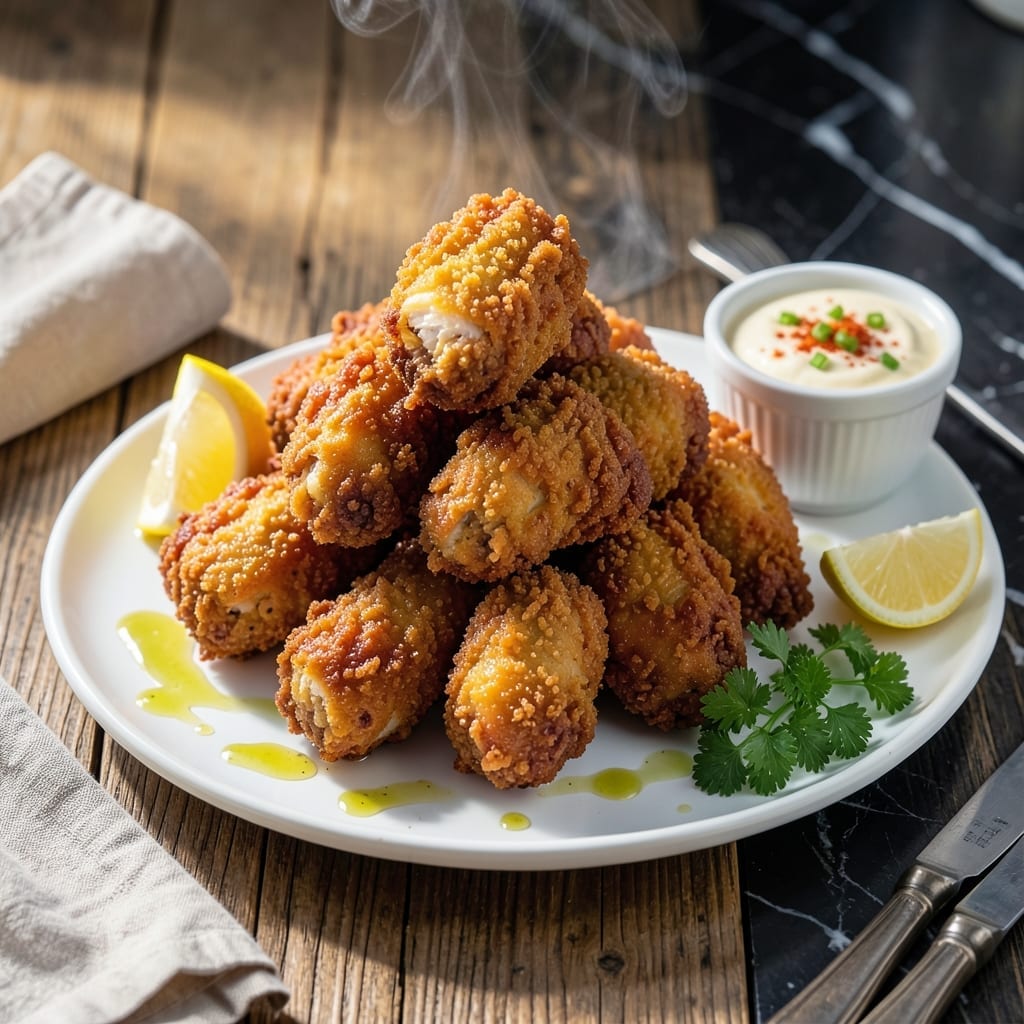
This method transforms ordinary chicken into golden, crispy tenders with centers that stay remarkably juicy. The secret lies in a double-dredging technique that creates an extra-thick crust, sealing in moisture while achieving that satisfying crunch.
I’ve tested countless batches to perfect the timing and temperature for frying. Maintaining oil at 350°F ensures even cooking without burning the coating. Each piece emerges with a deep amber hue and a shatteringly crisp exterior.
The result is tenders that break apart at the slightest touch, revealing tender meat beneath. The contrast between the crunchy shell and succulent interior makes every bite irresistible. This isn’t just fried chicken—it’s an experience.
Serve immediately with your favorite dipping sauces for maximum crispness. The texture is at its peak right out of the fryer.
Ingredients for Recipe for Deep Fried Chicken Tenders
These ingredients transform chicken into golden, shatteringly crisp bites with juicy centers.
| Ingredient | Amount | Notes |
|---|---|---|
| Chicken Breast Tenderloins 🍗 | 1 ½ lb | Boneless, skinless, uniform thickness |
| All-Purpose Flour 🌾 | 2 cups | Divided for double-dredging |
| Cornstarch 🌾 | ½ cup | For extra crispiness |
| Baking Powder 🧂 | 1 tsp | Creates air pockets in crust |
| Paprika 🌶️ | 1 tbsp | Sweet or smoked variety |
| Garlic Powder 🧄 | 1 tbsp | Fresh ground preferred |
| Onion Powder 🧅 | 1 tbsp | Balances seasoning blend |
| Salt 🧂 | 1 tbsp | Diamond Crystal preferred |
| Black Pepper 🌶️ | 1 tsp | Freshly ground for best flavor |
| Cayenne Pepper 🔥 | ½ tsp | Adjust for heat preference |
| Large Eggs 🥚 | 2 whole | Beaten for egg wash |
| Buttermilk 🥛 | 1 cup | Full-fat for richness |
| Vegetable Oil 🫒 | 6 cups | For deep frying, 350°F |
[recipe_ingredient_scaler]
The chicken tenderloins are key here—uniform thickness means even cooking. Costco sells them pre-cut, or slice your own from chicken breasts. The cornstarch is non-negotiable—it’s what creates that shatteringly crisp crust. For the flour, King Arthur or Gold Medal all-purpose work perfectly. Don’t skip the baking powder; it creates tiny air pockets that make the coating extra crispy.
Out of buttermilk? Whole milk plus 1 tbsp vinegar works in a pinch. No cornstarch? Arrowroot powder at the same amount. The paprika can be swapped for smoked paprika if you want a deeper flavor. For extra crunch, add crushed cornflakes to the flour mixture. If you’re avoiding eggs, buttermilk alone works—just let the chicken soak a bit longer.
Fry in batches to avoid crowding the pot—oil temp drops fast if you add too much at once. Leftovers (if any) keep 2-3 days in the fridge, but they’re best eaten fresh. Reheat in the oven at 375°F for 10-12 minutes to revive crispiness.
Why You’ll Love This Recipe
- I’ll be real: the cornstarch and paprika give a crackle that’s loud and proud, with a smoky warmth under the crunch.
- 20-Minute Crisp: The baking powder in the flour mix makes them puff up fast—hot oil, golden in minutes, no babysitting required.
- That Paprika Snap: I’ll be real: the cornstarch and paprika give a crackle that’s loud and proud, with a smoky warmth under the crunch.
- Freezer to Table: Double the batch, freeze half—straight from icy to oil in ten, so a last-minute dinner feels intentional.
Step-by-Step Instructions for Deep Fried Chicken Tenders
Here’s the method that guarantees crispy outsides and juicy insides every single time.
Step 1: Prep the Chicken and Make the Wet and Dry Mixes
Pat the 1.5 lb Chicken Breast Tenderloins completely dry with paper towels—this is non-negotiable for maximum crispiness. Cut any uneven pieces so all tenders are similar in size for even cooking.
In a shallow dish, whisk together the 2 cups All-Purpose Flour, 0.5 cup Cornstarch, 1 tsp Baking Powder, 1 tbsp Paprika, 1 tbsp Garlic Powder, 1 tbsp Onion Powder, 1 tbsp Salt, 1 tsp Black Pepper, and 0.5 tsp Cayenne Pepper. In another bowl, beat the 2 whole Large Eggs with the 1 cup Buttermilk until smooth.
Step 2: Double-Dredge for Extra Crispy Coating
Dip each tender in the buttermilk mixture, letting excess drip off for 5 seconds. Then dredge in the flour mixture, pressing firmly to adhere. Repeat the process—this double-dredge creates that signature shatteringly crisp crust.
Place the coated tenders on a wire rack set over a baking sheet. Let them rest for 10 minutes—this allows the coating to set, preventing it from falling off during frying. You’ll notice the coating starts to look slightly dry, which is exactly what you want.
Step 3: Heat the Oil to the Perfect Temperature
In a heavy pot or Dutch oven, heat the 6 cups Vegetable Oil to 350°F. Use a deep-fry thermometer for accuracy—this temperature is the sweet spot for cooking through without burning the exterior. The oil should shimmer but not smoke.
If you don’t have a thermometer, test with a wooden chopstick: when bubbles form rapidly around the wood, the oil is ready. Maintain the heat at 350°F throughout frying—if it drops below 325°F, your tenders will absorb too much oil and become greasy.
Step 4: Fry in Batches to Golden Perfection
Working in batches to avoid crowding (which lowers the oil temperature), carefully lower 3-4 tenders into the hot oil. Fry for 4-5 minutes, turning occasionally, until they’re golden brown and the internal temperature reaches 165°F.
Transfer the cooked tenders to a wire rack or paper towel-lined plate to drain. The rack prevents steam from making the underside soggy. Between batches, let the oil return to 350°F before adding more tenders—this ensures consistent results.
Step 5: Rest Briefly and Serve Hot
Let the tenders rest for 2-3 minutes after frying. This allows the juices to redistribute so the meat stays moist. The coating will also crisp up slightly as it cools.
Serve immediately while still hot and crispy. The outside should have an audible crunch when bitten, while the inside remains tender and juicy. For best results, don’t let them sit more than 10 minutes before serving—deep-fried foods are always best fresh from the fryer.
Pro Tips For Making Recipe For Deep Fried Chicken Tenders
- Dry the Chicken: Pat the tenderloins completely dry with paper towels before dredging—I learned this the hard way after my first batch turned out soggy instead of crispy.
- Hot Oil is Key: Heat the oil to 350°F and maintain it there; after burning three batches, I finally figured out that temperature is what keeps the outside golden and the inside juicy.
- Skip the Overcrowding: Fry in small batches so the oil temperature doesn’t drop; resist the urge to dump everything in at once, or you’ll end up with greasy, undercooked tenders.
- Add Cornstarch Twice: Mix a little cornstarch into your flour dredge and dust the tenders with it again after dipping in egg—sounds weird, but it works for an extra-crispy crust.
Serving Suggestions for This Recipe
Classic Dipping Sauces
I always serve these with ranch dressing—the creamy tang cuts through the richness. Hidden Valley is my go-to brand. For something spicier, mix ½ cup mayonnaise with 2 tbsp sriracha and 1 tbsp honey. 💛
Fresh and Crunchy Sides
A simple coleslaw made with shredded cabbage, carrots, and a light vinegar-based dressing adds the perfect crunch. I use 1 part vinegar to 3 parts oil ratio. Pickle spears also work beautifully—they cleanse your palate between bites.
Comfort Food Pairings
Mac and cheese is an indulgent side that turns this into a full meal. I love the contrast of creamy pasta with crispy tenders. For a lighter option, baked sweet potato fries add natural sweetness that balances the savory notes.
Vegetable Balance
Steamed broccoli or green beans with a sprinkle of lemon zest add freshness. Roasted Brussels sprouts with a touch of balsamic glaze also complement the richness. These provide color and nutrition to the plate.
Party Platter Ideas
For gatherings, arrange tenders on a large platter with crudité and multiple dipping sauces. Include carrot sticks, celery, and cherry tomatoes. Add BBQ sauce and honey mustard for variety. 🔥
Kid-Friendly Options
Children love these with ketchup and chicken nugget sauce. Cut tenders into bite-sized pieces for little hands. Serve with apple slices and potato chips for a fun, casual meal that disappears fast.
Nutrition Facts
Frequently Asked Questions
What oil works best for frying?
Use oils with a high smoke point like vegetable, peanut, or canola. Vegetable oil is most common and maintains 350°F well. Avoid olive oil as it burns at lower temperatures.
How do I keep them crispy after cooking?
Drain on a wire rack, not paper towels, to prevent steam buildup. Keep warm in a 200°F oven for up to 10 minutes. Never cover—they’ll turn soggy.
Can I make these ahead of time?
Fry and cool completely, then freeze in a single layer. Reheat at 375°F for 10-12 minutes to restore crispiness. Avoid microwaving as it makes them soft.
Why did my coating fall off?
Likely the chicken wasn’t dry before dredging or the oil wasn’t hot enough. Pat tenders thoroughly and ensure oil reaches 350°F before frying. Let coated pieces rest 10 minutes too.

Trained in classic French technique but raised on slow-cooked ribs and spicy rubs, she blends culinary skill with smoke and soul.
- Recipe for Boneless Pork Chops in Cast Iron Skillet: Sear and Baste to Juicy Perfection - October 3, 2026
- Recipe for Boneless Cross Rib Roast: Slow-Roasted Beef with Herb Crust - October 3, 2026
- Hamburgers in Sauce Recipe Crock Pot: Slow-Cooked Savory Delight - October 3, 2026